Death Knight Weakness and Locations
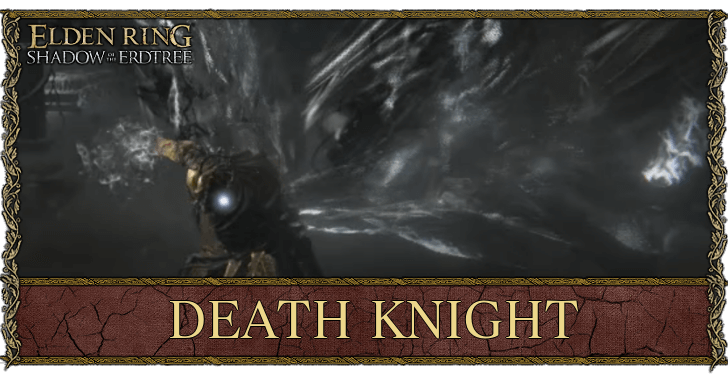
Death Knight is a recurring optional boss in the Elden Ring DLC Shadow of the Erdtree. See Death Knight's weakness and locations, rewards, and general tips for Death Knight here.
List of Contents
Death Knight Weakness
Weak to Holy
Death Knight takes increased damage from Holy compared to the other elements. Focus on Sacred affinity weapons using the Sanctified Whetblade and weapons with innate Holy damage, or use Holy Grease if you don't have those kinds of armaments.
For weapons, Siluria's Tree and any weapon with the Sacred Blade Ash of War are great Holy weapons that also deal huge amounts of Holy damage. Meanwhile, Discus of Light and Black Blade are reliable spells for casters to target the Knight's weakness to Holy.
Death Knight General Tips
| Tips for Beating Death Knights |
|---|
|
|
Prepare Lightning Resistance
The Death Knights both buff their attacks with lightning infusion to boost their damage. Equip talismans like the Boltdrake Talisman +3 in order to negate some of their heavier attacks.
Utilize Parries
The Death Knight has predictable attack patterns if you are fighting it in melee range. Utilize parries and capitalize on these moves to deal huge amounts of damage to the Death Knight.
Focus on Avoiding its Drain Attack at 50% HP
Once the Death Knight drops down to half of its HP, it will start using its lightning attacks more often. Not only that, it also gets a lifesteal grab attack that can reset any progress you made pre-Phase 2. Avoid the grab at all costs and try to end the fight as soon as you can.
Use Poison, Frost and Bleed for Burst Damage
Due to the Death Knight's high HP pool, using Bleed and Frost to chunk its HP, as well as Poison to apply damage-over-time, will greatly speed up the battle. If you have weapons, spells, or incantations that can deal these status effects, be sure to utilize them during this fight.
Scorpion River Catacombs Fight: Watch for Ranged Attacks
The Death Knight in Scorpion River Catacombs has two unique attacks that can hit you from a longer range than you may anticipate. Be on guard for these moves, especially if the Death Knight aggressively pushes you with melee attacks right after.
Knight's Lightning Spear Incantation
The Death Knight in Scorpion River can use the Knight's Lightning Spear incantation, usually throwing it at the start of the fight. A well-timed side roll is enough to dodge this and the rest of the projectiles.
AoE Ground Lightning
After a delay, the Death Knight will swing its violently sparking hammer twice before triggering lightning explosions in an AoE just outside its melee range.
You can either roll into the small safe zone in the Knight's immediate proximity, or distance yourself and focus on dodging the explosions by rolling or jumping.
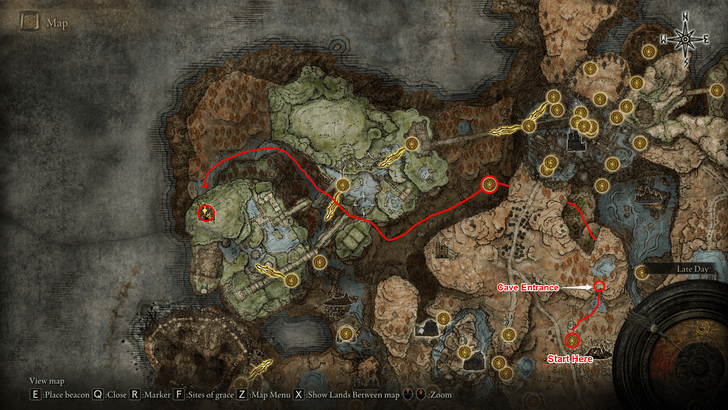
Death Knight Locations
| Boss | Location and Rec. Level |
|---|---|
 |
Rec. Lvl.: 150+
Location: Fog Rift Catacombs Where to Find: Optional boss at the end of Fog Rift Catacombs in Gravesite Plain. |
 |
Rec. Lvl.: 160+
Location: Scorpion River Catacombs Where to Find: Optional boss at the end of Scorpion River Catacombs in Rauh Base. You can reach the catacombs by heading west from the Ancient Ruins Base site of grace then turn right on the narrow path and follow the river. |
There are two optional boss versions of the Death Knight, each with unique drops. One is located in Fog Rift Catacombs in Gravesite Plain, while the other is in Scorpion River Catacombs in Rauh Base.
Death Knight Rewards
| Death Knight | Rewards |
|---|---|
| Death Knight (Fog Rift Catacombs) |
・110000 Runes |
| Death Knight (Scorpion River Catacombs) |
・130000 Runes |
Elden Ring Related Guides
DLC Bosses
Main Bosses
Optional Bosses
Mini-Bosses
| All Bosses in Elden Ring | |
|---|---|
| Elder Dragon Greyoll | Lion Guardian |
| Valiant Gargoyle (Leyndell) | - |
Hostile NPCs and Invaders
| Limgrave Invaders and Hostile NPCs | |
|---|---|
| Bloody Finger Nerijus | Old Knight Istvan |
| Recusant Henricus | - |
| Liurnia of the Lakes Invaders and Hostile NPCs | |
| Great Horned Tragoth | Festering Fingerprint Vyke |
| Altus Plateau Invaders and Hostile NPCs | |
| Eleonora, Violet Bloody Finger | Inquisitor Ghiza |
| Maleigh Marais, Shaded Castle Castellan | Rileigh the Idle |
| Vargram the Raging Wolf & Errant Sorcerer Wilhelm | Magnus the Beast Claw |
| Mountaintops of the Giants Invaders and Hostile NPCs | |
| Juno Hoslow, Knight of Blood | - |
| The Roundtable Hold Invaders and Hostile NPCs | |
| Mad Tongue Alberich | - |
| Multiple Location Invaders and Hostile NPCs | |
| Anastasia, Tarnished-Eater | - |
Comment
Author

Death Knight Weakness and Locations
Rankings
- We could not find the message board you were looking for.
Gaming News


![Monster Hunter Stories 3 Review [First Impressions] | Simply Rejuvenating](https://img.game8.co/4438641/2a31b7702bd70e78ec8efd24661dacda.jpeg/thumb)
Popular Games

Genshin Impact Walkthrough & Guides Wiki
Honkai: Star Rail Walkthrough & Guides Wiki
Umamusume: Pretty Derby Walkthrough & Guides Wiki
Pokemon Pokopia Walkthrough & Guides Wiki
Resident Evil Requiem (RE9) Walkthrough & Guides Wiki
Monster Hunter Wilds Walkthrough & Guides Wiki
Wuthering Waves Walkthrough & Guides Wiki
Arknights: Endfield Walkthrough & Guides Wiki
Pokemon FireRed and LeafGreen (FRLG) Walkthrough & Guides Wiki
Pokemon TCG Pocket (PTCGP) Strategies & Guides Wiki


Recommended Games
Diablo 4: Vessel of Hatred Walkthrough & Guides Wiki
Cyberpunk 2077: Ultimate Edition Walkthrough & Guides Wiki
Fire Emblem Heroes (FEH) Walkthrough & Guides Wiki
Yu-Gi-Oh! Master Duel Walkthrough & Guides Wiki
Super Smash Bros. Ultimate Walkthrough & Guides Wiki
Pokemon Brilliant Diamond and Shining Pearl (BDSP) Walkthrough & Guides Wiki
Elden Ring Shadow of the Erdtree Walkthrough & Guides Wiki
Monster Hunter World Walkthrough & Guides Wiki
The Legend of Zelda: Tears of the Kingdom Walkthrough & Guides Wiki
Persona 3 Reload Walkthrough & Guides Wiki


All rights reserved
ELDEN RING™ & ©BANDAI NAMCO Entertainment Inc. / ©2021 FromSoftware, Inc.
The copyrights of videos of games used in our content and other intellectual property rights belong to the provider of the game.
The contents we provide on this site were created personally by members of the Game8 editorial department.
We refuse the right to reuse or repost content taken without our permission such as data or images to other sites.