This survey will take about 1 minute.
Your answers will help us to improve our website.
Elden Ring
Volcano Manor Questline Walkthrough | Should You Join the Volcano Manor?
Volcano Manor is one of the Legacy Dungeons that you can explore in Elden Ring. Read on for a complete walkthrough of the dungeon, its location on the map, list of bosses and how to beat them, obtainable items, and what happens if you join the Volcano Manor!
List of Contents
Volcano Manor Overview
Volcano Manor Basic Information
| Volcano Manor | |
|---|---|
 View Full Map |
|
| Type | Legacy Dungeon |
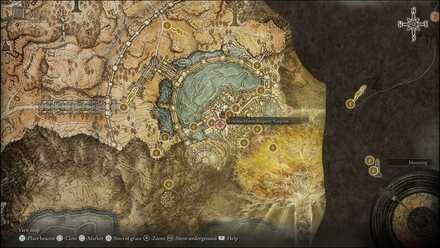
| Region | Altus Plateau |
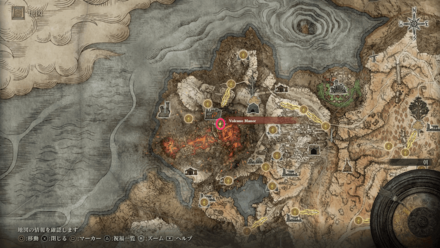
| Location | South of the Ninth Mt. Gelmir Campsite, take the Spirit Spring, cross the jagged rock bridge and go down the hill |
| Boss |
Rykard, Lord of Blasphemy
Godskin Noble (Liurnia Tower Bridge) Abductor Virgins Inquisitor Ghiza Magma Wyrm |
How to Get to Volcano Manor
Pass through the Bridge of Iniquity
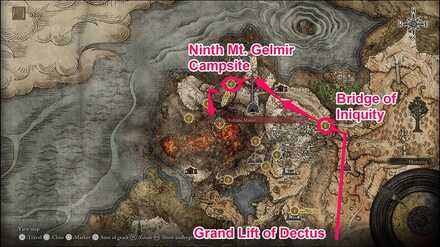
From the Grand Lift of Dectus, head north until you reach the Site of Grace at the Bridge of Iniquity. Follow the guidance of grace west until it leads you south to the entrance of Volcano Manor.
Get the invitation from Rya
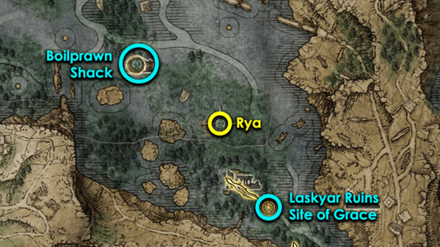
There's another way to get inside the Volcano Manor as soon as you reach Altus Plateau through the Grand Lift of Dectus. Find Rya in a shrine north of Laskyar Ruins and help her retrieve her necklace from the Tarnished at Boilprawn Shack, northwest of where you found Rya.
Buy the necklace for 1000 Runes and bring the necklace back to Rya. She will give you a Volcano Manor Invitation in return, which you can then use to go straight to Volcano Manor by finding Rya at the top of the Grand Lift of Dectus.
Alternate route from Academy of Raya Lucaria

Ride one of the lifts until you fall down the area below with the iron maiden
You can also reach Volcano Manor without having to activate the Grand Lift of Dectus using the Dectus Medallion, but you have to get killed in the process. Find a mobile iron maiden within the Academy of Raya Lucaria and get your character killed by its imprison attack. This will respawn you in an area near the Volcano Manor.
Find a way out of the cavern and defeat the two iron maidens near the exit, then head northwest to the Volcano Manor.
Academy of Raya Lucaria Legacy Dungeon Walkthrough and Location
Volcano Manor Walkthrough
Passing through Mt. Gelmir
| 1 | 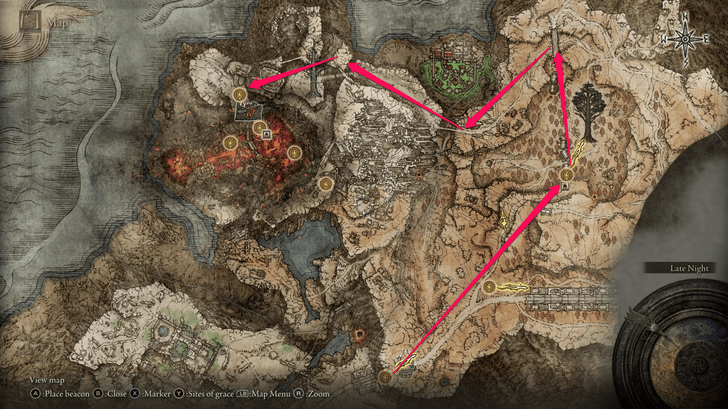 Warp back to the Grand Lift of Dectus and head north until you reach the Bridge of Iniquity |
|---|---|
| 2 | 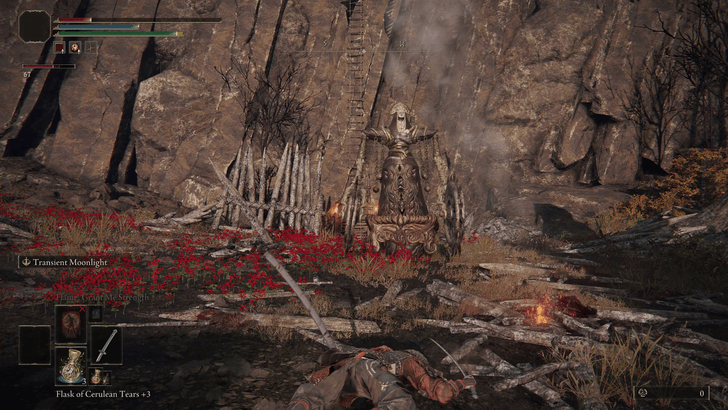 Press on to the area with Abductor Virgins and find a ladder along the cliff on your left that leads to the top |
| 3 | Head further to the west to reach the First Mt. Gelmir Campsite |
| 4 | Keep following the path west until you reach the Ninth Mt. Gelmir Campsite, then head south to the Volcano Manor You can ignore the boss past the spirit spring. |
Complete the Volcano Manor Questline or Explore the Legacy Dungeon
Players can progress through Volcano Manor in two ways, either through the questline or its hidden legacy dungeon. Both of which can be completed in one playthrough, only locking the player from progressing once they have defeated Rykard.
| Jump to a Section! | |
|---|---|
| Questline Walkthrough | Legacy Dungeon Walkthrough |
Volcano Manor Questline
| 5 | Talk to the NPC near the Site of Grace to join the Volcano Manor and receive the Drawing-Room Key. |
|---|---|
| 6 | Take the hallway nearby and use the key to unlock the drawing room (second door on the left side), then find the Letter from Volcano Manor on the table inside. |
| 7 | 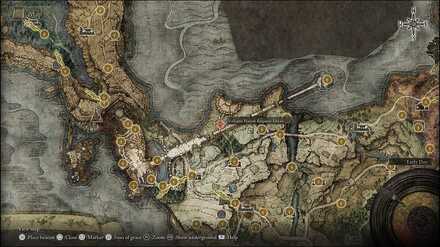 Defeat Old Knight Istvan in Limgrave and report back to Tanith |
| 8 |  Pick up another letter from the drawing room, defeat Rileigh the Idle in Altus Plateau, and report back to Tanith. |
| 9 | 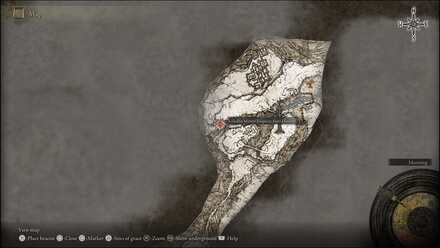 Return to the drawing room again for the third letter, defeat Juno Hoslow, Knight of Blood at the Mountaintops of the Giants, and report back to Tanith. |
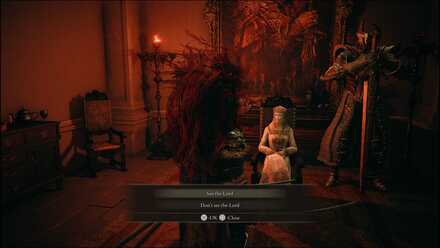
| 10 | Select "See the Lord" when asked by Tanith to be sent straight to the Site of Grace near the next boss |
| 11 | 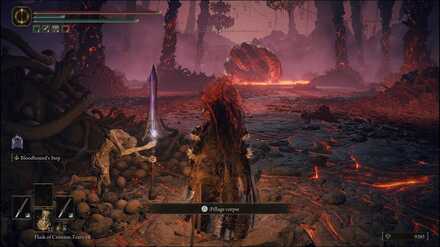 Pass through the mist, grab the Serpent-Hunter from the corpse on your left, and defeat the God-Devouring Serpent We recommend using the Serpent Hunter against this boss (and the next) especially if you're using a Strength build. The weapon doesn't have stat requirements and has a B-scale with Strength. |
| 12 | A cutscene will play after defeating the serpent before moving on to the boss fight against Rykard, Lord of Blasphemy ▶ How to Beat Rykard, Lord of Blasphemy |
| 13 | If you return to Tanith at the manor, all the NPCs inside will leave |
Points of Interest in Volcano Manor
| Location | What You Can Find |
|---|---|
| Drawing Room | ・Complete Bernahl's questline (Available only before defeating Rykard) |
| Volcano Manor | ・Secret passage to the boss area |
Walkthrough and Progression Guide: Where to Go and What to Do First
Volcano Manor Legacy Dungeon Walkthrough
| 5 | 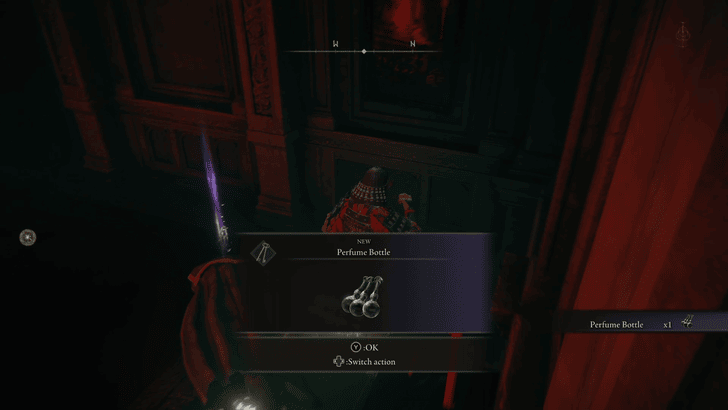 Use the Drawing Room Key on the first door to your right on the hallway. There will be an Illusory Wall behind the corpse holding perfume bottles. |
|---|---|
| 6 | Walk through the hidden hallway, avoiding or killing the snails. These aren't much of a threat unless you get mobbed. |
| 7 | Walk down the staircase and you will find a Bloodknight Hound. Defeat him or avoid him and enter through the metal gate, bringing you to the Prison Town Church Site of Grace. |
| 8 | 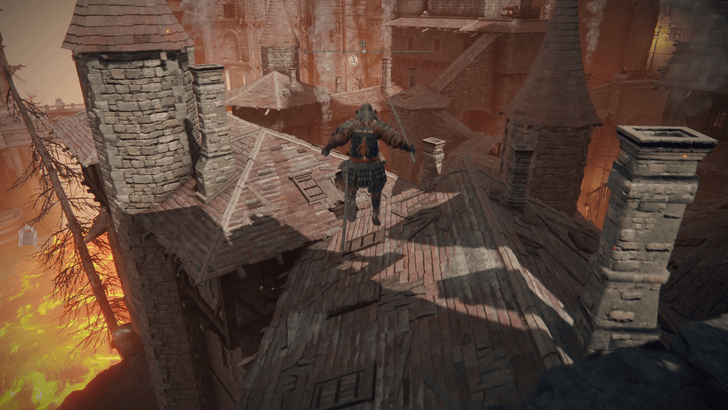 Exit the Prison Town Church and turn right, then jump and run along the rooftops towards the end opposite of where you came from. Jump off the building right before the stairs. |
| 9 | Here, players can turn back and take on the Omenkiller to look for the Erdtree Seal. |
| 10 | Walk up the stairs. On your right will be a tower locked by an Imp Seal Statue, containing a Virgin Abductor and a Crimson Amber Medallion |
| 11 | 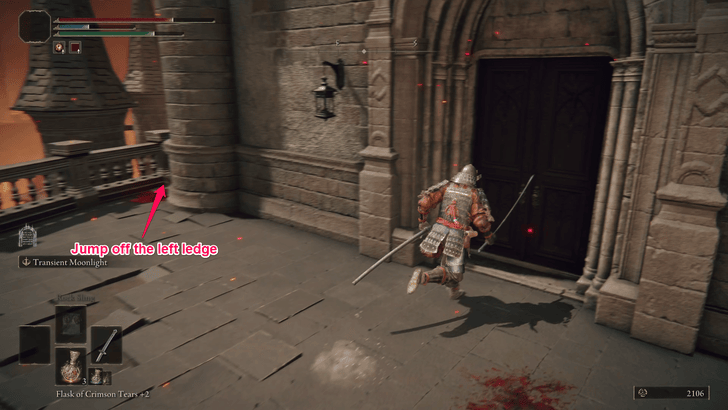 To the left will be a bridge. Cross the bridge and jump off the ledge to the left of the locked door and onto the roof. Players can then continue forward and jump to the side-entrance of the building and open the door, granting a shortcut. |
| 12 | Go through the door at the end of the room down the stairs. Upon reaching the ground floor, enter the door on the left, turn right at the end of the hallway, and make your way to the end of the room to open the large door. |
| 13 | Turn right and you will find a ladder. Follow the safe path and hug the right wall, which will eventually lead you to a staircase. |
| 14 | 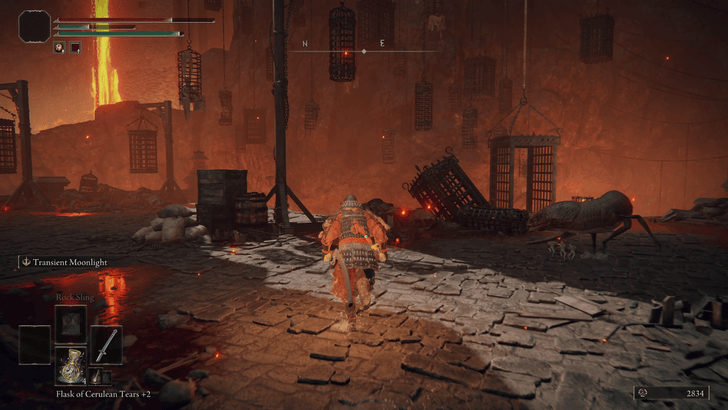 Defeat the Man-Serpent or lure it away from the elevator, as its attacks have a wide AOE. Take the elevator to the left. The elevator on the right will lead you to a Magma Wyrm, an optional boss. |
| 15 | Exit the elevator, and there will be a perfumer to your left, and a Somber Smithing Stone [5] on a corpse to your right. |
| 16 | Defeat the perfumer, and head up the stairs. Players can find a lever to lower the bridge, granting you access to a shortcut that allows you to retry the upcoming boss fight as many times as it takes. |
| 17 | Enter the chapel on the right and take on the Godskin Noble. This is a difficult fight, so prepare accordingly. Beating the Godskin Noble allows players to progress, and unlocks the Temple of Eiglay site of grace. ▶ How to Beat Godskin Noble: Boss Fight Guide |
| 18 | 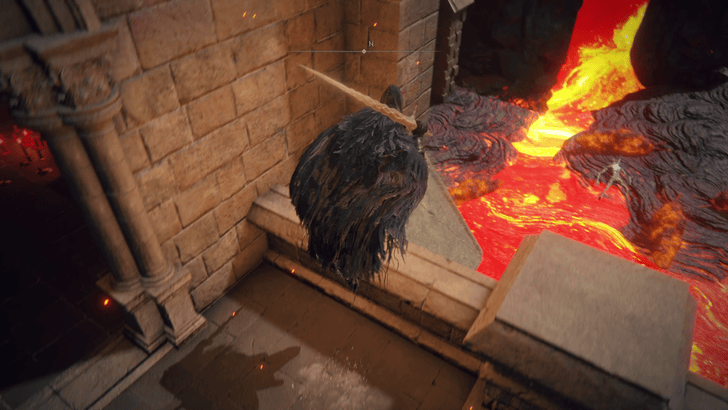 Once the Godskin Noble is defeated, make your way to the elevator to the left of the grace and walk out to the balcony. Walk towards the rocky path and jump down. |
| 19 | Make your way along and up the narrow path until you reach a wide open space. There, you will have to fight or avoid an Abductor Virgin. If you can run past it, there is a cave filled with Basilisks where you can find a Somber Smithing Stone [6] |
| 20 | 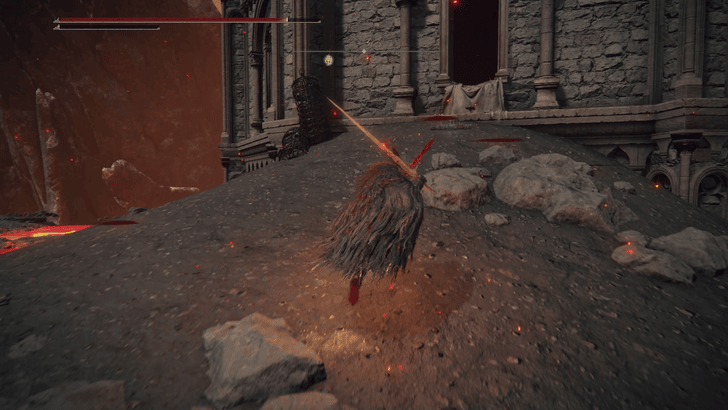 To the left of the Virgin Abductor is a building with an open window. Jump in the open window and follow the path to the next building, then activate the elevator to your left. This is a shortcut from the Temple Eiglay Site of Grace. |
| 20 | 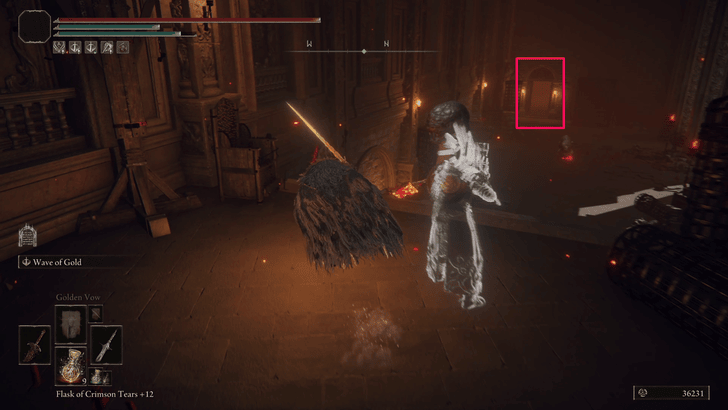 Opposite the shortcut is a large hallway. Move past the mobs and enter the door on the left. |
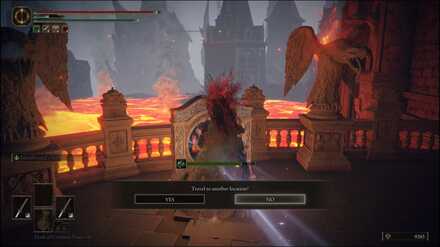
| 20 |  Go down the hall and into the large room. Upon entering the room, go up the staircase in front of you and out of the balcony. There will be a sending gate that will take you to Praetor Rykard's Audience Chambers. |
| 20 | Additionally, the staircase leading behind the door will lead you to a gate locked by an Imp Seal Statue. Opening this gate with two stonesword keys will allow you to access a hidden part of the map, with more loot. |
Should You Join the Volcano Manor?
Join and become one of the Recusants
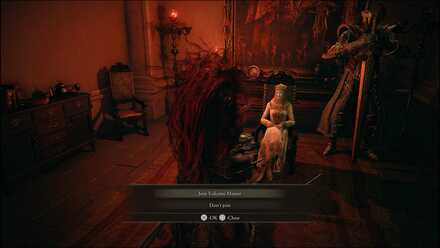
Upon arriving at the Volcano Manor, speak with Tanith, the woman sitting next to a knight, and become a member of the Volcano Manor. Tanith will then give you the Drawing Room Key for the rooms along the hallway on your right (except for the first door on the left side, which should be opened from the other side).
The key that you get from Tanith grants you access to more questlines and items within the Volcano Manor.
Tanith will take you to Rykard
The second and third door on the left side of the hallway can be unlocked using the Drawing Room Key, and is where you can find some of the other Recusants. You can also find a letter on the table inside, which is basically an assassination contract.
The location of your target will be marked red on your map and is explained in detail if you examine the letter from your inventory. Head to the marked location and interact with the red summon sign to invade your target's world. After winning, report back to Tanith to receive your reward.
Another letter will appear on the table after receiving your reward. Eventually, you'll find a red letter on the table instead of the usual design—marking your final target. Report back to Tanith after your third successful kill and she will offer to take you straight to Rykard.
Access the rest of the Volcano Manor
Alternatively, you can find Rykard yourself by exploring the manor (or if you don't like hunting down your own kind). You can do so by unlocking the first door on the right side of the hallway and revealing the illusory wall next to the corpse.
This opens a path to the rest of the legacy dungeon where you can find more rare items, as well as a portal at the very end of the long trek that will take you to Rykard's boss room.
Volcano Manor General Tips
| Volcano Manor Checklist | ||
|---|---|---|
|
|
Find Somber Smithing Stones 5-7
Players can find Somber Smithing Stones 5-7 in Volcano Manor's legacy dungeon alone. This can easily boost unique weapons to +9 if you account for the Somber Smithing Stones you can find in Caelid.
Somber Smithing Stones Farming Guide
Somber Smithing Stone 5 Location
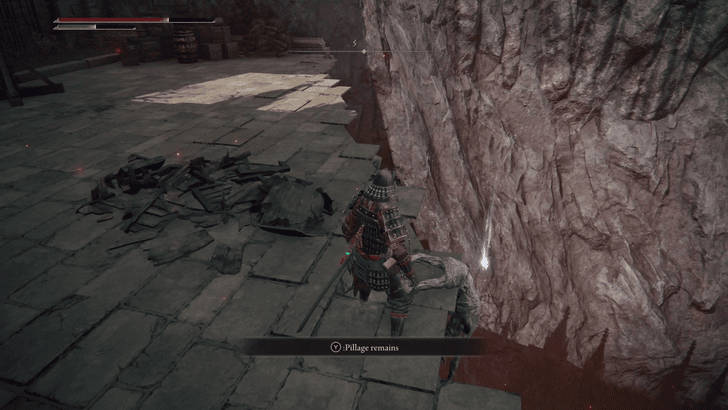
Somber Smithing Stone 5 can be found opposite of the perfumer after taking the elevator before the Godskin Noble boss fight. Look to the right after taking the lift and loot the stone from the corpse hanging off the ledge.
Somber Smithing Stone 6 Location

Somber Smithing Stone 6 is found by the open lava lake with the Abductor Virgin after climbing the rocks. It will be hidden near the door before the final room in a basement with an semi-circle opening with some Basilisks inside. These inflict Deathblight, so don't stay around too long.
List of All Status Effects and How to Cure
Somber Smithing Stone 7 Location

Somber Smithing Stone 7 can be found on a ledge with an Abductor Virgin. This used to be accessible through a skip, but was since patched out.
Players must now progress to the room where you can find the sending gate to Rykard's Audience Chambers, turn back and look for the doorway locked by the imp seal statue. Make your way down through the cages, and head to the east section to pick up a seedbed curse, and look right to see a staircase leading to the ledge.
Defeat Old Knight Istvan
| Stormhill, Limgrave | |
|---|---|
|
|
| Reward | Magma Shot |
Your first target, Old Knight Istvan, is found at Stormhill in Limgrave. Head north from the Warmaster's Shack Site of Grace and you'll find the sign in front of a colosseum. Return to Tanith after defeating Istvan to receive the Magma Shot Sorcery.
Defeat Rileigh the Idle
| Bridge of Iniquity, Atlus Plateau | |
|---|---|
|
|
| Reward | Serpentbone Blade |
Pick up the second letter inside the drawing room after reporting to Tanith to receive the letter for your next target, Rileigh. You can find the summon sign for Rileigh below a cliff south of the Bridge of Iniquity. Report back to Tanith after taking out your second target to receive the Serpentbone Blade weapon.
Defeat Juno Hoslow, Knight of Blood
| Ancient Snow Valley Ruins, Mountaintops of the Giants | |
|---|---|
|
|
| Reward | Taker's Cameo |
Return to the drawing room to find the third letter on the table, which sends you to the Mountaintops of the Giants to defeat Juno Hoslow. You'll find your target's summon sign near a shack north of the Ancient Snow Valley Ruins Site of Grace. Return to Tanith after defeating Juno Hoslow to receive the Taker's Cameo talisman.
Shortcut to Rykard
Talk to Tanith after your third kill and she'll offer to take you straight to Rykard. Choose the "See the Lord" option when asked and you will appear next to the Site of Grace near the boss area.
Take note that after you defeat Rykard, all NPCs inside the manor will disappear. Make sure to finish all their questlines first before engaging the lord.
Boss Fight Strategy for Rykard
You'll first battle against the God-Devouring Serpent before the fight transitions to Rykard revealing himself in the second phase.
Use the Serpent Hunter
Before you approach the serpent, grab the sword conveniently placed on a nearby corpse, the Serpent Hunter, and equip it. This weapon doesn't have stat requirements but since it has a B-scale with Strength, it'll be more powerful if you invested a lot on Strength.
With the Serpent Hunter, you'll be able to deal massive damage without having to get close. Keep an eye out on your stamina bar, though, as each attack consumes a chunk of stamina and you might want to save some for dodging.
Bring one or two charges of Cerulean Flasks
Using the Serpent Hunter's skill can make the fight a lot smoother due to its damage output, but since it consumes FP each use, be sure to allocate at least one charge to the Sacred Flask of Cerulean Tears so you can keep spamming.
How to Beat Rykard, Lord of Blasphemy: Boss Fight Guide
What to Do in Altus Plateau
| Altus Plateau Checklist | ||
|---|---|---|
|
|
Complete Bernahl's Request
Note: Defeating Rykard will make all NPCs in the manor disappear so make sure to complete their questlines first.
| Vagram and Wilhelm Location | |
|---|---|
 |
 |
After defeating Rileigh the Idle as part of Tanith's second request, talk to Bernahl to receive a letter and another mission. Your targets, Vagram the Raging Wolf and Errant Sorcerer Wilhelm, are found in Leyndell's Roundtable Hold.
Bernahl will join your side after invading your targets' world to make this a fair fight. After defeating them, return to Bernahl to receive the Gelmir's Fury Sorcery.
Bernahl Questline and Location
Find the secret path in the manor
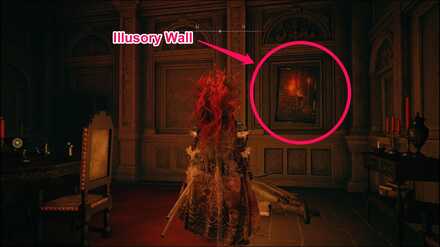
If you want to take the long way and find Rykard yourself, you can unlock the first door to the right of the hallway and approach the corpse to reveal an illusory wall. The tunnel will lead you back outside to a different area within the manor.
This lets you explore the rest of the legacy dungeon where you can also find a portal that leads to Rykard at the very end.
Restore Rykard's Great Rune
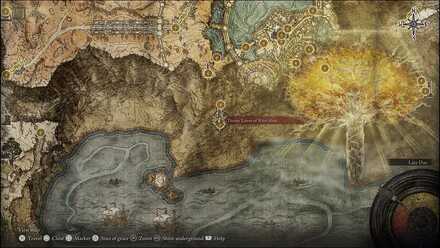
After defeating Rykard, take his rune to the Divine Tower of West Altus to restore its power. You can reach the tower by passing through the Sealed Tunnel, a minor dungeon filled with illusory walls.
Rykard's Great Rune, when equipped and activated by a Rune Arc, makes your character recover HP by defeating enemies.
How to Equip Great Runes: All Effects and Locations| Elden Ring
Elden Ring Related Guides

All Legacy Dungeons
| Legacy Dungeons Guides | ||
|---|---|---|
| Stormveil Castle | Academy of Raya Lucaria | Redmane Castle |
| Leyndell, Royal Capital | Volcano Manor | Mohgwyn Palace |
| Crumbling Farum Azula | Miquella's Haligtree | - |
All DLC Legacy Dungeons
| DLC Legacy Dungeon Guides | ||
|---|---|---|
| Castle Ensis | Belurat Tower Settlement | Shadow Keep |
| Midra's Manse | Enir-Ilim | Specimen Storehouse |
Comment
Author

Volcano Manor Questline Walkthrough | Should You Join the Volcano Manor?
Please participate in our site
improvement survey
03/2026
improvement survey
03/2026
Would you assist in
improving Game8's site?
improving Game8's site?

×
We are listening to our users' valuable opinions and discussing how to act on them.
The information collected through this survey will be used for the purpose of improving our services. In addition, the information will only be disclosed a part of a statistic in a format that will not allow identification of personal information.
Begin Survey
Not Now
×
Please rate each item regarding Game8.co's Advertisements.
Amount of Ads
Very Dissatisfied
Somewhat Dissatisfied
Fine
Somewhat Satisfied
Highly Satisfied
Placement of Ads
Timing of Ad Display
Ad Loading Speed
Safeness of Ads
Content of Ads
×
Please rate each item regarding Game8.co's Quality of Articles.
Amount of information
Very Dissatisfied
Somewhat Dissatisfied
Fine
Somewhat Satisfied
Highly Satisfied
Frequency of updates
Speed of new information
Accuracy of articles
Understandibility of articles
Readability of sentences
×
Please rate each item regarding Game8.co's Usability of the Site.
Ease of finding information
Very Dissatisfied
Somewhat Dissatisfied
Fine
Somewhat Satisfied
Highly Satisfied
Loading Speed
Use of Color
Font Size
Visibility of Images
Easy to Understand Layout
×
Please rate each item regarding Game8.co's Message Boards, Comments.
Ease of Writing
Very Dissatisfied
Somewhat Dissatisfied
Fine
Somewhat Satisfied
Highly Satisfied
Readability
Ease in Finding Information
Comment Quality
Comment Quantity
Admin Response
×
Please rate each item regarding Game8.co's Site's new design.
Please rate our site's new design
Very Dissatisfied
Somewhat Dissatisfied
Fine
Somewhat Satisfied
Highly Satisfied
Do you think that the website's design change makes the site easier to use?
Has the new design made it easier for you to find information on the site?
Has the new design improved the overall visual appeal of the site?
How would you rate your overall satisfaction with the new design of the site?
×
How likely are you to recommend Game8 to someone you know?
Very Unlikely
0
1
2
3
4
5
6
7
8
9
10
Very Likely
If you have other opinions regarding potential improvement to the website, please share them with us. We would appreciate your honest opinion.
Note: This is a free response section, so you can proceed without entering anything.
Note: Please be sure not to enter any kind of personal information into your response.
Note: Please be sure not to enter any kind of personal information into your response.
×
Thank You
×
Thank you for participating in our survey! Your answers will help us to improve the quality of our website and services.
We hope you continue to make use of Game8.
We hope you continue to make use of Game8.
Close
Rankings
- We could not find the message board you were looking for.
Gaming News


![Monster Hunter Stories 3 Review [First Impressions] | Simply Rejuvenating](https://img.game8.co/4438641/2a31b7702bd70e78ec8efd24661dacda.jpeg/thumb)
Popular Games

Genshin Impact Walkthrough & Guides Wiki
Honkai: Star Rail Walkthrough & Guides Wiki
Umamusume: Pretty Derby Walkthrough & Guides Wiki
Pokemon Pokopia Walkthrough & Guides Wiki
Resident Evil Requiem (RE9) Walkthrough & Guides Wiki
Monster Hunter Wilds Walkthrough & Guides Wiki
Wuthering Waves Walkthrough & Guides Wiki
Arknights: Endfield Walkthrough & Guides Wiki
Pokemon FireRed and LeafGreen (FRLG) Walkthrough & Guides Wiki
Pokemon TCG Pocket (PTCGP) Strategies & Guides Wiki


Recommended Games
Diablo 4: Vessel of Hatred Walkthrough & Guides Wiki
Cyberpunk 2077: Ultimate Edition Walkthrough & Guides Wiki
Fire Emblem Heroes (FEH) Walkthrough & Guides Wiki
Yu-Gi-Oh! Master Duel Walkthrough & Guides Wiki
Super Smash Bros. Ultimate Walkthrough & Guides Wiki
Pokemon Brilliant Diamond and Shining Pearl (BDSP) Walkthrough & Guides Wiki
Elden Ring Shadow of the Erdtree Walkthrough & Guides Wiki
Monster Hunter World Walkthrough & Guides Wiki
The Legend of Zelda: Tears of the Kingdom Walkthrough & Guides Wiki
Persona 3 Reload Walkthrough & Guides Wiki


All rights reserved
ELDEN RING™ & ©BANDAI NAMCO Entertainment Inc. / ©2021 FromSoftware, Inc.
The copyrights of videos of games used in our content and other intellectual property rights belong to the provider of the game.
The contents we provide on this site were created personally by members of the Game8 editorial department.
We refuse the right to reuse or repost content taken without our permission such as data or images to other sites.