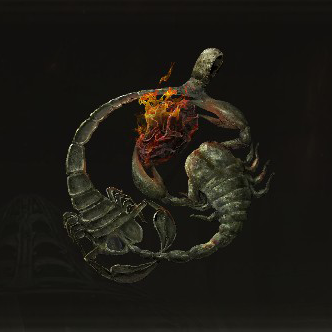
Romina, Saint of the Bud Weakness and Location
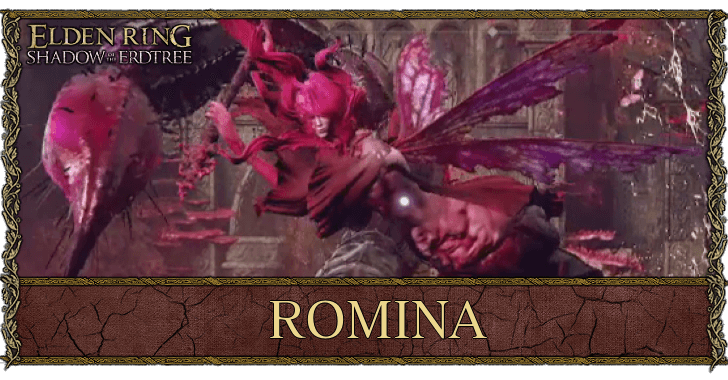
Romina, Saint of the Bud is a Remembrance boss at the Church of the Bud in the Elden Ring DLC Shadow of the Erdtree. Read on to learn more about Romina Saint of the Bud, including her weakness and location, stats and drops, and how to beat her.
List of Contents
Romina, Saint of the Bud Weakness
Weak to Fire and Frostbite
Romina, Saint of the Bud is weak to attacks that inflict Fire and Frostbite. These dealt the most damage and procs the easiest when we tested each affinity using the same weapon against Romina.
The Blasphemous Blade and Fire Knight's Greatsword are highly effective fire weapons against Romina. If you are using regular weapons, infusing them with Fire or Flame affinity will significantly increase your damage.
For those using Cold builds, you can use the Chilling Mist or Hoarfrost Stomp Ashes of War to Cold-infuse weapons of your choice to easily proc Frostbite against Romina.
As for spellcasters, your best bet would be Giantsflame Take Thee for dealing large amounts of fire damage, and Adula's Moonblade or Glintstone Icecrag for Frostbite.
Bleed is Also Effective Against Romina
You can go for Bleed Weapons if you want to proc Blood Loss as it is still a viable option. Keep in mind that katanas/swords may be less effective since Romina is resistant to slash damage.
If you are playing as a spellcaster, Impenetrable Thorns or Swarm of Flies are also great for procing Blood Loss.
Best Bleed Weapons and All Bleed Weapons List
Best Build Against Romina, Saint of the Bud
Fire or Bleed Weapons are Recommended
 Eleonora's Poleblade Eleonora's Poleblade
|
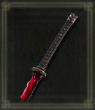 Rivers of Blood Rivers of Blood
|
It is recommended to use weapons with innate fire damage, are switched to Fire or Flame affinity, or coated with Fire Grease as Romina is weak to Fire.
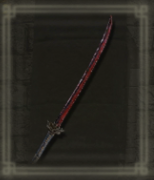
Romina is also vulnerable to Blood Loss so weapons that both deal fire damage and cause Blood Loss buildup like Eleonora's Poleblade and Rivers of Blood are great choices for this fight.
If you have both unique weapons, we recommend choosing Eleonora's Poleblade over Rivers of Blood since poleblades mainly deal Standard damage whereas katanas mainly deal Slash damage, which Romina is more resistant to.
Imbue Regular Weapons With Fire Ashes of War
|
|
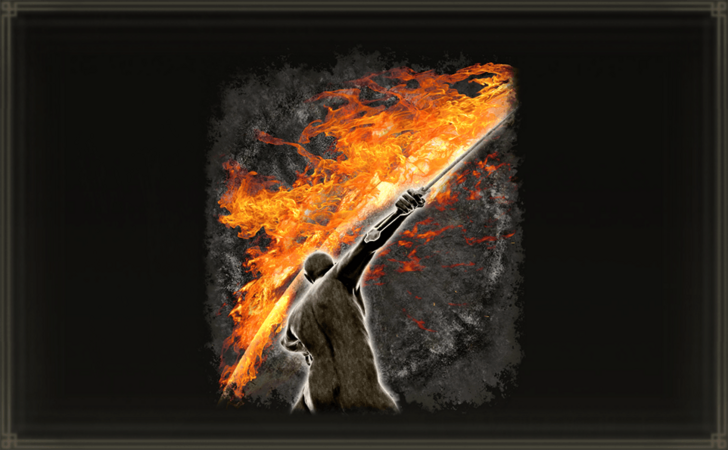 Ash of War: Flaming Strike Ash of War: Flaming Strike
|
You can also just use a non-unique melee weapon and change its ash of war to either Flame Spear or Flaming Strike. These ashes of war not only deal fire damage but also imbues your weapon with fire element.
Increase Fire Power With Fire Scorpion Charm
 Fire Scorpion Charm Fire Scorpion Charm
|
 Shard of Alexander Shard of Alexander
|
 Lord of Blood's Exultation Lord of Blood's Exultation
|
 Dragoncrest Greatshield Talisman Dragoncrest Greatshield Talisman
|
Your weapon's fire damage can be increased further with Fire Scorpion Charm at the cost of lower damage negation values. Because of its drawback, this talisman is recommended only if you have a high Scadutree Blessing level and/or if you have Dragoncrest Greatshield equipped.
Lord of Blood's Exultation is a must if you will be using Eleonora's Poleblade, Rivers of Blood, or another bleed weapon as it will give you a damage boost whenever you pop Blood Loss.
Use Impenetrable Thorns or Catch Flame for Spells
 Impenetrable Thorns Impenetrable Thorns
|
 Catch Flame Catch Flame
|
For mage builds with high arcane (and enough faith), Impenetrable Thorns is the perfect spell for this fight as it deals massive damage, especially when cast at point blank range, and procs Blood Loss almost instantly.
But if your build leans more on faith, then Catch Flame is a great spell choice for dealing quick fire damage that can be used as you dodge Romina's attacks.
Specific Recommended Build: Burn and Bleed Build
| Main Hand Weapon | Off-Hand Weapon | ||||||||
|---|---|---|---|---|---|---|---|---|---|
|
Eleonora's Poleblade
|
|
||||||||
| Character Stat Distribution | |||||||||
| VIG | 50 | MND | 20 | ||||||
| END | 25 | STR | 12 | ||||||
| DEX | 38 | FAI | 25 | ||||||
| INT | 9 | ARC | 50 | ||||||
If you're willing to respec your stats through Rennala's rebirth, we recommended going with a Burn and Bleed build with Eleonora's Poleblade to defeat Romina.
This build lets you both deal fire damage and proc Blood Loss quickly with Eleonora's Poleblade's swift attacks and its Bloodblade Dance ash of war.
Buff Yourself First With Flame, Grant Me Strength and Golden Vow
The Finger Seal recommended in this build is only used to cast Flame, Grant Me Strength and Golden Vow before engaging Romina. Afterwards, you can two-hand Eleonora's Poleblade for fluid combos.
Equip Talismans That Boost Successive Attacks
 Millicent's Prosthesis Millicent's Prosthesis
|
 Rotten Winged Sword Insignia Rotten Winged Sword Insignia
|
Eleonora's Poleblade, or twinblades in general, have high attack speed that can benefit from talismans that boost successive attacks like Millicent's Prosthesis and Rotten Winged Sword Insignia. Try to keep both buffs up as much as possible to make your fire combos even deadlier to Romina.
Romina, Saint of the Bud General Tips
| Tips for Beating Romina, Saint of the Bud |
|---|
|
|
Dodge into Romina's Attacks
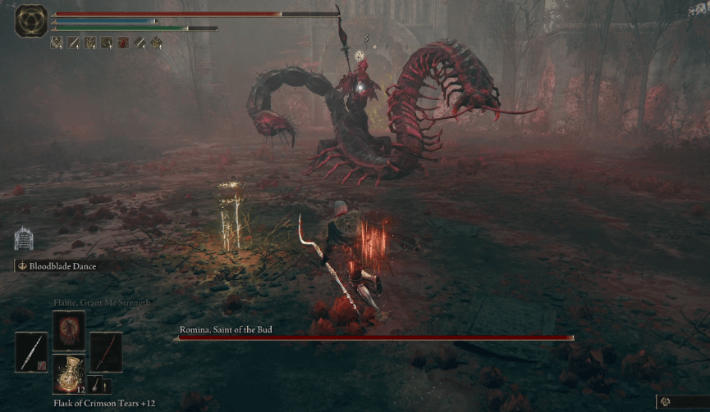
Romina has good mobility and long melee range with her combos due to her centipede body, but their reach is mostly restricted to a frontal cone. If you dodge into her attacks, you can safely attack her side or rear.
Avoid her Stinger Attacks
The stinger attacks Romina does have the combined threat of inflicting high upfront damage and high amounts of Scarlet Rot if they hit, which can build up the damage you take over the course of the fight.
You should naturally be dodging attacks when you can, but especially avoid getting stung so you don't give Romina windows to attack as you heal or alleviate Scarlet Rot status.
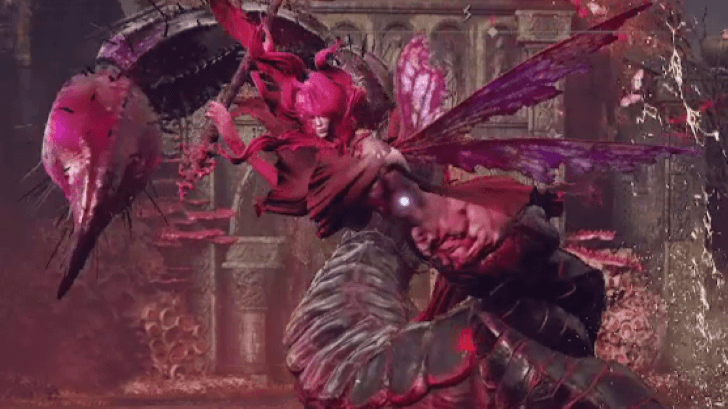
Dodge and Walk From Butterfly Explosions
During Romina's second phase, she will incorporate new attacks that involve scattering butterflies that will glow and explode after a delay. The delay is long enough that you can just dodge once and walk away, or even just walk, from the butterflies to avoid getting hit.
Use Bleed and Frost for Big Damage
Romina is highly susceptible to Bleed and Frost status effects, and can be burst down very quickly. Weapons like Eleonora's Poleblade and spells like Adula's Moonblade are especially effective because they can hit a big target like Romina multiple times to build up the statuses even faster.
Eleonora's Poleblade Location and Stats
Prepare Scarlet Rot Resistance
If you are having trouble dodging Romina's attacks, it is best to up your resistance to Scarlet Rot so that you do not accumulate so much of it when you get hit. Craft Preserving Boluses to cure Rot, or resist it by crafting Immunizing White Cured Meat or wearing either the Immunizing Horn Charm or Mottled Necklace talismans.
Romina, Saint of the Bud Location
Found In the Church of the Bud
| World View | Map Location |
|---|---|
 |
 |
Romina, Saint of the Bud can be found at the Church of the Bud on the west side of the Ancient Ruins of Rauh. The church entrance is found after going up a bloodsoaked tunnel filled with Pests.
Romina, Saint of the Bud Rewards
| Romina Saint of the Bud Details | |
|---|---|
 |
|
| Runes | 380000 |
| Drops | |
| Spirit Summons? | Spirit Ashes Allowed |
| Gold Summons? |
・Dryleaf Dane |
Elden Ring Related Guides

DLC Bosses
Main Bosses
Optional Bosses
Mini-Bosses
| All Bosses in Elden Ring | |
|---|---|
| Elder Dragon Greyoll | Lion Guardian |
| Valiant Gargoyle (Leyndell) | - |
Hostile NPCs and Invaders
| Limgrave Invaders and Hostile NPCs | |
|---|---|
| Bloody Finger Nerijus | Old Knight Istvan |
| Recusant Henricus | - |
| Liurnia of the Lakes Invaders and Hostile NPCs | |
| Great Horned Tragoth | Festering Fingerprint Vyke |
| Altus Plateau Invaders and Hostile NPCs | |
| Eleonora, Violet Bloody Finger | Inquisitor Ghiza |
| Maleigh Marais, Shaded Castle Castellan | Rileigh the Idle |
| Vargram the Raging Wolf & Errant Sorcerer Wilhelm | Magnus the Beast Claw |
| Mountaintops of the Giants Invaders and Hostile NPCs | |
| Juno Hoslow, Knight of Blood | - |
| The Roundtable Hold Invaders and Hostile NPCs | |
| Mad Tongue Alberich | - |
| Multiple Location Invaders and Hostile NPCs | |
| Anastasia, Tarnished-Eater | - |
Comment
Author

Romina, Saint of the Bud Weakness and Location
Rankings
- We could not find the message board you were looking for.
Gaming News

![Monster Hunter Stories 3 Review [First Impressions] | Simply Rejuvenating](https://img.game8.co/4438641/2a31b7702bd70e78ec8efd24661dacda.jpeg/show)


![Monster Hunter Stories 3 Review [First Impressions] | Simply Rejuvenating](https://img.game8.co/4438641/2a31b7702bd70e78ec8efd24661dacda.jpeg/thumb)
Popular Games

Genshin Impact Walkthrough & Guides Wiki
Honkai: Star Rail Walkthrough & Guides Wiki
Umamusume: Pretty Derby Walkthrough & Guides Wiki
Pokemon Pokopia Walkthrough & Guides Wiki
Resident Evil Requiem (RE9) Walkthrough & Guides Wiki
Monster Hunter Wilds Walkthrough & Guides Wiki
Wuthering Waves Walkthrough & Guides Wiki
Arknights: Endfield Walkthrough & Guides Wiki
Pokemon FireRed and LeafGreen (FRLG) Walkthrough & Guides Wiki
Pokemon TCG Pocket (PTCGP) Strategies & Guides Wiki


Recommended Games
Diablo 4: Vessel of Hatred Walkthrough & Guides Wiki
Cyberpunk 2077: Ultimate Edition Walkthrough & Guides Wiki
Fire Emblem Heroes (FEH) Walkthrough & Guides Wiki
Yu-Gi-Oh! Master Duel Walkthrough & Guides Wiki
Super Smash Bros. Ultimate Walkthrough & Guides Wiki
Pokemon Brilliant Diamond and Shining Pearl (BDSP) Walkthrough & Guides Wiki
Elden Ring Shadow of the Erdtree Walkthrough & Guides Wiki
Monster Hunter World Walkthrough & Guides Wiki
The Legend of Zelda: Tears of the Kingdom Walkthrough & Guides Wiki
Persona 3 Reload Walkthrough & Guides Wiki


All rights reserved
ELDEN RING™ & ©BANDAI NAMCO Entertainment Inc. / ©2021 FromSoftware, Inc.
The copyrights of videos of games used in our content and other intellectual property rights belong to the provider of the game.
The contents we provide on this site were created personally by members of the Game8 editorial department.
We refuse the right to reuse or repost content taken without our permission such as data or images to other sites.