How to Beat Night's Cavalry: Boss Fight Guide
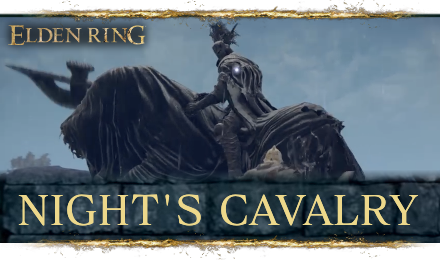
This is a guide on how to beat Night's Cavalry, an optional boss in Elden Ring. Read on to learn more about Night's Cavalry's strengths, weaknesses, attack patterns, and lore!
List of Contents
Night's Cavalry General Info
Stats and Rewards
| Night's Cavalry | ||
|---|---|---|

|
||
| Weakness | Resistance | Immune |
| ━ |
Standard Strike Slash Fire Holy Bleed Frost Scarlet Rot Poison |
Madness |
| Affected By | Poison, Scarlet Rot, Bleed, Frost | |
| Spirit Ashes Available? | No | |
| Rune Rewards |
2400 (NG) |
|
| Summonable NPCs |
None
|
|
| Location |
・Altus Plateau ・Caelid ・Limgrave ・Liurnia of the Lakes ・Mountaintops of the Giants |
|
| Item Drops |
・Nightrider Flail
・Nightrider Glaive ・Night's Cavalry Armor ・Night's Cavalry Gauntlets ・Night's Cavalry Greaves ・Night's Cavalry Helm ・Ancient Dragon Smithing Stone ・Barricade Shield ・Bloodhound's Step ・Giant Hunt ・Ice Spear ・Phantom Slash ・Poison Moth Flight ・Repeating Thrust ・Shared Order |
|
Night's Cavalry Locations
Where to Find
| Jump to a Location! | ||
|---|---|---|
| Limgrave | Weeping Peninsula | Liurnia (South) |
| Liurnia (North) | Caelid | Greyoll's Dragonbarrow |
| Altus Plateau | Forbidden Lands | Mountaintops of the Giants |
The different Night's Cavalry bosses can only be found at night. There are nine of them in total that can be fought across the Lands Between.
Limgrave
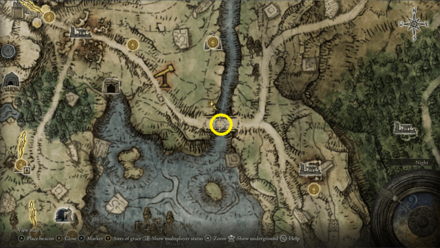
Appears on the bridge southeast of the Agheel Lake North Site of Grace. Will reward the Repeating Thrust Ash of War on defeat.
Weeping Peninsula
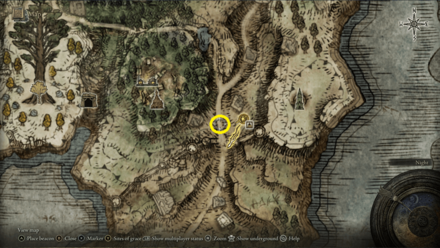
Appears on the road to the west of the Castle Morne Rampart Site of Grace. Will reward the Nightrider Flail and the Barricade Shield Ash of War on defeat.
Liurnia of the Lakes (South)
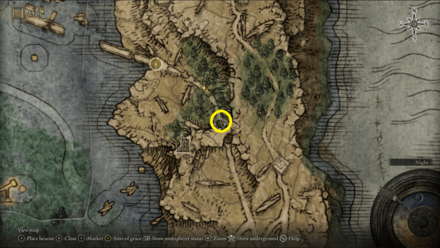
Appears east of the Gate Town Bridge Site of Grace. Will reward the Ice Spear Ash of War on defeat.
Liurnia of the Lakes (North)
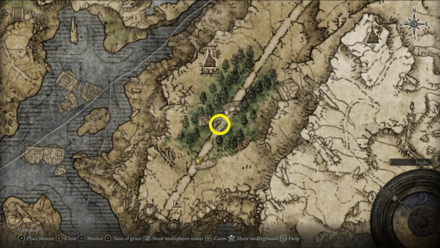
Appears in the forested area northeast of the East Raya Lucaria Gate Site of Grace. Will reward the Nightrider Glaive and the Giant Hunt Ash of War on defeat.
Caelid
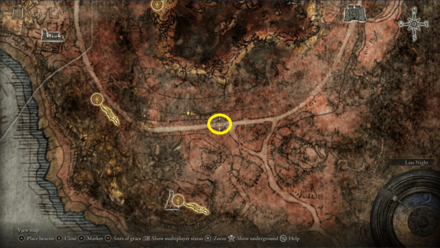
Appears east of the Caelid Highway South Site of Grace. Will reward the Poison Moth Flight Ash of War on defeat.
Greyoll's Dragonbarrow
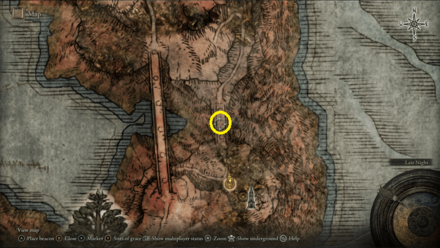
Appears on the bridge to the north of the Lenne's Rise Site of Grace. Will reward the Bloodhound's Step Ash of War on defeat.
Altus Plateau
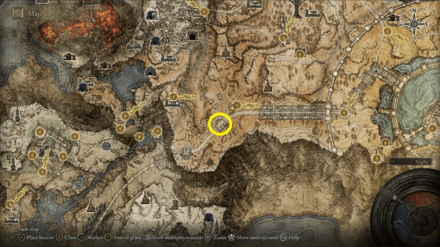
Appears on the road southwest of the Altus Highway Junction Site of Grace. Will reward the Shared Order Ash of War on defeat.
Forbidden Lands
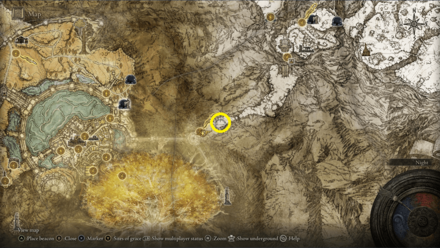
Appears on the road east of the Forbidden Lands Site of Grace. Will reward the Phantom Slash Ash of War.
Mountaintops of the Giants
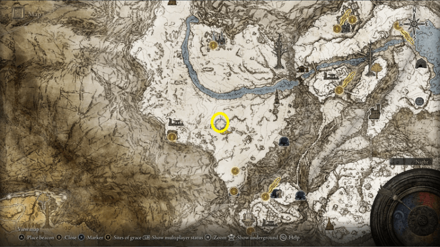
Two Night's Cavalry will appear escorting a caravan southwest of the Inner Consecrated Snowfield Site of Grace. Defeating both Night's Cavalry will reward an Ancient Dragon Smithing Stone and the complete Night's Cavalry armor set.
How to Beat Night's Cavalry
| Tips for Beating Night's Cavalry |
|---|
| How to Beat Strategies | ||
|---|---|---|
| Ranged Strategy | Melee Strategy | |
Click a link above to take you to that section.
Ranged Strategy
| Night's Cavalry Boss Tips |
|---|
Remove the enemies near the bridge first
You don't want to agro the enemies camping on either side of the bridge, so defeat them from afar before engaging with Night's Cavalry. This will allow you to keep your distance when fighting the boss.
Attack when the horse gets stuck on the bridge
The horse will constantly run up and down the bridge, and may get stuck on the rocks when attempting to turn around. Use this to your advantage by firing off as many attacks as you can before the horse eventually gets unstuck.
Melee Strategy
| Night's Cavalry Boss Tips |
|---|
Roll into the side of the horse to avoid its attacks
The sweet spot to avoiding taking damage is closest to the horse, so try to roll under it when Night's Cavalry swings its huge glaive. The exception to this is when it performs a dragging sweep with the glaive. Instead of rolling, try jumping over this attack.
Strike the horse's rear legs, then roll away
Repeating this strategy is the key to beating Night's Cavalry. Wait for it to swing its glaive, roll at it to avoid damage, then go for 1-2 strikes on its rear legs then back away.
Night's Cavalry Attack Patterns
Trample
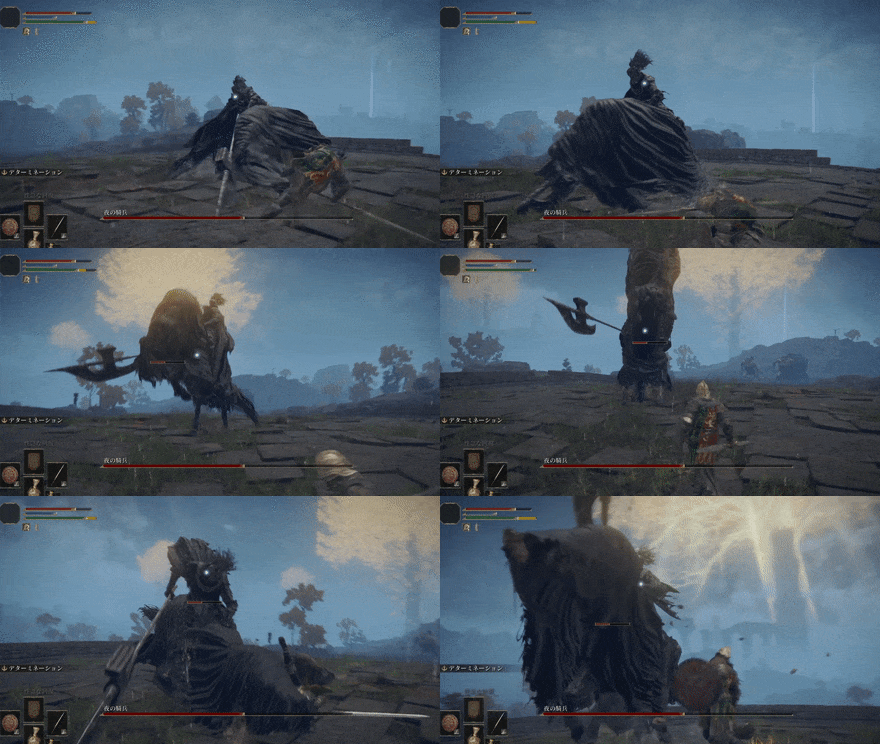
This attack always follows after Night's Cavalry's horse has reared back on its hind legs. Roll under the horse to avoid this attack, as the horse will often follow up with a Side Bash and leave you stunned.
Low Glaive Swipe
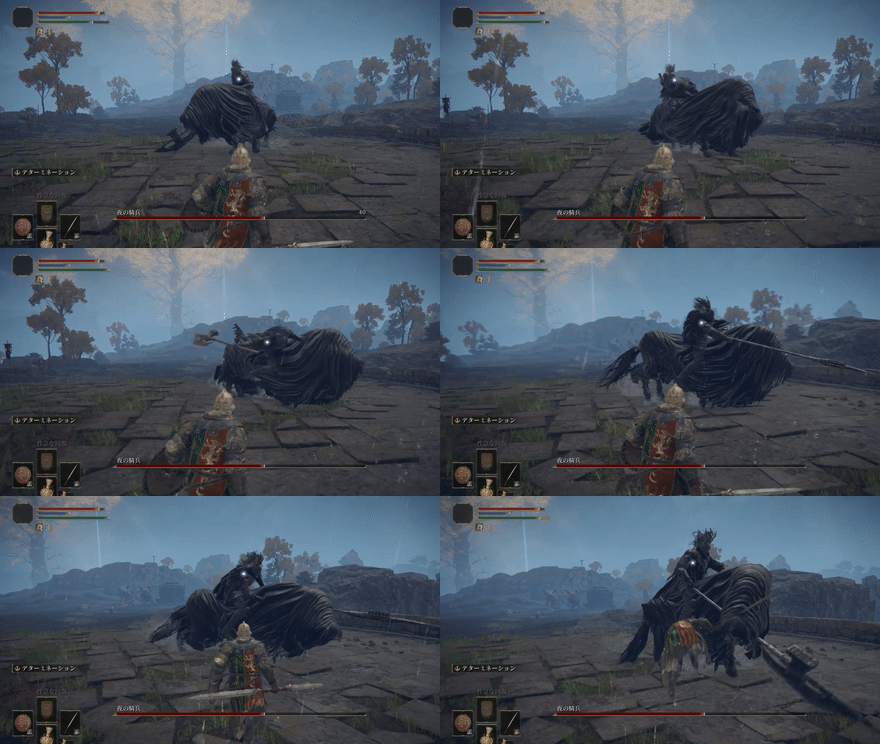
Night's Cavalry's favorite move. This move is fast and has a wide reach, so avoid it by rolling back or into the horse's side where the glaive blade will miss you.
Side Bash

The horse jerks suddenly, throwing its body into you and knocking you off balance. This move almost always follows after the horse rears and tramples the ground, so roll toward its hindquarters, sneak in a strike or two, then pull back. If you're standing at its side when its hooves land on the ground, a side bash is likely coming next.
Heavy Downward Smash
Night's Cavalry smashes its glaive into the ground with both hands. Look for the telltale sign of the boss raising the weapon its head and get out of the way, because it packs a punch. The windup for this move is the longest of any of its attacks, so it should be relatively easy to get out of the way.
Demounted Heavy Downard Smash
Just like the regular version, Night's Cavalry will also perform this move after it has been demounted from its horse. Without its steed, however, you'll be able to take advantage of the long charge time by getting behind Night's Cavalry and getting in a few light attacks.
Dragging Sweep

Night's Cavalry will start dragging its glaive on the ground and try to sweep you with the blade. Night's Cavalry tends to start this attack from far away, giving you enough time to predict it. Jump over the glaive to avoid getting swept up.
Leaping Swipe
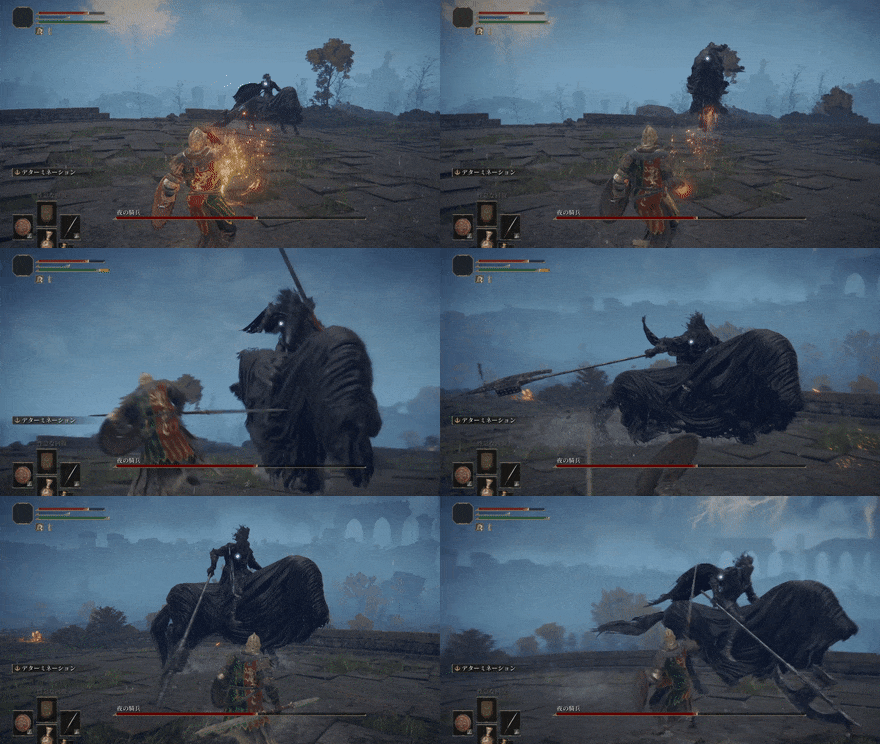
Night's Cavalry leaps with its horse, closing the distance between you and swiping its weapon downward. Like most attacks, the sweet spot to avoid this attack is rolling as close to the horse as possible. This attack is only likely to hit if you're standing still.
Upward Swing
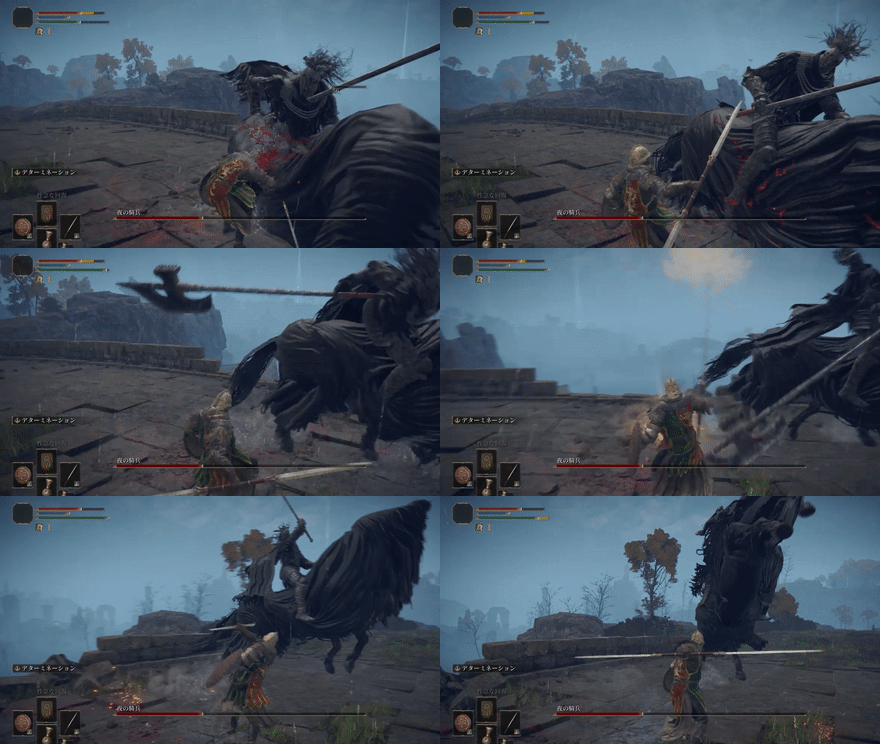
This attack often follows after a side bash and when Night's Cavalry is turning around. This attack happens fast and may land if you try to roll into the horse, so rolling to the side or back is generally preferred here.
Horse Respawn
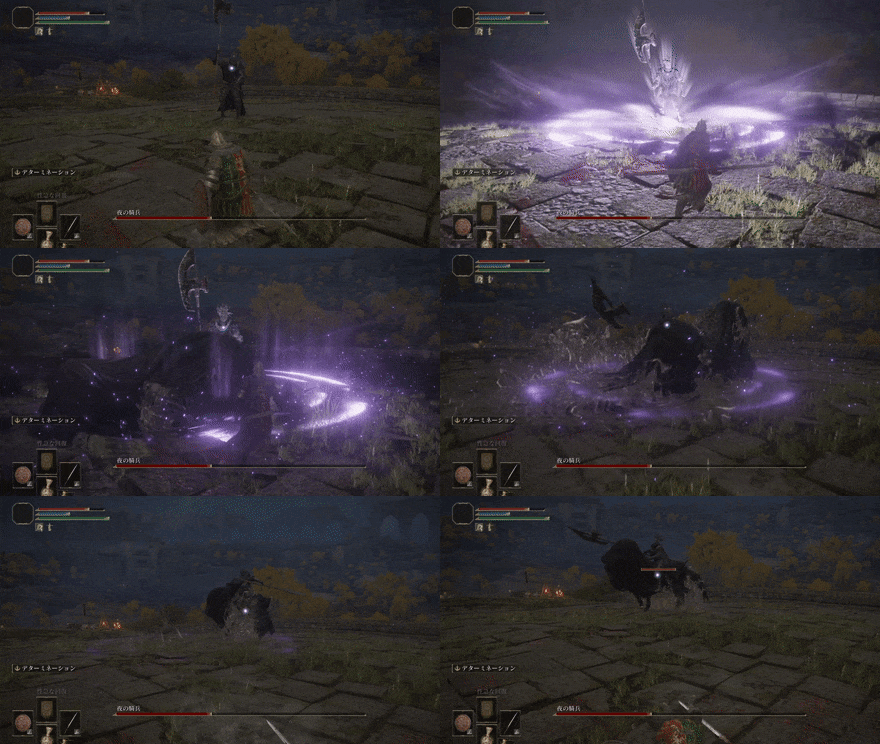
Night's Cavalry will respawn its horse almost immediately after the horse has been defeated. You'll know it's happening when Night's Cavalry stamps the handle of its glaive and the ground starts glowing purple. This move can also damage you, so stay back when you see the ground turn purple.
Double Overhead Swing (Dismounted)
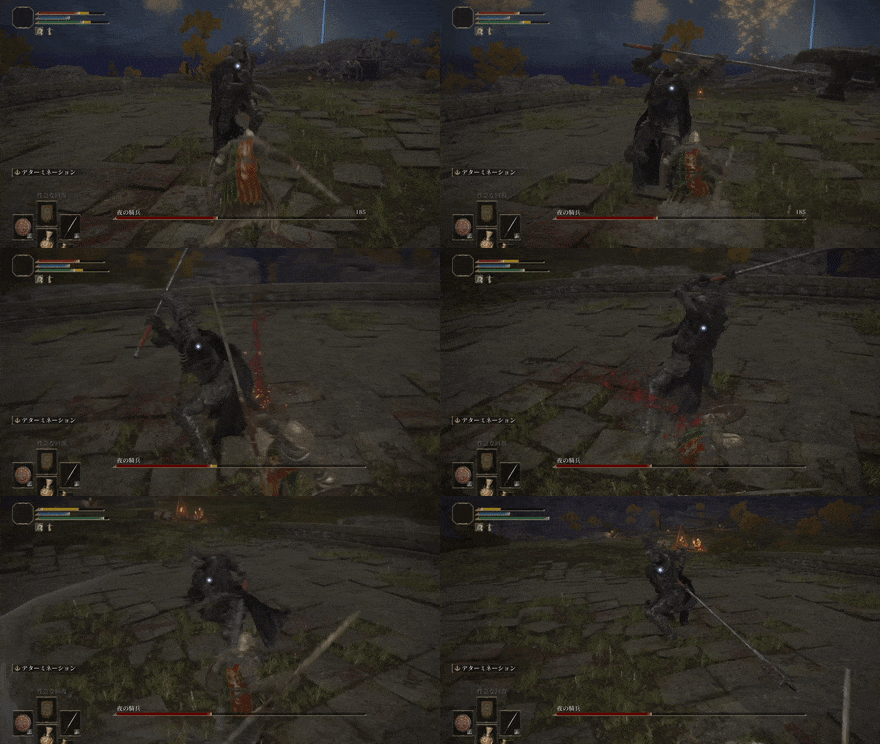
Night's Cavalry swings its glaive with both hands in 360 degrees twice. Because the size of the weapon, this attack has a huge reach. Stay back at all costs, as it will leave you with a sliver of health.
Elden Ring Related Guides

DLC Bosses
Main Bosses
Optional Bosses
Mini-Bosses
| All Bosses in Elden Ring | |
|---|---|
| Elder Dragon Greyoll | Lion Guardian |
| Valiant Gargoyle (Leyndell) | - |
Hostile NPCs and Invaders
| Limgrave Invaders and Hostile NPCs | |
|---|---|
| Bloody Finger Nerijus | Old Knight Istvan |
| Recusant Henricus | - |
| Liurnia of the Lakes Invaders and Hostile NPCs | |
| Great Horned Tragoth | Festering Fingerprint Vyke |
| Altus Plateau Invaders and Hostile NPCs | |
| Eleonora, Violet Bloody Finger | Inquisitor Ghiza |
| Maleigh Marais, Shaded Castle Castellan | Rileigh the Idle |
| Vargram the Raging Wolf & Errant Sorcerer Wilhelm | Magnus the Beast Claw |
| Mountaintops of the Giants Invaders and Hostile NPCs | |
| Juno Hoslow, Knight of Blood | - |
| The Roundtable Hold Invaders and Hostile NPCs | |
| Mad Tongue Alberich | - |
| Multiple Location Invaders and Hostile NPCs | |
| Anastasia, Tarnished-Eater | - |
Author
How to Beat Night's Cavalry: Boss Fight Guide
improvement survey
03/2026
improving Game8's site?

Your answers will help us to improve our website.
Note: Please be sure not to enter any kind of personal information into your response.

We hope you continue to make use of Game8.
Rankings
- We could not find the message board you were looking for.
Gaming News
Popular Games

Genshin Impact Walkthrough & Guides Wiki

Honkai: Star Rail Walkthrough & Guides Wiki

Umamusume: Pretty Derby Walkthrough & Guides Wiki

Pokemon Pokopia Walkthrough & Guides Wiki

Resident Evil Requiem (RE9) Walkthrough & Guides Wiki

Monster Hunter Wilds Walkthrough & Guides Wiki

Wuthering Waves Walkthrough & Guides Wiki

Arknights: Endfield Walkthrough & Guides Wiki

Pokemon FireRed and LeafGreen (FRLG) Walkthrough & Guides Wiki

Pokemon TCG Pocket (PTCGP) Strategies & Guides Wiki
Recommended Games

Diablo 4: Vessel of Hatred Walkthrough & Guides Wiki

Fire Emblem Heroes (FEH) Walkthrough & Guides Wiki

Yu-Gi-Oh! Master Duel Walkthrough & Guides Wiki

Super Smash Bros. Ultimate Walkthrough & Guides Wiki

Pokemon Brilliant Diamond and Shining Pearl (BDSP) Walkthrough & Guides Wiki

Elden Ring Shadow of the Erdtree Walkthrough & Guides Wiki

Monster Hunter World Walkthrough & Guides Wiki

The Legend of Zelda: Tears of the Kingdom Walkthrough & Guides Wiki

Persona 3 Reload Walkthrough & Guides Wiki

Cyberpunk 2077: Ultimate Edition Walkthrough & Guides Wiki
All rights reserved
ELDEN RING™ & ©BANDAI NAMCO Entertainment Inc. / ©2021 FromSoftware, Inc.
The copyrights of videos of games used in our content and other intellectual property rights belong to the provider of the game.
The contents we provide on this site were created personally by members of the Game8 editorial department.
We refuse the right to reuse or repost content taken without our permission such as data or images to other sites.


![Everwind Review [Early Access] | The Shaky First Step to A Very Long Journey](https://img.game8.co/4440226/ab079b1153298a042633dd1ef51e878e.png/thumb)

![Monster Hunter Stories 3 Review [First Impressions] | Simply Rejuvenating](https://img.game8.co/4438641/2a31b7702bd70e78ec8efd24661dacda.jpeg/thumb)


