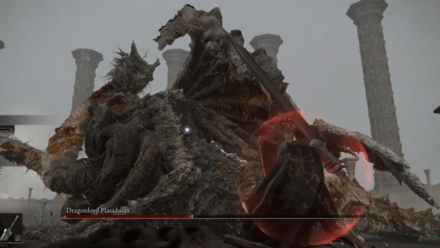
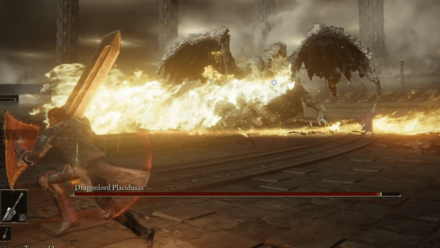
How to Beat Dragonlord Placidusax: Boss Fight Guide
This is a guide on how to beat Dragonlord Placidusax, an optional boss in Elden Ring. Read on to learn more about Dragonlord Placidusax's drops, weaknesses, and recommended level!
List of Contents
Dragonlord Placidusax General Info
Stats and Rewards
| Dragonlord Placidusax | ||
|---|---|---|

|
||
| Weakness | Resistance | Immune |
| ━ |
Frost |
━ |
| Affected By | Poison, Scarlet Rot, Bleed | |
| Spirit Ashes Available? | Yes | |
| Rune Rewards |
280000 (NG) |
|
| Summonable NPCs |
None
|
|
| Location |
・Crumbling Farum Azula |
|
| Item Drops |
・Remembrance of the Dragonlord
|
|
Dragonlord Placidusax Location
Where to Find Dragonlord Placidusax
| Map Location | |
|---|---|
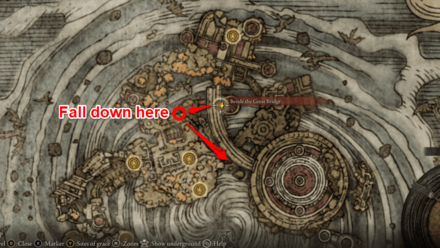 View Full Image |
|
| Recommended Level | Lv.120 |
Progress through Crumbling Farum Azula until you get to the Site of Grace labeled Beside the Great Bridge. Then, make your way back down the nearby elevator and out into the open area in front of the chapel. There, you will find a rocky ledge to drop down onto.
Make your way down and follow the floating rocky path till you reach a platform where several Beastmen remains are buried. Find the spot that is empty and interact with it to lie down. You will then be taken to the boss fight with Dragonlord Placidusax
How to Beat Dragonlord Placidusax
| Tips for Beating Dragonlord Placidusax |
|---|
| How to Beat Strategies | ||
|---|---|---|
| Ranged Strategy | Melee Strategy | |
Click a link above to take you to that section.
Ranged Strategy
| Dragonlord Placidusax Boss Tips |
|---|
Cerulean Hidden Tear + Terra Magica + Comet Azur
The Cerulean Hidden Tear will make FP consumption zero for a short time, so as soon as Placidusax has his attention on your Spirit Ash, cast Terra Magica to bolster your damage, and unload Comet Azur till you run out of FP. Bring extra Cerulean flasks with you and repeat till Placidusax goes down.
Inflict Status Ailments
Poison Pots and Rot Pots will help to bring Placidusax's health down if the status effect can be applied. The Rotten Breath incantation can help if you are able to cast it.
For archer builds, Poisonbone, Rotbone, and Bloodbone arrows and bolts will be the main tools at your disposal.
Stay Very Far Away
It will be easier to dodge Placidusax's moves if you can see them coming from far away. Stay a good distance away, take pot shots at him every so often, and retreat to a safe distance. Taking this route will take much longer but it's relatively safer.
Summon Spirit Ashes for His Second Phase
A good Spirit Ash like Mimic Tear will be hardy enough to assist you in this phase. Placidusax's attacks get quicker and more powerful. While your Spirit Ashes attracts Placidusax' attention, continue attacking this boss from the side.
Melee Strategy
| Dragonlord Placidusax Boss Tips |
|---|
Stay Behind It
It's good to stay behind this boss at all times and attack its hind legs or tail. Its attacks will be more manageable from this position.
Dodge All Attacks Except Flame
All of Dragonlord Placidusax' attacks, even the red lightning, can be dodged. His tail swings can easily be dodged or even blocked. His red lightning attacks require more precise timing but are completely dodgeable.
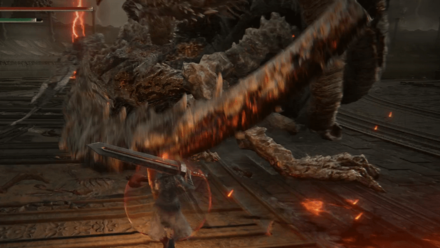
You should watch out for Placidusax' yellow flame, which lasts a long time and is not easily dodged. Always keep an eye on what his head is doing. If he's charging up for a yellow flame attack, quickly run and jump to the other side of his body.
Run Away When It Stabs a Spear into the Ground
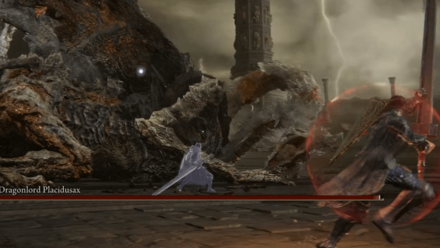
When you see it stab a red lightning spear into the ground, run away. This is a charge up for a large AoE attack that can instakill. If you think you're not going to make it outside the blast's range, you can try to block the explosion to lessen the damage.
Infuse Weapon
Inflict Scarlet Rot on Placidusax by using Rot Grease to help bring his HP down. Adding Magic Grease or Blood Grease or using the Bloodflame Blade incantation or Scholar's Armament sorcery on your weapon will help increase your damage output while Placidusax suffers from Scarlet Rot.
Use Envoy's Long Horn for Great Damage
The Envoy's Long Horn Bubble Shower weapon skill is a mid-range attack that Strength-Faith builds can use to inflict massive damage on Placidusax. This works well on this boss since his size allows him to get hit by all of the bubbles of Bubble Shower.
Dragonlord Placidusax Attack Patterns
Phase 1
Physical Attacks
| Physical Attack Variations |
|---|

Jumping Attack: Dragonlord Placidusax jumps a long distance forward and slashes at you with its claws. This is best dodged forward and into the attack, so Placidusax will pass right through you. |
Double Bite: Dragonlord Placidusax bites twice at you. Very short range and easy to dodge away from. Steal a couple of hits right after he does this. |

Tail Swipe: Dragonlord Placidusax Brings its tail up and swipes at you. This move is done when you are directly behind Placidusax. Dodge into the tail to avoid getting hit. |
Tail Smash and Swipe: Dragonlord Placidusax Brings its tail up, smashes it on the ground, then swipes at you, causing two counts of damage. This move is done when you are directly behind Placidusax. Dodge away from Placidusax to avoid getting hit. |
Wing Smash: Dragonlord Placidusax lifts its wing up, and smashes it down on the ground. He then violently brings it out of the ground, causing another round of damage. This attack has very low range and can easily be dodged backwards. |
Red Lightning Attacks
| Red Lightning Attack Variations |
|---|
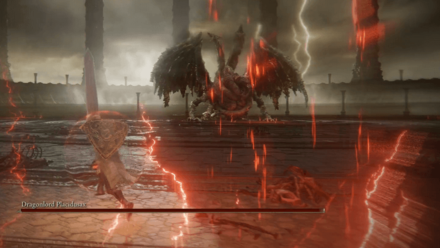
Red Lightning: Dragonlord Placidusax Summons red lightning to strike down on you. These are very easily avoided by running around and staying out of the red auras. There is a way to dodge out of the lightning strike, but it requires precise timing. Dodging is recommended if you're running a build that relies on fast damage, like Bleed. |

Lightning Claws: Dragonlord Placidusax creates giant red claws and slashes at you. This can easily be dodged forward or to the right. |

Quick Claws: If you are at his side, Dragonlord Placidusax looks at you, roars, then quickly does a Lightning Claw slash. This is harder to avoid if you're not paying attention to his heads. |

Lightning Spear Explosion: Dragonlord Placidusax thrusts a lightning spear into the ground and charges up for a huge explosion. While it is charging up, run as far away as you can. The explosion will cover a certain radius so make sure you're outside of it when it goes off. If you're too late to run away, you can try to block the explosion with your shield. |
Flame Attacks
| Flame Attack Variations |
|---|
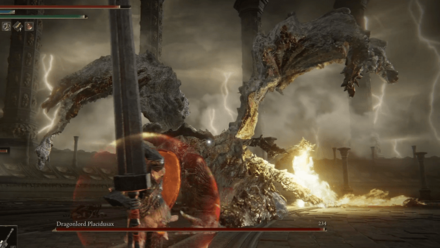 Side Flame: Dragonlord Placidusax gathers yellow flame in its mouth and releases a large, continuous flame that can damage you several times. Placidusax performs this move when you are by its side. This cannot be dodged. Once you see flame gather in Placidusax' mouth, either run away, or try to jump over its tail to the other side of its body. |
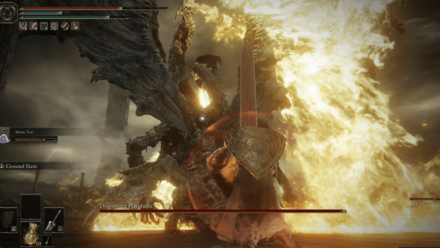
Flamethrower: Dragonlord Placidusax usually does this move right after his Lightning Claws attack. Placidusax burns a wide area in front of him so right after his claw attack, immediately circle round to his back and try to stay behind him while this Flamethrower move is happening. |
Reposition and Flamethrower: Dragonlord Placidusax jumps to another place on the battlefield and fires flames at you. When he does this, it's best to stay away so as not to get hit. |
Phase 2
During Phase 2, Dragonlord Placidusax will gain only a few new moves but this boss will be faster and hit harder, so do whatever you can to mitigate damage with items like Boiled Prawns and Boiled Crabs.
Red Lightning Attacks
| Red Lightning Attack Variations |
|---|

Surprise Swoop: This is the move that begins Phase 2. Dragonlord Placidusax Floats into the air and then disappears. Then, he launches a surprise attack from the sky. You will be able to see where he's coming from, as he will be exuding red lightning in the sky. This surprise claw attack completely avoidable and is best dodged forward, into the attack. |

Apparating Claw Attack: Dragonlord Placidusax appears out of thin air and smashes a lightning claw on the ground, and drags it back, for two counts of damage. Best dodged diagonally forward, away from the arm performing the attack. |
Elden Ring Related Guides
DLC Bosses
Main Bosses
Optional Bosses
Mini-Bosses
| All Bosses in Elden Ring | |
|---|---|
| Elder Dragon Greyoll | Lion Guardian |
| Valiant Gargoyle (Leyndell) | - |
Hostile NPCs and Invaders
| Limgrave Invaders and Hostile NPCs | |
|---|---|
| Bloody Finger Nerijus | Old Knight Istvan |
| Recusant Henricus | - |
| Liurnia of the Lakes Invaders and Hostile NPCs | |
| Great Horned Tragoth | Festering Fingerprint Vyke |
| Altus Plateau Invaders and Hostile NPCs | |
| Eleonora, Violet Bloody Finger | Inquisitor Ghiza |
| Maleigh Marais, Shaded Castle Castellan | Rileigh the Idle |
| Vargram the Raging Wolf & Errant Sorcerer Wilhelm | Magnus the Beast Claw |
| Mountaintops of the Giants Invaders and Hostile NPCs | |
| Juno Hoslow, Knight of Blood | - |
| The Roundtable Hold Invaders and Hostile NPCs | |
| Mad Tongue Alberich | - |
| Multiple Location Invaders and Hostile NPCs | |
| Anastasia, Tarnished-Eater | - |
Author

How to Beat Dragonlord Placidusax: Boss Fight Guide
Rankings
- We could not find the message board you were looking for.
Gaming News


![Monster Hunter Stories 3 Review [First Impressions] | Simply Rejuvenating](https://img.game8.co/4438641/2a31b7702bd70e78ec8efd24661dacda.jpeg/thumb)
Popular Games

Genshin Impact Walkthrough & Guides Wiki
Honkai: Star Rail Walkthrough & Guides Wiki
Umamusume: Pretty Derby Walkthrough & Guides Wiki
Pokemon Pokopia Walkthrough & Guides Wiki
Resident Evil Requiem (RE9) Walkthrough & Guides Wiki
Monster Hunter Wilds Walkthrough & Guides Wiki
Wuthering Waves Walkthrough & Guides Wiki
Arknights: Endfield Walkthrough & Guides Wiki
Pokemon FireRed and LeafGreen (FRLG) Walkthrough & Guides Wiki
Pokemon TCG Pocket (PTCGP) Strategies & Guides Wiki


Recommended Games
Diablo 4: Vessel of Hatred Walkthrough & Guides Wiki
Cyberpunk 2077: Ultimate Edition Walkthrough & Guides Wiki
Fire Emblem Heroes (FEH) Walkthrough & Guides Wiki
Yu-Gi-Oh! Master Duel Walkthrough & Guides Wiki
Super Smash Bros. Ultimate Walkthrough & Guides Wiki
Pokemon Brilliant Diamond and Shining Pearl (BDSP) Walkthrough & Guides Wiki
Elden Ring Shadow of the Erdtree Walkthrough & Guides Wiki
Monster Hunter World Walkthrough & Guides Wiki
The Legend of Zelda: Tears of the Kingdom Walkthrough & Guides Wiki
Persona 3 Reload Walkthrough & Guides Wiki


All rights reserved
ELDEN RING™ & ©BANDAI NAMCO Entertainment Inc. / ©2021 FromSoftware, Inc.
The copyrights of videos of games used in our content and other intellectual property rights belong to the provider of the game.
The contents we provide on this site were created personally by members of the Game8 editorial department.
We refuse the right to reuse or repost content taken without our permission such as data or images to other sites.