Obsidian Lamina Build Guide
The Obsidian Lamina build is an evasive bleed and poise damage setup using Ansbach's scythe in the Elden Ring DLC Shadow of the Erdtree. Read on to learn how to make and play the Obsidian Lamina build, including its stat distribution and required equipment.
| Obsidian Lamina Guides | |
|---|---|
Obsidian Lamina Build Guide
Dual-Wields Ansbach's Obsidian Lamina and Blood Scythe
| Main Weapon | Left Hand Weapon | ||||||||
|---|---|---|---|---|---|---|---|---|---|
 Obsidian Lamina Obsidian Lamina
Ash of War: Dynastic Sickleplay |
 Scythe Scythe
Infused Affinity: |
This build channels your inner Ansbach, combining the Reaper's power stance moveset with the evasion and poise damage of Obsidian Lamina's Dynastic Sickleplay weapon skill to dodge and counter enemy attacks, cutting foes down with Bleed and physical damage.
However, this build can only be obtained at the end of the DLC after beating the final boss, and will also require you to progress Sir Ansbach's questline so that he is still alive right before the final boss fight.
Obsidian Lamina Location and Stats
Evade and Counter with Dynastic Sickleplay
Obsidian Lamina's unique Ash of War, Dynastic Sickleplay is a swift dodge away from whichever direction the character is moving, similar to Bloodhound's Step. But, it also has an optional heavy attack follow-up where you quickly dash forward and perform a single slash with the scythe.
If you do a second heavy attack right after the first slash, it will initiate a three-swing combo that ends with a leap backward, out of melee range.
Dynastic Sickleplay Ash of War Effect
Quick Counters for Poise Damage
The evade and heavy attack follow-ups of Dynastic Sickleplay are a deadly combination to weave in and out of combat with any foe. The evade is fast and comes with i-frames, making it a great dodge tool in a pinch.
Meanwhile, each of the heavy attack follow-up hits deals respectable poise damage and Bleed buildup to the enemy, emphasizing the hit-and-run nature of this build to repeatedly engage and disengage opponents.
Only Do One Heavy Attack Follow-Up Against Fast Opponents
The second follow-up heavy attack locks you into its three-swing combo animation, leaving you vulnerable to enemies that either can't be staggered or have hyperarmor during their attacks.
In general, only do one heavy attack follow-up so that you can immediately roll or dodge away, unless you are fighting opponents that are slow, staggerable, or have timings you have mastered.
Save Stamina and FP by Mixing in Normal Rolls
The Sickeplay skill should not be spammed as a pure evasion tool, as it costs more stamina than a normal roll and can be a waste of FP if you're not using it to do the follow-up heavy attack.
Get used to your foe's attack timings so you can mix in normal rolls and end with the Dynastic Sickleplay evade to immediately counter at the end of enemy combos and deal some poise damage.
Dual Wield for Maximum Bleed Buildup
The Obsidian Lamina boasts decent base and bonus damage due to its B scaling in DEX and has inherent Bleed buildup, but this buildup maxes out at 73, which is relatively low for its slow normal attack speed.
If you want to maximize this build's damage while still having the Sickleplay skill available, it's best to equip a Scythe or Grave Scythe with Blood affinity to your left hand, so you can take advantage of the double hits and swings you get when power stancing Reapers.
Get Black Whetblade to Infuse Bleed
For Ansbach Fans: Equip Ansbach's Longbow for Ranged Options
Players that are fully invested into cosplaying Ansbach can also opt to equip Ansbach's Longbow as a secondary ranged weapon. It can be especially effective for applying debuffs or DoT with Fan Shot to further boost your overall damage.
If you are going for the Obsidian Lamina, you should already have Ansbach's Longbow as a reward for helping him fight Leda during his, and Leda's, NPC questlines.
Ansbach's Longbow Location and Stats
Stacks Damage Buffs for Higher Damage to HP and Poise
Stacking the appropriate buffs will improve your upfront damage and poise damage, which will both complement the Bleed damage bursts you'll be frequently proccing. The Dragon Communion Seal is a good choice of Sacred Seal for this, due to its early accessibility in the starting area tomb and its ARC scaling for any extra offensive incantations.
Remember to apply buffs in sequence to maximize their uptimes, especially before big boss fights.
| How to Buff Before a Boss | |
|---|---|
| 1 | Cast Golden Vow for a damage buff and defense buff. |
| 2 | Drink your Wondrous Physick for additional buffs or survival purposes. A good mix for poise damage and buffed attack chains is Stonebarb Cracked Tear with Thorny Cracked Tear. |
| 3 | Cast Flame, Grant Me Strength for a physical damage buff. Must be cast as late as possible during prep due to its short uptime. |
All Buffs and Debuffs and What They Do
Endgame Build: Optimal at Level 205
The Obsidian Lamina build is a true endgame setup, not only because the weapon can only be found at the end of the DLC, but also because it requires great stat investment to be able to use efficiently in terms of both damage and stamina conservation.
To set yourself up for damage as soon as you get the titular weapon, invest heavily into DEX, ARC and END so that you're able to deal respectable physical damage and build up Bleed quickly, whilst having the stamina to balance attacking and evading.
Obsidian Lamina Build Stat Distribution
Recommended Stats
| Recommended Level | ||
|---|---|---|
| 205 | ||
| Stat | Points | Explanation |
| VGR | 60 | 60 Vigor should be your target for a high enough HP value to comfortably tank high-damage attacks from bosses. |
| MND | 20 | You'll want a respectable amount of MND so that you have enough FP to buff yourself and maintain the poise damage of Dynastic Sickleplay before having to drink a Cerulean Flask. |
| END | 30 | 30 END will be important not just for equip load, but for higher max stamina to compensate for the stamina drain from power stance attacks and the evade of Dynastic Sickleplay. |
| STR | 14 | The Obsidian Lamina's minimum STR requirement is 12, but for a dual-wield build, you'll need at least 14 to equip a regular Scythe with Blood affinity. |
| DEX | 80 | DEX is the priority stat to increase the physical damage of your attacks. Aim for 80 points here to reach the highest soft cap, but balance it with leveling ARC. |
| INT | 10 | INT will not be needed. |
| FAI | 25 | You should have at least 25 Faith to access the buffing incantations necessary to maximize your physical damage. |
| ARC | 45 | 17 ARC is your minimum requirement, but reaching the soft cap of 45 should be your second-highest priority after DEX to increase your weapons' Blood Loss buildups. |
Recommended Starting Class

| VGR | MND | END | STR | DEX | INT | FAI | ARC |
|---|---|---|---|---|---|---|---|
| 11 | 12 | 11 | 10 | 16 | 10 | 8 | 14 |
The best starting class for the Obsidian Lamina build is the Warrior for its high starting DEX and ARC. Since the Obsidian Lamina is a DLC endgame weapon, you should be able to take your time to reach the necessary soft caps for DEX and any other minimum stat requirements for the weapons and buffs.
However, when you're close to the final area and boss of the DLC, start investing more into END to have the stamina necessary to evade and attack with Dynastic Sickleplay with minimal interruption.
Respec Stats at Rennala in Raya Lucaria
Before hitting the DLC, make sure to respec your stats by offering a Larval Tear to Rennala at the Academy of Raya Lucaria in Liurnia. You can do this before going to the DLC since the Milady can be obtained without having to fight any DLC bosses.
Required Equipment for the Obsidian Lamina Build
| How to Get All Required Build Items | ||
|---|---|---|
| Weapon | Armor Set | Whetblade |
| Talismans | Incantations | Great Rune |
Get Obsidian Lamina From Ansbach's Corpse After Final Boss Fight
| Map Location | World View |
|---|---|
 |
 |
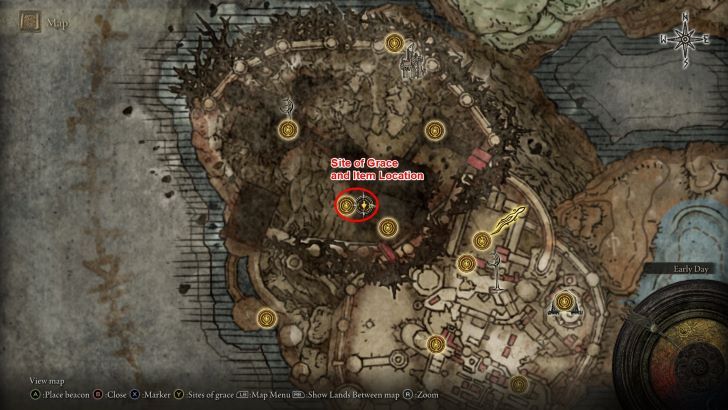
The Obsidian Lamina can be looted from Ansbach's corpse near the Gate of Divinity Site of Grace, after defeating the final boss. His corpse, and the weapon, will only be present if you completed his questline and kept him alive until the final boss fight.
Obsidian Lamina Stats, and Scaling
Get the Scythe from Cliffbottom Catacombs
The regular Scythe, one of two Reapers that can be infused for the purposes of this build, can be looted from a corpse in Cliffbottom Catacombs in Liurnia of the Lakes.
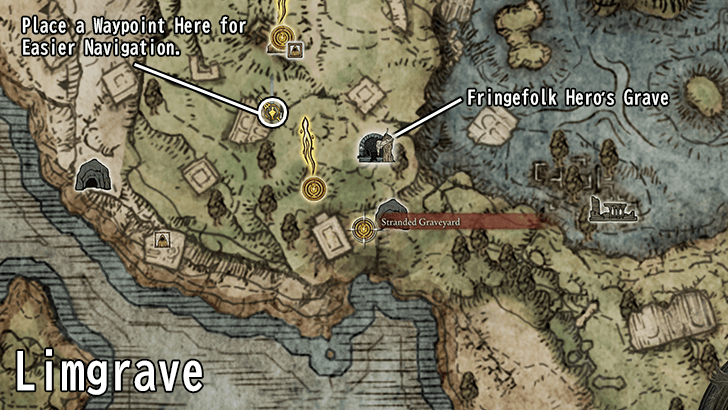
Get the Dragon Communion Seal in Fringefolk Hero's Grave
| Map Location | World View |
|---|---|
 |
 |
The Dragon Communion Seal is optimal for this build due to its ARC scaling, which you will be already be leveling up for this setup.
The seal can be found in the Fringefolk Hero's Grave in Limgrave, which is locked by an Imp Statue in the beginning area tomb. It's dropped by a Banished Knight, who is located at the end of an upward ramp patrolled by the chariot.
Dragon Communion Seal Stats and Scaling
Optional: Get Ansbach's Longbow From Helping Him Fight Leda
| Map Location | World View |
|---|---|
 |
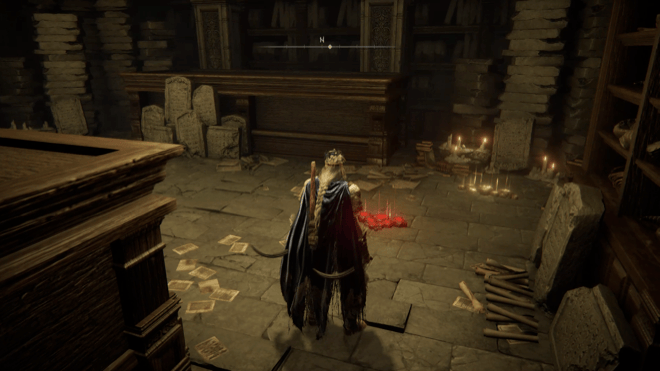 |
If you are on the right track to get the Obsidian Lamina, you should already have Ansbach's Longbow as a reward for helping him defeat Leda in the Specimen Storehouse.
You might have this as a reward for choosing to kill him instead. But if you already chose to kill Ansbach, then you need to start NG+ to be able to get the Obsidian Lamina.
Ansbach's Longbow Location, Stats, and Scaling
Get Ansbach's Armor Pieces From His Corpse After Final Boss Fight
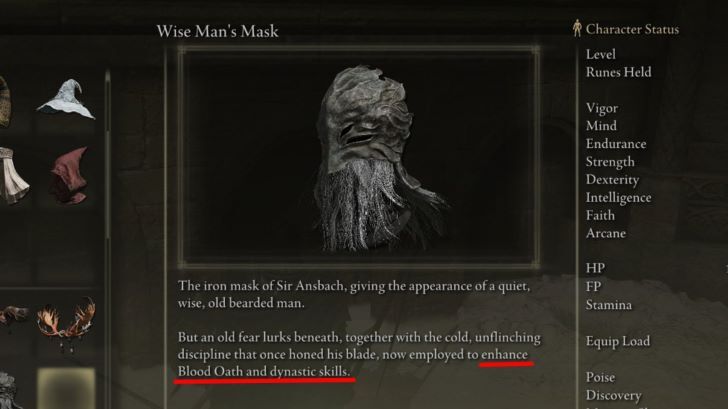
Each of the pieces in Ansbach's armor set provides a minor damage boost to Blood Oath and dynastic skills, including Dynastic Sickleplay. You will get these items from Ansbach's corpse along with the Obsidian Lamina, and for this build specifically, you'll be equipping the Wise Man's Mask, Ansbach's Manchettes, and Ansbach's Boots.
How to Get Ansbach's Armor Set
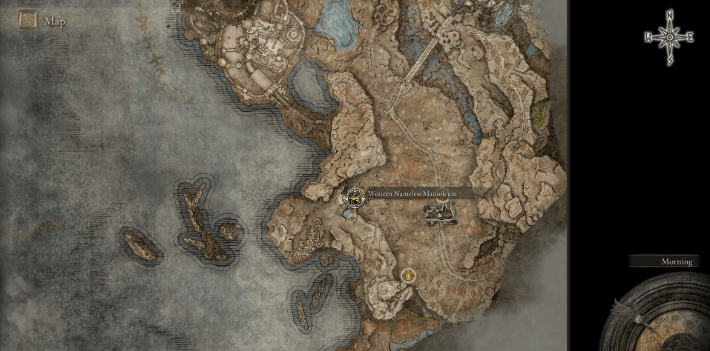
To Surpass 51 Poise: Get Armor of Solitude from Blackgaol Knight
| Map Location | World View |
|---|---|
 |

|
Ansbach's armor set alone will not reach the standard 51 poise breakpoint. To reach the breakpoint and boost your damage negations, get the Armor of Solitude chestpiece by defeating Blackgaol Knight in the Western Nameless Mausoleum, to the west of the Scorched Ruins in Gravesite Plain.
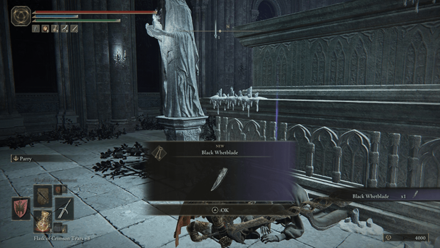
Get the Black Whetblade at Night's Sacred Ground in Nokron
| Map View | World View |
|---|---|
 |
 |
No specific Ashes of War are necessary for your Scythe secondary, but you will need to infuse it with Blood affinity so you can accelerate Bleed buildup by power stancing it with the Obsidian Lamina.
The Black Whetblade, which allows you infuse weapons with Blood affinity, can be found on a corpse in Night's Sacred Ground in Nokron, which is reachable after the Mimic Tear optional boss fight.
How to Get Black Whetblade: Effects and Locations
Obtain the Two-Headed Turtle Talisman at the End of Ellac River
| Map View | World View |
|---|---|
 |
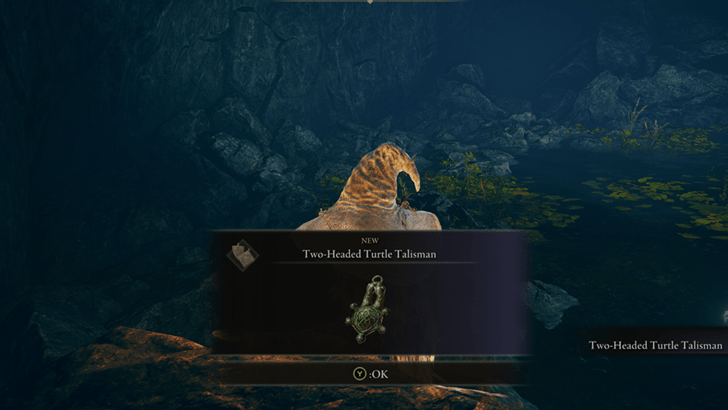 |
The Obsidian Lamina build will be extremely stamina-heavy, so the greater stamina recovery speed from the Two-Headed Turtle Talisman will be a great quality of life boost to your performance so you can attack and dodge with shorter lapses in between.
The talisman can be found in a a cave hidden by a waterfall at the end of Ellac River, northwest of the Ellac River Cave Site of Grace
Two-Headed Turtle Talisman Location and Effects
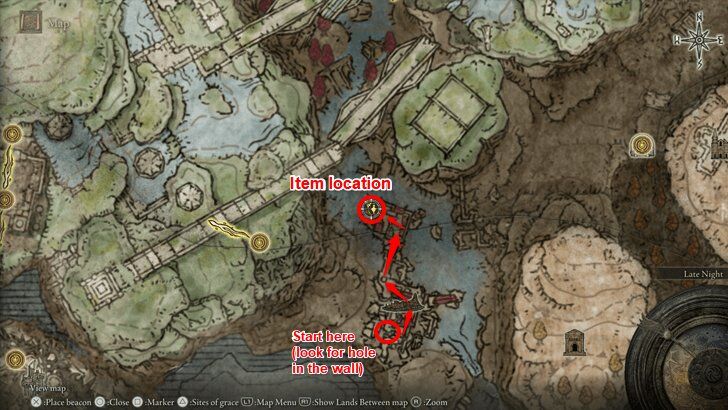
For Two-Handers: Obtain the Two-Handed Sword Talisman in Temple Town Ruins
| Map View | World View |
|---|---|
 |
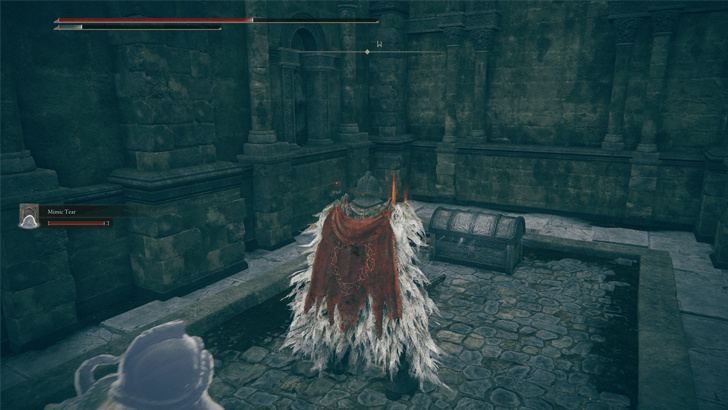 |
Players that would rather two-hand the Obsidian Lamina to conserve stamina rather than power-stance can opt to get the Two-Handed Sword Talisman to boost their damage.
This talisman can be found in a treasure chest in the Temple Town Ruins, located in Rauh Base. Go through the small opening on the backside and make your way to the highest tower inside. You'll find the treasure chest at the end of the tower.
Two-Handed Sword Talisman Location and Effects
Obtain the Rest of the Talismans from the Base Game
The rest of the talismans that can be used in this build are obtained in the base game. The best base game talismans for this build specifically are the Shard of Alexander to buff the Dynastic Sickleplay's follow-up attacks and the Lord of Blood's Exultation to boost attack power after your consistent blood loss procs.
Other options or alternatives for less skill spam-heavy playstyles, or against enemies that can't be bled, include the Claw Talisman and the Rotten Sword Insignia.
| Talisman | Effect and How to Get |
|---|---|
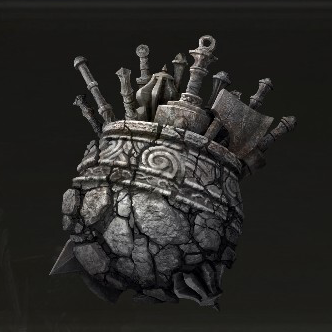 Great-Jar's Arsenal Great-Jar's Arsenal
|
Effect:
Vastly raises maximum equip load.
How to Get: Defeating the Giant Jar's three champions in northern Caelid, accessible from Deep Siofra Well. |
 Shard of Alexander Shard of Alexander
|
Effect:
Greatly boosts the attack power of skills.
How to Get: Obtained after defeating Alexander in the Crumbling Farum Azula. |
 Lord of Blood's Exultation Lord of Blood's Exultation
|
Effect:
Blood loss in vicinity increases attack power.
How to Get: You can obtain the Lord of Blood's Exultation after defeating Esgar, Priest of Blood inside the Leyndell Catacombs. You can find the catacombs northeast of the West Capital Rampart. |
 Rotten Winged Sword Insignia Rotten Winged Sword Insignia
|
Effect:
Greatly raises attack power with successive attacks.
How to Get: Obtained by helping Millicent at the end of her questline. Locks you out of getting Millicent's Prosthesis until NG+. |
 Millicent's Prosthesis Millicent's Prosthesis
|
Effect:
Boosts dexterity, raises attack power with successive attacks.
How to Get: Obtained by invading and killing Millicent at the end of her questline. Locks you out of getting the Rotten Winged Sword Insignia until NG+. |
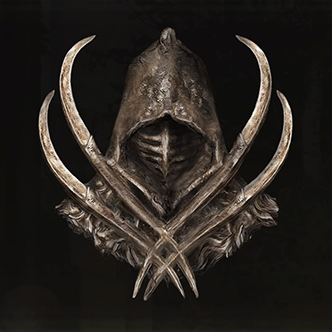 Claw Talisman Claw Talisman
|
Effect:
Enhances jump attacks.
How to Get: You can find the Claw Talisman on one of the watchtowers at Stormveil Castle. jump to the Stormveil Castle bridge by climbing up the stairs from the liftside chamber site of grace. |
Obtain All Required Incantations from the Base Game
Both the incantations required to buff your damage can be found in the base game. Neither of them are gated by a major boss, allowing you to pick them up even if you're in the middle of a DLC run.
| Spells | Effect and How to Get |
|---|---|
 Golden Vow Golden Vow |
Effect: Increases attack and defense for self and nearby allies. Looted from the Corpse-Stench Shack in Mt. Gelmir. On approach, you will be invaded by Anastasia, Tarnished Eater. |
|
Effect: Raises physical and fire-affinity attack power. Looted from a corpse in between two fire-breathing Giant Heads, behind Fort Gael in the region of Caelid. |
Activate Godrick's Great Rune if Available
Our recommended Great Rune is Godrick's Great Rune, due to its +5 to all stats providing minor boosts to your FP, stamina, attacks, and Bleed buildup.
This Rune is very easy to obtain early game as Godrick is likely to be the first Great Rune holder you'll defeat. Make sure to activate the rune at the Divine Tower of Limgrave first, then remember to consume a Rune Arc before a big fight to get its effects.
Godrick's Great Rune Effects and Locations
Elden Ring Related Guides

List of All Builds
Comment
Author
Obsidian Lamina Build Guide
Rankings
- We could not find the message board you were looking for.
Gaming News
Popular Games

Genshin Impact Walkthrough & Guides Wiki

Honkai: Star Rail Walkthrough & Guides Wiki

Umamusume: Pretty Derby Walkthrough & Guides Wiki

Pokemon Pokopia Walkthrough & Guides Wiki

Resident Evil Requiem (RE9) Walkthrough & Guides Wiki

Monster Hunter Wilds Walkthrough & Guides Wiki

Wuthering Waves Walkthrough & Guides Wiki

Arknights: Endfield Walkthrough & Guides Wiki

Pokemon FireRed and LeafGreen (FRLG) Walkthrough & Guides Wiki

Pokemon TCG Pocket (PTCGP) Strategies & Guides Wiki
Recommended Games

Diablo 4: Vessel of Hatred Walkthrough & Guides Wiki

Cyberpunk 2077: Ultimate Edition Walkthrough & Guides Wiki

Fire Emblem Heroes (FEH) Walkthrough & Guides Wiki

Yu-Gi-Oh! Master Duel Walkthrough & Guides Wiki

Super Smash Bros. Ultimate Walkthrough & Guides Wiki

Pokemon Brilliant Diamond and Shining Pearl (BDSP) Walkthrough & Guides Wiki

Elden Ring Shadow of the Erdtree Walkthrough & Guides Wiki

Monster Hunter World Walkthrough & Guides Wiki

The Legend of Zelda: Tears of the Kingdom Walkthrough & Guides Wiki

Persona 3 Reload Walkthrough & Guides Wiki
All rights reserved
ELDEN RING™ & ©BANDAI NAMCO Entertainment Inc. / ©2021 FromSoftware, Inc.
The copyrights of videos of games used in our content and other intellectual property rights belong to the provider of the game.
The contents we provide on this site were created personally by members of the Game8 editorial department.
We refuse the right to reuse or repost content taken without our permission such as data or images to other sites.


![Monster Hunter Stories 3 Review [First Impressions] | Simply Rejuvenating](https://img.game8.co/4438641/2a31b7702bd70e78ec8efd24661dacda.jpeg/thumb)


