Island Transfer Tool Guide
★ Update 3.0 and NS2 Editions are out now!
┗ Unlock the Hotel & the Special Nintendo Catalog.
┗ Collab Guides with LEGO, Splatoon, and Zelda
☆ Switch 2 Edition Features and Price
★ Enjoy sandbox building in Slumber Islands.
☆ New Villagers: Cece, Viche, Tulin, and Mineru!
Use the Island Transfer Tool to move your Animcal Crossing: New Horizons (ACNH) save file from one Switch console to another. See how to use the Island Transfer Tool, how to transfer save data to a new Switch 2, and more!
List of Contents
Nintendo Switch 2 System Transfer
Save File Included in System Transfer
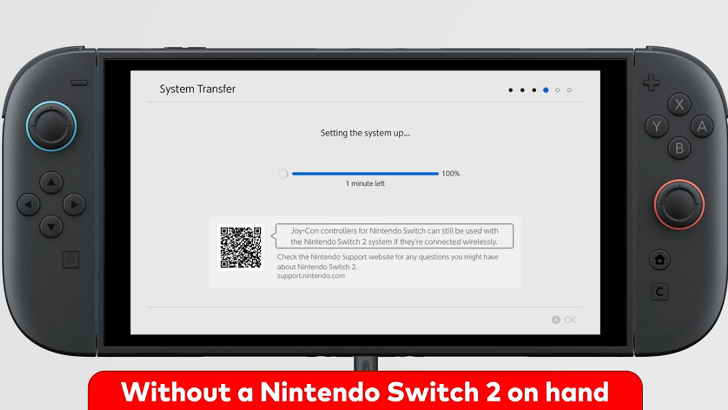
Upon opening the Nintendo Switch 2 for the first time, players can opt to use the system transfer tool to move files from an old Switch 1 to the Switch 2. This transfer includes all save files on the Switch 1, including the one for Animal Crossing: New Horizons.
Do note that this is only available during the first time a Switch 2 system is opened.
Switch 2 Edition New Features and Upgrade Price
Can Still Use Island Transfer Tool
If no system transfer was done when the Switch 2 was set up for the first time, the Island Transfer Tool application can still be used to transfer user profiles from an old Switch 1 to the new Switch 2.
Save Data Transfer Explained
Introduced in Ver 1.6.0 Winter Update
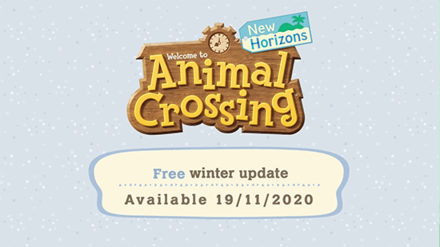
The Winter Update has introduced a way to transfer you save data to another Switch. This is useful for those who bought a new system but don't want to start a new island again.
Two Ways to Transfer Data
Moving the Island
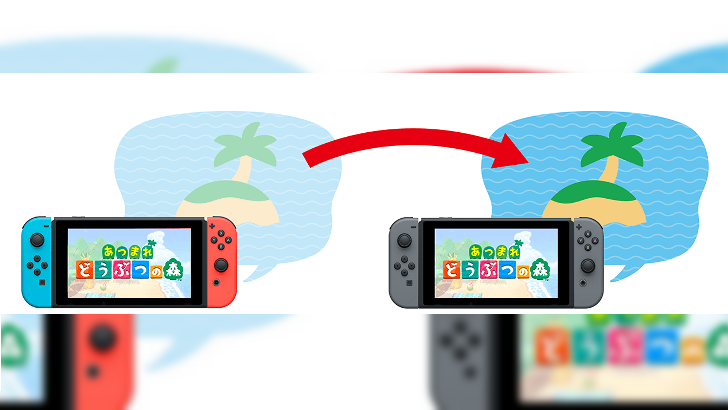
This option allows you to move your entire island to another Nintendo Switch system. You need to download the Island Transfer Tool from the Nintendo eShop.
Moving the Residents
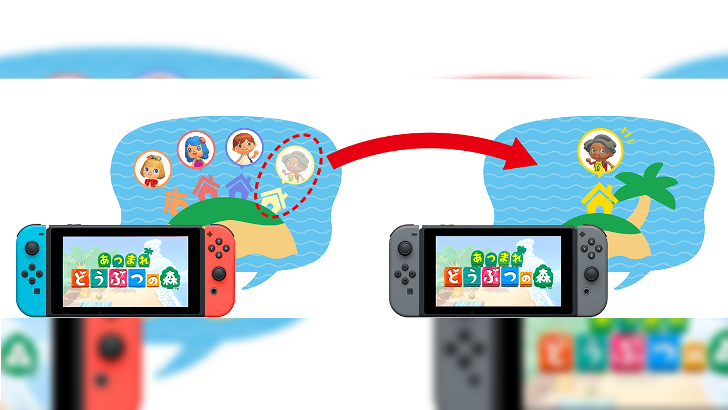
This option allows you to move player residents to another Nintendo Switch system. This is for people who shared a Switch before and now have their own console to start their own island.
*Resident Representatives cannot move to another Nintendo Switch system.
Things to Note When Moving Islands
Update Game to Latest Version
First, make sure to update the game to its latest version. At the time of writing, Animal Crossing: New Horizons is in Version 3.0, which added the hotel and various new features to the game.
What can be transferred when moving islands?
Things needed to move islands
|
(Source of save data)
(Target of save data)
・ Available for free on the Nintendo eShop
・Switch Online membership is not required |
How to Move Islands
Steps to Move Islands
| 1 | Create a backup save data. |
|---|---|
| 2 | Transfer your User Data to the new Switch. |
| 3 | Link a Nintendo account. |
| 4 | Download the Island Transfer Tool. |
| 5 | Start the Island Transfer Tool. |
1. Backup Your Save Data
We recommend setting a backup of your island before using the Island Transfer Tool as data might be lost during the transfer process.
2. Transfer Your User Data to the New Switch
Move all user accounts from the main Switch unit to the destination unit. You cannot move multiple users at once, so repeat the process until all users have been transferred.
How to Transfer User Data and Accounts to Another Switch
3. Link a Nintendo Account
A new user will be added after the transfer is complete. Link any Nintendo Account to this user.
4. Download the Island Transfer Tool

On both Nintendo Switch units, download the Island Transfer Tool from the Nintendo eShop.
5. Start the Island Transfer Tool

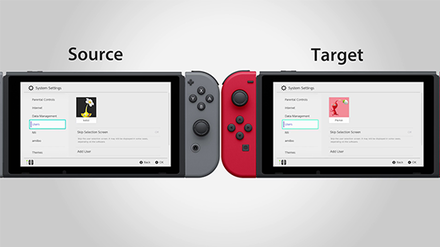
Start the Island Transfer Tool on both Switch units. Follow the on-screen instructions and select if the Switch unit is the Target or the Source of the save data.
The nicknames of the Target Switch and Source Switch will be displayed. Confirm that all information is correct and start the transfer.
*Once the transfer is complete, saved data will be deleted from the Source Switch.
Things to Note When Moving Residents
Things That Will Carry Over
| Player Data |
・Player Name ・Birthday ・Appearance and Gender ・Reactions you have learned ・Wand Transformations ・Unlocked Hair Styles |
|---|---|
| Bells |
・Bells in possession (Wallet and ATM) ・Items in Home Storage ・NookPhone pattern ・Unlocked patterns |
| Home |
・House Upgrades ・House Exterior ・Wallpapers and Rugs ・Loan Balance ・Mailbox ・Customizations that are in progress |
| NookPhone |
・ Unlocked Apps ・ Passports ・ DIY Recipes ・ Critterpedia ・ Status of Custom Design PRO ・ Island Creator |
| Catalog |
・All items purchased and in possession |
| Nook Miles |
・All achieved milestones and current mileage |
Things That Will Not Carry Over
| Items |
・ Lost Items ・ "What Was This Again?" ・ Villager Quest Items ・ Treasures ・ Communicator Parts (will become Rusted Parts) ・ Communicator (will become Rusted Parts) ・ Wisp Spirit Piece ・ House Kits ・ Mailbox |
|---|---|
| Relocation Status |
・The cost of the relocation will be refunded to your bank account |
Things That Will Carry Over Once Conditions are Met
| Custom Designs |
・You can only carry over the Custom Designs if you become the Resident Representative on the Target Switch. |
|---|---|
| Best Friends List /
Custom Designs Creator ID |
・ Ensure that the Nintendo Account that was linked to that user is the same. |
How to Move Residents
Steps to Move Residents
| 1 | Transfer your User Data to the Target Switch. |
|---|---|
| 2 | Start the game on the Target Switch. |
| 3 | Move the resident from the Source Switch. |
| 4 | Start the transfer on the Target Switch. |
| 5 | Confirm the transfer on the Source Switch. |
1. Transfer Your User Data to the Target Switch

Move all user accounts from the main Switch unit to the destination unit. You cannot move multiple users at once, so repeat the process until all users have been transferred.
How to Transfer User Data and Accounts to Another Switch
2. Start the game on the Target Switch
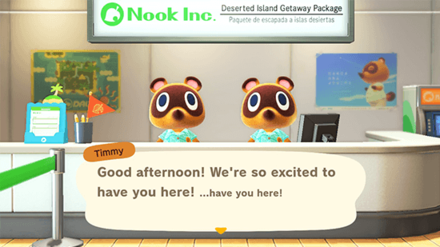
Open Animal Crossing: New Horizons on the Target Switch. Pick the user account of the resident who will move. When prompted by the Nook Twins, choose the Moving from another island
option.
3. Move the resident from the Source Switch
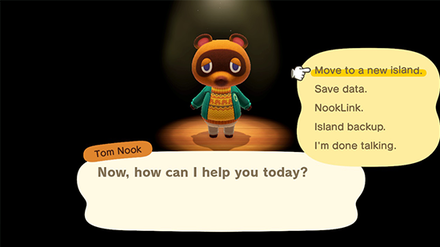
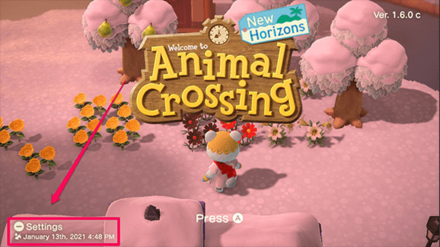
Open the game using the Resident Representative account on the Source Switch. Go the settings by pressing the Minus (-) button on the title screen.
Choose Move to a new island
and select the respective resident to move to the Target Switch. Follow Tom Nook's instructions and make sure that all information is correct.
4. Start the transfer on the Target Switch
You'll be notified on the Target Switch that a resident will be moving. The name of the island and resident from the Source Switch will be shown. Confirm if the info is correct and proceed with the transfer.
5. Confirm the transfer on the Source Switch
The name of the user on the Target Switch will be displayed on the Source Switch. Confirm the info and start the transfer.
If the Target unit doesn't have an Animal Crossing: New Horizons save data, the transferred resident will be the Resident Representative.
If you moved to a Target unit that has a save data, the transferred resident will be considered as a second player.
Animal Crossing: New Horizons (ACNH) Related Guides
System Info
 Server Maintenance | How to Fix Errors
 Island Backup and Restoration | How to Recover Save Data
 How to Delete and Transfer Save Data
 How to Add or Delete Players
 How to Restart Your Game
 Can You Transfer Data From Pocket Camp?
 NookLink Features
 List of amiibos and Compatibility
 List of Controls
 The Language Setting
 System Requirements
 Do You Need Nintendo Switch Online?
 Island Transfer Tool Guide
Author
Island Transfer Tool Guide
Rankings
- We could not find the message board you were looking for.
Gaming News

![Monster Hunter Stories 3 Review [First Impressions] | Simply Rejuvenating](https://img.game8.co/4438641/2a31b7702bd70e78ec8efd24661dacda.jpeg/show)


![Monster Hunter Stories 3 Review [First Impressions] | Simply Rejuvenating](https://img.game8.co/4438641/2a31b7702bd70e78ec8efd24661dacda.jpeg/thumb)
Popular Games

Genshin Impact Walkthrough & Guides Wiki
Honkai: Star Rail Walkthrough & Guides Wiki
Umamusume: Pretty Derby Walkthrough & Guides Wiki
Pokemon Pokopia Walkthrough & Guides Wiki
Resident Evil Requiem (RE9) Walkthrough & Guides Wiki
Monster Hunter Wilds Walkthrough & Guides Wiki
Wuthering Waves Walkthrough & Guides Wiki
Arknights: Endfield Walkthrough & Guides Wiki
Pokemon FireRed and LeafGreen (FRLG) Walkthrough & Guides Wiki
Pokemon TCG Pocket (PTCGP) Strategies & Guides Wiki


Recommended Games
Diablo 4: Vessel of Hatred Walkthrough & Guides Wiki
Cyberpunk 2077: Ultimate Edition Walkthrough & Guides Wiki
Fire Emblem Heroes (FEH) Walkthrough & Guides Wiki
Yu-Gi-Oh! Master Duel Walkthrough & Guides Wiki
Super Smash Bros. Ultimate Walkthrough & Guides Wiki
Pokemon Brilliant Diamond and Shining Pearl (BDSP) Walkthrough & Guides Wiki
Elden Ring Shadow of the Erdtree Walkthrough & Guides Wiki
Monster Hunter World Walkthrough & Guides Wiki
The Legend of Zelda: Tears of the Kingdom Walkthrough & Guides Wiki
Persona 3 Reload Walkthrough & Guides Wiki


All rights reserved
©2020 Nintendo
The copyrights of videos of games used in our content and other intellectual property rights belong to the provider of the game.
The contents we provide on this site were created personally by members of the Game8 editorial department.
We refuse the right to reuse or repost content taken without our permission such as data or images to other sites.