How to Unlock and Upgrade the Museum
★ Update 3.0 and NS2 Editions are out now!
┗ Unlock the Hotel & the Special Nintendo Catalog.
┗ Collab Guides with LEGO, Splatoon, and Zelda
☆ Switch 2 Edition Features and Price
★ Enjoy sandbox building in Slumber Islands.
☆ New Villagers: Cece, Viche, Tulin, and Mineru!

This guide will show you how to unlock the Museum Animal Crossing: New Horizons (ACNH) for the Nintendo Switch. Read on to learn where to put the museum, how to upgrade, how to relocate, and more!
List of Contents
How to Unlock the Museum

| 1. | Give Tom Nook 5 Bugs or Fish |
|---|---|
| 2. | Set Up Blathers' Tent |
| 3. | Give Blathers 15 Bugs or Fish |
| 4. | Wait for the Museum to Open in 2 Days |
1. Give Tom Nook 5 Bugs or Fish

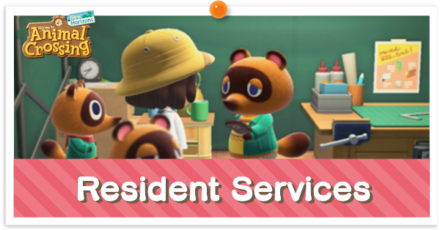
You'll first have to catch five bugs or fish and hand them over to Tom Nook. You can find him inside Resident Services. He'll then call up Blathers and ask you to set up a tent for him.
2. Set Up Blathers' Tent

After Tom Nook's call, he'll ask you to set up a tent for Blathers to stay. Select the location for his tent and wait for him to appear the next say. Keep in mind Blathers's tent will be the location of the upgraded museum.
3. Give Blathers 15 Bugs or Fish

Just like in Step 1, bring 15 bugs or fish to Blathers and he'll consider opening up a museum! His tent will no longer be available the next day you complete your donations.
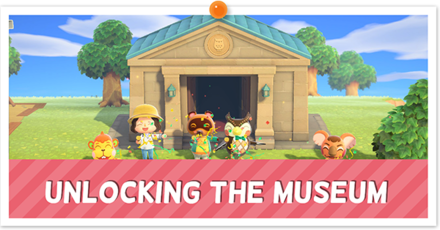
4. Wait for the Museum to Open

The museum will open in two days! You can take a look at the critters you've already donated at the exhibits or donate even more critters.
Also, you'll find an extra exhibit for Art and Sea Creatures. To learn how to get painting and statues, read up on our guide on how to find Redd!
What Can You Do At the Museum?
Donate and View Bugs, Fish and Fossils

After you've built the Museum, you will be able to donate any Bugs, Fish and Fossils you find, and view all the Bugs, Fish and Fossils you have previously donated to Blathers.
You can only donate each item once. Try to fill up the whole Museum with all the Bugs, Fish and Fossils in the game!
| Items to Donate | ||
|---|---|---|
| List of Bugs | List of Fish | List of Fossils |
Fossil Assessment

After you've found a Fossil by digging it up, you can take it to Blathers to assess. This will identify the fossil, both changing its appearance as well as its price.
You should always take new Fossils to Blathers to assess right away. If the fossil assessed is one that you have already donated, either sell it for a high price, or keep it as furniture in your home.
How to Move the Museum
Upgraded Resident Services is required to use this feature.
|
1. Talk to Tom Nook About Infrastructure

Talk to Tom Nook at Resident Services and select Let's talk about infrastructure.
Moving building will cost you 50,000 Bells so you better have than on hand before progressing.
2. Choose "I want layout changes" and Select the Museum

Say "I want layout changes". You can now select a building to move; from an island home, up to facilities like the tailors and the Museum. Select the Museum.
3. Use the Moving Kit on the New Location

After choosing the new area, select the moving kit from your pockets and use it. You will be able to see how it will look like before you confirm.
You can back out before choosing the location
If you speak to Tom Nook again before choosing the new location, you can cancel relocation. However, once you have decided on a spot, it cannot be cancelled, so be sure to make up your mind 100% beforehand.
4. The Museum will be Relocated the Next Day

The construction site will be put up, and the store will be moved to the new location the next day.
Where Should You Put the Museum?
Close to the Airport

Choosing a spot for the Museum that is close to the Airport will make it easier to deliver bugs, fish and fossils found on Mystery Island Tours to Blathers, descreasing the amount of time you spend going back and forth.
How to Go on a Mystery Island Tour
Move It Anywhere after Unlocking Island Designer
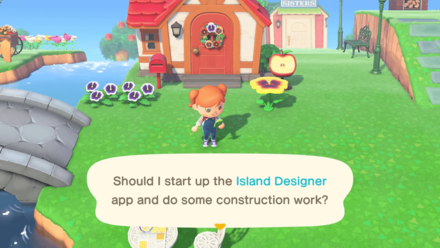
After unlocking Island Designer, you can decorate the vicinity of facilities however you like. At this point, you will also be able to relocate the Museum anywhere you want, including on top of cliffs, so you don't need to worry too much if you dislike the initial spot you picked for the Museum.
How to Use the Island Designer App
Related Articles

How to Unlock Shops and Facilities
List of All Facilities
 Resident Services Resident Services |
 Museum Museum |
 Nook's Cranny Nook's Cranny |
 Able Sisters Able Sisters |
 Airport Airport |
 Campsite Campsite |
 Harvey's Island & Photopia Harvey's Island & Photopia |
 Harv's Plaza Harv's Plaza |
 Jolly Redd's Treasure Trawler Jolly Redd's Treasure Trawler |
 The Roost The Roost |
Author
How to Unlock and Upgrade the Museum
Rankings
Gaming News


![Monster Hunter Stories 3 Review [First Impressions] | Simply Rejuvenating](https://img.game8.co/4438641/2a31b7702bd70e78ec8efd24661dacda.jpeg/thumb)
Popular Games

Genshin Impact Walkthrough & Guides Wiki
Umamusume: Pretty Derby Walkthrough & Guides Wiki
Pokemon Pokopia Walkthrough & Guides Wiki
Honkai: Star Rail Walkthrough & Guides Wiki
Monster Hunter Stories 3: Twisted Reflection Walkthrough & Guides Wiki
Arknights: Endfield Walkthrough & Guides Wiki
Wuthering Waves Walkthrough & Guides Wiki
Zenless Zone Zero Walkthrough & Guides Wiki
Pokemon TCG Pocket (PTCGP) Strategies & Guides Wiki
Monster Hunter Wilds Walkthrough & Guides Wiki


Recommended Games
Diablo 4: Vessel of Hatred Walkthrough & Guides Wiki
Cyberpunk 2077: Ultimate Edition Walkthrough & Guides Wiki
Fire Emblem Heroes (FEH) Walkthrough & Guides Wiki
Yu-Gi-Oh! Master Duel Walkthrough & Guides Wiki
Super Smash Bros. Ultimate Walkthrough & Guides Wiki
Pokemon Brilliant Diamond and Shining Pearl (BDSP) Walkthrough & Guides Wiki
Elden Ring Shadow of the Erdtree Walkthrough & Guides Wiki
Monster Hunter World Walkthrough & Guides Wiki
The Legend of Zelda: Tears of the Kingdom Walkthrough & Guides Wiki
Persona 3 Reload Walkthrough & Guides Wiki


All rights reserved
©2020 Nintendo
The copyrights of videos of games used in our content and other intellectual property rights belong to the provider of the game.
The contents we provide on this site were created personally by members of the Game8 editorial department.
We refuse the right to reuse or repost content taken without our permission such as data or images to other sites.
I've been playing animal crossing for a year and 1⁄2 how do I get a museum it won't let me