Sunken Ruins (Elite) Stage Guide | Tidal Defense Simulator
★ Version 3.2 out now!
┣ Sigrika → Builds, Materials, Weapon
┣ Qiuyuan → Builds, Materials, Weapon
┗ Phase 2 → Lynae, Zani, Phoebe
★ 3.2 Main Story, All Events
★ Exclusives: Tier Maker | State of the Meta
Sunken Ruins is the sixth stage in the Elite Pass Guardian Mode of the Tidal Defense Simulator event in Version 2.6 of Wuthering Waves. See Sunken Ruins's map layout, best combat machines, and a guide on how to complete all waves in this guide!
| All Sunken Ruins Stage Guides | ||
|---|---|---|
| Common | Elite | Overlord |
Sunken Ruins (Elite) Map Layout and Enemies
| Sunken Ruins (Elite) Map and Enemies Information | |
|---|---|
 |
|
| No. of Waves | 7 |
| List of Enemies |
Chop Chop HP: 80 SPD: 100 DMG: 10 Passive - Fortified All DMG this Tacet Discord takes is 1. Passive - Adaptation This Tacet Discord becomes immune to Paralysis/Frozen/Confusion when its HP drops below 50% for the first time x1 |
Flautist HP: 7,500 SPD: 100 DMG: 10 Domain - Malfunction This Tacet Discord periodically disables nearby Combat Machines. Passive - Adaptation This Tacet Discord becomes immune to Paralysis/Frozen/Confusion when its HP drops below 50% for the first time x1 |
Aero Prism HP: 2,000 SPD: 200 DMG: 5 Domain - Acceleration This Tacet Discord periodically increases the Speed of several nearby Tacet Discords. x9 |
|---|---|---|
|
Havoc Prism HP: 1,200 SPD: 200 DMG: 5 Deathsound - Summon This Tacet Discord summons one Chop Chop: Headless and three Tick Tacks when defeated. x3 |
Spectro Prism HP: 1,200 SPD: 200 DMG: 5 Deathsound - Healing When defeated, this Tacet Discord heals nearby Tacet Discords for a certain amount. Passive - Adaptation This Tacet Discord becomes immune to Paralysis/Frozen/Confusion when its HP drops below 50% for the first time x3 |
Aero Predator HP: 600 SPD: 150 DMG: 1 Wrath This Tacet Discord starts with a slow Movement Speed. The lower its remaining HP, the faster it moves. x10 |
|
Cruisewing HP: 75 SPD: 600 DMG: 1 Velocity This Tacet Discord moves faster. x60 |
Electro Predator HP: 300 SPD: 200 DMG: 1 Shield This Tacet Discord has a Shield that blocks damage. When Shielded, it is immune to Slow. x40 |
Nimbus Wraith HP: 50 SPD: 200 DMG: 1 Passive - Bounty This Tacet Discord drops one Lucky Coin when defeated. Collect Lucky Coins to gain Sim Credits. x22 |
|
Glacio Predator HP: 400 SPD: 200 DMG: 1 x74 |
Tick Tack HP: 100 SPD: 200 DMG: 1 x188 |
Chop Chop: Headless HP: 800 SPD: 150 DMG: 1 x25 |
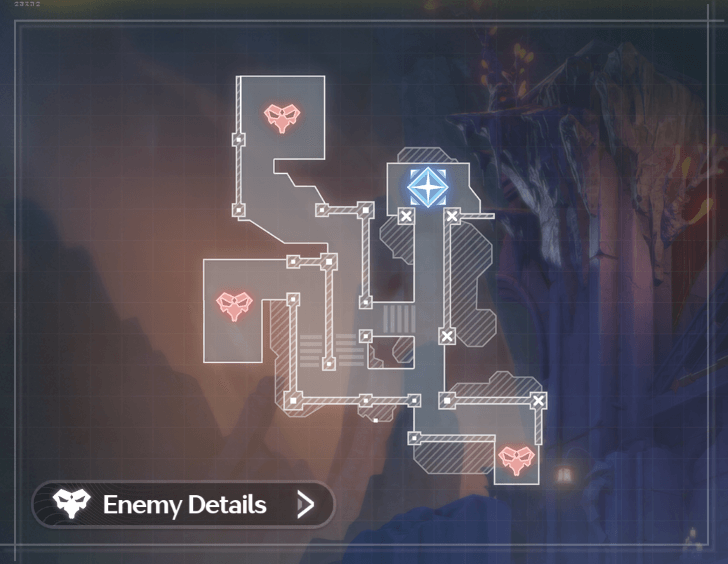
The elite version of the Sunken Ruins contains 3 different paths, with the first two meeting at a point before joining up with the third path. The stage begins from the northwestern path, and joins with the second lane.
The second path is the western path, and has enemies walk down some stairs to join with the first path. The last lane is the southeastern path, which is very short and goes directly to the Energy Matrix with no turns.
Sunken Ruins (Elite) Best Combat Machines
Recommended Combat Machines
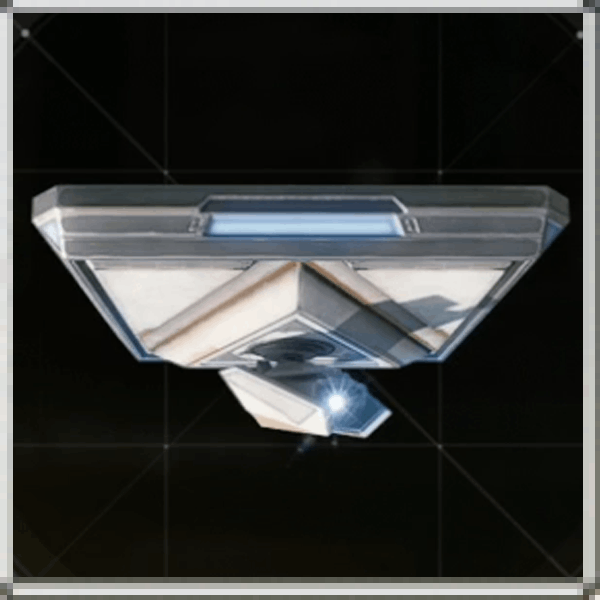 Freeze Jet Freeze Jet Freeze Jet Type: Ceiling
Cost: 500 Base ATK: 21 Cooldown: 6 Periodically ejects a freezing burst, dealing Glacio DMG and Slowing Tacet Discords within the range. |
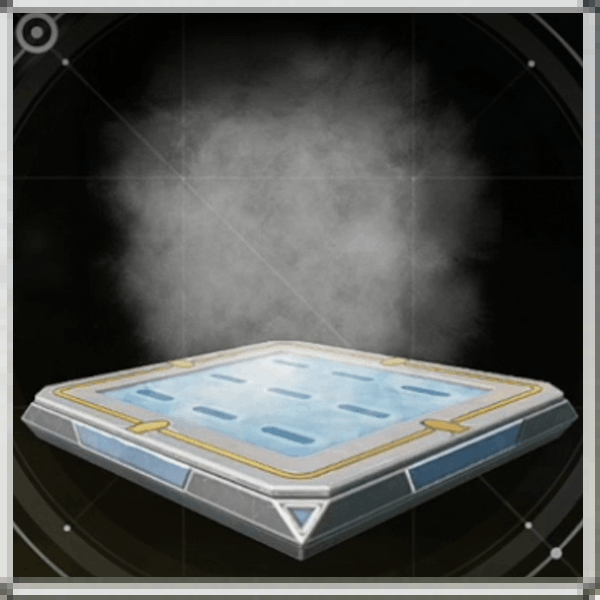 Glacio Beacon Glacio Beacon Glacio Beacon Type: Ground
Cost: 200 Base ATK: 0 Emits artificial chilling currents, Slowing any Tacet Discords moving past the device. |
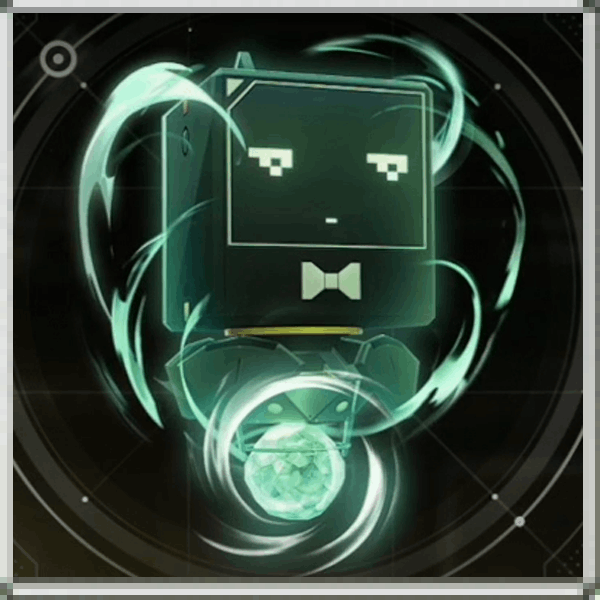 Repulsion Field Repulsion Field Repulsion Field Type: KU-Roro Weapon
Base ATK: 0 Cooldown: 15 Generates a repulsion field, knocking back targets within the range. |
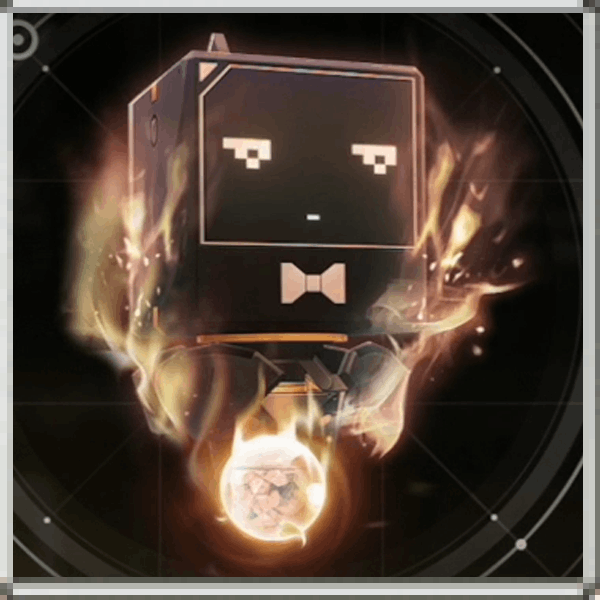 Speed Shooter Speed Shooter Speed Shooter Type: KU-Roro Weapon
Base ATK: 60 Automatically fires projectiles in a row, dealing low Fusion DMG. |
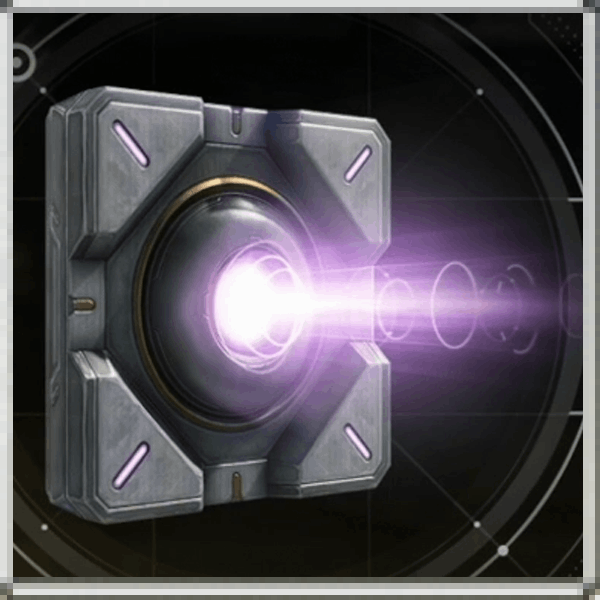 Thunder Lance Thunder Lance Thunder Lance Type: Wall
Cost: 300 Base ATK: 150 Cooldown: 4 Periodically fires a thunder lance that can pierce through Tacet Discords with an unlimited range, dealing Electro DMG. |
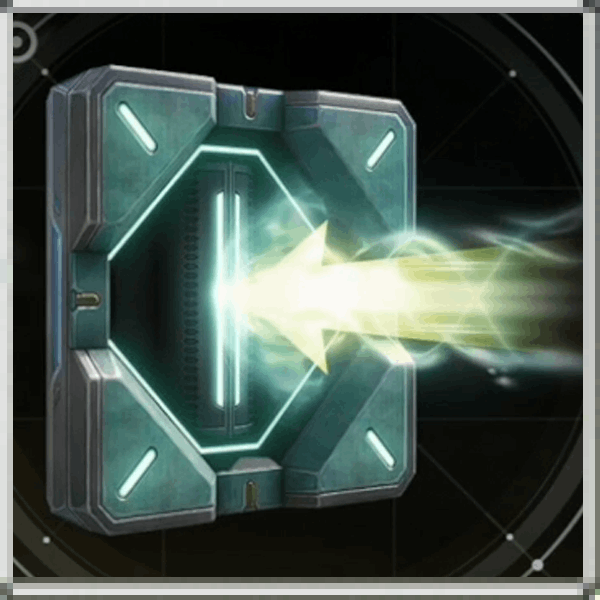 Vortex Generator Vortex Generator Vortex Generator Type: Wall
Cost: 250 Base ATK: 12 Cooldown: 6 Emits an artificial vortex that periodically draws Tacet Discords toward the front of the device and removes their Shield. |
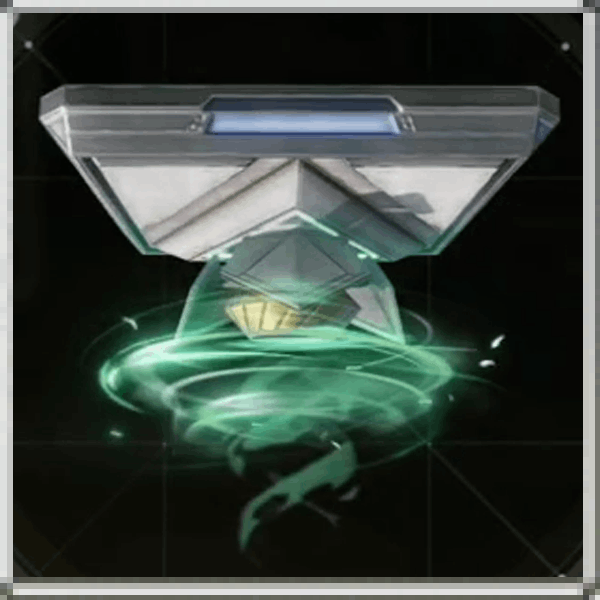 Whirlpool Device Whirlpool Device Whirlpool Device Type: Ceiling
Cost: 300 Base ATK: 28 Cooldown: 8 Periodically generates a whirlpool that pulls in Tacet Discords, removing their Shield and suspending small ones while it lasts. |
For the final Elite stage, the Freeze Jet will do double-duty as both a DPS and Slowing Machine for the final chokepoint in front of the Energy Matrix. It will also be supported by the Vortex Generator and Whirlpool Device.
The Thunder Lance will be used to provide more DPS for the northwestern and western paths, while the KU-Roro Weapons of choice are the Speed Shooter and Repulsion Field for rapid Damage Ticks and on-demand knockback respectively.
Get the Armory Expansion Upgrade

To use 2 different KU-Roro Weapons, you need the Armory Expansion upgrade from the Overwatch Protocols store. Note that this upgrade is only available once the previous node have been unlocked.
Sunken Ruins (Elite) Wave Guide
| Sunken Ruins (Elite) Wave Guide |
|---|
|
|
Wave 1: Set Up the Northwestern Defense
| 1 | Wave 1 Tips and Recommendations |
|---|---|
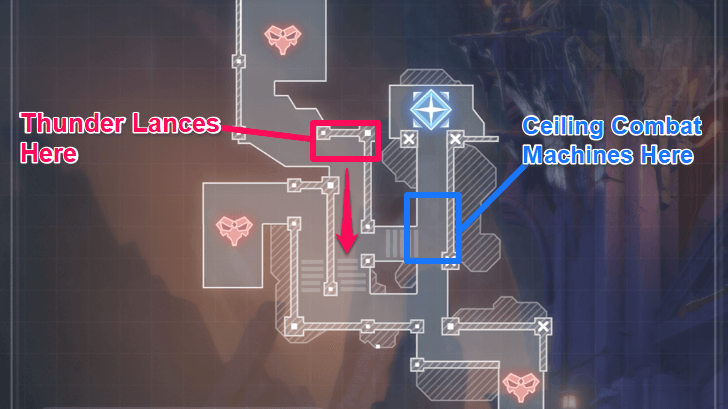 The initial defense will be split into two parts: one guarding the Energy Matrix, and one targeting the first active path. |
|
| 2 | 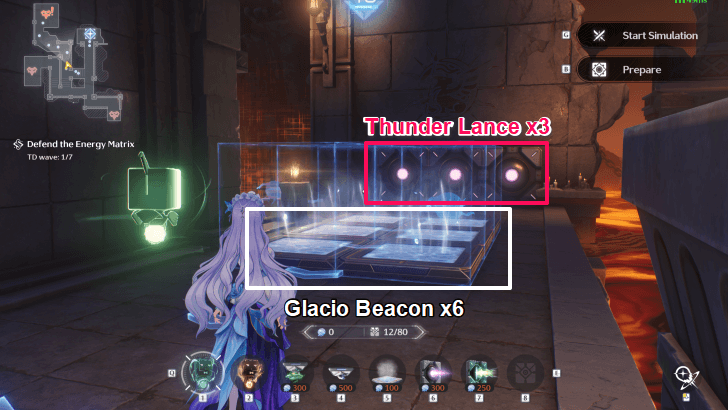 The first two waves will spawn from the northwestern lane. Put up some Thunder Lances and Glacio Beacons to take them out. |
| 3 | 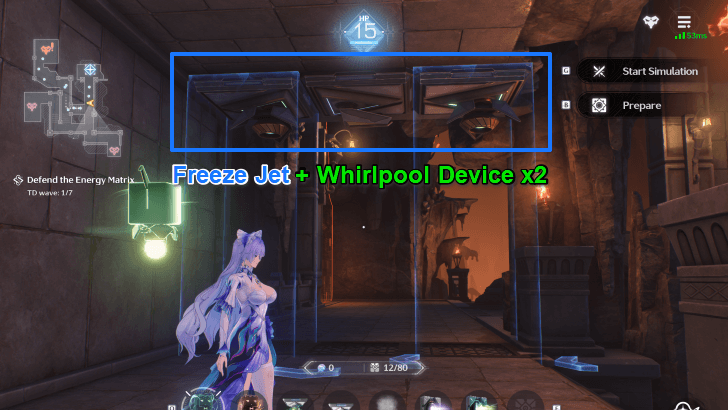 With your leftover funds, also place down a Freeze Jet and two Whirlpool Devices in the hallway above the stairs. This is the final chokepoint, and you will need to constantly fortify the defenses here for later enemy waves. |
| 4 | Use the Repulsion Field to push the stronger enemies into the pit, while the Speed Shooter can quickly pick off any remaining enemies. |
Wave 2: Set Up the Chokepoint Defense
| 1 | Wave 2 Tips and Recommendations |
|---|---|
 Now add more Freeze Jets and Whirlpool Devices into the final chokepoint. This area is where all three paths will pass, meaning that it will catch enemies from everywhere, including any enemies that get past the Thunder Lances on the north lane. |
|
| 2 | Use the Speed Shooter to chip away at the very fast-moving Cruisewings, as they are liable to barely surviving the Thunder Lances and speeding past them. |
Wave 3: Set Up the Western Defense
| 1 | Wave 3 Tips and Recommendations |
|---|---|
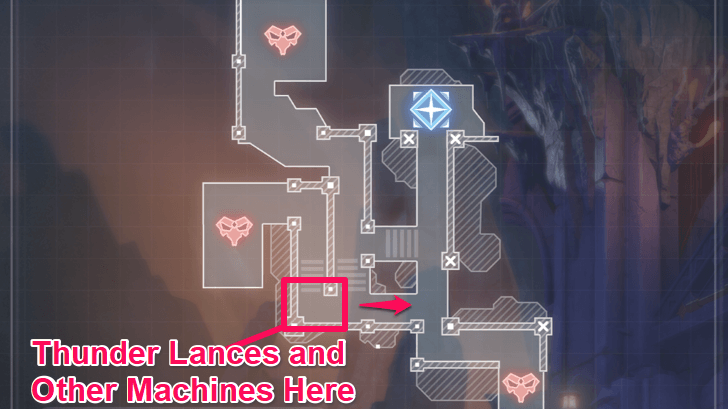 Wave 3 marks the the start of enemies spawning from the western entrance. Move over to prepare a defensive line in this area, to help cut down on enemy density before they reach the final chokepoint. |
|
| 2 | 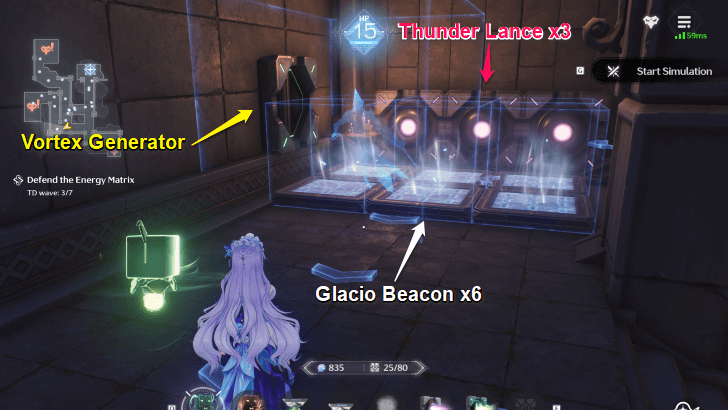 Set up at the chokepoint in the corner, using Thunder Lances, Glacio Beacons, and a Vortex Generator to hamper enemies coming down this lane. |
| 3 | 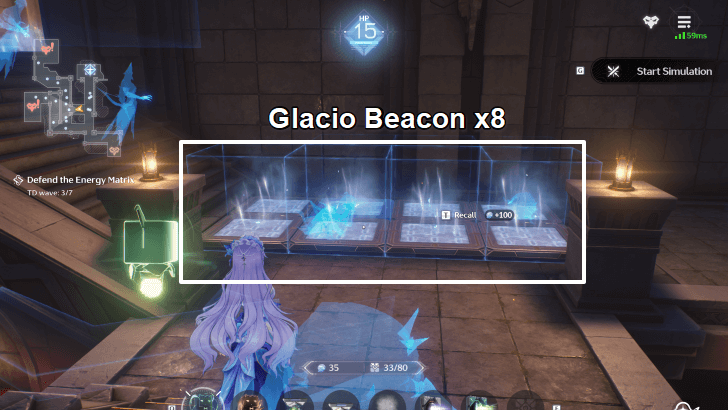 Additionally, add more Glacio Beacons to the intersection of the northwestern and western map. This intersection is still in range of the first wave's Thunder Lances, so slowing enemies down here will lead to more damage. |
| 4 | Once you've defeated the first bunch of enemies in the wave, they will spawn a second set from both the northwestern and western entrances. Focus on the western path, as the northwestern enemies are just Tick Tacks that the Thunder Lances can take care of. |
Wave 4: Prepare for Chop Chop: Headless
| 1 | Wave 4 Tips and Recommendations |
|---|---|
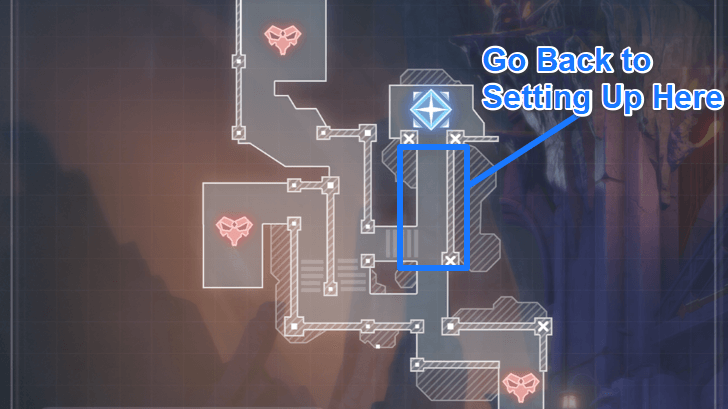 With auxiliary defenses now ready, return to the final chokepoint and begin to add more machines to this area. |
|
| 2 | 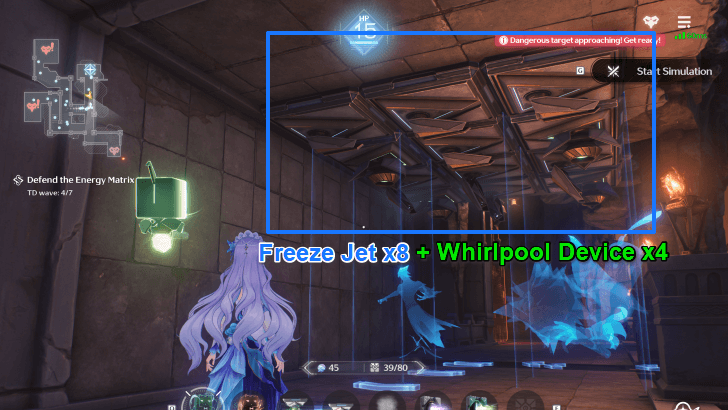 Continue to add more Freeze Jets and Whirlpool Devices to the final chokepoint. The Freeze Jets especially will be of great help for the upcoming Chop Chop: Headless mini-boss. |
| 3 | Various Prism enemies will begin to spawn from this wave onwards. Use the Repulsion Field to pick them off by pushing them into the lava, ensuring that they cannot grant their buffs to the other enemies. |
| 4 | Once Chop Chop: Headless appears, use the Speed Shooter to start chipping away at its HP. The mass of Freeze Jets should be able to melt it once it reaches the final chokepoint. |
Wave 5: Place Slows in the Chokepoint
| 1 | Wave 5 Tips and Recommendations |
|---|---|
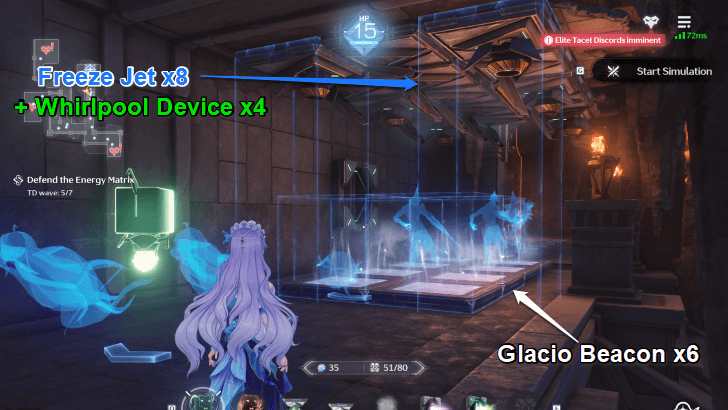 Stage 5 marks the opening of the southeastern path, meaning that for the last few waves, all paths will be active. Shore up the final chokepoint's defenses by adding Glacio Beacons and a Vortex Generator to the mix. |
|
| 2 | Prisms will now spawn from every lane. Continue to push them off the paths for the rest of the wave, swapping to the Speed Shooter to DPS when the Repulsion Field is on cooldown. |
Wave 6: Add One More Line of Defense
| 1 | Wave 6 Tips and Recommendations |
|---|---|
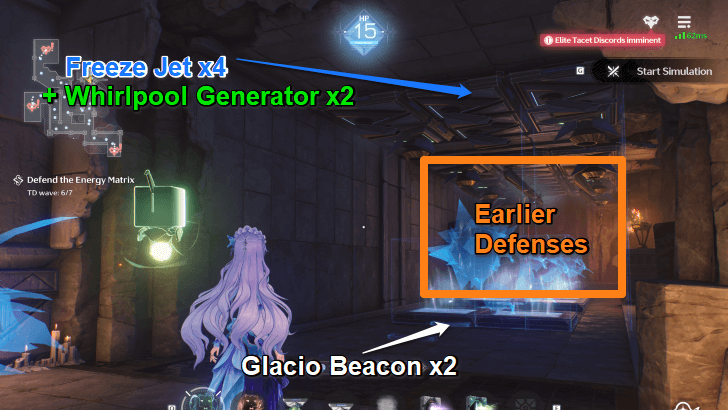 Add another set of Freeze Jets, Glacio Beacons, and a Vortex Generator to the very end of the chokepoint. |
|
| 2 | Continue to push off Prisms using the Repulsion Field. Also, take note of the minimap to see if enemies have breached your defenses, so that you can rush back for a final defense if needed. |
Wave 7: Take Down the Final Boss
| 1 | Wave 7 Tips and Recommendations |
|---|---|
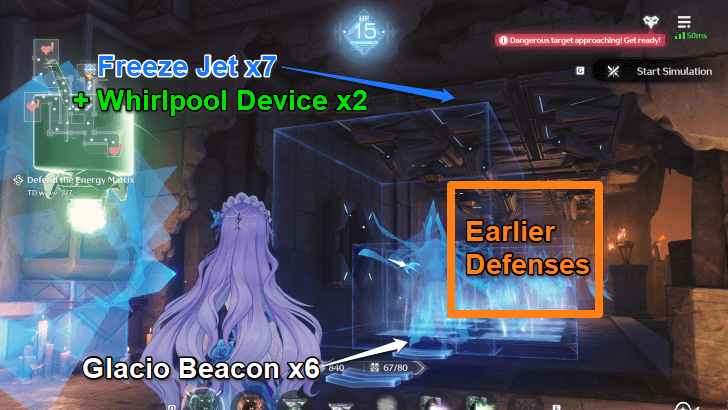 Add one last batch of Freeze Jets and Glacio Beacons to the chokepoint. |
|
| 2 | 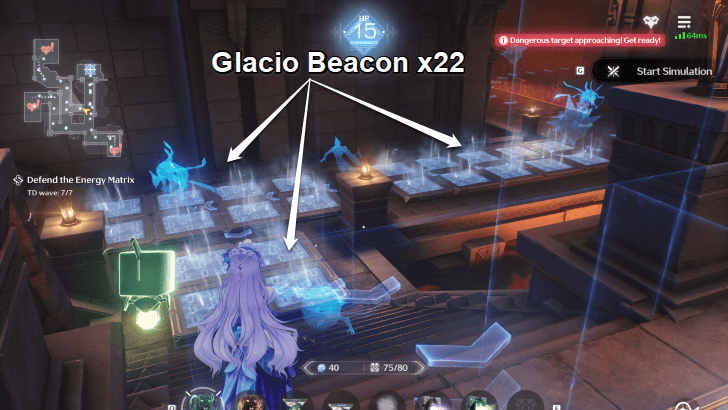 Additionally, flood the intersection with Glacio Beacons, to make dealing with the impending wave easier. |
| 3 | The Flautist final boss will arrive as the very last enemy from the northwestern path. Once every other enemy has been dealt with, swap to the Speed Shooter and use it to focus down the boss alongside the Freeze Jets, which have enough range to avoid the boss' disable ability for a bit. |
Sunken Ruins (Elite) Stage Information
Basic Information
| Stage Information | |
|---|---|
| Stage Type: Pass Guardian |
Threat Level: Elite |
| Rewards | |
|
|
|
| All Challenge Goals | |
|
|
|
Wuthering Waves Related Guides

Tidal Defense Simulator Event Guide
Pass Guardian Stages
| Threat: Overlord | |||||
|---|---|---|---|---|---|
| Threat: Elite | |||||
| Threat: Common | |||||
Deathtrap Mode Stages
(Infinite Mode) |
|
All Tidal Defense Simulator Guides
| - |
Comment
the fact the repulsion field's attack can blow enemies onto another path - CLOSER to the goal - and let them continue on is hot BS. i blew enemies from the N start into the wall on the goal platform, and they spawned **right** next to the goal point... i could do literally nothing about them other than try to sprint up there and kill them (it didn't work.)
Author
Sunken Ruins (Elite) Stage Guide | Tidal Defense Simulator
Premium Articles
Rankings
Gaming News
Popular Games

Genshin Impact Walkthrough & Guides Wiki

Umamusume: Pretty Derby Walkthrough & Guides Wiki

Pokemon Pokopia Walkthrough & Guides Wiki

Honkai: Star Rail Walkthrough & Guides Wiki

Monster Hunter Stories 3: Twisted Reflection Walkthrough & Guides Wiki

Arknights: Endfield Walkthrough & Guides Wiki

Wuthering Waves Walkthrough & Guides Wiki

Zenless Zone Zero Walkthrough & Guides Wiki

Pokemon TCG Pocket (PTCGP) Strategies & Guides Wiki

Monster Hunter Wilds Walkthrough & Guides Wiki
Recommended Games

Fire Emblem Heroes (FEH) Walkthrough & Guides Wiki

Diablo 4: Vessel of Hatred Walkthrough & Guides Wiki

Cyberpunk 2077: Ultimate Edition Walkthrough & Guides Wiki

Yu-Gi-Oh! Master Duel Walkthrough & Guides Wiki

Super Smash Bros. Ultimate Walkthrough & Guides Wiki

Pokemon Brilliant Diamond and Shining Pearl (BDSP) Walkthrough & Guides Wiki

Elden Ring Shadow of the Erdtree Walkthrough & Guides Wiki

Monster Hunter World Walkthrough & Guides Wiki

The Legend of Zelda: Tears of the Kingdom Walkthrough & Guides Wiki

Persona 3 Reload Walkthrough & Guides Wiki
All rights reserved
Copyright© 2024-2025 Kuro Games. All Rights Reserved.
The copyrights of videos of games used in our content and other intellectual property rights belong to the provider of the game.
The contents we provide on this site were created personally by members of the Game8 editorial department.
We refuse the right to reuse or repost content taken without our permission such as data or images to other sites.


![Star Savior Review [First Impressions] | Engaging, Entertaining, and Expensive](https://img.game8.co/4447603/8f500e9bf666bdb8adb1af478e9dfdbd.png/thumb)
![Death Stranding 2: On The Beach [PC] Review | A Port That Delivers](https://img.game8.co/4447392/15310a0c9aa1b6843bb713b2ea216930.jpeg/thumb)


Thank you for this! Finish the limited reward part at last hours 🤣 big salute to this guide!