Abyssal Pass (Overlord) Stage Guide | Tidal Defense Simulator
★ Version 3.2 out now!
┣ Sigrika → Builds, Materials, Weapon
┣ Qiuyuan → Builds, Materials, Weapon
┗ Phase 2 → Lynae, Zani, Phoebe
★ 3.2 Main Story, All Events
★ Exclusives: Tier Maker | State of the Meta
Abyssal Pass (Overlord) is the first Overlord stage in Pass Guardian Mode of the Tidal Defense Simulator event in Version 2.6 of Wuthering Waves. See Abyssal Pass (Overlord)'s map layout, best combat machines, and a guide on how to complete all waves in this guide!!
Abyssal Pass (Overlord) Map Layout and Enemies
| Abyssal Pass (Overlord) Map and Enemies Information | |
|---|---|
 |
|
| No. of Waves | 6 |
| List of Enemies |
Tambourinist HP: 3,000 SPD: 100 DMG: 10 Passive - Invisibility This Tacet Discord doesn't trigger Combat Machines on the wall and ceiling. Passive - Adaptation This Tacet Discord becomes immune to Paralysis/Frozen/Confusion when its HP drops below 50% for the first time x1 |
Havoc Prism HP: 1,200 SPD: 200 DMG: 5 Deathsound - Summon This Tacet Discord summons one Chop Chop: Headless and three Tick Tacks when defeated. x9 |
Aero Predator HP: 600 SPD: 150 DMG: 1 Wrath This Tacet Discord starts with a slow Movement Speed. The lower its remaining HP, the faster it moves. x28 |
|---|---|---|
|
Cruisewing HP: 75 SPD: 600 DMG: 1 Velocity This Tacet Discord moves faster. x40 |
Electro Predator HP: 300 SPD: 200 DMG: 1 Shield This Tacet Discord has a Shield that blocks damage. When Shielded, it is immune to Slow. x28 |
Nimbus Wraith HP: 50 SPD: 200 DMG: 1 Passive - Bounty This Tacet Discord drops one Lucky Coin when defeated. Collect Lucky Coins to gain Sim Credits. x20 |
|
Glacio Predator HP: 400 SPD: 200 DMG: 1 x30 |
Tick Tack HP: 100 SPD: 200 DMG: 1 x100 |
|
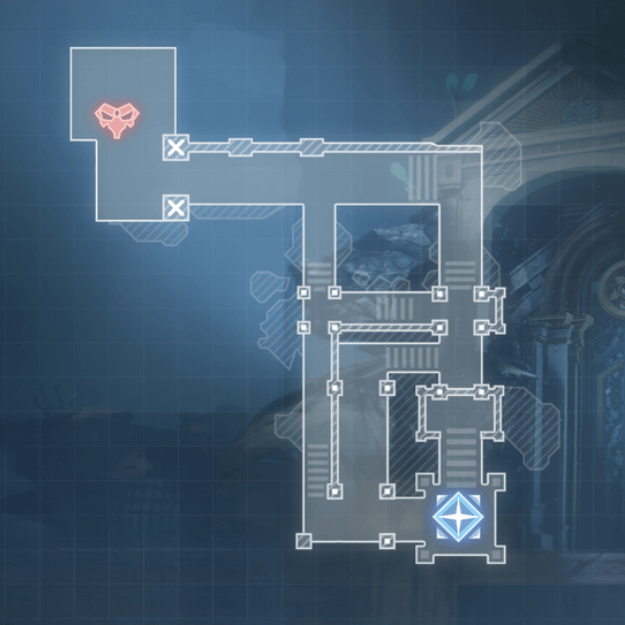
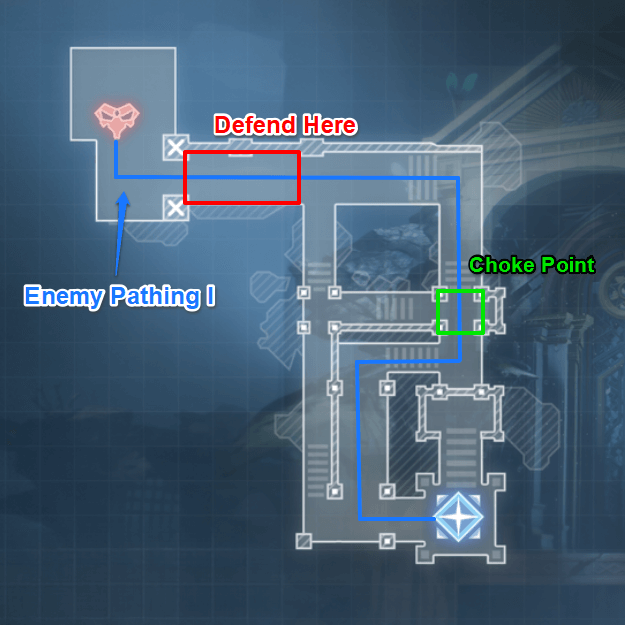
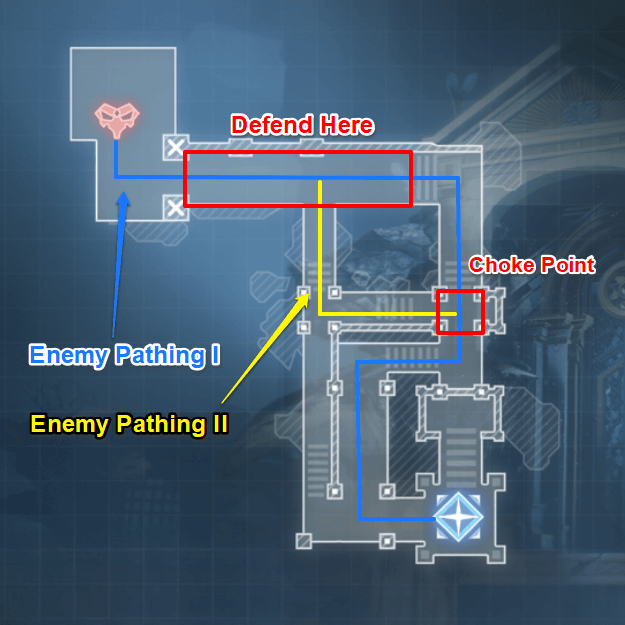
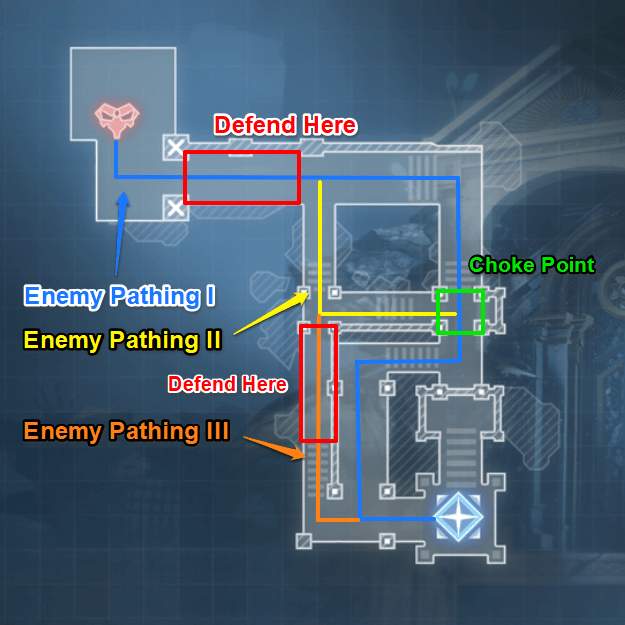
Abyssal Pass (Overlord) is an expanded map of the Common and Elite Threat levels of the same stage name, but is significantly harder due to the enhanced enemies and the Max Matrix Durability of 1. There are two main routes that enemies pass through with one main choke point that you can use to hold multiple enemies in place.
You will face against multiple Tacet Discords for 6 waves in total. Among these enemies, dealing with the Tambourinist is your main challenge in this stage, as it has two passive abilities, Invisibility and Adaptation that you need to beat.
Tambourinist Passive Abilities
| Passive - Invisibility | This Tacet Discord doesn't trigger Combat Machines on the wall and ceiling. |
|---|---|
| Passive - Adaptation | This Tacet Discord becomes immune to Paralysis/Frozen Confusion when its HP drops below 50% for the first time. |
Tambourinist appears in Wave 6 of Abyssal Pass (Overlord) and is significantly stronger than other Tacet Discords. You need to dedicate a few resources and your attention to defeat this enemy, leaving other Tacet Discords to be dealt with by your Combat Machines.
The Combat Machine that you need in particular is the Vortex Generator, as it can remove Invisibility once you upgrade it to level 3.
Abyssal Pass (Overlord) Best Combat Machines
Recommended Combat Machines
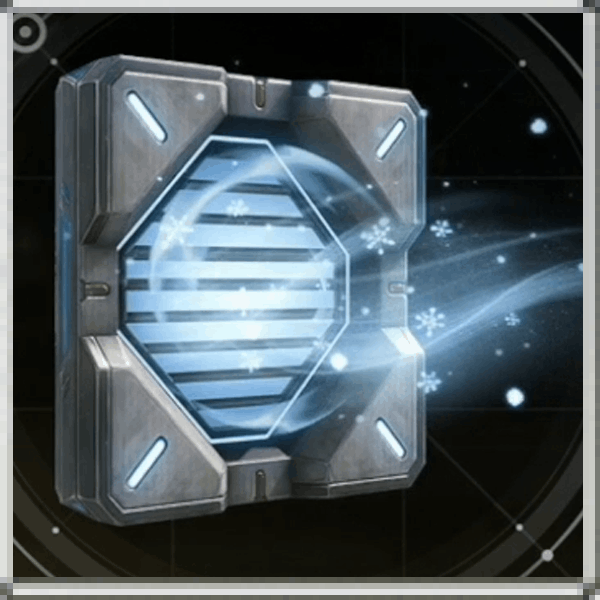
 Freeze Jet Freeze Jet Freeze Jet Type: Ceiling
Cost: 500 Base ATK: 21 Cooldown: 6 Periodically ejects a freezing burst, dealing Glacio DMG and Slowing Tacet Discords within the range. |
 Frost Spout Frost Spout Frost Spout Type: Wall
Cost: 300 Base ATK: 135 Cooldown: 6 Periodically ejects cryogenic air, dealing Glacio DMG and Slowing Tacet Discords within range. |
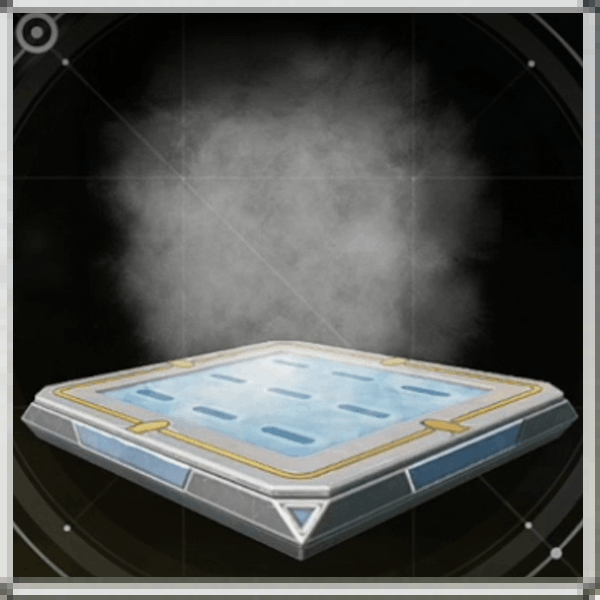 Glacio Beacon Glacio Beacon Glacio Beacon Type: Ground
Cost: 200 Base ATK: 0 Emits artificial chilling currents, Slowing any Tacet Discords moving past the device. |
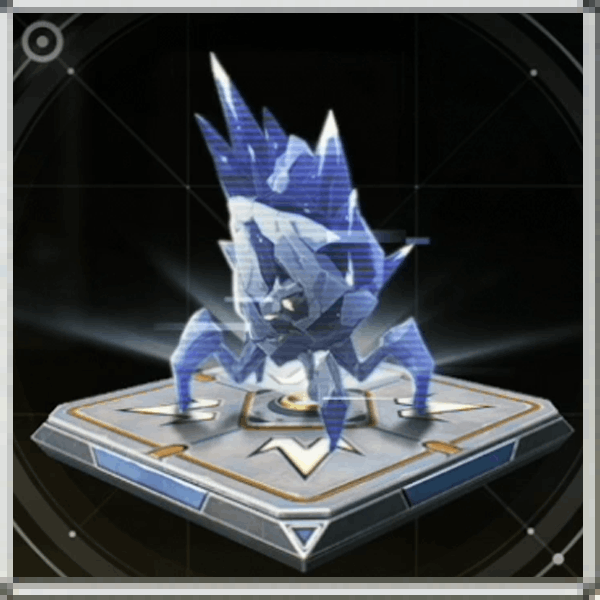 Hologram Echo: Junrock Hologram Echo: Junrock Hologram Echo: Junrock Type: Ground
Cost: 300 Base ATK: 600 Cooldown: 8 Periodically summons a Junrock Echo that explodes when approached by Tacet Discords, dealing AoE Physical DMG. |
 Repulsion Field Repulsion Field Repulsion Field Type: KU-Roro Weapon
Base ATK: 0 Cooldown: 15 Generates a repulsion field, knocking back targets within the range. |
 Repulsor Spout Repulsor Spout Repulsor Spout Type: Wall
Cost: 300 Base ATK: 0 Cooldown: 8 Periodically ejects high-pressure gas, knocking back small Tacet Discords within the range. |
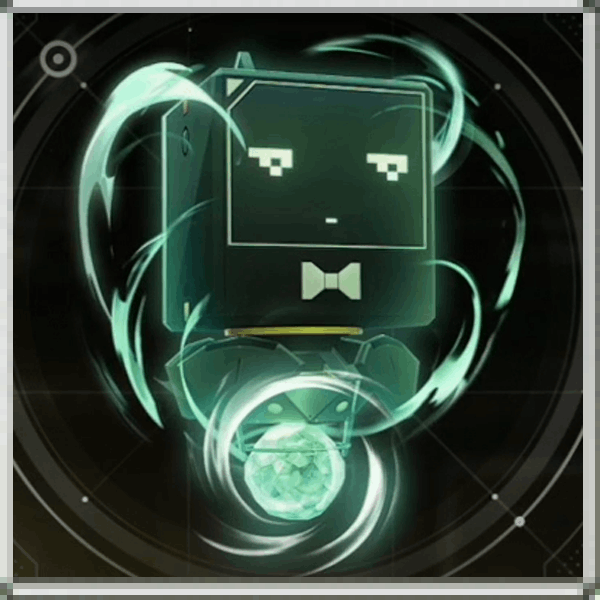
 Speed Shooter Speed Shooter Speed Shooter Type: KU-Roro Weapon
Base ATK: 60 Automatically fires projectiles in a row, dealing low Fusion DMG. |
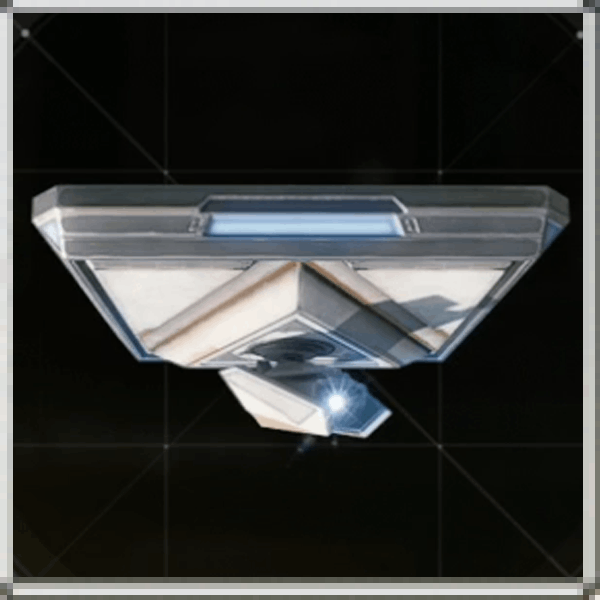
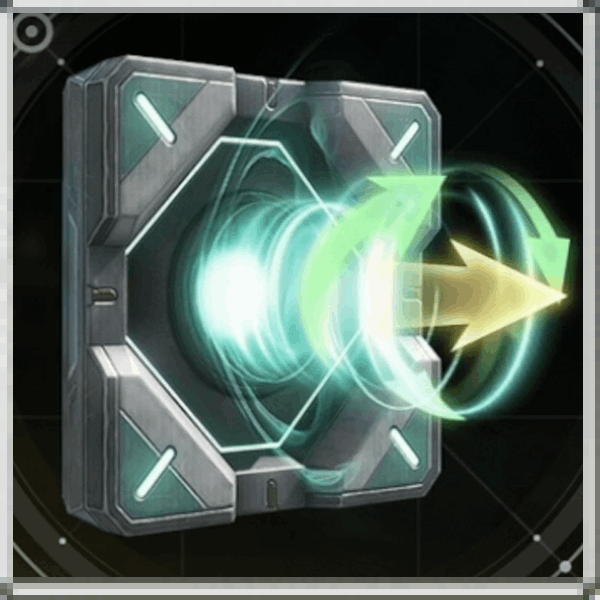
 Vortex Generator Vortex Generator Vortex Generator Type: Wall
Cost: 250 Base ATK: 12 Cooldown: 6 Emits an artificial vortex that periodically draws Tacet Discords toward the front of the device and removes their Shield. |
Glacio Combat Machines are highly effective when you use them together. Freeze Jets and Hologram Echo: Junrocks, in particular, can deal with hordes of enemies with their slowing and freezing effects, while continuously doing damage in the process.
Vortex Generators are also crucial in this stage to deal with Tambourinist's Invisibility that lets it ignore wall and ceiling machines. Whereas, Repulsor Spout is a secondary measure to knock back enemies that pass through your defenses.
As for KU-Roro's Weapons, we suggest picking up both Repulsion Field and Speed Shooter. Repulsion Field is one of the best tools to have at knocking back enemies out of the map, especially at lower cooldowns. On the other hand, Speed Shooter is a great passive source of damage while moving through the map.
Abyssal Pass (Overlord) Wave Guide
| Abyssal Pass (Overlord) Wave Guide |
|---|
|
|
Wave 1 - Knock Back Enemies with Repulsion Field
| Wave 1 Tips and Recommendations | |
|---|---|
 Primary Location for Defense |
|
| 1 | Wave 1 is beatable with KU-Roro's Weapons alone as all of the enemies are considered small and can be knocked back with the Repulsion Field. Use this to your advantage and knock them out of the map to deal with their numbers. |
| 2 | 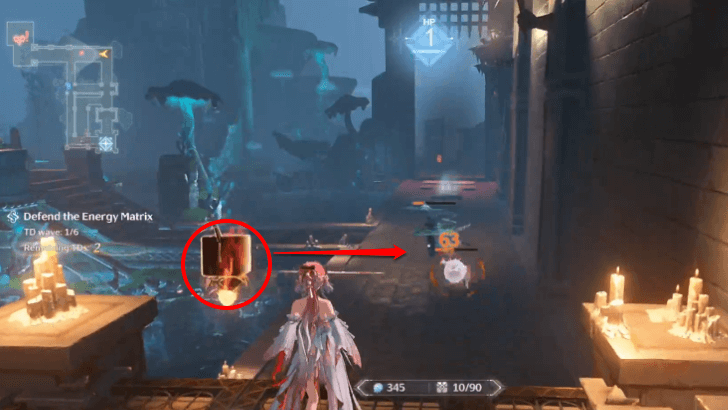 Use Speed Shooter when your Repulsion Field is on cooldown. This provides a consistent source of damage that can deal with small enemies quite easily, despite them having higher HP in Threat: Overlord. |
| 3 | 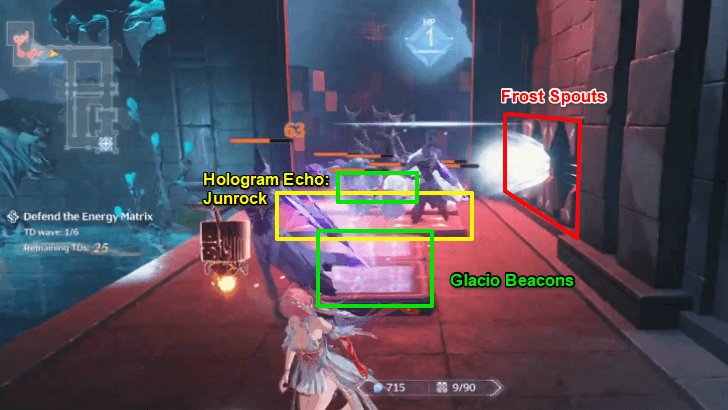 (Optional) With your Sim Credits, you can purchase some Frost Spouts, Glacio Beacons, and Hologram Echo: Junrocks to slow down enemies while you attack them. Alternatively, you can start building Freeze Jets in the Choke Point to catch stray enemies. |
Wave 2 - Set Up Freeze Jets at the Choke Point
| Wave 2 Tips and Recommendations | |
|---|---|
 Primary Location for Defense |
|
| 1 | 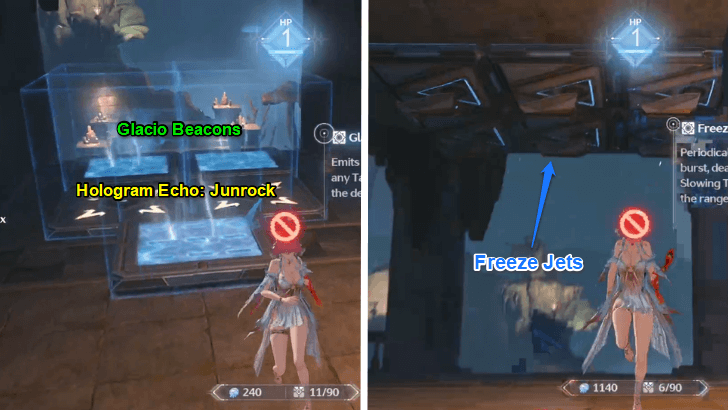 During the Wave 2 preparation phase, you can start setting up your Combat Machines at the main choke point of the stage map. This choke point will be relevant from Waves 1 to 4, as enemies will begin to pass by the left stairway starting Wave 5. Build multiple Freeze Jets on the ceiling and add some Glacio Beacons and Junrocks on the ground to supplement the Freeze Jets. |
| 2 | Continue doing the same strategy with KU-Roro's weapons. Knock enemies out of the map with Repulsion Field and use Speed Shooter for damage while Repulsion Field is on cooldown. |
Wave 3 - Focus on Protecting the New Route
| Wave 3 Tips and Recommendations | |
|---|---|
 Primary Location for Defense |
|
| 1 | 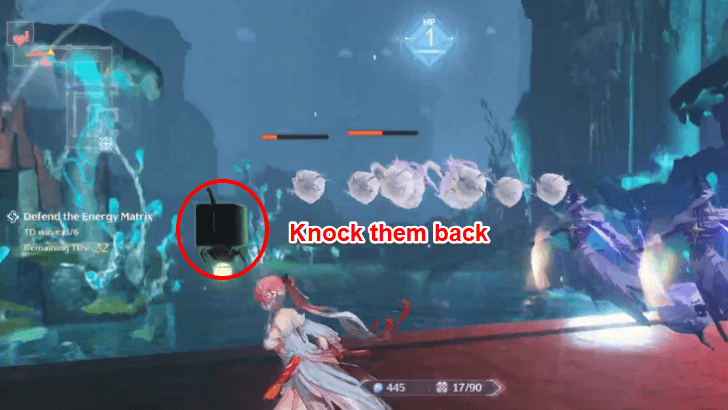 Starting Wave 3, some enemies will start using the pathway where you cannot set up any Combat Machines. Use KU-Roro's weapons to deal with them. |
| 2 | As the map has only one spawn point where enemies will be coming from, you can wait for them by the entrance. Do note that despite using different paths, enemies will still go through the choke point, which is protected by your combat machines. |
Wave 4 - Repeat the Previous Tactics
| Wave 4 Tips and Recommendations | |
|---|---|
 Primary Location for Defense |
|
| 1 | 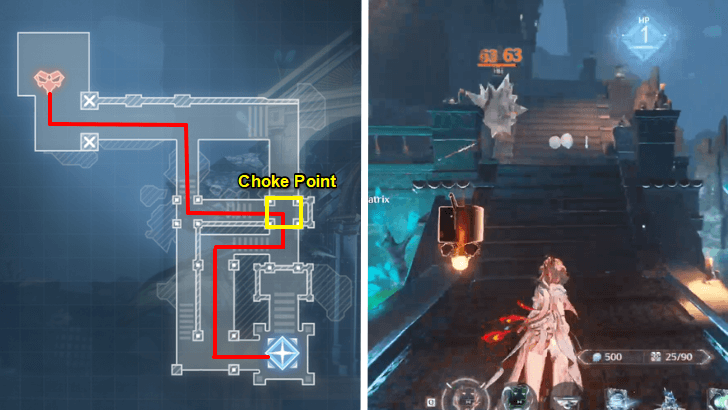 Wave 4 is similar to Wave 3 with the difference being only the enemies that spawn during the challenge. There will be two medium enemies, Havoc Prism, that will spawn a Chop-chop: Headless and two Tick Tacks when defeated. Use your Repulsion Field on them to knock them back from the choke point, as they may bypass it if you're not careful. |
Wave 5 - Set Up Defenses in the Left Stairway
| Wave 5 Tips and Recommendations | |
|---|---|
 Primary Location for Defense |
|
| 1 | 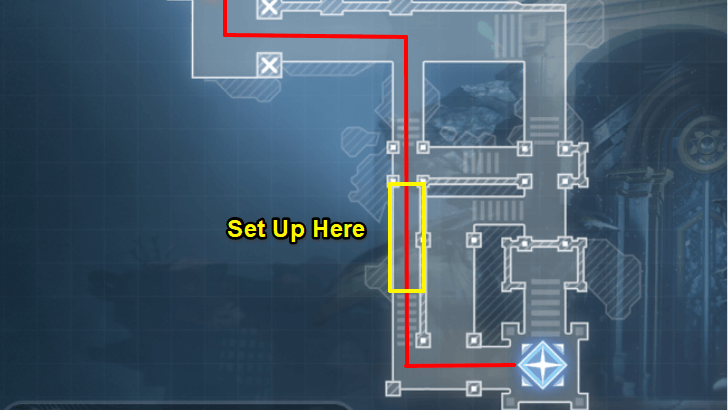 On Wave 5, some enemies will begin using the left stairway, avoiding the choke point with all your Combat Machines. Focus your defenses here and use KU-Roro's weapons to deal with these stray enemies. |
| 2 | 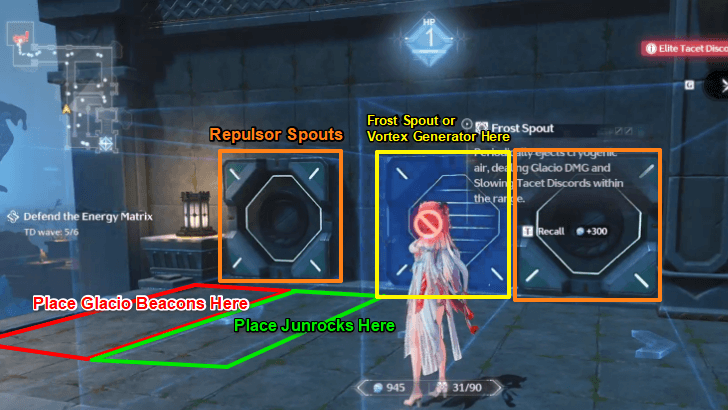 Place Glacio Beacons at the top of the stairway and some Junrocks to explode when enemies get near them. Add some Repulsor Spouts to knock enemies out of the map for extra measure. |
Wave 6 - Focus on Tambourinist
| Wave 6 Tips and Recommendations | |
|---|---|
 Primary Location for Defense |
|
| 1 | Wave 6 is your biggest hurdle, as it has the most enemies and Tambourinist to challenge your run. Tambourinist will be using the left stairway, so we suggest focusing on it while leaving the rest to be dealt with by your Combat Machines in the choke point. |
| 2 |  Tambourinist will ignore your wall and ceiling combat machines due to its passive, Invisibility. Build some Vortex Generators by the left stairway to remove it and place ground combat machines like Hologram Echo: Junrock and Glacio Beacons, as they are still effective. |
| 3 | 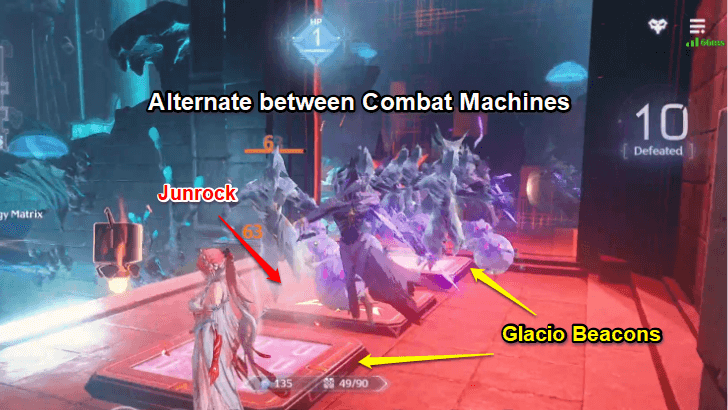 By the entrance, you can also add combat machines in an alternating manner. Place Glacio Beacon after a Hologram Echo: Junrock and repeat this a few times to slow down and manage the wave of enemies. |
Abyssal Pass (Overlord) Stage Information
Basic Information
| Stage Information | |
|---|---|
| Stage Type: Pass Guardian |
Threat Level: Overlord |
| Rewards | |
|
No Rewards
|
|
| All Challenge Goals | |
|
|
|
Wuthering Waves Related Guides

Tidal Defense Simulator Event Guide
Pass Guardian Stages
| Threat: Overlord | |||||
|---|---|---|---|---|---|
| Threat: Elite | |||||
| Threat: Common | |||||
Deathtrap Mode Stages
(Infinite Mode) |
|
All Tidal Defense Simulator Guides
| - |
Author

Abyssal Pass (Overlord) Stage Guide | Tidal Defense Simulator
Premium Articles

Rankings

Gaming News


![Star Savior Review [First Impressions] | Engaging, Entertaining, and Expensive](https://img.game8.co/4447603/8f500e9bf666bdb8adb1af478e9dfdbd.png/thumb)
![Death Stranding 2: On The Beach [PC] Review | A Port That Delivers](https://img.game8.co/4447392/15310a0c9aa1b6843bb713b2ea216930.jpeg/thumb)
Popular Games

Genshin Impact Walkthrough & Guides Wiki
Umamusume: Pretty Derby Walkthrough & Guides Wiki
Pokemon Pokopia Walkthrough & Guides Wiki
Honkai: Star Rail Walkthrough & Guides Wiki
Monster Hunter Stories 3: Twisted Reflection Walkthrough & Guides Wiki
Arknights: Endfield Walkthrough & Guides Wiki
Wuthering Waves Walkthrough & Guides Wiki
Zenless Zone Zero Walkthrough & Guides Wiki
Pokemon TCG Pocket (PTCGP) Strategies & Guides Wiki
Monster Hunter Wilds Walkthrough & Guides Wiki


Recommended Games
Fire Emblem Heroes (FEH) Walkthrough & Guides Wiki
Diablo 4: Vessel of Hatred Walkthrough & Guides Wiki
Cyberpunk 2077: Ultimate Edition Walkthrough & Guides Wiki
Yu-Gi-Oh! Master Duel Walkthrough & Guides Wiki
Super Smash Bros. Ultimate Walkthrough & Guides Wiki
Pokemon Brilliant Diamond and Shining Pearl (BDSP) Walkthrough & Guides Wiki
Elden Ring Shadow of the Erdtree Walkthrough & Guides Wiki
Monster Hunter World Walkthrough & Guides Wiki
The Legend of Zelda: Tears of the Kingdom Walkthrough & Guides Wiki
Persona 3 Reload Walkthrough & Guides Wiki


All rights reserved
Copyright© 2024-2025 Kuro Games. All Rights Reserved.
The copyrights of videos of games used in our content and other intellectual property rights belong to the provider of the game.
The contents we provide on this site were created personally by members of the Game8 editorial department.
We refuse the right to reuse or repost content taken without our permission such as data or images to other sites.
This guide is brilliant. Please add on vortex generators at the front to remove the shield of the final boss early. That way you can defeat him a little earlier. Watch of for the prism as they release mobs when they die and can slip through the end defenses if you are not careful at the last stage.