How to Beat the Curator Capstone Dungeon Boss Guide
★ NEW: Season 12 Guide and New Features
┗ Seasonal Content: New Uniques | Bloodied Sigils | Slaughterhouses
┗ Seasonal Mechanic: Killstreaks and Bloodied Items
★ NEW: Lord of Hatred Expansion Release Date
★ Check out our Vessel of Hatred expansion guide
This is a guide on the Curator, the Cathedral of Light Capstone boss in Diablo 4 (D4). Read on to learn more about the Curator, including its location, possible workarounds for a bug where the Curator goes missing, attack patterns as well as the best tips and strategies to beat this boss, and all notable rewards!
List of Contents
The Curator Overview and Rewards
The Curator Basic Information
 |
|
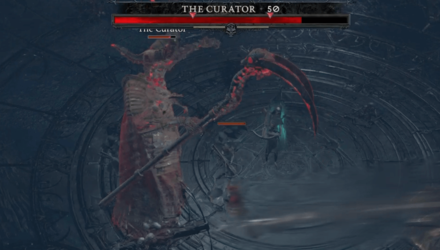
| Location | ・Cathedral of Light Capstone Dungeon (Kyovashad) on Veteran difficulty |
|---|---|
| Rewards | ・Level-scaled EXP ・Level-scaled Gold ・Random Equipment ・Unlock World Tier 3: Nightmare Difficulty |
Capstone Dungeon Unlocked after Completing the Main Quest
The Curator is the boss of the first Capstone Dungeon (the Cathedral of Light), which becomes available after completing the main story campaign. Note that you must currently be on World Tier 2: Veteran difficulty for this dungeon to appear on your map.
Campaign Walkthrough and List of Main Quests
Level 50 is the Recommended Level
Unlike content in the overworld, Capstone dungeons do not scale to your level. The Curator boss and enemies inside this Capstone dungeon are locked at level 50, so if you're having trouble with clearing it, take some time to level up your character and come back later for a more manageable fight.
The Curator Went Missing Bug Workaround
Some players have reported The Curator disappearing when its health is down to 5 or 10%. When this bug occurs, the screen is cleared of all enemies, but the audio persists.
Currently, there is no bug fix for this issue, however, there are some possible workarounds.
- Try to beat the boss as fast as possible. The longer the boss fight drags on, the higher the chance of this bug occuring.
- Switch to World Tier I, then back to World Tier II.
- Avoid using Necromancer's Summons. While this bug doesn't seem to be specific to one class, most bug reports are coming from Necro minion players.
- Invite another player to your party after you encounter the bug, then exit the game. Reboot, then join the same player's party. You should be able to continue the boss fight where you left off.
If any of these solutions worked for you, or if you've discovered anouther workaround, let us know what you did in the comments!
How to Beat the Curator
| The Curator Tips and Strategies |
|---|
|
|
Party Up with Other Players
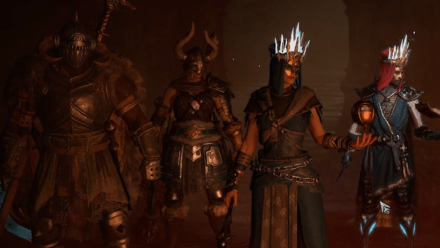
This may sound like generic advise at first, but the most frustrating thing about the Curator boss fight is that so many distractions are flying your way. Teaming up with other players will allow you to split up the duties and keep the damage focused on the boss itself as much as possible. If possible, set out the following roles in advance:
- Someone to delete the Skeleton Ballistas asap.
- Someone to group up and clear out the normal Skeleton spam.
- Someone to focus on the boss and inflict Stagger as fast as possible. When the boss drops down, have everyone temporarily pitch in for the most dps possible.
How to Play Co-Op With Friends
Craft Elixir of Undead-Slaying
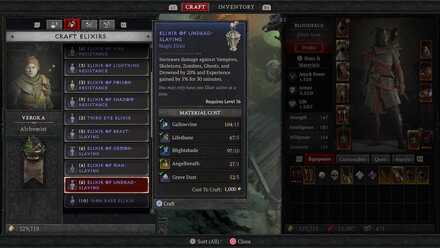
Consuming the Elixir of Undead-Slaying will give 20% bonus damage against Skeletons. You can craft these cheaply at any Alchemist, so it's worth having a few on hand to level the playing field against this boss.
Spam Attacks at the Beginning
The Curator takes a minute to get going, so use this time to knock off about 8 - 10% of its health before the area gets flooded with mobs of Skeletons. Get some free damage in before its attacks start ramping up.
Prioritize Taking Out Sniper Skeletons
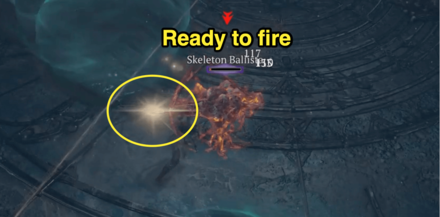
While most of the other enemies that spawn can be ignored, the Skeleton Ballistas are deadly accurate and their shots are hard to see. Get behind these as soon as they spawn and take them out of commission so you can focus on dodging the other attacks coming straight from the boss itself.
Juke the Homing Skulls by With Sudden Movements
As the Homing Skulls close in on you, they become nearly impossible to outrun. Their purpose is to distract you from focusing on the boss, so don't participate in a game of cat and mouse here. Instead, move forward then back (or side to side) with fast precision to dodge them. You might not miss them all this way, but tanking one or two Skulls should only incur minor damage.
Be Conservative with Healing Potions
The Curator has a large health pool, and tends to drag the fight out even longer by spamming the area with Skeletons and other distractions. Surviving this fight requires three things: consistent maneuverability, patience and careful use of Potions. Once you memorize the deadliest attacks like the Spectral Ground Slam (3) and Skeleton Ballistas, the rest of the damage can be taken in stride. This boss's attacks tend to drag the fight out for a long time, making it harder to survive with enough Potions. Make sure you have at least 2-3 Potions heading into the second half of the fight and you should be good.
How to Upgrade Your Healing Potion and Increase Healing Pots
The Curator Attack Patterns
Skeleton Summon
The Curator floods the room with basic Skeleton enemies that slowly shamble your way. The difficulty with these is that it becomes hard to target the boss with ranged attacks when there are too many Skeletons in the way. Ignore the Skeletons by circling the room for a better shot of the boss, or using a pixel pull skill to group up the Skeletons and clear them out when they get too close.
Don't Ignore the Skeleton Ballistas
These are stationary Skeleton snipers that will tag you across the room and halve your health instantly. If you find you keep dying to unseen enemies, this is the likely culprit. Two Skeleton Ballistas spawn when the boss summons his Skeletons, often on opposite sides of the room. Their aim is surprisingly accurate, so watch for the telltale shine from their arrows to know when the shots are coming.
To counter these no-scoping skellies, get behind them when they lock into place (you'll know when they stop strafing) and use your strongest-single target skill to eliminate them and get back to the boss.
Scythe Swipe
A melee attack with surprising reach that deals massive damage. The Curator will default to this any time you approach from the front, so don't spend a lot of time within its reach. If you're running a melee build, you're going to struggle to stay within range long enough to land continuous damage. Practice timing how many melee swings you can land without getting hit, then backing away using a Mobility skill before it has time to start this attack.
Homing Skeleton Skulls
The Curator shoots out streams of glowing Skulls that track to your location, popping on impact and doing minimal damage. Although perhaps the weakest move in the boss's arsenal damage-wise, the real danger with this move is in constantly distracting you from other ongoing attacks. Try to use jerky movements when the Homing Skulls are about to hit you, use your Mobility skills to outrun them, or just tank the damage if it's only one or two Skulls - whatever you do, don't let them distract you from greater sources of damage.
Spectral Ground Slam (5)
The Curator winds up his scythe, sending 5 lines across the floor. This attack has a long wind-up and easy tell, so it should be no problem to stand between the lines. Alternatively, the attack is slow enough to get behind the boss and land some melee damage, so take the chance to do so.
Spectral Ground Slam (3)
A quick, three-part attack that causes devastating damage in a W-shaped pattern. The trick to avoiding this is to position yourself in the 'dead-zone' inside of the lines. After the first Ground Slam finishes, the Curator will teleport nearby and attempt to repeat the pattern two times in such a way that the 'dead-zone' of the previous attack is covered by the second attack, forcing you to move with each successive attack.
Taking just two hits from this attack will wipe you out, so stay sharp. This is easily the deadliest move in its arsenal, so make dodging this attack priority #1.
Bone Walls
This is a two-phase attack, starting with Bone Walls that appear in various patterns around the room. The walls themselves don't do damage, but make it hard to move around the Homing Skeletons and other enemies.
During the second phase, the boss will detonate these, causing damage in a small radius. Hugging the outer wall of the room helps with avoiding taking damage from this part of the attack.
Cyclones
These are slow-moving funnels that cause damage over time and impair your vision. Their pathing is easy to predict and shouldn't cause too much trouble, but are a nuisance in combination with Bone Walls. These will quickly whittle your health down and allow the Curator to catch you off guard.
Diablo 4 Related Guides

All Lair Bosses and Required Materials
| Lair Boss | Required Materials |
|---|---|
| Lord Zir | ・Exquisite Blood x12 |
| Echo of Varshan | ・Malignant Heart x12 |
| Grigoire | ・Living Steel x12 |
| The Beast in the Ice | ・Distilled Fear x12 |
| Urivar | ・Judicator's Mask x12 |
| Duriel | ・Shard of Agony x3 |
| Andariel | ・Pincushioned Doll x3 |
| Harbinger of Hatred | ・Abhorrent Heart x3 |
| Belial | ・Betrayer's Husk x2 |
| The Butcher | ・Pound of Flesh x3 |
All Bosses By Type
| Main Quest Bosses | Stronghold Bosses | ||
| Dungeon Bosses | Uber Bosses |
All Bosses Per Region
| Fractured Peaks | Scosglen | Dry Steppes | |||
| Kehjistan | Hawezar | Nahantu |
All Dungeon Bosses
| Blood Bishop | Bramble | Broodguard |
| Chief Marauder | Cyhrach The First Born | Den Mother |
| Devoted Champion | Drowned Seahag | Elias |
| Innes, Vengeance of Glor-han-Fhaidha | Khazra Abomination | Mother's Judgment |
| Outlaw Sharpshooter | Resurrected Malice | Sarat |
| Scourge of the Land | Seething Hivemaster | Slither |
| Spiritcaller of Frost | Spiritcaller of Squalls | The Butcher |
| The Curator | Tomb Lord |
Comment
Author
How to Beat the Curator Capstone Dungeon Boss Guide
Rankings
- We could not find the message board you were looking for.
Gaming News
Popular Games

Genshin Impact Walkthrough & Guides Wiki

Honkai: Star Rail Walkthrough & Guides Wiki

Umamusume: Pretty Derby Walkthrough & Guides Wiki

Pokemon Pokopia Walkthrough & Guides Wiki

Resident Evil Requiem (RE9) Walkthrough & Guides Wiki

Monster Hunter Wilds Walkthrough & Guides Wiki

Wuthering Waves Walkthrough & Guides Wiki

Arknights: Endfield Walkthrough & Guides Wiki

Pokemon FireRed and LeafGreen (FRLG) Walkthrough & Guides Wiki

Pokemon TCG Pocket (PTCGP) Strategies & Guides Wiki
Recommended Games

Diablo 4: Vessel of Hatred Walkthrough & Guides Wiki

Cyberpunk 2077: Ultimate Edition Walkthrough & Guides Wiki

Fire Emblem Heroes (FEH) Walkthrough & Guides Wiki

Yu-Gi-Oh! Master Duel Walkthrough & Guides Wiki

Super Smash Bros. Ultimate Walkthrough & Guides Wiki

Pokemon Brilliant Diamond and Shining Pearl (BDSP) Walkthrough & Guides Wiki

Elden Ring Shadow of the Erdtree Walkthrough & Guides Wiki

Monster Hunter World Walkthrough & Guides Wiki

The Legend of Zelda: Tears of the Kingdom Walkthrough & Guides Wiki

Persona 3 Reload Walkthrough & Guides Wiki
All rights reserved
©2022 BLIZZARD ENTERTAINMENT, INC. ALL RIGHTS RESERVED.
All trademarks referenced herein are the properties of their respective owners.
The copyrights of videos of games used in our content and other intellectual property rights belong to the provider of the game.
The contents we provide on this site were created personally by members of the Game8 editorial department.
We refuse the right to reuse or repost content taken without our permission such as data or images to other sites.


![Monster Hunter Stories 3 Review [First Impressions] | Simply Rejuvenating](https://img.game8.co/4438641/2a31b7702bd70e78ec8efd24661dacda.jpeg/thumb)


