How to Make a Build
★ NEW: Season 12 Guide and New Features
┗ Seasonal Content: New Uniques | Bloodied Sigils | Slaughterhouses
┗ Seasonal Mechanic: Killstreaks and Bloodied Items
★ NEW: Lord of Hatred Expansion Release Date
★ Check out our Vessel of Hatred expansion guide
In Diablo 4 (D4), making a build requires focusing on a few central skills or synergies and augmenting them with Aspects, Paragon Boards, Affixes, and Gems. Check out how to make your own build and our tips and strategies to make them as effective as possible!
List of Contents
How to Make a Build
| Tips and Strategies for Making Builds |
|---|
|
|
Focus on a Central Skill or Synergy
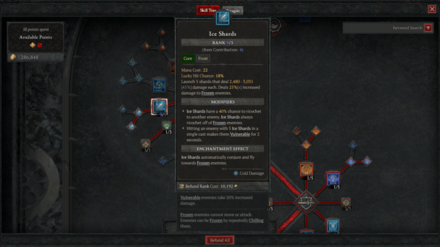
When creating a build, you should determine which of your class's skills, Unique effects, or ability synergies to focus on. Generally, most Diablo 4 builds are built around a single Core skill or a synergy between two, with the rest of the skills and gear supporting them.
Focusing on too many skills or synergies at once can end up with your build lacking speed, efficiency, or damage, so it's best to stick to a central "theme" to make it as effective as possible.
Avoid Relying on Super Rare Unique Items
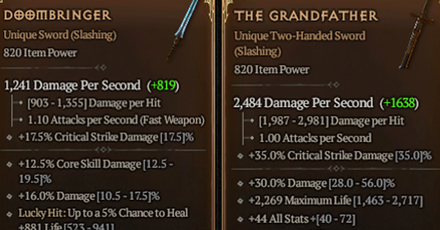
In addition, we also recommend avoiding relying on or focusing a build around Super Rare Unique items, such as the Harlequin Crest or The Grandfather. These Uniques have an abysmally low drop rate, so it's better to consider them as upgrades to an endgame build rather than central gear pieces.
Support the Build With Other Skills
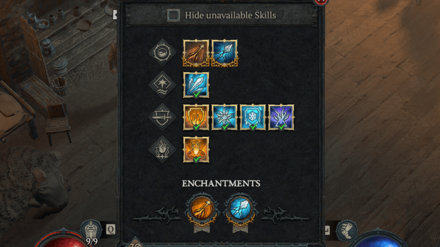
Once you've determined your build's central skill or synergy, you should figure out the best skills and passives that support it. Prioritize improving your build's damage output by increasing your central skills' levels and picking passives that enhance their damage output.
We also recommend investing in a healthy level of survivability in each build, as enemies and Elites in higher World Tiers can quickly burst down players that don't invest enough in defensive skills and affixes. We suggest running at least one skill that breaks Crowd Control and saving a few skill points for damage-mitigating effects, like Damage Reduction, Barrier, and Fortify.
Determine Key Aspects For Your Build
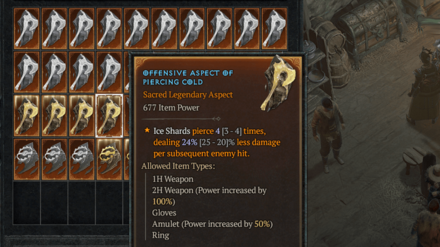
After using up your skill points, we recommend noting down Legendary Aspects that further enhance your build's damage output, survivability, and mobility. Outside of class-specific Aspects that directly improve your central skills and synergies, we recommend the following Aspects if you have trouble filling additional Aspect slots.
Recommended General Legendary Aspects
| Skill | Effect |
|---|---|
|
|
You gain 0.4 - 0.7% increased Armor for 4 seconds when you deal any form of damage, stacking up to 25 - 40%. |
|
|
Skills deal up to (10-20)% increased damage based on your available Primary Resource when cast, receiving the maximum benefit while you have full Primary Resource. |
|
|
While Unstoppable, and for 4 seconds after, you gain (10=25)% increased Movement Speed and can move freely through enemies. |
|
|
Damaging an Elite enemy grants you a Barrier absorbing damage for 10 seconds. This effect can happen once every 20 seconds. |
|
|
Critical Strikes with Core Skills increase your Attack Speed by (15-25)% for 5 seconds. |
|
|
You have 20% increased Crowd Control Duration. While enemies are Unstoppable, you deal (20-40)% increased damage to them. |
Plan Out Your Paragon Boards
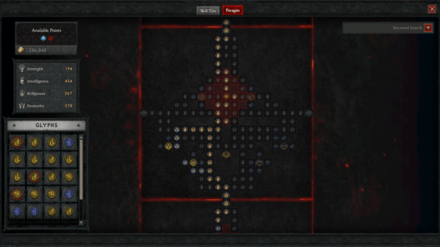
With your build's Aspects established, you should prioritize planning out your Paragon Boards next. While these don't become relevant until Level 50, the bonuses that Paragon Nodes and Glyphs provide can significantly contribute to a build's damage output, mobility, and survivability.
Since Paragon Boards are unique to each class, consider taking the time to look through each one or reference another build's Paragon Boards to get an idea of the most optimal Nodes, Glyphs, and leveling path for your build.
Look For Optimal Gear Affixes
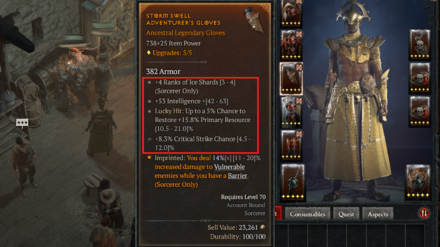
After finalizing your preferred skills, Aspects, and Paragon Boards, the next crucial step is to find the optimal Affixes for your gear. We recommend prioritizing Affixes that increase the level of your central Skills or directly improve your damage output, such as increases in Critical Strike Chance, Critical Strike Damage, and Attack Speed.
However, while your build should mainly have offensive Affixes, we highly suggest aiming for potent defensive Affixes on your Helm, Chest, and Pants to maintain enough survivability in higher World Tiers. Prioritize rolling for Maximum Life, Total Armor, and Damage Reduction for these three armor pieces.
Socket Gear with Synergistic Gems
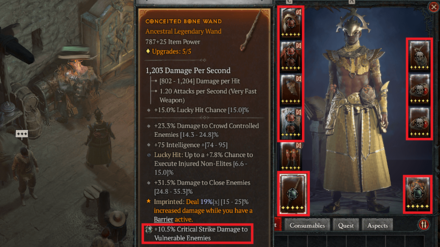
To round out your build, determine the best Gems to socket your armor, weapons, and jewelry. While we generally recommend socketing Rubies into armor and Skulls into jewelry for their potent Maximum Life and Armor bonuses, we highly suggest taking the time to determine the best-fit gems for your build.
For example, Barbarians can slot Sapphires into their armor due to their unique Fortify mechanic. Sorcerers can also slot Emeralds and Sapphires on their weapons due to their frequent application of Vulnerable and Crowd Control.
Adjust and Improve by Testing

After finishing these steps, you should have a complete build for your class. The last thing you need to do to perfect it is to test it in-game and apply adjustments based on its results in clearing difficult endgame content.
We recommend trying your build in Helltides, Nightmare Dungeons, and World Bosses and checking how well it performs in terms of damage output and speed. Based on your findings, feel free to tweak your skills, Aspects, Paragon Boards, Affixes, and Gems until you optimize it to your preference.
Take Inspiration from Other Builds

At any point in the build-making process, we highly recommend checking out other builds for inspiration and reference to help guide you along the way.
Check out our various best builds for each class below to get an idea of some of the possible synergies and skills you can use in your own build!
Diablo 4 Related Guides

Beginner Guides and Best Tips for Getting Started
Tips and Tricks
Comment
Author
How to Make a Build
Rankings
- We could not find the message board you were looking for.
Gaming News
Popular Games

Genshin Impact Walkthrough & Guides Wiki

Umamusume: Pretty Derby Walkthrough & Guides Wiki

Pokemon Pokopia Walkthrough & Guides Wiki

Honkai: Star Rail Walkthrough & Guides Wiki

Monster Hunter Stories 3: Twisted Reflection Walkthrough & Guides Wiki

Arknights: Endfield Walkthrough & Guides Wiki

Wuthering Waves Walkthrough & Guides Wiki

Zenless Zone Zero Walkthrough & Guides Wiki

Pokemon TCG Pocket (PTCGP) Strategies & Guides Wiki

Monster Hunter Wilds Walkthrough & Guides Wiki
Recommended Games

Diablo 4: Vessel of Hatred Walkthrough & Guides Wiki

Cyberpunk 2077: Ultimate Edition Walkthrough & Guides Wiki

Fire Emblem Heroes (FEH) Walkthrough & Guides Wiki

Yu-Gi-Oh! Master Duel Walkthrough & Guides Wiki

Super Smash Bros. Ultimate Walkthrough & Guides Wiki

Pokemon Brilliant Diamond and Shining Pearl (BDSP) Walkthrough & Guides Wiki

Elden Ring Shadow of the Erdtree Walkthrough & Guides Wiki

Monster Hunter World Walkthrough & Guides Wiki

The Legend of Zelda: Tears of the Kingdom Walkthrough & Guides Wiki

Persona 3 Reload Walkthrough & Guides Wiki
All rights reserved
©2022 BLIZZARD ENTERTAINMENT, INC. ALL RIGHTS RESERVED.
All trademarks referenced herein are the properties of their respective owners.
The copyrights of videos of games used in our content and other intellectual property rights belong to the provider of the game.
The contents we provide on this site were created personally by members of the Game8 editorial department.
We refuse the right to reuse or repost content taken without our permission such as data or images to other sites.


![Marathon Cryo Archive Map Teased as [REDACTED] on Selection Screen](https://img.game8.co/4442236/6357203e58172f6de57f1991e7c39b22.png/thumb)


