Best Dungeons to Farm (Season 10)
★ NEW: Season 12 Guide and New Features
┗ Seasonal Content: New Uniques | Bloodied Sigils | Slaughterhouses
┗ Seasonal Mechanic: Killstreaks and Bloodied Items
★ NEW: Lord of Hatred Expansion Release Date
★ Check out our Vessel of Hatred expansion guide
The best dungeons to farm are Sirocco Caverns, Caldera Gate, and Zenith in Diablo 4: Vessel of Hatred (D4). See which Dungeons are best for solo and party play, and how to farm dungeons here!
| Best Dungeon Guides | |
|---|---|
| Best Dungeons to Farm | Nightmare Dungeon Tier List |
List of Contents
Best Dungeons for Solo Play
| Best Solo Dungeons |
|---|
|
|
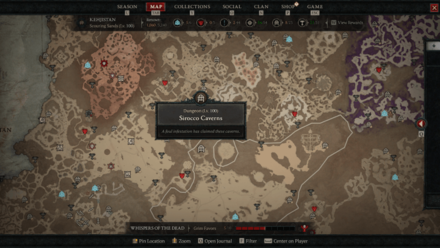
Sirocco Caverns
| Worldview | Map View | 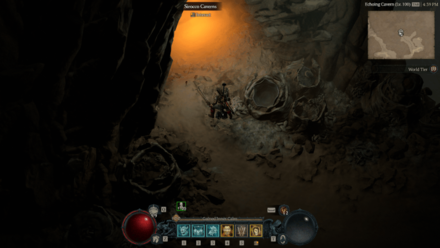 |
 |
|---|
The Sirroco Caverns is a great linear dungeon that you can repeatedly farm for exp. The monster density is thick while only have one path to follow which makes it easy to grind repeatedly.
Caldera Gate
| Worldview | Map View |  |
 |
|---|
The Caldera Gate, much like the Sirroco Caverns, can be a great alternative to the best dungeon to grind solo. It's also a linear dungeon with a thich mob density and can be grinded repeatedly for exp.
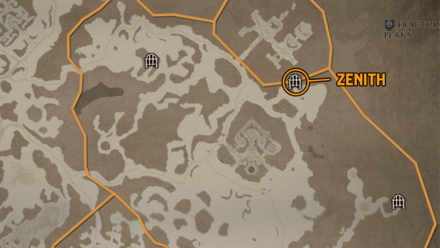
Zenith
| Worldview | Map View | 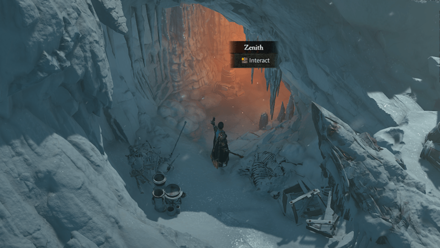 |
 |
|---|
Unlike the first two dungeons, Zenith is a circular dungeon that you'll need to explore to complete. It still has a thick mob density so circling through the dungeon to complete the fetch quests inside isn't too bad but a bit less inefficient than the first two dungeons.
Best Dungeons for Party Play
| Best Party Dungeons |
|---|
|
|
Conclave
| Worldview | Map View | 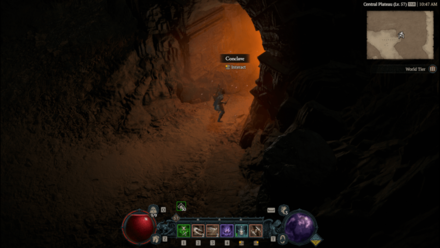 |
 |
|---|
The Conclave has a multi objective format with an insane mob count. It's best tackled with at least three players to check each separate corners of the map to quickly complete each objectives while wiping out the monsters in the area.
Domahainne Tunnel
| Worldview | Map View |  |
 |
|---|
Domhainne Tunnel is also a dungeon with a wide layout while sporting a high amount of monsters. It's a great alternative to the Conclave as a dungeon to farm while playing multiplayer.
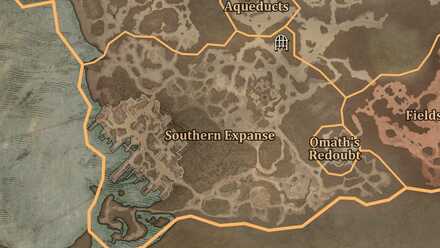
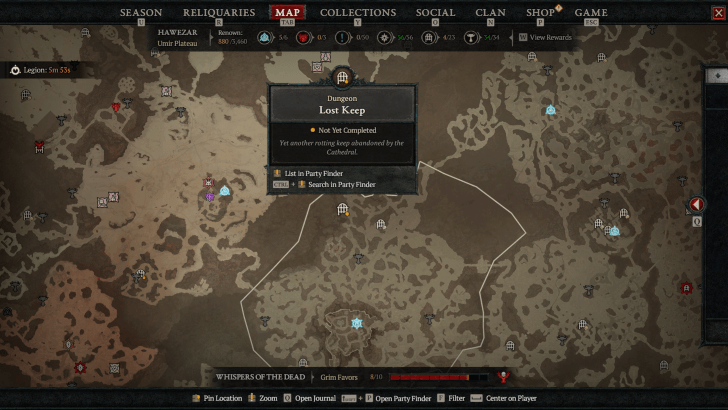
Lost Keep
| Worldview | Map View | 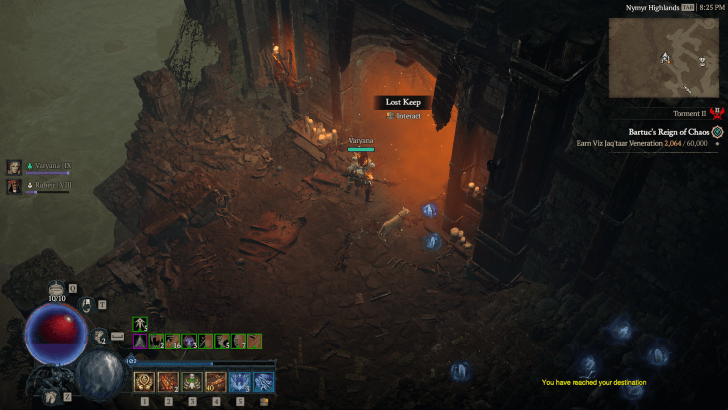 |
 |
|---|
Lost Keep have branching paths that multiple players can take to clear out the mobs faster. A grea third chocie to consider for a party play dungeon.
How to Farm Dungeons
Obtain Nightmare Sigils in Chaos Rifts
We highly recommend farming Nightmare Dungeons instead of regular dungeons since these drop large amounts of Obducite which you can use to start Masterworking your gear.
Before you start doing Nightmare Dungeon runs, you first have to obtain a Nightmare Sigil. As of Season 10, the best way to farm these sigils is by clearing Chaos Rifts found throughout Helltides.
Instant Reset for Nightmare Dungeons
| # | How to Instantly Reset Nightmare Dungeons |
|---|---|
| 1 | Activate a Nightmare Sigil, preferably with Magic Find or Gold Find, to start a Nightmare Dungeon. |
| 2 | Enter the Nightmare Dungeon. Finish the first area or leave immediately. |
| 3 | Enter a different Dungeon and finish the first area of the Dungeon. |
| 4 | The Nightmare Dungeon will reset. Furthermore, the Nightmare Dungeon will continue to reset every time you leave, without doing the three previous steps again. |
Doing this instant reset trick will spawn all enemies again and refresh your revive count. You can continue this loop until you run out of revives, finish the Dungeon, or disconnect.
This trick is incredibly useful to maximize the Magic Find and Gold Find affixes, on top of gaining EXP.
Quick Reset for Normal Dungeons
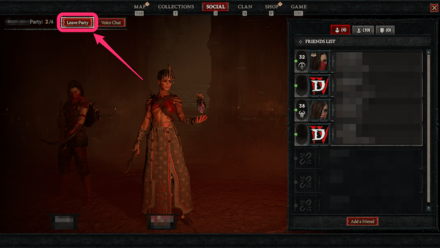
Regular Dungeons can also be reset, depending if you are in a party or not. When solo, you will need to wait for a few seconds, depending on Dungeon completion. Otherwise when you are in a party, you can have the leader leave the party and join again.
How to Reset Dungeons Instantly
Diablo 4 Related Guides

List of All Capstone Dungeons
| All Capstone Dungeons | ||
|---|---|---|
| Cathedral of Light | Fallen Temple | Echo of Hatred |
| Vault of the Crucible | Hellish Descent | Enclave of Darkness |
| Den of the Apostate | Breach of Sins | - |
List of Dungeons by Region
| Fractured Peaks | Scosglen | Dry Steppes | |||
|---|---|---|---|---|---|
| Hawezar | Kehjistan | Nahantu |
Dungeons Related Guides
- Best Dungeons to Farm
- Escalating Nightmares Guide
Comment
Author

Best Dungeons to Farm (Season 10)
Rankings
- We could not find the message board you were looking for.

Gaming News


![Monster Hunter Stories 3 Review [First Impressions] | Simply Rejuvenating](https://img.game8.co/4438641/2a31b7702bd70e78ec8efd24661dacda.jpeg/thumb)
Popular Games

Genshin Impact Walkthrough & Guides Wiki
Umamusume: Pretty Derby Walkthrough & Guides Wiki
Pokemon Pokopia Walkthrough & Guides Wiki
Honkai: Star Rail Walkthrough & Guides Wiki
Monster Hunter Stories 3: Twisted Reflection Walkthrough & Guides Wiki
Arknights: Endfield Walkthrough & Guides Wiki
Wuthering Waves Walkthrough & Guides Wiki
Zenless Zone Zero Walkthrough & Guides Wiki
Pokemon TCG Pocket (PTCGP) Strategies & Guides Wiki
Monster Hunter Wilds Walkthrough & Guides Wiki


Recommended Games
Diablo 4: Vessel of Hatred Walkthrough & Guides Wiki
Cyberpunk 2077: Ultimate Edition Walkthrough & Guides Wiki
Fire Emblem Heroes (FEH) Walkthrough & Guides Wiki
Yu-Gi-Oh! Master Duel Walkthrough & Guides Wiki
Super Smash Bros. Ultimate Walkthrough & Guides Wiki
Pokemon Brilliant Diamond and Shining Pearl (BDSP) Walkthrough & Guides Wiki
Elden Ring Shadow of the Erdtree Walkthrough & Guides Wiki
Monster Hunter World Walkthrough & Guides Wiki
The Legend of Zelda: Tears of the Kingdom Walkthrough & Guides Wiki
Persona 3 Reload Walkthrough & Guides Wiki


All rights reserved
©2022 BLIZZARD ENTERTAINMENT, INC. ALL RIGHTS RESERVED.
All trademarks referenced herein are the properties of their respective owners.
The copyrights of videos of games used in our content and other intellectual property rights belong to the provider of the game.
The contents we provide on this site were created personally by members of the Game8 editorial department.
We refuse the right to reuse or repost content taken without our permission such as data or images to other sites.