How to Summon the Golem
★ NEW: Season 12 Guide and New Features
┗ Seasonal Content: New Uniques | Bloodied Sigils | Slaughterhouses
┗ Seasonal Mechanic: Killstreaks and Bloodied Items
★ NEW: Lord of Hatred Expansion Release Date
★ Check out our Vessel of Hatred expansion guide
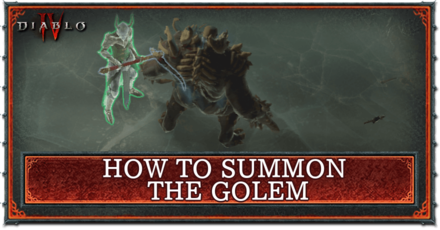
This is a guide to summoning the Necromancer's Golem in Diablo 4 (D4). Read on to see how to unlock the Necromancer's Golem Skill with Book of the Dead, how to summon the Golem, all the different types of Golem, the best Golem to use, and all Golem related Aspects!
List of Contents
How to Summon the Golem
Complete Call of the Underworld Quest

Call of the Underworld is a class specific questline for the Necromancer. Despite most class quests unlocking at level 15, this Necromancer quest will only unlock at 25.
Proceed to the location and complete the objectives of the quest to unlock the last part of the Book of the Dead which will allow you to summon golems. Note that you must equip the Golem to your skill hotbar to summon it.
Necromancer: Call of the Underworld Quest Walkthrough and Rewards
How to Assign Golem Skill to Hotbar
Open the Skill Assignment Tab
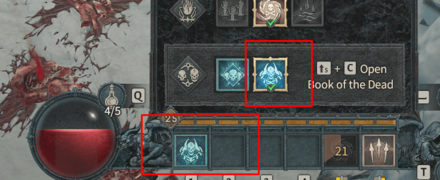
To summon the Golem, you'll need to equip the Golem skill into an empty skill slot in your hotbar. To do this, first open your Abilities menu and go to Skill Tree. Once there, click on Skill Assignment found at the bottom right of the screen. This will open the Skill Assignment tab and allow you to place the Golem skill to your hotbar.
You do not need to consume a corpse to summon the Golem, as it will automatically spawn once placed in your skill hotbar.
Both Skeletons and Golems Can Be Equipped
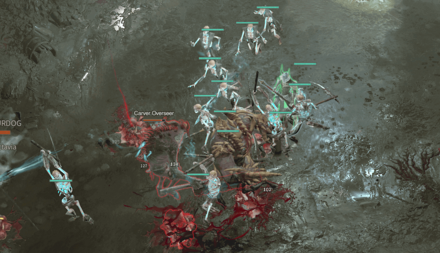
It is possible to have both the skeletal mages and warriors active while also having the golem. However, to do so, you'll need to allocate two active skill slots and equip both skills at the same time!
Types of Golems
| Golem Type | Upgrade Options |
|---|---|
 Bone Golem Bone Golem |
• Each time your Bone Golem takes up to 20% of its Maximum Life as damage, it sheds a Corpse. • Your Bone Golem gains 10% Maximum Life and the amount of Thorns it inherits from you is increased from 30% to 50%. • Sacrifice: You gain +10% increased Attack Speed, but you lose the ability to summon a Golem |
 Blood Golem Blood Golem |
• Your Blood Golem absorbs 15% of damage you would take. • While Healthy, your Blood Golem gains 25% Damage Reduction and x50% increased damage. • Sacrifice: Your Maximum Life is increased by x10%, but you lose the ability to summon a Golem |
 Iron Golem Iron Golem |
• Every 4th Iron Golem attack causes a shockwave, dealing 40% damage to the primary enemy and to enemies behind them. • Your Iron Golem's slam attack also makes enemies Vulnerable for 3 seconds. • Sacrifice: You deal x30% Critical Strike Damage, but you lose the ability to summon a Golem |
Golems Can Be Sacrificed For Buffs
You can sacrifice a golem to gain specific buffs based on the Golem you select. Sacrificed Golems can no longer be summoned.
Best Golems to Use
| Golem Type | Best Uses |
|---|---|
| Bone Golem | Best Overall |
| Blood Golem | Best for Bosses |
| Iron Golem | Best for Crowd Control |
Bone Golem is Best Overall
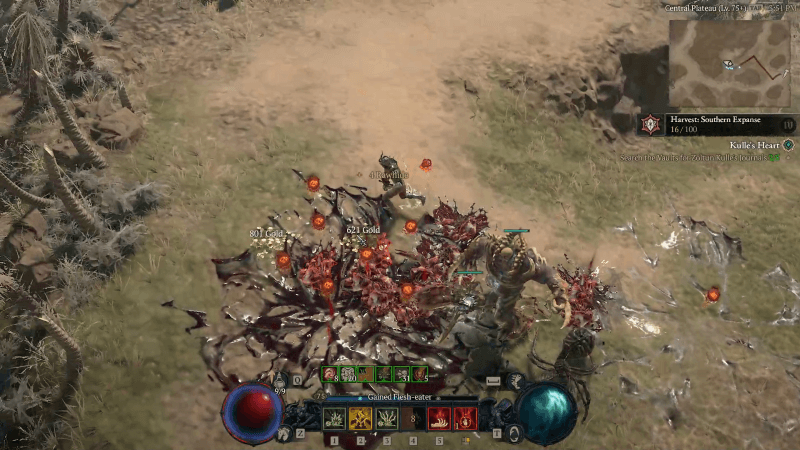
The best Golem to have in general is the simplest one out of all, the Bone Golem. This Golem greatly helps your survival by Taunting enemies away and dealing effective AoE damage through its swings.
This Golem is best summoned with its 2nd upgrade option, which allows it to have 10% more Maximum Life and gain a certain amount of Thorns for even more damage.
Blood Golem is Best for Bosses
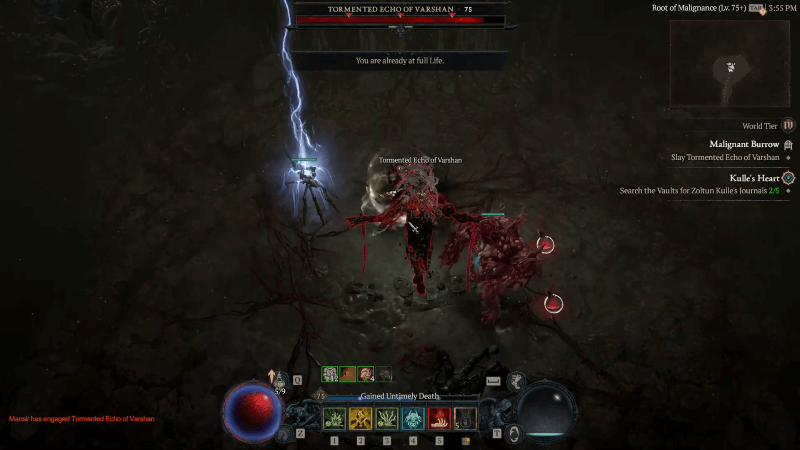
The Blood Golem provides the best single-target damage, which is useful when fighting bosses. Partner that with its insane sustainability, and you have yourself a powerful, undying Golem. The only downside is that it falls short of dealing with hordes of enemies, which is often the scenario in endgame content.
This Golem is best summoned with its 2nd upgrade, which increases both its offensive and defensive capabilities by boosting its Damage Reduction and giving it a significant Damage multiplier while Healthy.
Iron Golem is Best for Crowd Control

If you want a Golem that excels at dealing with multiple enemies, then the Iron Golem is the best option for you. This Golem deals impactful damage while keeping groups of enemies in check with its ability to Stun.
This Golem is best summoned with its 1st upgrade option for more AoE damage, unless you have no consistent way to apply Vulnerable.
Golem Aspects
| Aspect | Effect and How to Get |
|---|---|
|
(Offensive) |
Your Golem Active also causes your Golem to erupt, dealing (200-400% of Weapon Damage) Physical damage to surrounding enemies.$Your Golem consumes Corpses to reduce its remaining Cooldown by 1 second. |
|
(Offensive) |
How to Get: Scosglen (Story Campaign)
Your Golem and Skeletons gain increased damage while alive, up to (30-40)% after 10 seconds. |
|
(Mobility) |
Casting Golem's active Skill creates a bond between you for 6 seconds.$While the bond is active, both of you are Unhindered and gain 25-40% Movement Speed. |
|
(Utility) |
How to Get: Sepulcher of The Forsworn (Dungeon Clear)
Your Golem has a (4-10)% chance to reduce its active Cooldown by 2 seconds and a (2-5)% chance to spawn a Corpse each time it damages an enemy with its normal attack. |
Diablo 4 Related Guides

Beginner Guides and Best Tips for Getting Started
Tips and Tricks
Author
How to Summon the Golem
Rankings
- We could not find the message board you were looking for.
Gaming News
Popular Games

Genshin Impact Walkthrough & Guides Wiki

Honkai: Star Rail Walkthrough & Guides Wiki

Umamusume: Pretty Derby Walkthrough & Guides Wiki

Pokemon Pokopia Walkthrough & Guides Wiki

Resident Evil Requiem (RE9) Walkthrough & Guides Wiki

Monster Hunter Wilds Walkthrough & Guides Wiki

Wuthering Waves Walkthrough & Guides Wiki

Arknights: Endfield Walkthrough & Guides Wiki

Pokemon FireRed and LeafGreen (FRLG) Walkthrough & Guides Wiki

Pokemon TCG Pocket (PTCGP) Strategies & Guides Wiki
Recommended Games

Diablo 4: Vessel of Hatred Walkthrough & Guides Wiki

Cyberpunk 2077: Ultimate Edition Walkthrough & Guides Wiki

Fire Emblem Heroes (FEH) Walkthrough & Guides Wiki

Yu-Gi-Oh! Master Duel Walkthrough & Guides Wiki

Super Smash Bros. Ultimate Walkthrough & Guides Wiki

Pokemon Brilliant Diamond and Shining Pearl (BDSP) Walkthrough & Guides Wiki

Elden Ring Shadow of the Erdtree Walkthrough & Guides Wiki

Monster Hunter World Walkthrough & Guides Wiki

The Legend of Zelda: Tears of the Kingdom Walkthrough & Guides Wiki

Persona 3 Reload Walkthrough & Guides Wiki
All rights reserved
©2022 BLIZZARD ENTERTAINMENT, INC. ALL RIGHTS RESERVED.
All trademarks referenced herein are the properties of their respective owners.
The copyrights of videos of games used in our content and other intellectual property rights belong to the provider of the game.
The contents we provide on this site were created personally by members of the Game8 editorial department.
We refuse the right to reuse or repost content taken without our permission such as data or images to other sites.





![Monster Hunter Stories 3 Review [First Impressions] | Simply Rejuvenating](https://img.game8.co/4438641/2a31b7702bd70e78ec8efd24661dacda.jpeg/thumb)


Ich hab eine Frage und zwar gibt es auch direkt in den Dungeon eine Map Wo man sehen kann, wo man genau lang laufen kann. Es wär echt cool, wenn ihr mir an. Wurde unter meine e Mail Adresse. Echt nett bitte, ich verzweifle, ich will nicht immer den Dungeon falsch laufen. Ich möchte genau den Weg finden, wo ich hin muss und es ist hab schon so viel Seiten danach gesucht. Ich hab nichts gefunden, deswegen schreib ich das jetzt einfach mal hier rein. Wer wirklich nett, ihr euch bei marcus32@live.de