Dark Citadel Left Wing: Enclave of Strife Guide
★ NEW: Season 12 Guide and New Features
┗ Seasonal Content: New Uniques | Bloodied Sigils | Slaughterhouses
┗ Seasonal Mechanic: Killstreaks and Bloodied Items
★ NEW: Lord of Hatred Expansion Release Date
★ Check out our Vessel of Hatred expansion guide

Enclave of Strife is the first and left wing of the Dark Citadel in Diablo 4: Vessel of Hatred (D4). Read on to learn more about all the Enclave of Strife mechanics, a step by step walkthrough to the raid, how to beat Gorschak the raid boss, and information on their rewards here!
| Dark Citadel Guides | ||
|---|---|---|
| Enclave of Strife Guide | Dominion of Zagraal Guide | Labyrinth of Souls Guide |
Enclave of Strife Puzzle and Boss Mechanics
| Left Wing Puzzles and Mechanics |
|
|---|
Core Mechanic: Dispel the Sealing Wards with Ward Stones
The Enclave of Strife focuses on the use of Ward Stones and Sealing Wards to progress. In order to dispel a Sealing Ward, you have to pick up the Ward Stones and place them on the Sealing Wards in order to open doors.
Ward Stones can be dropped from Ward Guardians (Elites), which are high value targets that you can find within the area.
Removing Barriers
As you progress through the raid dungeon, you will encounter colored tiles with Barriers nearby, blocking your path to progession. Step on the tile that matches the color of the barrier in order to remove them and allow you to progress.
Charging a Soul Siphon
In order to charge a Soul Siphon, you have to stay inside its radius until the crystal fills up and is fully charged. Keep in mind that mobs will consistently spawn throughout the duration so try to stay on your toes.
Deposit Realm Shards to Activate Gateways
Whenever you find a Gateway, you will need to deposit Realm Shards on it in order to fully charge it up. Realm Shards are dropped by Realm Guardians (Elites) that spawn throughout the game so make sure to keep an eye out for them.
Using Soul Dampeners
Soul Dampeners are capable of reducing your Impending Doom buildup to prevent you from instantly dying. In order to use a Soul Dampener, you have to stay inside the radius until all your Impending Doom stacks are diminished, allowing you to progress further in the Dark Citadel.
Enclave of Strife Boss Fight
How to Beat Gorschak
| No. | Step by Step Guide to Defeating Gorschak |
|---|---|
| 1 | 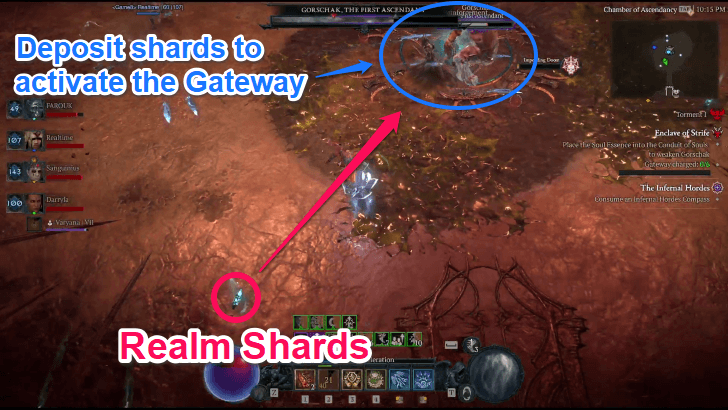 Once you reach the first health threshold of Gorschak, it will become immune until you deposit the Soul Essence at the Conduit of Souls. This consists of eliminating nearby mobs to drop Realm Shards and deposit them in the Gateway in the middle. Teleport in the Gateway to enter the Spirit Realm. Note: Make sure to have at least one person left behind who does not take the Gateway as that player will need to charge up the Gateway again in order to bring back your teammates. |
| 2 |  After entering the Spirit Realm, defeat the 2 Ward Guardians to drop the Ward Stones and dispel the 2 Sealing Wards. This will spawn an elite called Fragmented Soul of Gorschak who will drop the Soul Essence that you need to bring back. Once you have picked it up, wait for your teammates from the other side to activate the Gateway again and teleport inside. Note: Keep in mind that players who entered the Spirit Realm will be afflicted with Impending Doom so try to clear this area as fast as possible. |
| 3 | 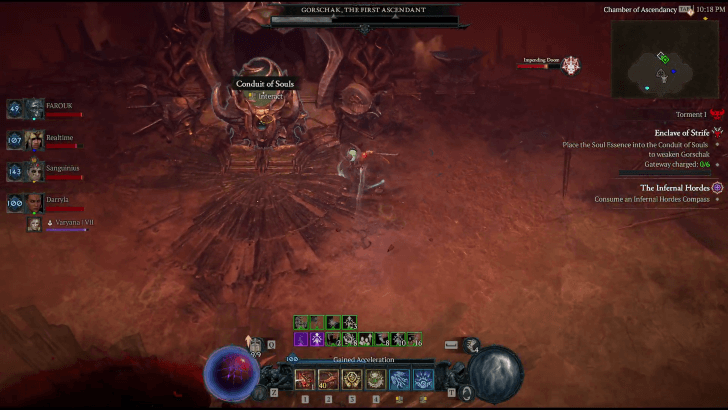 Deposit the Soul Essence on the Conduit of Souls to make Gorschak vulnerable, allowing you to damage its health. Repeat all these steps for every health threshold in order to defeat Gorschak and claim the rewards for the Dark Citadel. |
The main mechanic of Gorschak is whenever it turns immune, at least one in the party has to enter the Spirit Realm by charging up the Gateway and teleporting inside, dispel the Sealing Wards, pick up the Soul Essence and exit the Spirit Realm, and finally deposit the essence on the Conduit of Souls. This will make Gorschak vulnerable which allows you and your party to damage its health directly.
Enclave of Strife Walkthrough
Step by Step Guide to Enclave of Strife
| No. | Enclave of Strife Step by Step Guide |
|---|---|
| 1 | 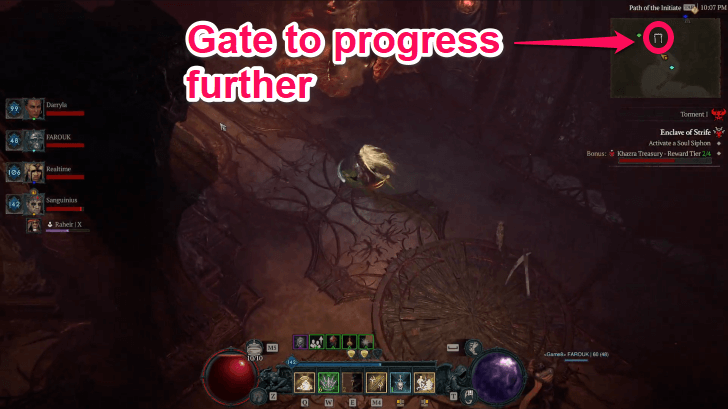 Zone: Path of the Initiate Progress through the area until you find the Gate icon on the your mini map. This will lead to an enclosed arena where you will encounter your first mechanic. |
| 2 | 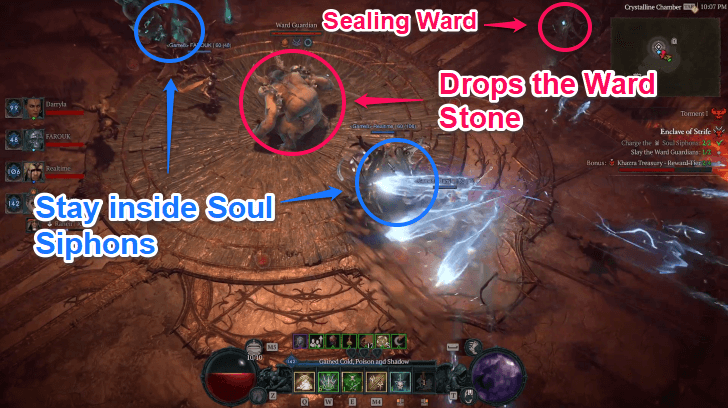 Zone: Crystalline Chamber In this area, fulfill the objectives by staying inside the Soul Siphons while dealing with the nearby mobs. Once the Soul Siphons are completed, Ward Guardians will spawn that will drop Ward Stones that you need to pickup and place on the Sealing Wards. |
| 3 | 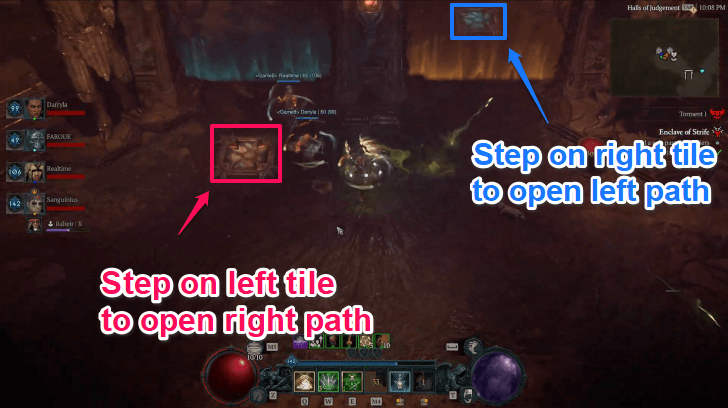 Zone: Halls of Judgement After opening the first door, keep progressing further until you find the next Gate icon on your mini map. Past that will be a Barrier that requires you to do the following: ┗ Step on the left tile to open the right path. ┗ Have another player enter the right path and step on the tile inside. ┗ Divide your party into two teams and have them proceed to the left and right paths. |
| 4 | Zone: Trail of Reflection Eliminate all enemies within the area before your Impending Doom meter fills up. Make sure to step on the tile where a Ward Guardian will spawn to have it come out, drop the Ward Stones and place it on the Sealing Wards. Note: The team that went to the other side will have to do the same thing before the door opens to the second part of this mechanic. |
| 4.5 | 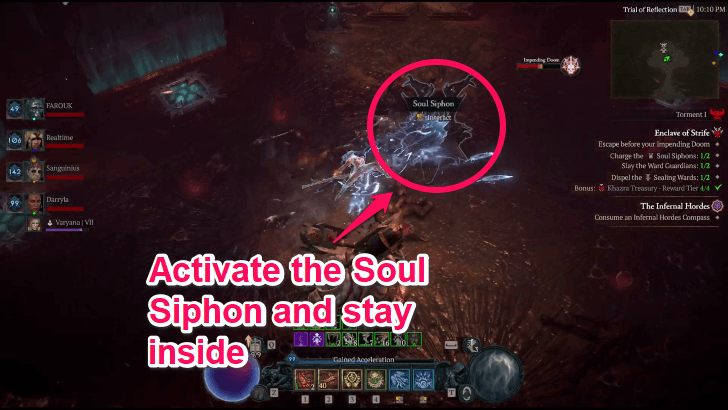 Zone: Trail of Reflection Activate the Soul Siphons and stay inside while eliminating all enemies within the area. Then, repeat the previous mechanic by stepping on the tile where a Ward Guardian will spawn to have it come out, drop the Ward Stones and place it on the Sealing Wards to progress further. |
| 5 | 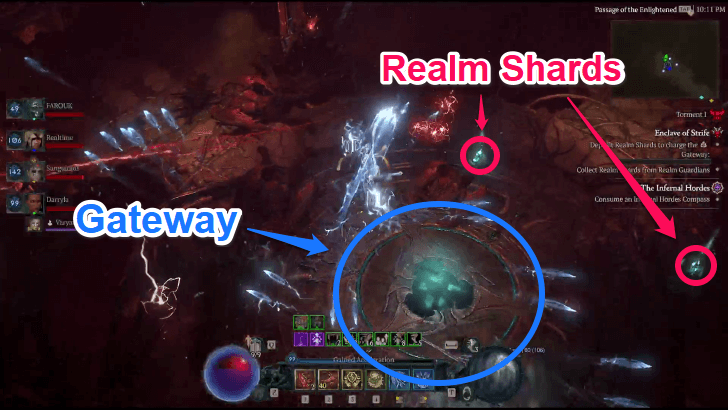 Zone: Passage of the Enlightened Progress further and open the Treasury Chest nearby. Keep moving forward until you find the Gateway icon on your mini map and eliminate the nearby enemies that spawn. Make sure to pick up the Realm Shards dropped by Realm Guardians and deposit them on the gateway to activate it and reach the next area. |
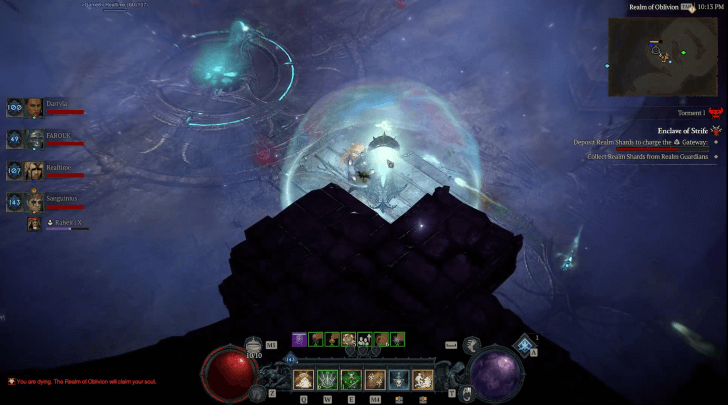
| 6 | 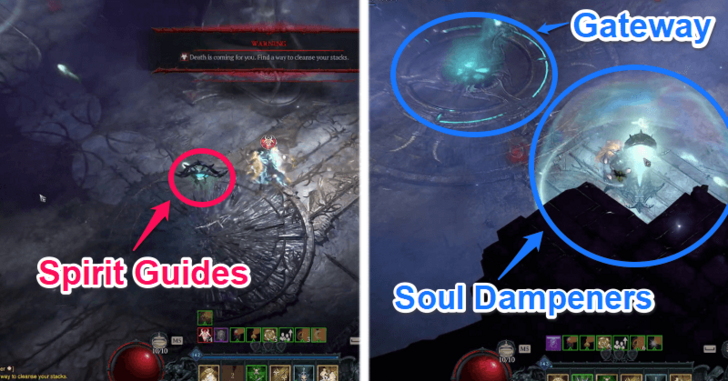 Zone: Realm of Oblivion Find the Gateway before the Impending Doom effect fills up. There will be spirit guides you can follow that leads to the Gateway so try to keep an eye out for them. Once you find the Gateway, defeat any Realm Guardians that spawn to deposit Realm Shards and activate the Gateway to the next area. Bonus: Stay inside one of the Soul Dampeners found throughout the area to help reduce and reset the Impending Doom buildup. |
| 7 | 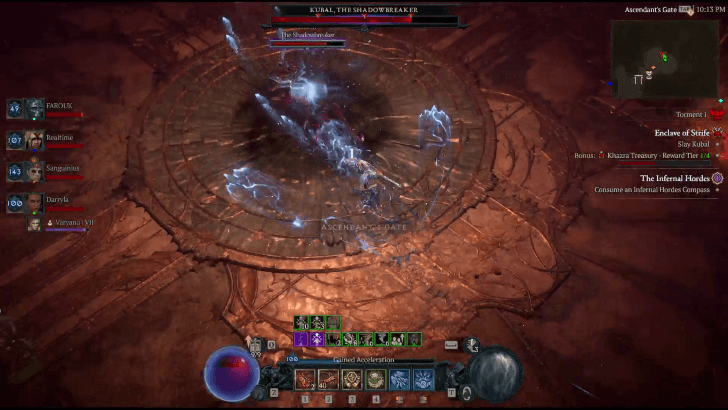 Zone: Warrior's Mark Progress through the area until you find the Gate icon on the your mini map. This will lead to an enclosed arena where you will encounter a short boss. Defeat Kubal, the Shadowbreaker in order to progress further and reach the last part of the Dark Citadel. Bonus: Before reaching the last area, keep a look out for Treasury Wardens found throughout the dungeon as eliminating them all will increase the rewards obtained at the end. |
| 8 | 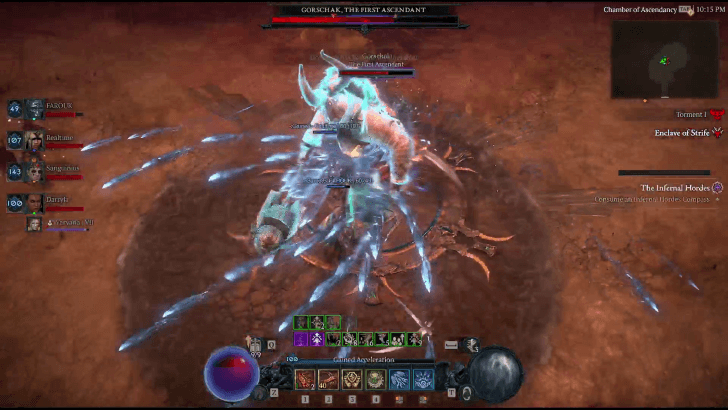 Zone: Chamber of Ascendancy This area will spawn the raid boss of the Enclave of Strife. Defeat Gorschak, the First Ascendant in order to complete the first wing of the Dark Citadel raid and claim your rewards. |
Enclave of Strife Rewards
Legendary Cache
You'll also get a Cache that can give you several legendary items, crafting materials, and Citadel coins.
Helm of Khazra Cosmetic
After clearing the Enclave of Strife, there's a high chance of obtaining the Helm of Khazra, a cosmetic you can consume to add a transmog option to your helm!
Diablo 4 (D4) Related Guides

Vessel of Hatred Guides
Spiritborn Guides
Mercenary Guides
Comment
Author

Dark Citadel Left Wing: Enclave of Strife Guide
Rankings
- We could not find the message board you were looking for.

Gaming News

![Monster Hunter Stories 3 Review [First Impressions] | Simply Rejuvenating](https://img.game8.co/4438641/2a31b7702bd70e78ec8efd24661dacda.jpeg/show)


![Monster Hunter Stories 3 Review [First Impressions] | Simply Rejuvenating](https://img.game8.co/4438641/2a31b7702bd70e78ec8efd24661dacda.jpeg/thumb)
Popular Games

Genshin Impact Walkthrough & Guides Wiki
Honkai: Star Rail Walkthrough & Guides Wiki
Umamusume: Pretty Derby Walkthrough & Guides Wiki
Pokemon Pokopia Walkthrough & Guides Wiki
Resident Evil Requiem (RE9) Walkthrough & Guides Wiki
Monster Hunter Wilds Walkthrough & Guides Wiki
Wuthering Waves Walkthrough & Guides Wiki
Arknights: Endfield Walkthrough & Guides Wiki
Pokemon FireRed and LeafGreen (FRLG) Walkthrough & Guides Wiki
Pokemon TCG Pocket (PTCGP) Strategies & Guides Wiki


Recommended Games
Diablo 4: Vessel of Hatred Walkthrough & Guides Wiki
Cyberpunk 2077: Ultimate Edition Walkthrough & Guides Wiki
Fire Emblem Heroes (FEH) Walkthrough & Guides Wiki
Yu-Gi-Oh! Master Duel Walkthrough & Guides Wiki
Super Smash Bros. Ultimate Walkthrough & Guides Wiki
Pokemon Brilliant Diamond and Shining Pearl (BDSP) Walkthrough & Guides Wiki
Elden Ring Shadow of the Erdtree Walkthrough & Guides Wiki
Monster Hunter World Walkthrough & Guides Wiki
The Legend of Zelda: Tears of the Kingdom Walkthrough & Guides Wiki
Persona 3 Reload Walkthrough & Guides Wiki


All rights reserved
©2022 BLIZZARD ENTERTAINMENT, INC. ALL RIGHTS RESERVED.
All trademarks referenced herein are the properties of their respective owners.
The copyrights of videos of games used in our content and other intellectual property rights belong to the provider of the game.
The contents we provide on this site were created personally by members of the Game8 editorial department.
We refuse the right to reuse or repost content taken without our permission such as data or images to other sites.