Duriel Location and Unique Drops
★ NEW: Season 12 Guide and New Features
┗ Seasonal Content: New Uniques | Bloodied Sigils | Slaughterhouses
┗ Seasonal Mechanic: Killstreaks and Bloodied Items
★ NEW: Lord of Hatred Expansion Release Date
★ Check out our Vessel of Hatred expansion guide
Duriel is an Uber Boss located in Kehjistan in Diablo 4 (D4). Read on to learn about How to Summon Duriel, Duriel's location, unique drops, rewards, and how to beat Duriel!
List of Contents
Duriel Location and How to Summon
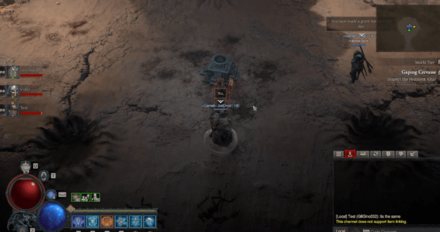
Gaping Crevasse, Kehjistan
The Interactive Map both shows the location of key points on the map, and doubles as a collectible checker.
- Click an icon on the right side to show all the pins of a specific type, or click the magnifying glass button to search for a specific pin by name.
- Click a pin on the map to see its name and description, and a relevant picture or video if available.
- From here, click Mark as Acquired to indicate that you've gotten a collectible already. This will change its icon on the map to show that it has been collected, and add 1 to that pin type's Counter.
- To undo this, click on the same pin and click Restore to unclaimed.
- To check how many pins you have marked so far, check the Counter in the bottom left, and click the icon that looks like a checklist to see counters for all pin types.
- If the collected pins start to get in the way, you can hide them all by clicking the green Show Pins button on the left side.
| Icon | How to Use |
|---|---|
 | Show Names This button reveals the Name of every icon currently shown. |
 | Show Pins This button will toggle between showing and hiding all the pins which you have already marked as acquired. |
 | Fullscreen This button will change the map display to fill the screen. |
 | Search Mode Toggle This button will display a searchbar which you can use to search for an individual pin by its name. |
 | Icon Mode Toggle In Search Mode, this button will toggle you back to Icon Mode, removing the search bar and displaying the icons again. |
 | All Pins This button is shown along with the Icons on the right when there are over 6 types of pins. Click it for a full selection of all available pin types. |
 | Counter Tracks the number of pins you have of a certain type. The pin type shown is set to the page and currently cannot be changed; however, all pin type counters can be viewed by clicking the checklist icon on the right side. |
| View All Counters This icon is found on the right side of the Counter. When a map has more than one pin type, click this icon to see Counters for all pin types. | |
| Zoom In / Zoom Out This icon is found on the top left side of the map. You can press these buttons, or use your scroll wheel while hovering, to Zoom In and Out of the interactive map. |
Duriel can only be found after reaching any Torment difficulty. Head inside the Gaping Crevasse dungeon, located south of Gea Kul in Kehjistan to fight Duriel. Like all other Uber Bosses, it is available on either the Eternal Realm or the Seasonal Realm.
Other Lair Boss Locations
| List of Lair Boss Locations | |
|---|---|
| Dungeon | Boss |
| Ancient's Seat | Lord Zir |
| Malignant Burrow | Echo of Varshan |
| Hall of the Penitent | Grigoire |
| Glacial Fissure | The Beast in the Ice |
| Gaping Crevasse | Duriel |
| Hanged Man's Hall | Andariel |
| Fields of Judgement | Urivar |
| Harbinger's Den | Harbinger of Hatred |
| Palace of the Deceiver | Belial |
| The Broiler | The Butcher |
How to Summon Duriel
Simply interact with the Summoning Altar to begin the fight against Duriel. As of Season 8, all Lair Bosses are now free to summon. However, to gain Duriel's rewards, you must open the Duriel's Hoard using 3 Shard of Agony.
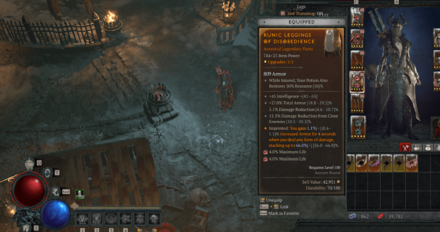
Duriel Unique Drops and Rewards
Duriel Unique Item Drops
| Class | Unique |
|---|---|
| All Classes |
・Blood-Mad Idol ・Blood-Mad Idol ・ +51- 65 All Stats ・+8.3-10% Attack Speed ・+7-8% Critical Strike Chance ・+17.5-31.5% Damage Reduction while Injured ・Shattered Vow ・Shattered Vow ・ + 1,200 Maximum Life ・+ 29.6% Attack Speed while Berserking ・+ 444.4% Damage Over Time ・Lucky Hit: Up to a 44% Chance to Become Berserking ・Shroud of False Death ・Shroud of False Death ・ + 160 All Stats ・+ 800 Maximum Life ・+ 333% Damage on Next Attack After Entering Stealth ・11.1% Resource Generation ・Heir of Perdition ・Heir of Perdition ・ + 20% Critical Strike Chance ・+ 20% Lucky Hit Chance ・20% Movement Speed ・+ 2 to Core Skills ・Shard of Verathiel ・Shard of Verathiel ・ + 5 - 13 Maximum Resource ・+ 5 - 13 Maximum Resource ・+ 16 - 25% Basic Attack Speed ・- ・Endurant Faith ・Endurant Faith ・ + 28 - 42 All Stats ・+ 638 - 873 Maximum Life ・+ 6 - 8% Cooldown Reduction ・+ 16 - 25% Healing Received ・Tyrael’s Might ・Tyrael’s Might ・ + 16.5% Movement Speed ・+ 7.5% Maximum Resistance to All Elements ・+ 60% Resistance to All Elements ・20% Damage Reduction "Thus Tyrael, a perfect aspect of Justice, came to be. None were more vehement against the forces of hell. All demonic entities learned to shudder at Justice's might." - The Books of Jarl, Volume I ・Banished Lord's Talisman ・Banished Lord's Talisman ・ 8 - 10% Maximum Life ・+ 7 - 9% Attack Speed ・+ 50 - 60% Overpower Damage ・+ 1 - 2 to Core Skills "His name has been lost to history, but to have been exiled from a land as cursed as Hawezar, his deeds must have been truly depraved." - Scholar's Notes ・Soulbrand ・Soulbrand ・ + 638 - 873 Maximum Life ・+ 1 - 2 Potion Capacity ・+ 26.5 - 40% Barrier Generation ・8 - 12.5% Damage Reduction while Healthy "To create such an artifact would require an impossible mastery over alchemy, transmutation and the subtle magics of the soul. By all rights, it should not exist, yet it does." - Artisan Callas ・X'Fal's Corroded Signet ・X'Fal's Corroded Signet ・ + 47 - 65 All Stats ・+ 5 - 6% Lucky Hit Chance ・+ 46.5 - 60% Vulnerable Damage ・+ 72.5 - 95% Damage Over Time Skulking in the shadows of the Realm of Destruction, the Scarred Baron plots the downfall of the mortal who banished him there. ・Tibault's Will ・Tibault's Will ・ + 28 - 42 All Stats ・+ 638 - 873 Maximum Life ・+ 5 - 13 Maximum Resource ・+ 10.5 - 15% Damage Reduction while Unstoppable "The younger apprentice thinks wearing heavy plate in the swamps is foolish. They fail to understand that our armor is our legacy, and without it we are nothing." - Crusader Pembroke ・Flickerstep ・Flickerstep ・ + 12.5 - 18% Movement Speed ・+ 219 - 300% Ultimate Damage ・+ 46.5 - 60% Lightning Resistance ・+ 8 - 12.5% Damage Reduction from Close Enemies "Considered as a failure by their creator, it wasn't until the assassination of an "untouchable" Caldeum noble that these boots' true power was understood." - Barrett's Boof of Implements ・Godslayer Crown ・Godslayer Crown ・ +28-42 All Stats ・+ 638 - 873 Maximum Life ・+ 50 - 67.3 Damage to Elites ・6 - 8% Cooldown Reduction "The Sahptev faithful believe in a thousand and one gods. If it takes me as many lifetimes, I will find and kill them all." - Gaspar Stilbian, Veradani Outcast ・Tassets of the Dawning Sky ・Tassets of the Dawning Sky ・ + 28 - 42 All Stats ・+ 12.5 - 18% Movement Speed ・+ 1.5 - 2.5% Maximum Resistance to All Elements ・+ 26 - 35% Resistance to All Elements "May the Light of Father Inarius shine down upon all weary travelers of this holy land. Turn your face toward his radiance and find your strength renewed." - Statue Inscription ・Ahavarion Spear of Lycander ・Ahavarion Spear of Lycander ・ + 18% All Stats ・+ 33% Movement Speed ・+ 66% Resistance to All Elements ・Lucky Hit: Up to a 5.0% Chance to restore +66% Primary Resource The angel Lycander left us a portion of her power in this spear. It is all the proof I need that she watches over us still. - Oracle Argoysni ・The Grandfather ・The Grandfather ・ + 220 All Stats ・+ 1,800 Maximum Life ・+ 20 Maximum Resource ・+ 300% Damage An unbroken lineage of unwavering strength. ・Temerity ・Temerity ・ + 5.5 - 7.5 Maximum Life ・+ 16 - 25% Healing Received ・7 - 9% Damage Reduction while Healthy ・Lucky Hit: Up to a 5% Chance to Heal 1,058 - 1,511 Life "The revelation that master tailor Callas was in fact a witch only served to further fuel the desire for her uniquely enchanted legwraps." - Barrett's Book of Implements ・Ring of Starless Skies ・Ring of Starless Skies ・ + 17.5% Attack Speed ・+ 12.5% Critical Strike Chance ・+ 12.5% Lucky Hit Chance ・+ 2 to Core Skills "Yours is the power to pluck the stars from the heavens with the ease of a child gathering fruit from the bough." - Unknown ・Razorplate ・Razorplate ・ + 3,447 - 4,740 Thorns ・+ 3,447 - 4,740 Thorns ・+ 3,447 - 4,740 Thorns ・+ 3,447 - 4,740 Thorns Crafted by the cannibal Armoda, each piece of this interlocking armor has been sharpened into a knife's edge. Even a century after death, the plate remained on her corpse, unable to be removed safely. ・Penitent Greaves ・Penitent Greaves ・ + 16 - 25% Movement Speed ・+ 4 - 6% Critical Strike Chance Against Chilled Enemies ・+ 41.5 - 55% Chill Slow Potency ・+ 46.5 - 60% Cold Resistance Remorseful devotees of the Cathedral of Light must undertake a grueling pilgrimage, journeying across the frigid glacier known as the Serac Rapture. Only then may their gravest sins be forgiven. ・Mother's Embrace ・Mother's Embrace ・ + 47 - 65 All Stats ・+ 10.5 - 15% Attack Speed ・+ 6 - 8% Critical Strike Chance ・+ 6 - 8% Lucky Hit Chance "Every tome, every scroll, every book in this temple produces the same answer. The only being willing to stand against the Eternal Conflict, against the Prime Evils, was Lilith." - Elias ・Melted Heart of Selig ・Melted Heart of Selig ・ + 15% Lucky Hit Chance ・+ 25% Movement Speed ・15% Damage Reduction while Healthy ・15% Resource Generation "Do not allow your passions to become obsessions. Fuel the fire that burns within you, but it is madness to allow yourself to become ash to please an uncaring universe." - Last words of Master Selig ・Harlequin Crest ・Harlequin Crest ・ + 800 Maximum Life ・+ 18 Maximum Resource ・+ 2,500 Armor ・20% Cooldown Reduction "This headress was once worn by an assassin disguised as a court mage. Her treachery was unveiled, but not before she used its magic to curse the king's entire lineage." - The Fall of House Aston ・Frostburn ・Frostburn ・ + 10.5 - 15% Attack Speed ・+ 142.5 - 182.1% Fire and Cold Damage ・Lucky Hit: Up to a 40% Chance to Deal (2,000 - 4,000) Fire Damage ・Lucky Hit: Up to a 40% Chance to Deal (2,000 - 4,000) Cold Damage A touch so frigid it stops the heart and chills the very soul. ・Fists of Fate ・Fists of Fate ・ + 0.1 - 8.7% Attack Speed ・+ 0.1 - 8.7% Critical Strike Chance ・+ 1.0 - 51.8% Lucky Hit Chance ・Lucky Hit: Up to a +1.0 - 51.8% Chance to Apply a Random Crowd Control Effect for 2 Seconds "Will you let fear cheat you, or will you risk everything to find understanding? After all, death is simply the coin with which we purchase life." - Zurke ・Doombringer ・Doombringer ・ + 160 All Stats ・35% Maximum Life ・10% Damage Reduction ・Lucky Hit: Up to a 5% chance to heal 2,687 Life. Whenever this ancient sword has reappeared throughout history, it portends a time of great strife, as well as a devastating loss of life. ・Andariel's Visage ・Andariel's Visage ・ + 110 All Stats ・+ 437 Life on Hit ・+ 3% Attack Speed ・+ 10% Maximum Poison Resistance The horrific whispers of the Maiden of Anguish flicker through your mind, pushing you ever closer to madness... |
| Barbarian |
・Tuskhelm of Joritz the Mighty ・Tuskhelm of Joritz the Mighty ・ + 638 - 873 Maximum Life ・+ 6 - 8% Attack Speed while Berserking ・+ 103.5 - 135% Damage while Berserking ・+ 10.5 - 15% Movement Speed while Berserking As he fought side by side with Raekor to liberate the labor camp, Joritz claimed this dented helm from a fallen foe. As his legend grew, its unique shape became synonymous with his great deeds. ・Azurewrath ・Azurewrath ・ + 47 - 65 All Stats ・+ 7 - 9% Attack Speed ・+ 46.5 - 60% Cold Resistance ・Lucky Hit: Up to a 40% Chance to Deal 4,250 - 6,500 Cold Damage The ancient runeblade of the angel Izual, Azurewrath was miraculously spared the corruption that consumed its master. ・Ramaladni's Magnum Opus ・Ramaladni's Magnum Opus ・ + 76 - 90 Strength ・+ 12 - 20 Maximum Resource ・+ 40 - 50% Critical Strike Damage ・+ 50 - 60% Overpower Damage "Without him the wine is less sweet, the hearth less warm, and our blades less keen. Our blood brother is gone, but Bul-Kathos willing, we will meet again one day." - Sorrowsong for Ramaladni ・Hellhammer ・Hellhammer ・ + 252 - 360 Strength ・+ 52 - 70% to Upheaval Size ・+ 4 - 6 to Upheaval ・+ 2 - 4 to Wallop The demon prince Ikonoth slew hundreds of the Heavenly Host with this infernal hammer before falling to none other than the Archangel Imperius himself. ・Gohr's Devastating Grips ・Gohr's Devastating Grips ・ + 10.5 - 15% Attack Speed ・+ 8 - 12.5% Movement Speed ・+ 13.5 - 22.5% Critical Strike Chance Against Close Enemies ・+ 3 - 5 to Whirlwind "The brutish construction of these gloves belies the strength they bestow. Gohr was clearly no craftsman, but it would be foolish to ignore the triumph of his work." - Barrett's Book of Implements ・Fields of Crimson ・Fields of Crimson ・ + 198 - 270 Strength ・+ 406 - 550% Damage to Bleeding Enemies ・+ 52 - 70% Enhanced Rupture Explosion Size ・16 - 25% Rupture Cooldown Reduction "We've been fighting these flesh-eaters for so long, been soaked in so much blood, that after a while it's difficult to tell what side you're truly on." - Daelyr, Crane Tribe warrior |
| Rogue |
・Death's Pavane ・Death's Pavane ・ +9.0-11.0 Critical Strike Chance ・+16.0-25.0 Movement Speed ・+2-3 Dance of Knives ・+60.0-85.0 Agility Damage ・Shroud of Khanduras ・Shroud of Khanduras ・ Evade Grants +16 - 25% 1.5 Movement Speed for 1.5 seconds ・+ 57.0 - 75.0% Non-Physical Damage ・+ 46.5 - 60.0% Shadow Resistance ・+ 2 - 3 to Dark Shroud ・Scoundrel's Leathers ・Scoundrel's Leathers ・ + 957 - 1,259 Maximum Life ・+ 26 - 35% Movement Speed while the Inner Sight Gauge is Full ・+ 31.5 - 45% Inner Sight Duration ・+ 10.5 - 15% Damage Reduction from Enemies Affected by Trap Skills "Rumor has it he lost them in a game of Skull & Anchor, but the boss is a devil with the dice. I think he wanted to give the poor sod something to keep him warm without wounding his pride" - Elstir ・Word of Hakan ・Word of Hakan ・ + 219 - 300% Ultimate Damage ・+ X% Chance Double Damage for Rain of Arrows ・29 - 42.5% Rain of Arrows Cooldown Reduction ・+ 4 - 6 to Imbuement Skills "Let the great gates of Caldeum be sealed. Let its proud walls stand fiercely defended. The rest of Kehjistan may suffer this plague, but my city, and my people, will not." - Proclamation of Hakan II ・Cowl of the Nameless ・Cowl of the Nameless ・ + 41.5 - 55% Crowd Control Duration ・+ 1 - 2 to Rapid Gambits ・+ 1 - 2 to Unstable Elixirs ・+ 1 - 2 to Trick Attacks "He is banished from the Guild, his name stricken from the Book. His punishment is to never have been." - Excerpt from a burned parchment. |
| Druid |
・Rotting Lightbringer ・Rotting Lightbringer ・ +18-22% Willpower ・+406-550% Poison Damage ・+26-35% Chance for Pulverize to Hit Twice ・+26-35% Resource Cost Reduction ・Stone of Vehemen ・Stone of Vehemen ・ + 135 Willpower ・+ 125.0% Critical Strike Damage ・+ 30.0% Chance for Stone Burst Projectiles to Cast Twice ・+ 4 to Stone Burst ・Dolmen Stone ・Dolmen Stone ・ + 21 - 30% Movement Speed while Hurricane is Active ・16 - 25% Nature Magic Cooldown Reduction ・+ 3 - 4 to Wrath Skills ・+ 2 - 3 to Crushing Earth As the hateful mob beat on his door, he gripped the pulsing shard tightly and screamed for calm. When he opened his eyes, all that greeted him was silence and the blood-smeared ruins of his cottage. ・Tempest Roar ・Tempest Roar ・ + 76 - 90 Willpower ・+ 5 - 13 Maximum Resource ・+ 32 - 40% Lightning Resistance ・+ 1 - 2 Wild Impulses "Listen, child, to the music of the storm. It has its own rhythm. Its own melody. Hear how beautifully it sings, and perhaps one day you will be able to join in its harmony." – Airidah ・Storm's Companion ・Storm's Companion ・ + 16 - 25% Wolves Attack Speed ・+ 62.5 - 85% Lucky Hit Chance for the Pack Leader Spirit Boon ・13 - 17.5% Damage Reduction from Close Enemies ・+ 4 - 5 to Wolves "The storm's rage is my own, brother. I call, and the skies roar in reply." - Vasily, to Bul-Kathos ・Insatiable Fury ・Insatiable Fury ・ 8 - 12.5% Maximum Life ・+ 108.5 - 140% Werebear Overpower Damage ・+ 2.5 - 4% to Ursine Strength's Bonuses ・+ 3 -4 to Iron Fur When the Days of Ash began, the great druid Nafain reminded his disciples that nothing, not even the loss of their humanity, was too great a sacrifice to protect Túr Dúlra from Astaroth's flames. ・Hunter's Zenith ・Hunter's Zenith ・ + 76 - 90 Willpower ・+ 1 - 2 to Quickshift ・+ 1 - 2 to Heightened Senses ・+ 3 - 5 to Predatory Instinct "By fang, claw, spear, or sword - send the bastards back to the flames from which they crawled! Soak the peat with their blood! For Fiacla-Géar! For Scosglen!" - Nafain, during the Days of Ash ・Greatstaff of the Crone ・Greatstaff of the Crone ・ + X% Chance for Stormstrike to Hit Twice ・+ 207 - 270 Damage to Close Enemies ・Storm Strike Chains to +2 Targets ・+ 2 - 4 to Basic Skills "She has existed in Scosglen since before Fiacla-Géar walked the land. Her purpose is a mystery to us all. However, approach her with deference; she may grant you her counsel." - Airidah, to Donan |
| Necromancer |
・The Hand of Naz ・The Hand of Naz ・ +77.5-100% Skeletal Mage Damage ・+10.5-15% Attack Speed ・+424-457 Maximum Life ・+2-4 Skeletal Mage Mastery ・Ebonpiercer ・Ebonpiercer ・ + 16 - 25% Chance for Blight Projectiles to Cast Twice ・+ 2 - 3 to Blight ・+ 3 - 5 to Reaper's Pursuit ・+ 1 - 2 to Gloom This talisman was the life's work of Deathspeaker Jurdann. Following his premature demise, Jurdann's successor wore the amulet in tribute as they trialed against the Temple of the Deathspeaker. ・Mutilator Plate ・Mutilator Plate ・ 13 - 17.5% Maximum Life ・+ X% Chance for Blood Lance to Deal Double Damage ・13 - 17.5% Damage Reduction from Enemies Affected by Blood Skills ・+ 2 - 4 to Blood Lance "The Cathedral of Light's earliest attempts at crafting their penitent armor was to infuse the plate with painful blood magic, before such acts were deemed heretical." - Barrett's Book of Implements ・Ring of the Sacrilegious Soul ・Ring of the Sacrilegious Soul ・ + 5 - 6 Lucky Hit Chance ・+ 12.5 - 18% Movement Speed ・+ 1 - 2 to Corpse Skills ・+ 2 - 3 to Grim Harvest The mere proximity of a practitioner of such dark arts can rouse the dead and disturb those souls who have earned their rest. ・Blood Moon Breeches ・Blood Moon Breeches ・ + 638 - 873 Maximum Life ・+ 88 - 115% Overpower Damage ・+ 26 - 35% Curse Duration ・+ 2 - 4 Curse Skills A naturally occuring curiosity, the blood moon persists as a sign of woe for the most superstitious Zakarum faithful, Children born under it are often considered cursed and cast out, lest it spread. ・Howl from Below ・Howl from Below ・ + 8 - 12.5% Lucky Hit Chance ・+ 26 - 35% Corpse Attack Speed ・Corpse Explosion Fears and Slows for 0.4 - 0.6 Seconds. ・+ 2 - 4 to Corpse Explosion "Can you not hear it? That endless scream from the cold earth beneath your feet!? They are down there, trapped, blind with rage! Waiting to drag us down into the sod!" - Ravings of Madman Gustav ・Deathspeaker's Pendant ・Deathspeaker's Pendant ・ + 7 - 9% Attack Speed ・+ 1 Essence per Enemy Drained by Blood Surge ・+ 3 - 5 to Blood Surge ・+ 2 -3 to Coalesced Blood Once a sanctum for Rathma's studies, the Temple of the Deathspeaker became a proving grounds for potential leaders of his priesthood. Its halls are filled with the corpses of those who failed. ・Blood Artisan's Cuirass ・Blood Artisan's Cuirass ・ + 957 - 1,259 Maximum Life ・+ 103.5 - 135% Damage for 4 Seconds After Picking Up a Blood Orb ・Blood Orbs Restore 8 - 12 Essence ・+ 2 - 3 to Bone Spirit "The infamous Necromancer Gaza-Thul's mastery over blood magic was indisputable. Many suspect that upon his death, his skin was used to fashion this eldritch armor." - Barrett's Book of Implements ・Black River ・Black River ・ + 36.5 - 50% Chance for Corpse Explosion to Deal Double Damage ・+ 1 - 3 to Corpse Skills ・+ 1 - 2 to Hewed Flesh ・+ 1 - 2 to Fueled by Death "The scrolls describe a river of tar that separated the living from the land of the dead. Any unfortunate soul who tried to cross would be dragged down into oblivion." - Notes of Scholar Kamien |
| Sorcerer |
・Galvanic Azurite ・Galvanic Azurite ・ +5.2-6% Critical Strike Chance ・+57-75% Lightning damage ・8.1-8.8% Cooldown reduction ・+2-3 Ranks to Elemental Synergies ・Ophidian Iris ・Ophidian Iris ・ +11.5-15.7% Intelligence ・+10.5-15 Attack Speed ・+77.5-100% Pyromancy Damage ・+1-2 to Primordial Binding ・Hail of Verglas ・Hail of Verglas ・ + 4-6 Ranks in Ice Shards ・+ 10.5-15% Intelligence ・+ 10.5-15% Attack Speed ・+ 8.1 - 8.8% Maximum Life ・Vox Omnium ・Vox Omnium ・ + 198 - 270 Intelligence ・+ 26 - 35% Core Attack Speed ・+ 114- 150% Non-Physical Damage ・+ 2 - 4 to Basic Skills ・Fractured Winterglass ・Fractured Winterglass ・ + 57 - 75% Non-Physical Damage ・+ 13 - 17.5% Chance for Frozen Orb Projectiles to Cast Twice ・+ 25% Resistance to All Elements ・+ 3 - 5 to Conjuration Mastery Winterglass refracts light and also manipulates mana - forming complex arrays of spells and enchantments. These distinct characteristics possess great power, yet the outcomes remain unpredictable. ・Starfall Coronet ・Starfall Coronet ・ + 126 - 180 Intelligence ・+ 18.5 - 27.5% Meteor Size ・6 - 8% Cooldown Reduction ・+ 4 - 6 to Meteor "The elders say they saw a star falling from the sky many years ago. A sign from the heavens that the end times were nigh. A rallying cry to take up arms and protect Sanctuary!" - Crusader Hamilton ・Tal Rasha’s Iridescent Loop ・Tal Rasha’s Iridescent Loop ・ + 6 - 8% Lucky Hit Chance ・+ 57 - 75% Non-Physical Damage ・6 - 8% Cooldown Reduction ・+ 2 - 3 to Potent Warding "Fool said he dug it out of the sandsd near Lut Gholein with a few other 'worthless trinkets'. I hid my delight at receiving such a treasure in exchange for a meager handful of coins." - Rakhaan ・Blue Rose ・Blue Rose ・ + 9 - 11 Critical Strike Chance ・+ 129.5 - 170% Cold Damage ・+ 251 - 350% Ice Spike Damage ・+ 26 - 35% Chance for Ice Spikes to Explode Twice "Her lover's spirit faded, and in her sorrow she wept frozen tears. Where they fell, roses of the purest ice would blossom each winter." - Greenslade's Tales, Chapter 7: "The Myth of Irina Coldheart" ・The Oculus ・The Oculus ・ + 126 - 180 Intelligence ・+ 470 - 650% Teleport Damage ・+ X% Chance for Teleport to Deal Double Damage. ・+ 8 - 12 to Teleport "The rhythm of the orb, which had pulsed steadily for five centuries, quickened as its owner took his final ragged breaths. It were as if some intelligence within reveled in the sight." - Master Eos ・Staff of Endless Rage ・Staff of Endless Rage ・ 252 - 360 Intelligence ・+ 37 - 55% Fireball Projectile Speed ・+ 57 - 75% Chance for Fireball Projectiles to Cast Twice ・+ 4 - 6 to Fireball "Leaving even blackened bones for your kin to mourn is too good an end for you." - Josiah ・Raiment of the Infinite ・Raiment of the Infinite ・ + 99 - 135 Intelligence ・+ 1 - 2 to Glass Cannon ・+ 1 - 2 to Elemental Attunement ・+ 1 - 2 to Shocking Impact The power you have is never enough. ・Flamescar ・Flamescar ・ + 153 - 225 Intelligence ・+ 8 - 12.5% Lucky Hit Chance ・+ X% Chance for Incinerate to Deal Double Damage ・+ 4 - 6 to Incinerate The burn may heal, but the pain is eternal. ・Esu's Heirloom ・Esu's Heirloom ・ + 12.5 - 18% Movement Speed ・+ 8 - 12.5% Movement Speed for 7 Seconds After Killing an Elite ・+ 57 - 75% Critical Strike Damage ・+ 8 - 10% Resistance to All Elements "While scholars have proven these boots were not created by Esu herself, it is noteworthy that they have been passed down since the formation of the Mage Clans." - Barrett's Book of Implements ・Esadora's Overflowing Cameo ・Esadora's Overflowing Cameo ・ + 10.5 - 15% Intelligence ・+ 365 - 500% Crackling Energy Damage ・+ 16 - 25% Movement Speed for 4 Seconds After Picking Up Crackling Energy ・1.4 - 2% Damage Reduction per Crackling Energy Charge The only thing more potent than Esadora's magic was her endless hatred of humanity. As she lay dying, the pale amulet around her neck drank in both. |
| Spiritborn |
・Sunbird’s Gorget ・Sunbird’s Gorget ・ + 16-25% Movement Speed ・+ 2-3 Ranks of Potent ・+ 2-3 Ranks of Furnace ・+ Ranks of Acceleration ・Rod of Kepeleke ・Rod of Kepeleke ・ + 12 - 24 Maximum Resource ・+ 80.0 - 100.0% Critical Strike Damage ・+ 26.0 - 35.0% Chance for Core Skills to Hit Twice ・+ 5 to Velocity “Beyond the world disc doth lie the keeper serpent Kepeleke. Ceaseless the serpent grows, and thus must ever consume his own tail, lest the world be overtaken.” - Lintel XII ・Sepazontec ・Sepazontec ・ + 214 - 242 Dexterity ・+ 4.0 - 6.0% Basic Lucky Hit Chance ・+ 26.0 - 35.0% Chance for Basic Skills to Deal Double Damage ・+ 6 to Follow Through To the silent skies, the hunter Etzlek raised his staff and then smote the numen. “Release her!” came his cries as he desecrated the hallowed ground. On the third strike, the spirit answered... ・Nesekem, The Herald ・Nesekem, The Herald ・ + 200 All Stats ・+ 1200 Maximum Life ・+ 250% Critical Strike Damage ・+ 450% Overpower Damage In the days when Ajaw Y'ishich ruled Nahantu, the phoenix constellation's crown fell in burning glory. From it was forged a blade that withered valor, heralding an age of despair. ・Harmony of Ebewaka ・Harmony of Ebewaka ・ + 47 - 65 All Stats ・+ 8.0 - 12.5% Movement Speed ・8.0 - 10.0% Damage Reduction ・+ 4 to Velocity Only Ebewaka has walked amid a dozen Guardians. In death, they waged war for his spirit, yet none prevailed. Thus, the Guardians shared dominion, granting Ebewaka to roam freely amid all their realms. ・Ring of the Midnight Sun ・Ring of the Midnight Sun ・ + 107 - 121 Dexterity ・+ 40.0 - 50.0% Critical Strike Damage ・8.1 - 8.8% Cooldown Reduction ・+ 4 to Mirage “At midnight laughed the second brother, Nebahayomo, spirit of cunning. Trickery is his blessing, suffering is his prayer. Honor him and shrewdness shall be your reward.” - The Niti Se, Verse V ・Ring of Writhing Moon ・Ring of Writhing Moon ・ + 7.0 - 8.0% Critical Strike Chance ・+ 17.5 - 23.0% Movement Speed ・Lucky Hit: Up to a 43.3 - 47.2% Chance to Make Enemies Vulnerable for 2 Seconds ・+ 4 to Unrestrained Power “Within this corpse-bound carapace we writhe. Chaotic winds converge to churn your bones. Our beat and breath a ceaseless war to break. The wretched cyclone black beyond the bounds.” - Balazan's Dream |
| Paladin |
・Gate of the Red Dawn ・Gate of the Red Dawn ・ +7.8-12.0% Strength ・+7.8-12.0% Damage Reduction ・8.1-8.8% Cooldown Reduction ・+1-2 Juggernaut Skills ・Judgement of Auriel ・Judgement of Auriel ・ +47-65 All Stats ・+489-526 Maximum Life ・8.1-8.8% Cooldown Reduction ・+2-3 to Righteousness ・Herald's Morningstar ・Herald's Morningstar ・ +89-99 Strength ・+244-272 Maximum Life ・+46.5-60.0% Chance for Blessed Hammer to Deal Double Damage. ・+2-3 Blessed Hammer ・Herald of Zakarum ・Herald of Zakarum ・ +244-272 Maximum Life ・+251-350 Armor ・+29.0-42.5% Chance for Retribution to Deal Double Damage ・+2-3 Core Skills ・Argent Veil ・Argent Veil ・ +89-99 Strength ・+244-272 Maximum Life ・+35.0-45.0% Vulnerable Damage ・+1-3 Core Skills ・Judicant's Glaivehelm ・Judicant's Glaivehelm ・ +15-21 Maximum Resource ・+9.0-11.0% Lucky Hit Chance ・+29.0-42.5% Chance for Judgement to Deal Double Damage ・+1-2 Judicator Skills ・Griswold's Opus ・Griswold's Opus ・ +34-36 Strength ・+15-19 Maximum Life ・+1-2 Break the Line ・+1-2 Heavyweight |
All Boss Ladder and Uber Boss Loot Tables
Mythic Unique Drops
 Andariel's Visage
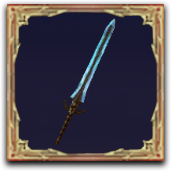 Doombringer
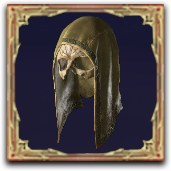 Harlequin Crest
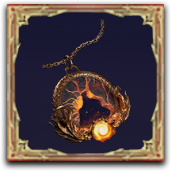 Melted Heart of Selig
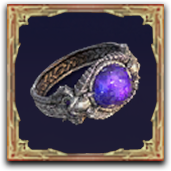 Ring of Starless Skies
 The Grandfather
 Ahavarion Spear of Lycander
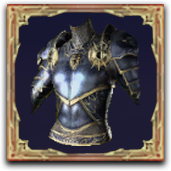 Tyrael’s Might
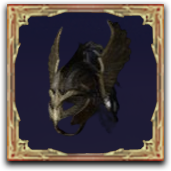 Heir of Perdition
 Shroud of False Death
 Shattered Vow
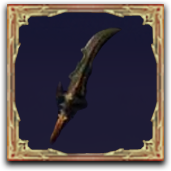 Nesekem, The Herald
Duriel's Hoard has a chance to drop Mythic Uniques by default. Additionally, opening Duriel's Hoard also has a chance to drop multiple Mythic Uniques!
If you are interested in target farming Mythic Unique Items, repeatedly defeating any of the Lair Bosses is an effective strategy.
Smouldering Brimstone Mount
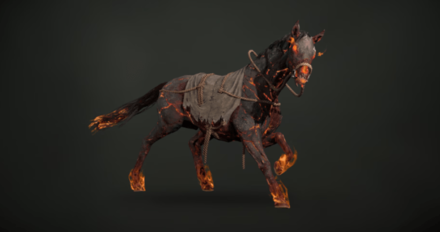
If you are able to defeat Duriel, there is also a chance that he drops the Smoldering Brimstone Mount.
How to Unlock Mounts and List of Mounts
How to Beat Duriel
| Duriel Tips and Strategies |
|---|
|
|
Optimize Your Build
It is advisable to optimize your build and gear for maximum survivability rather than focusing on your DPS. Given that Duriel is level 100, it is possible to die in one shot if your armor and resistances are not high enough. Try to level up and upgrade your equipment as much as possible before taking on this fight.
Kill the Ads as Soon as They Spawn
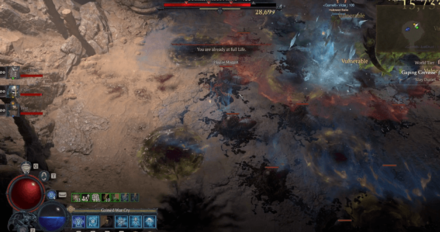
At the start of the fight, Duriel will not immediately spawn. Instead, he will summon two adds that emerge from the hole on the ground. These adds will continuously fire poison projectiles that can deal massive damage. Try to avoid these projectiles as much as possible and focus on defeating the adds to make Duriel spawn.
Stay Away From the Holes
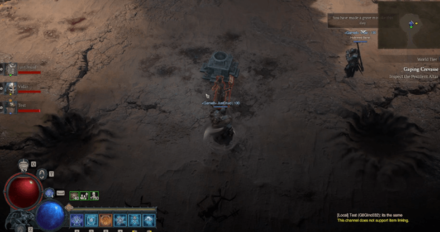
There are multiple holes in the area where you will fight Duriel. These holes are where the adds will emerge when Duriel summons them before they attack you with their poison attacks. Maintain a safe distance from these holes to provide yourself with enough time to dodge their attacks.
Build Up Poison Resistance
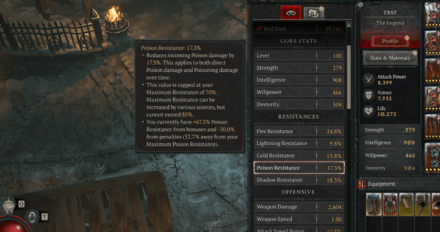
Most of Duriels attacks can inflict Poison, it is highly recommended that you use an Elixir of Poison Resistance to prevent yourself from using all of your Healing Potions to recover from the poison. You can craft elixirs at the Alchemist in exchange for some materials.
Invite Other Players
It's recommended to invite other players to your party to maximize the rewards when summoning Duriel. The item drops won't be tradable, but it will drop for all four players when done in a group, as opposed to just one when attempted solo.
Duriel Attack Patterns
Poison Pool
Duriel will sometimes shoot a poison projectile that will turn into a poison pool upon landing. These pools have a significant area of effect that can restrict your movement. Try to build up some Poison Resistance, as it can be difficult to avoid all of them during the fight.
Claw Attack
Try to maintain your distance from Duriel, as he frequently performs a series of claw attacks that ends with a ground stab, creating a poison pool that inflicts continuous damage if you step on it.
Charge Attack
Duriel can also perform a charge attack to close its distance. Use your Evade to get out of the way and continue to spam your skills while playing defensive.
Burrow Attack
If you get Duriel low enough, he will sometimes burrow underground and emerge from one of the holes along with his adds before shooting their poison attack. This can deal massive damage and it is difficult to avoid. Make sure that you have your Mobility Skill available and use it immediately to get out of the way.
Summon Maggots
A large group of maggot adds will sometimes fall down from above. Deal with them as soon as they spawn so you can focus on keeping your distance from Duriel during the fight.
Immunity Phase Replaced with Barriers
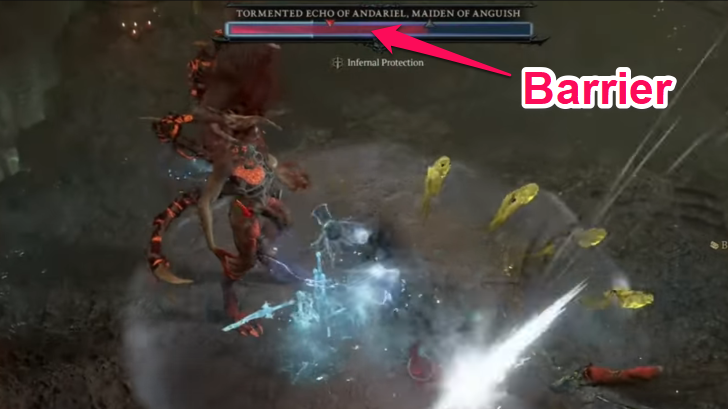
As of Season 10, all Immunity phases from Lair Bosses have been replaced with a Barrier system that powerful builds can easily burst down to finish the fight. Do note that this only includes specific bosses that had immunity phases such as Duriel, Andariel, and Harbinger of Hatred.
Diablo 4 Related Guides

All Lair Bosses and Required Materials
| Lair Boss | Required Materials |
|---|---|
| Lord Zir | ・Exquisite Blood x12 |
| Echo of Varshan | ・Malignant Heart x12 |
| Grigoire | ・Living Steel x12 |
| The Beast in the Ice | ・Distilled Fear x12 |
| Urivar | ・Judicator's Mask x12 |
| Duriel | ・Shard of Agony x3 |
| Andariel | ・Pincushioned Doll x3 |
| Harbinger of Hatred | ・Abhorrent Heart x3 |
| Belial | ・Betrayer's Husk x2 |
| The Butcher | ・Pound of Flesh x3 |
All Bosses By Type
| Main Quest Bosses | Stronghold Bosses | ||
| Dungeon Bosses | Uber Bosses |
All Bosses Per Region
| Fractured Peaks | Scosglen | Dry Steppes | |||
| Kehjistan | Hawezar | Nahantu |
Comment
Author

Duriel Location and Unique Drops
Rankings
- We could not find the message board you were looking for.

Gaming News


![Monster Hunter Stories 3 Review [First Impressions] | Simply Rejuvenating](https://img.game8.co/4438641/2a31b7702bd70e78ec8efd24661dacda.jpeg/thumb)
Popular Games

Genshin Impact Walkthrough & Guides Wiki
Umamusume: Pretty Derby Walkthrough & Guides Wiki
Pokemon Pokopia Walkthrough & Guides Wiki
Honkai: Star Rail Walkthrough & Guides Wiki
Monster Hunter Stories 3: Twisted Reflection Walkthrough & Guides Wiki
Arknights: Endfield Walkthrough & Guides Wiki
Wuthering Waves Walkthrough & Guides Wiki
Zenless Zone Zero Walkthrough & Guides Wiki
Pokemon TCG Pocket (PTCGP) Strategies & Guides Wiki
Monster Hunter Wilds Walkthrough & Guides Wiki


Recommended Games
Diablo 4: Vessel of Hatred Walkthrough & Guides Wiki
Cyberpunk 2077: Ultimate Edition Walkthrough & Guides Wiki
Fire Emblem Heroes (FEH) Walkthrough & Guides Wiki
Yu-Gi-Oh! Master Duel Walkthrough & Guides Wiki
Super Smash Bros. Ultimate Walkthrough & Guides Wiki
Pokemon Brilliant Diamond and Shining Pearl (BDSP) Walkthrough & Guides Wiki
Elden Ring Shadow of the Erdtree Walkthrough & Guides Wiki
Monster Hunter World Walkthrough & Guides Wiki
The Legend of Zelda: Tears of the Kingdom Walkthrough & Guides Wiki
Persona 3 Reload Walkthrough & Guides Wiki


All rights reserved
©2022 BLIZZARD ENTERTAINMENT, INC. ALL RIGHTS RESERVED.
All trademarks referenced herein are the properties of their respective owners.
The copyrights of videos of games used in our content and other intellectual property rights belong to the provider of the game.
The contents we provide on this site were created personally by members of the Game8 editorial department.
We refuse the right to reuse or repost content taken without our permission such as data or images to other sites.