Avarice Spawn Locations and How to Beat
★ NEW: Season 12 Guide and New Features
┗ Seasonal Content: New Uniques | Bloodied Sigils | Slaughterhouses
┗ Seasonal Mechanic: Killstreaks and Bloodied Items
★ NEW: Lord of Hatred Expansion Release Date
★ Check out our Vessel of Hatred expansion guide
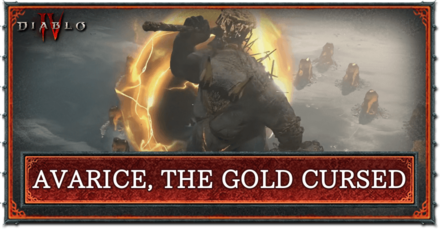
This is a guide on Avarice, a World Boss in Diablo 4 (D4). Read on to learn more about Avarice including its spawn location, attack patterns, how to beat Avarice, and all notable rewards in defeating the world boss!
List of Contents
Avarice Spawn Locations
World Boss Map
All three World Bosses (Avarice, Avarice, and Wandering Death) all have a chance to appear at any of the five locations shown above.
- The Crucible, Fractured Peaks
- Caen Adar, Scosglen
- Saraan Caldera, Dry Steppes
- Seared Basin, Kehjistan
- Fields of Desecration, Hawezar
- The Cauldron, Nahantu
Nahantu World Boss Spawn Location
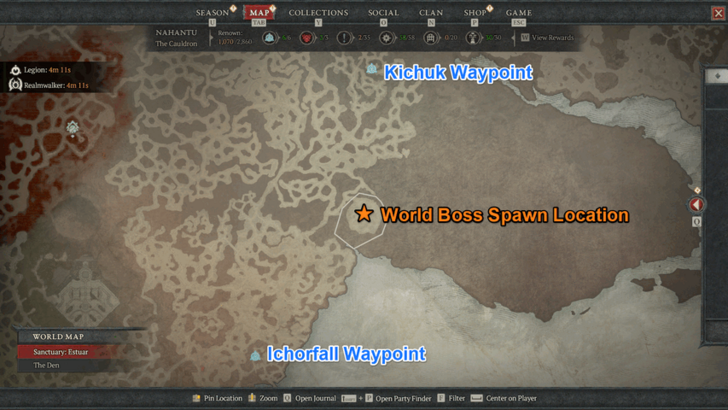
Avarice can also spawn in The Cauldron, which is located in the Nahantu region. You can find this area northeast of the Ichorfall Waypoint.
Note that World Bosses will only appear in The Cauldron after completing the Whispering objectives during the Deeds of a Champion campaign quest.
How to Beat Avarice
| Avarice Tips and Strategies |
|---|
|
|
Optimize Your Build and Gear
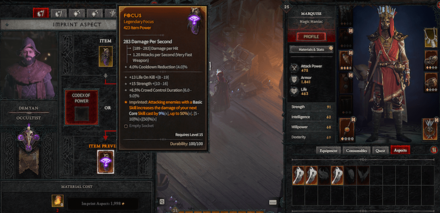
It is recommended to have optimized gear and builds for your respective class. If you are missing key pieces like Aspects from the Codex of Power, you can try farming for legendary items and gambling with the Purveyor of Curiosities.
Party Up With Other Players
World Bosses are extremely difficult to take on alone. It is highly recommended to team up with other players because there is a 15-minute time limit for these encounters. You will need all the extra firepower and crowd control you can get from other players in order to succeed.
What Is the Maximum Party Size?
Use Crowd Control
World Bosses have a Stagger Bar below their Health Bar. Filling up the Stagger Bar by using crowd control Skills will open up a window for your party to deal as much damage as possible.
When Avarice is staggered, two Treasure Goblins will spawn. If your group has no shortage of DPS, feel free to take them down for the rewards. Otherwise, it is best to solely focus on Avarice.
All Crowd Control Effects
Crowd Control is a generic term for debilitating effects which limit or stop enemy movement. The table below lists all effects in the game that contribute to Crowd Control.
| Crowd Control Effect List | |
|---|---|
| Stun | Immobilize |
| Slow | Knockdown |
| Taunt | Fear |
| Tether | Daze |
| Knockback | Petrify |
| Chill | Freeze |
Avoid the Pillars
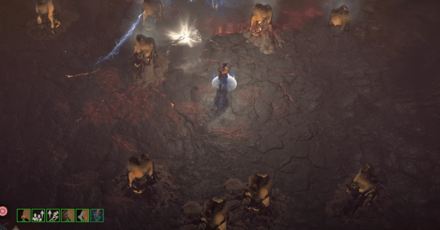
Over the course of the fight, pillars will pop up from the ground that will obstruct your movement and attacks. Some of Avarice's attacks will cause these to explode so it is best to stay away from them altogether.
Revive Yourself Immediately

Waiting for allies to revive you will use up time that could be better used to deal damage instead. It also puts them in a dangerous position and puts them at risk of taking a lethal attack from Avarice. Take the 10% loss in equipment durability and return to the fray immediately!
Lower World Tier Difficulty
As a last resort, you can always try to lower the World Tier. You may get an upgrade that can help you beat Avarice at a higher World Tier.
Avarice Attack Patterns
Minor Attacks
Vomit Gold
Avarice regurgitates liquid gold that persists for a duration. Players standing on it will take damage. This move is easily avoided as long as you are careful of your positioning.
Hammer Swipe
Avarice quickly swings its hammer in an arc. Stay at its left side to have ample time to react and dodge.
Dangerous Attacks
Chest Slam
Avarice slams its treasure chest and sends out a big shockwave. It is not dangerous by itself, but the shockwave causes all surrounding pillars to detonate and deal massive damage. It is best to stay away from pillars as much as possible.
Chest Swing
Avarice first throws forward its treasure chest, then swings it, dragging it in a circular path. You can easily avoid this by staying close to the chains or staying out of its effective range.
Hammer Upswing
Avarice digs through the ground with its hammer in an upwards motion, sending out a huge shockwave. It has a pretty long wind up time and is easily avoided, but anyone caught in its AoE will suffer heavy damage.
Portal Rush
Avarice summons a portal and charges to it, trampling on anyone along its path. Avarice then reemerges through a new portal and slams its hammer. This move also has a long animation and gives you plenty of time to move out of the way.
Diablo 4 Related Guides

All World Bosses Schedule and Locations
All World Boss Guides
| Ashava the Pestilent | The Wandering Death |
| Avarice the Gold Cursed | - |
Comment
Author
Avarice Spawn Locations and How to Beat
Rankings
- We could not find the message board you were looking for.
Gaming News
Popular Games

Genshin Impact Walkthrough & Guides Wiki

Umamusume: Pretty Derby Walkthrough & Guides Wiki

Pokemon Pokopia Walkthrough & Guides Wiki

Honkai: Star Rail Walkthrough & Guides Wiki

Monster Hunter Stories 3: Twisted Reflection Walkthrough & Guides Wiki

Arknights: Endfield Walkthrough & Guides Wiki

Wuthering Waves Walkthrough & Guides Wiki

Zenless Zone Zero Walkthrough & Guides Wiki

Pokemon TCG Pocket (PTCGP) Strategies & Guides Wiki

Monster Hunter Wilds Walkthrough & Guides Wiki
Recommended Games

Diablo 4: Vessel of Hatred Walkthrough & Guides Wiki

Cyberpunk 2077: Ultimate Edition Walkthrough & Guides Wiki

Fire Emblem Heroes (FEH) Walkthrough & Guides Wiki

Yu-Gi-Oh! Master Duel Walkthrough & Guides Wiki

Super Smash Bros. Ultimate Walkthrough & Guides Wiki

Pokemon Brilliant Diamond and Shining Pearl (BDSP) Walkthrough & Guides Wiki

Elden Ring Shadow of the Erdtree Walkthrough & Guides Wiki

Monster Hunter World Walkthrough & Guides Wiki

The Legend of Zelda: Tears of the Kingdom Walkthrough & Guides Wiki

Persona 3 Reload Walkthrough & Guides Wiki
All rights reserved
©2022 BLIZZARD ENTERTAINMENT, INC. ALL RIGHTS RESERVED.
All trademarks referenced herein are the properties of their respective owners.
The copyrights of videos of games used in our content and other intellectual property rights belong to the provider of the game.
The contents we provide on this site were created personally by members of the Game8 editorial department.
We refuse the right to reuse or repost content taken without our permission such as data or images to other sites.


![Marathon Cryo Archive Map Teased as [REDACTED] on Selection Screen](https://img.game8.co/4442236/6357203e58172f6de57f1991e7c39b22.png/thumb)


