Riju of Gerudo Town Walkthrough
▲ Get Pristine Weapons from the depths!
△ All 1000 Koroks | All 4 Great Fairies
▲ 81 Addison Signs | 147 Caves | 58 Wells
△ Tips: Farm Rupees | Starting Armor
▲ Best Weapons | Best Armor | Best Food
Riju of Gerudo Town is a Main Quest in The Legend of Zelda: Tears of the Kingdom (TotK) that starts in Gerudo Town. Read on for a detailed walkthrough of this main quest, including guides on how to prepare for the Gibdo attack, the location of the pillars, and how to solve the mural riddle!
| ◄ Previous Quest | Next Quest ▶ |
|---|---|
| A Mystery in the Depths | Yunobo of Goron City |
How to Unlock Riju of Gerudo Town
Find the Hidden Shelter Beneath the Throne Room
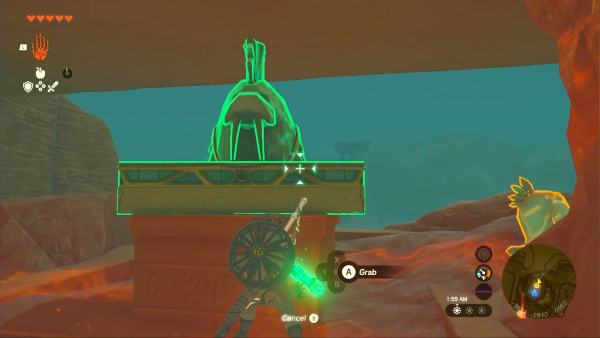
Riju of Gerudo Town can be started by talking to Buliara in a hidden shelter. You can find this shelter by removing the cover behind the throne and dropping down two levels.
Gerudo Desert - Gerudo Town
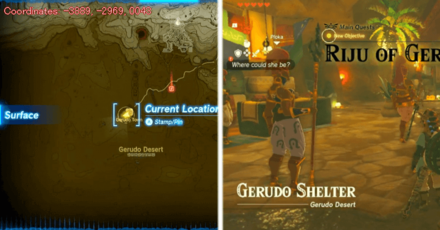
The exact coordinates for this quest on the map are -3889, -2969, 0043.
Rewards
| Rewards |
|---|
| ・Vow of Riju, Sage of Lightning |
Riju of Gerudo Town Walkthrough Guide
| Riju of Gerudo Town Walkthrough Guide |
|---|
Find Riju in the North Gerudo Ruins
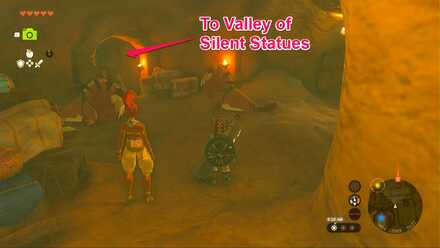
Upon arriving at the shelter's central room (where you fell down), enter the southeast room then turn left to the next. You'll know if you're in the correct room if you see two sand seals. From here, take another left to reach the Valley of Silent Statues.
Speak with Nellie
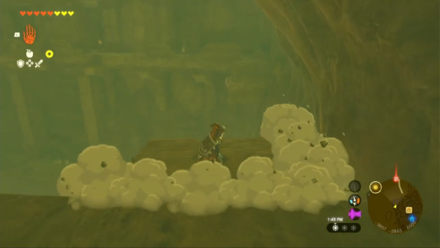
Keep following the path until you find a ledge with a Gerudo named Nellie nearby. The square ledge at the end will break off and fall down as soon as you step foot, but since there's no other way across, might as well play along.
Cross the Moving Sands
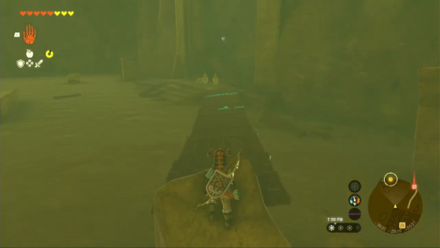
Use Ultrahand to create bridges with the wooden boards to cross the moving sands. You can also use the square platform that broke off earlier.
Your goal here is to get on the platform with a ladder on the right side of the room. Once you get there, keep using Ascend until you reach the bridge above.
Defeat the Lurking GIbdos
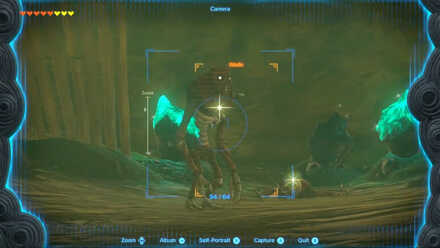
Walk north until you hit a wall then turn left. Jump to the next platform then quickly run to other end before you fall back down.
At the top of this slope is your first encounter with Gibdos —insect-like enemies that are nigh invulnerable until hit by elemental attacks.
Talk to RIju

Continue going up until you find the exit leading to the North Gerudo Ruins, where you can see Riju training along with her sand seal, Patricia.
Approach Riju to advance the main quest.
Train with Riju

Bring out your bow and arrow and shoot the first dummy to guide Riju's lightning strike. For the second set, wait for Riju to build up enough energy to reach the sand pile then shoot it so that the lightning strike hits all three dummies at once.
Head to Kara Kara Bazaar
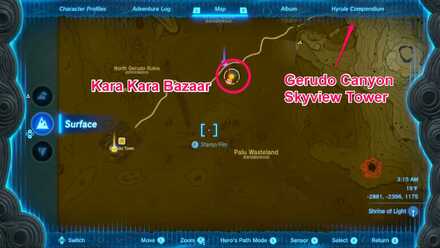
You can fast travel to Mayatat Shrine, which is right outside Kara Kara Bazaar, if you already have it unlocked. Otherwise, fast travel to the Gerudo Canyon Skyview Tower instead then glide southwest to your destination.
Defeat the Gibdos
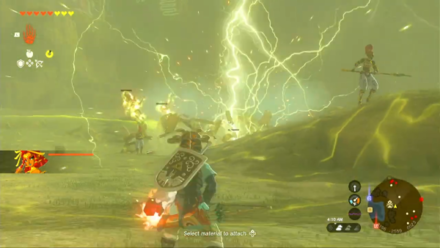
Same with training, letting Riju charge up increases the range of her lightning strikes. Once your target Gibdo is within range, shoot it with an arrow to guide Riju's lightning strike at it, dealing area damage.
Destroy Gibdo Hives
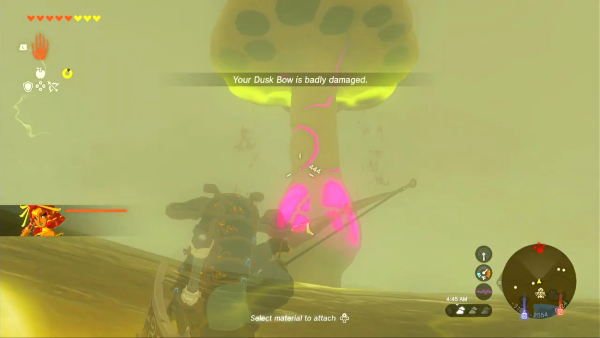
During the attack, you can also spot a tall mushroom-like object that seems to be where the Gibdos are coming from. Shoot it with an arrow once it gets within Riju's range to stop it from spawning more Gibdos.
Return to Gerudo Town
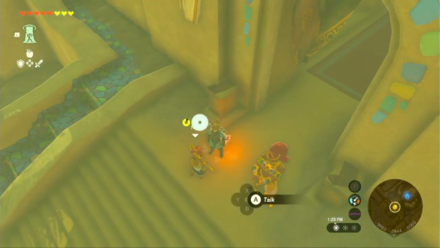
Head back to Gerudo Town and talk to Riju at the palace entrance.
Inquire About the Upcoming Battle
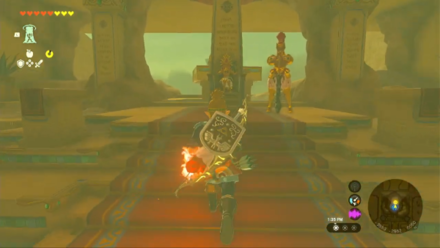
Head inside and talk to Riju at the throne. She will tell you to prepare for the upcoming fight and help the soldiers in organizing the town's defenses
Talk to Buliara to know about the plan and the enemy.
Prepare for the Battle
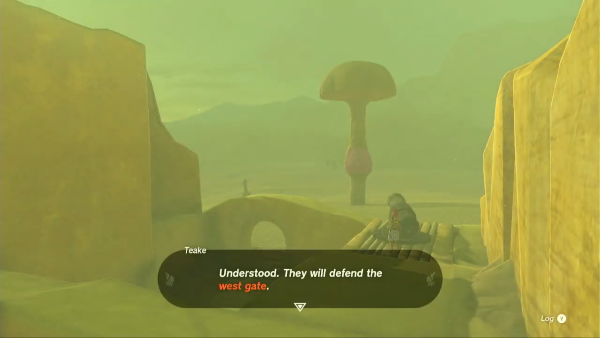
You will be given a chance to set up the town's defenses as preparation for the Gibdo attack. Sword troops, Spear troops, and a cannoneer can each be deployed at the gate of your choice, including a barricade. There will also be a hive in front of each gate and the number of attacking Gibdos will be the same.
The final setup won't really matter, but below are the most optimal positions for each squad when the siege starts.
| Troops | Barricade? | |
|---|---|---|
| West Gate | Cannoneer | ✔️ |
| North Gate | Sword/Spear | ❌ |
| East Gate | Sword/Spear | ❌ |
It would be better to station the cannoneer at the west gate with a barricade as this side is relatively farther from the starting point and is harder to access. Having the cannoneer delay the attackers from this side will be helpful once you've cleared the north and east sides.
They will also benefit more from the blockade, being long-ranged attackers.
Talk to Riju when you're ready to start the siege.
Defend Gerudo Town
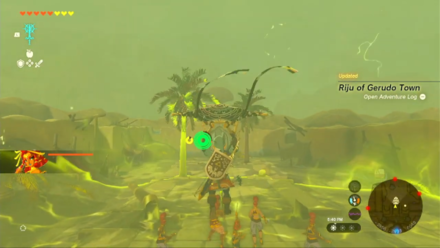
Destroy the three hives around Gerudo Town and wipe out all the Gibdos using Riju's lightning. You must also protect Riju from the Gibdos marching towards her.
The hives and enemies are marked with red circles on your minimap.
Investigate the Mural Beneath Gerudo Town
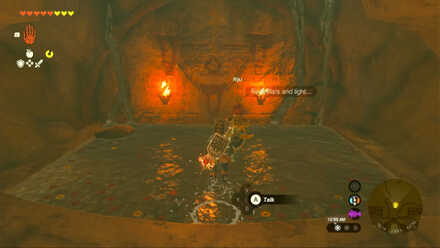
Drop back down again to the underground shelter and keep walking southwest until you find Riju and the mural she spoke of.
Solve the Riddle of the Pillars
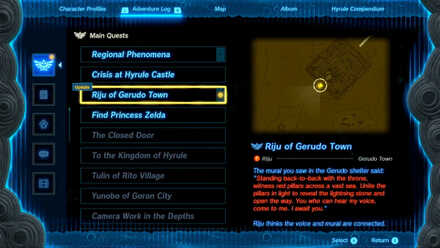
You now need to find the pillars mentioned and solve the riddle to proceed.
Solving the Pillars Riddle
Check the Center of the Triangle
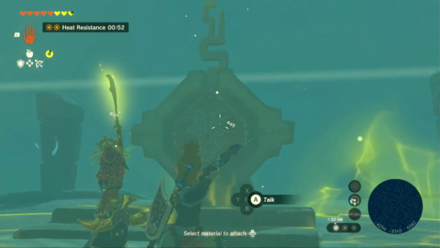
Glide down to the center to find a mechanism revealed by lighting up the three pillars. Once Riju rejoins you, shoot the mechanism with an arrow to strike it with lightning.
This will cause a temple to emerge in front of the altar. You will also be able to call on Riju's lightning for the dungeon run!
Clear the Lightning Temple
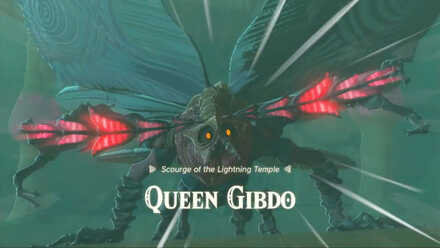
Approach the temple and get close to the purple node at the entrance. Call on Riju and shoot the node with an arrow to trigger a boss fight against the Queen Gibdo.
After taking away a third of its health, it will fly to the roof of the temple and leave the entrance unprotected.
Destroy the Purple Node
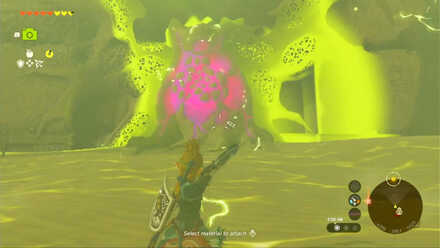
Destroy the node blocking the temple entrance with Riju's lightning, head inside, and clear the Lightning Temple.
Defeat the Queen Gibdo once and for all to receive the Vow of Riju, Sage of Lightning back at Gerudo Town.
Our next objective leads us to a more searing place: the Eldin Canyon region.
How to Beat Queen Gibdo
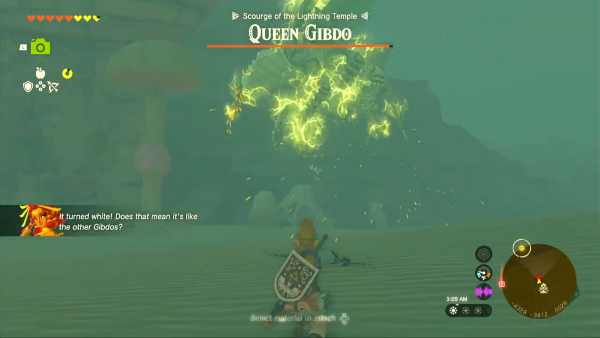
Like every other Gibdo, the Queen Gibdo is immune to damage until you attack it with elemental weapons. Infuse your arrows with Fire, Ice, or Shock Fruits or call upon Riju's lightning to pierce through its immunity.
The Queen Gibdo turns white when it's vulnerable. Use this opportunity to unleash attacks with your strongest weapons.
| ◄ Previous Quest | Next Quest ▶ |
|---|---|
| A Mystery in the Depths | Yunobo of Goron City |
Pillars Location and Mural Riddle Solution
| Pillars Map Location | Pillars In-Game View |
|---|---|
 |
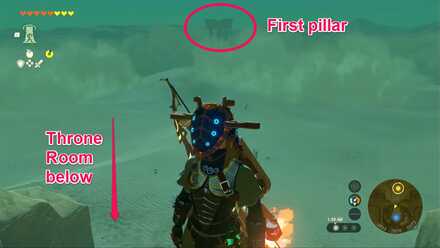 |
The pillars are located far behind Gerudo town. Use Ascend from the throne and look southwest to spot a towering structure across the desert. Head there and follow the steps below to solve the riddle.
| Mural Riddle Solution |
|---|
Find the First Tower
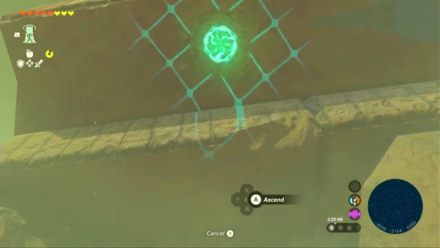
Fast travel to Soryotanog Shrine and head east to find the tower. Use Ascend on the structure to find a breakable cover at the center
Break the Cracked Rocks
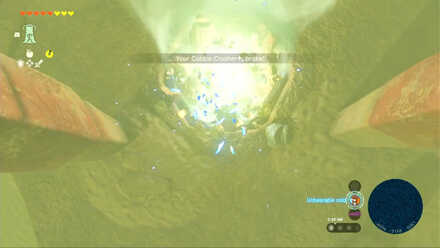
Equip a hammer-type weapon and destroy the cracked rocks with a jump attack (X > Y). This will reveal a pillar of light that is redirected by an object above it.
Follow the Light
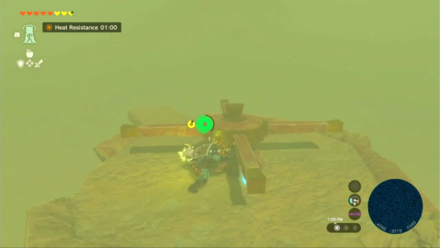
Follow the direction of the light until you find a structure similar with the first pillar, but with a wheel crank.
Push it counter-clockwise until the light hits the second pillar.
Follow the Newly Reflected Light
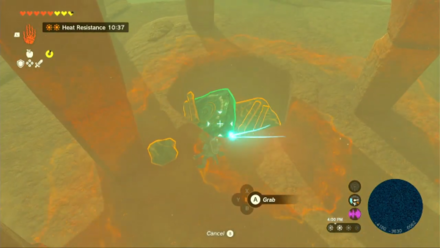
The light will then be reflected to the third pillar and back to the first, creating a large, imperfect, triangle. Follow the light to the third tower and go up with Ascend to find two stones and four sticks.
Gather All Materials Before Heading Up

Attach all six objects together and hold them up with Ultrahand near the platform above for at least five seconds.
Release them, quickly Ascend to the platform above, then use Recall on the stones.
Quickly Grab the Items with Ultrahand
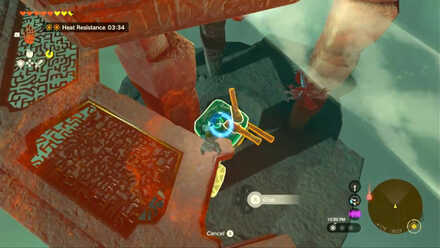
This will make the stones and sticks float near you, where you can grab it with Ultrahand again.
Reach the Top of the Pillar
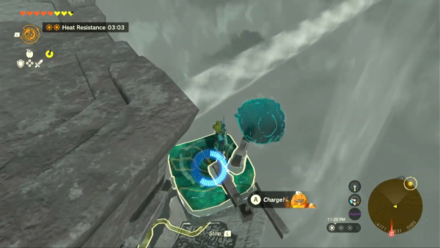
Do the same on the next platform above, but this time, hop on the stones as it rewinds, so you can reach the top of the pillar.
Move the Wheel Crank
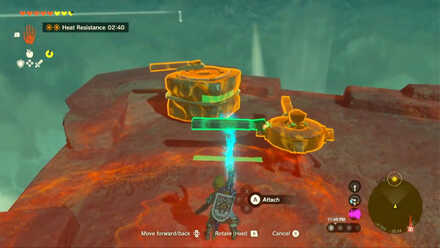
Take the sticks and attach them on the wheel crank in the middle, then turn it counter-clockwise until the light triangle is finally complete.
The Legend of Zelda: Tears of the Kingdom Related Guides

List of All Walkthroughs
| All Quest Types | ||
|---|---|---|
 Main Quests Main Quests |
 Side Quests Side Quests |
 Side Adventures Side Adventures |
List of All Main Quests
Author
The Legend of Zelda: Tears of the Kingdom Walkthrough & Guides Wiki
Riju of Gerudo Town Walkthrough
improvement survey
03/2026
improving Game8's site?

Your answers will help us to improve our website.
Note: Please be sure not to enter any kind of personal information into your response.

We hope you continue to make use of Game8.
Rankings
- We could not find the message board you were looking for.
Gaming News
Popular Games

Genshin Impact Walkthrough & Guides Wiki

Honkai: Star Rail Walkthrough & Guides Wiki

Umamusume: Pretty Derby Walkthrough & Guides Wiki

Pokemon Pokopia Walkthrough & Guides Wiki

Resident Evil Requiem (RE9) Walkthrough & Guides Wiki

Monster Hunter Wilds Walkthrough & Guides Wiki

Wuthering Waves Walkthrough & Guides Wiki

Arknights: Endfield Walkthrough & Guides Wiki

Pokemon FireRed and LeafGreen (FRLG) Walkthrough & Guides Wiki

Pokemon TCG Pocket (PTCGP) Strategies & Guides Wiki
Recommended Games

Diablo 4: Vessel of Hatred Walkthrough & Guides Wiki

Fire Emblem Heroes (FEH) Walkthrough & Guides Wiki

Yu-Gi-Oh! Master Duel Walkthrough & Guides Wiki

Super Smash Bros. Ultimate Walkthrough & Guides Wiki

Pokemon Brilliant Diamond and Shining Pearl (BDSP) Walkthrough & Guides Wiki

Elden Ring Shadow of the Erdtree Walkthrough & Guides Wiki

Monster Hunter World Walkthrough & Guides Wiki

The Legend of Zelda: Tears of the Kingdom Walkthrough & Guides Wiki

Persona 3 Reload Walkthrough & Guides Wiki

Cyberpunk 2077: Ultimate Edition Walkthrough & Guides Wiki
All rights reserved
© Nintendo. The Legend of Zelda and Nintendo Switch are trademarks of Nintendo.
The copyrights of videos of games used in our content and other intellectual property rights belong to the provider of the game.
The contents we provide on this site were created personally by members of the Game8 editorial department.
We refuse the right to reuse or repost content taken without our permission such as data or images to other sites.


![Everwind Review [Early Access] | The Shaky First Step to A Very Long Journey](https://img.game8.co/4440226/ab079b1153298a042633dd1ef51e878e.png/thumb)

![Monster Hunter Stories 3 Review [First Impressions] | Simply Rejuvenating](https://img.game8.co/4438641/2a31b7702bd70e78ec8efd24661dacda.jpeg/thumb)


Amazing! Detail was great and really helped me thank you