Sahirow Shrine Location and Walkthrough
▲ Get Pristine Weapons from the depths!
△ All 1000 Koroks | All 4 Great Fairies
▲ 81 Addison Signs | 147 Caves | 58 Wells
△ Tips: Farm Rupees | Starting Armor
▲ Best Weapons | Best Armor | Best Food
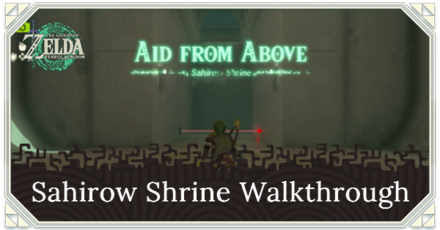
Sahirow Shrine (Aid From Above) in The Legend of Zelda: Tears of the Kingdom (TotK) can be found near Corvash Peak in the Hebra Mountains region. Read on to learn its location, puzzle solution, as well as all treasure chest locations in Sahirow Shrine.
List of Contents
Sahirow Shrine Location
Corvash Peak, Hebra Mountains
Sahirow Shrine can be found on a mountain peak near Corvash Peak, just east of the Rospro Pass Skyview and north of Rito Village in the Hebra Mountains Region. The exact coordinates of the shrine is -3358, 2392, 0359.
In order to access this shrine, you'll need to prepare yourself for the freezing temperatures! Prepare food with cold-resistance or equip a Snowquill Set to survive!
Puzzle Shrine
This is a Puzzle type Shrine, so you need to solve the puzzle to reach the end and get a Light of Blessing.
Try to look around the area to find a way to move forward, and remember to use Link's Ultrahand, Ascend, or Recall abilities!
All Abilities and How to Unlock
Sahirow Shrine Puzzle Solution
- Avoid the Lasers
- Use Ascend on the Moving Platform
- Block the Laser’s Path With Cube to Get Chest
- Use the Other Cube to Jump Over the Chasm
- Proceed and Avoid the Lasers
- Use Ascend to Reach Moving Laser Platform
- Proceed Towards the Altar
Video Guide
1. Avoid the Lasers
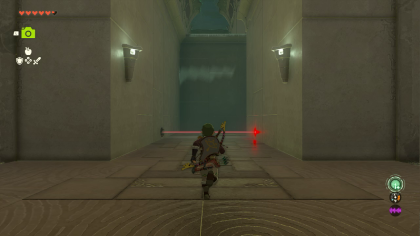
When you proceed towards the area, avoid the lasers that are firing off from the walls on your path.
Use crouch or other means to avoid coming into contact with them.
2. Use Ascend on the Moving Platform
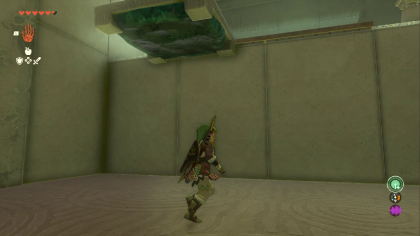
During your progress, you will encounter a metal panel that moves along the edge of an elevated platform.
Time it correctly, and use Ascend when you are directly underneath the moving panel to reach the platform above.
3. Block the Laser’s Path With Cube to Get Chest
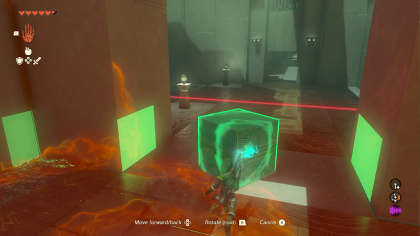
On your right, you will see a laser blocking an area that leads to a large gate containing a chest inside it. Avoid the laser, and proceed towards the area.
You will see two large cubes in the vicinity. Grab one with Ultrahand, and place it on the nearby laser's path to open the large gate. The chest will contain a Spicy Elixir.
4. Use the Other Cube to Jump Over the Chasm
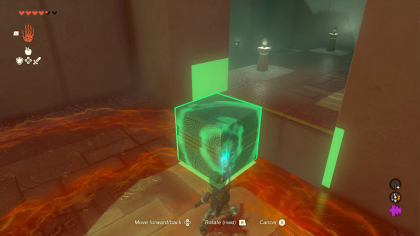
Blocking the laser's path will not only unlock the large gate, but will also open a chasm for you to fall on should you come into contact with it.
After opening the chest, place the other cube with Ultrahand near the chasm and use it to glide over the gaping hole.
5. Proceed and Avoid the Lasers
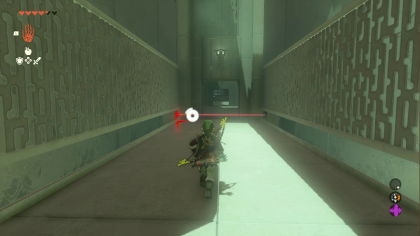
During your progress, you will encounter a laser from the wall that moves along your path. Simply crouch and proceed towards the next area to avoid falling to a chasm.
6. Use Ascend to Reach Moving Laser Platform
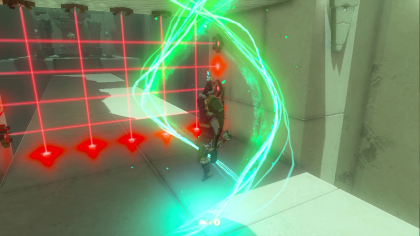
The next area will have another moving laser coursing through a path. This time, the lasers are emitted from some sort of rectangular arch.
Use Ascend just underneath the rectangular arch to reach the top. Be careful to not get hit by the lasers when ascending.
7. Proceed Towards the Altar
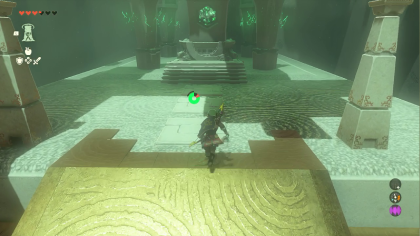
When you reach the top of the rectangular arch, jump from it and continue towards the altar to complete the Sahirow Shrine.
Sahirow Shrine Rewards and Chest Locations
Spicy Elixir
| Chest Location | Chest Contents |
|---|---|
 |
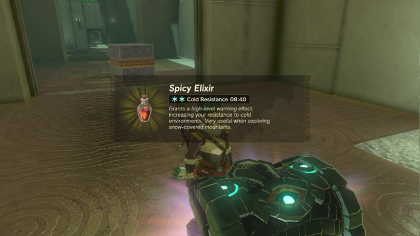 |
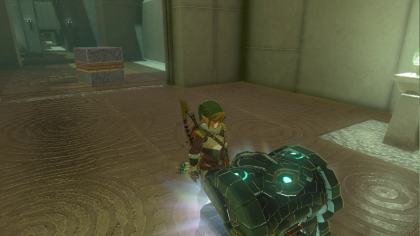
After using Ascent to climb up the platform, you'll find a nook with a chest blocked by a laser. Block the laser's path using a metal cube to trigger the mechanism that will open the gate. Be warned not to stand near the area of the laser where the chasm might be.
Open the chest, and acquire the Spicy Elixir.
The Legend of Zelda: Tears of the Kingdom Related Guides

Shrines Lists
| Shrines Lists | |
|---|---|
| All Shrines | All Shrine Quests |
All Great Sky Island Shrines
| Great Sky Island Shrines | ||
|---|---|---|
| Ukouh Shrine | In-isa Shrine | Gutanbac Shrine |
| Nachoyah Shrine | - | - |
All Hyrule Field Shrines
All Tabantha Shrines
| Tabantha Shrines | ||
|---|---|---|
| Oromuwak Shrine | Gatakis Shrine | Nouda Shrine |
| Wao-os Shrine | Iun-orok Shrine | Turakawak Shrine |
| Gasas Shrine | Mayausiy Shrine | Ikatak Shrine |
| Ga-ahisas Shrine | Ganos Shrine | Taunhiy Shrine |
All Hebra Shrines
All Great Hyrule Forest Shrines
| Great Hyrule Forest Shrines | ||
|---|---|---|
| Sakunbomar Shrine | Pupunke Shrine | Ninjis Shrine |
| Musanokir Shrine | Kikakin Shrine | Kiuyoyou Shrine |
| Ekochiu Shrine | Mayam Shrine | Simosiwak Shrine |
All Akkala Shrines
All Eldin Shrines
All Lanayru Shrines
All Necluda Shrines
All Faron Shrines
| Faron Shrines | ||
|---|---|---|
| Jiukoum Shrine | Ishokin Shrine | Utsushok Shrine |
| Joku-u Shrine | Joku-usin Shrine | - |
All Gerudo Shrines
Comment
Author
The Legend of Zelda: Tears of the Kingdom Walkthrough & Guides Wiki
Sahirow Shrine Location and Walkthrough
improvement survey
03/2026
improving Game8's site?

Your answers will help us to improve our website.
Note: Please be sure not to enter any kind of personal information into your response.

We hope you continue to make use of Game8.
Rankings
- We could not find the message board you were looking for.
Gaming News
Popular Games

Genshin Impact Walkthrough & Guides Wiki

Honkai: Star Rail Walkthrough & Guides Wiki

Umamusume: Pretty Derby Walkthrough & Guides Wiki

Pokemon Pokopia Walkthrough & Guides Wiki

Resident Evil Requiem (RE9) Walkthrough & Guides Wiki

Monster Hunter Wilds Walkthrough & Guides Wiki

Wuthering Waves Walkthrough & Guides Wiki

Arknights: Endfield Walkthrough & Guides Wiki

Pokemon FireRed and LeafGreen (FRLG) Walkthrough & Guides Wiki

Pokemon TCG Pocket (PTCGP) Strategies & Guides Wiki
Recommended Games

Fire Emblem Heroes (FEH) Walkthrough & Guides Wiki

Diablo 4: Vessel of Hatred Walkthrough & Guides Wiki

Yu-Gi-Oh! Master Duel Walkthrough & Guides Wiki

Super Smash Bros. Ultimate Walkthrough & Guides Wiki

Pokemon Brilliant Diamond and Shining Pearl (BDSP) Walkthrough & Guides Wiki

Elden Ring Shadow of the Erdtree Walkthrough & Guides Wiki

Monster Hunter World Walkthrough & Guides Wiki

The Legend of Zelda: Tears of the Kingdom Walkthrough & Guides Wiki

Persona 3 Reload Walkthrough & Guides Wiki

Cyberpunk 2077: Ultimate Edition Walkthrough & Guides Wiki
All rights reserved
© Nintendo. The Legend of Zelda and Nintendo Switch are trademarks of Nintendo.
The copyrights of videos of games used in our content and other intellectual property rights belong to the provider of the game.
The contents we provide on this site were created personally by members of the Game8 editorial department.
We refuse the right to reuse or repost content taken without our permission such as data or images to other sites.


![Slay the Spire 2 Review [Early Access] | Still the Deckbuilder to Beat](https://img.game8.co/4433115/44e19e1fb0b4755466b9e516ec7ffb1e.png/thumb)

![Resident Evil Village Review [Switch 2] | Almost Flawless Port](https://img.game8.co/4432790/e1859f64830960ce4248d898f8cd38d9.jpeg/thumb)


