Kadaunar Shrine Location and Walkthrough
▲ Get Pristine Weapons from the depths!
△ All 1000 Koroks | All 4 Great Fairies
▲ 81 Addison Signs | 147 Caves | 58 Wells
△ Tips: Farm Rupees | Starting Armor
▲ Best Weapons | Best Armor | Best Food
Kadaunar Shrine (Water Makes a Way) in The Legend of Zelda: Tears of the Kingdom (TotK) can be found at the South Eldin Sky Archipelago in the Eldin Canyon Sky Region. Read on to learn its location, puzzle solution, as well as all treasure chest locations in Kadaunar Shrine.
List of Contents
Kadaunar Shrine Location
South Eldin Sky Archipelago, Eldin Canyon Sky
Kadaunar Shrine can be found at the South Eldin Sky Archipelago in the Eldin Canyon Sky region.
The exact coordinates of the Kadaunar Shrine is at 1881, 1203, 1251.
Travel to Thyphlo Ruins Skyview Tower, and launch yourself from there to glide east towards the Kadaunar Shrine.
Puzzle Shrine
This is a Puzzle type Shrine, so you need to solve the puzzle to reach the end and get a Light of Blessing.
Try to look around the area to find a way to move forward, and remember to use Link's Ultrahand, Ascend, or Recall abilities!
All Abilities and How to Unlock
Kadaunar Shrine Puzzle Solution
- Take the Lava Slab
- Connect the Lava Slabs Together
- Lay Down the Bridge
- Carry the Bridge
- Create a Ramp
- Break the Wall
- Create More Slabs
- Add the Bridge
- Examine the Shrine
Kadaunar Shrine Video Guide
1. Take the Lava Slab
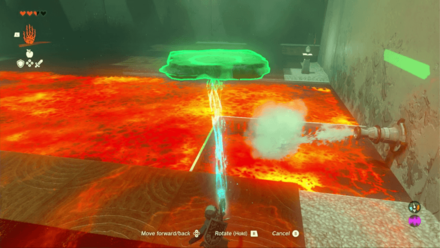
Upon entering the shrine, you'll notice a pool of lava and a spout of water on the side. Grab the Lava Slab and set it aside.
2. Connect the Lava Slabs Together
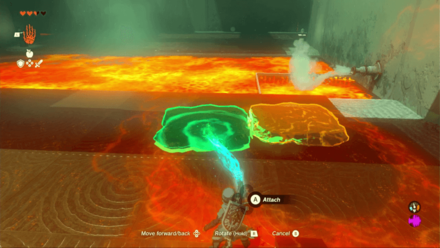
Pull a few pieces with Ultrahand and connect them together to create a makeshift bridge.
3. Lay Down the Bridge

With the slabs all formed together, lift the set of slabs and lower it down to cross!
4. Carry the Bridge
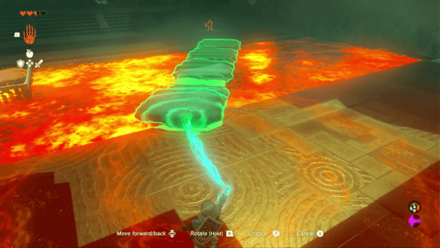
You'll be needing your Lava Slab bridge so carry it over to the next section with you!
5. Create a Ramp
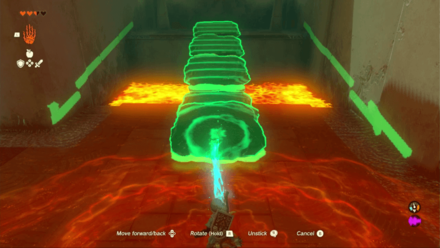
On this next side, you should see a chest on an elevated platform. Using the bridge, you can create a ramp to climb up safely! Access the chest from here!
6. Break the Wall

Merge the Lava Slab with your weapon and swing at the wall to break it.
7. Create More Slabs
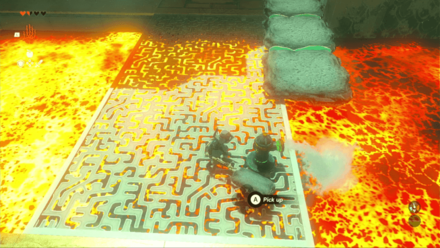
The lava in the next room is a slow moving stream, so you may need to work pretty quickly to get more Lava Slabs to extend the bridge. Use the hydrants to create more Lava Slabs and connect them together with Ultrahand!
8. Add the Bridge

When your makeshift bridge is ready, place it down on the gap to cross and move forward!
9. Examine the Shrine
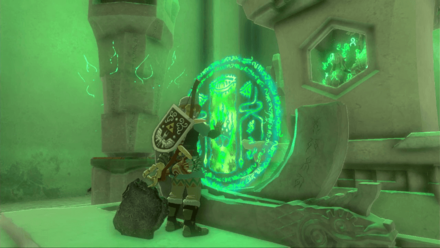
Examine the Shrine to receive your reward!
Kadaunar Shrine Rewards and Chest Locations
Strong Construct Bow
| Chest Location | Chest Contents |
|---|---|
 |
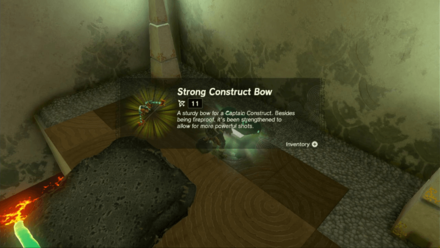 |
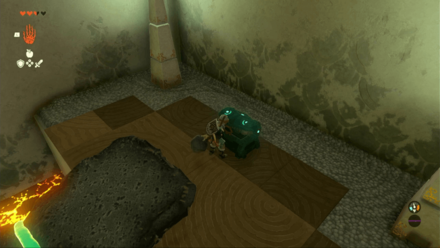
In order to reach this chest, you'll need to cross the first lava section. After that, you will find a raised section across a lava pool. Using the bridge you made earlier, you can create a ramp to access the chest with the Strong Construct Bow!
The Legend of Zelda: Tears of the Kingdom Related Guides

Shrines Lists
| Shrines Lists | |
|---|---|
| All Shrines | All Shrine Quests |
All Great Sky Island Shrines
| Great Sky Island Shrines | ||
|---|---|---|
| Ukouh Shrine | In-isa Shrine | Gutanbac Shrine |
| Nachoyah Shrine | - | - |
All Hyrule Field Shrines
All Tabantha Shrines
| Tabantha Shrines | ||
|---|---|---|
| Oromuwak Shrine | Gatakis Shrine | Nouda Shrine |
| Wao-os Shrine | Iun-orok Shrine | Turakawak Shrine |
| Gasas Shrine | Mayausiy Shrine | Ikatak Shrine |
| Ga-ahisas Shrine | Ganos Shrine | Taunhiy Shrine |
All Hebra Shrines
All Great Hyrule Forest Shrines
| Great Hyrule Forest Shrines | ||
|---|---|---|
| Sakunbomar Shrine | Pupunke Shrine | Ninjis Shrine |
| Musanokir Shrine | Kikakin Shrine | Kiuyoyou Shrine |
| Ekochiu Shrine | Mayam Shrine | Simosiwak Shrine |
All Akkala Shrines
All Eldin Shrines
All Lanayru Shrines
All Necluda Shrines
All Faron Shrines
| Faron Shrines | ||
|---|---|---|
| Jiukoum Shrine | Ishokin Shrine | Utsushok Shrine |
| Joku-u Shrine | Joku-usin Shrine | - |
All Gerudo Shrines
Comment
Author
The Legend of Zelda: Tears of the Kingdom Walkthrough & Guides Wiki
Kadaunar Shrine Location and Walkthrough
improvement survey
03/2026
improving Game8's site?

Your answers will help us to improve our website.
Note: Please be sure not to enter any kind of personal information into your response.

We hope you continue to make use of Game8.
Rankings
- We could not find the message board you were looking for.
Gaming News
Popular Games

Genshin Impact Walkthrough & Guides Wiki

Honkai: Star Rail Walkthrough & Guides Wiki

Umamusume: Pretty Derby Walkthrough & Guides Wiki

Pokemon Pokopia Walkthrough & Guides Wiki

Resident Evil Requiem (RE9) Walkthrough & Guides Wiki

Monster Hunter Wilds Walkthrough & Guides Wiki

Wuthering Waves Walkthrough & Guides Wiki

Arknights: Endfield Walkthrough & Guides Wiki

Pokemon FireRed and LeafGreen (FRLG) Walkthrough & Guides Wiki

Pokemon TCG Pocket (PTCGP) Strategies & Guides Wiki
Recommended Games

Diablo 4: Vessel of Hatred Walkthrough & Guides Wiki

Cyberpunk 2077: Ultimate Edition Walkthrough & Guides Wiki

Fire Emblem Heroes (FEH) Walkthrough & Guides Wiki

Yu-Gi-Oh! Master Duel Walkthrough & Guides Wiki

Super Smash Bros. Ultimate Walkthrough & Guides Wiki

Pokemon Brilliant Diamond and Shining Pearl (BDSP) Walkthrough & Guides Wiki

Elden Ring Shadow of the Erdtree Walkthrough & Guides Wiki

Monster Hunter World Walkthrough & Guides Wiki

The Legend of Zelda: Tears of the Kingdom Walkthrough & Guides Wiki

Persona 3 Reload Walkthrough & Guides Wiki
All rights reserved
© Nintendo. The Legend of Zelda and Nintendo Switch are trademarks of Nintendo.
The copyrights of videos of games used in our content and other intellectual property rights belong to the provider of the game.
The contents we provide on this site were created personally by members of the Game8 editorial department.
We refuse the right to reuse or repost content taken without our permission such as data or images to other sites.


![Monster Hunter Stories 3 Review [First Impressions] | Simply Rejuvenating](https://img.game8.co/4438641/2a31b7702bd70e78ec8efd24661dacda.jpeg/thumb)


