Mogawak Shrine Location and Walkthrough
▲ Get Pristine Weapons from the depths!
△ All 1000 Koroks | All 4 Great Fairies
▲ 81 Addison Signs | 147 Caves | 58 Wells
△ Tips: Farm Rupees | Starting Armor
▲ Best Weapons | Best Armor | Best Food
Mogawak Shrine (The Power of Water) in The Legend of Zelda: Tears of the Kingdom (TotK) can be found in Zora's Domain in the Lanayru Great Spring region. Read on to learn its location, puzzle solution, as well as all treasure chest locations in Mogawak Shrine.
List of Contents
Mogawak Shrine Location
Zora's Domain, Lanayru Great Spring
Mogawak Shrine is located below the walkways of Zora's Domain in the Lanayru Great Spring region. Fast travel to Upland Zorana Skyview Tower, then keep heading east until you arrive at 3298, 0424, 0112 to access the shrine.
Lanayru Great Spring Region Map
Puzzle Shrine
This is a Puzzle type Shrine, so you need to solve the puzzle to reach the end and get a Light of Blessing.
Try to look around the area to find a way to move forward, and remember to use Link's Ultrahand, Ascend, or Recall abilities!
All Abilities and How to Unlock
Mogawak Shrine Puzzle Solution
- Grab the Battery
- Place the Battery on the Pedestal
- Spin the Contraption
- Carry the Battery Across
- Use the Battery
- Move the Chained Balls
- Open the Chest
- Recharge the Battery
- Grab the Chest
- Open the Chest
- Place the Battery on the Pedestal
- Ride the Elevator
- Examine the Shrine
Video Guide
1. Grab the Battery
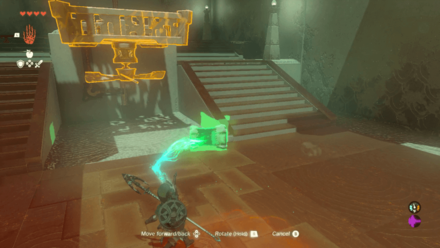
To solve the puzzle, you'll have to charge the battery using hydroelectric energy from the waterfall in order to power up the elevator leading to the altar.
Upon entering the shrine, on the back of the chamber is a battery on the floor. Use Ultrahand to pick it up an bring it over to the waterfall on the side.
2. Place the Battery on the Pedestal
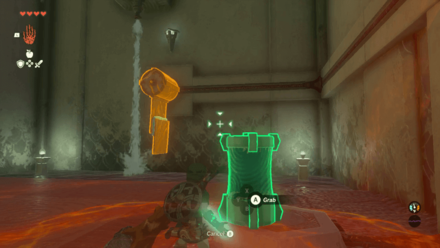
On the other end of a circuit is a pedestal, place the battery here.
3. Spin the Contraption
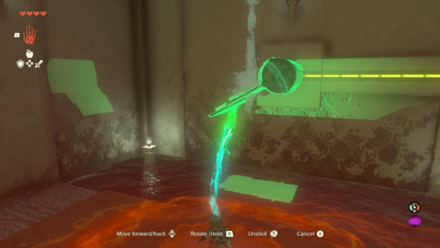
In order to charge the battery, you will need to spin the contraption using Ultrahand. The circuit will light up when it's charging.
4. Carry the Battery Across
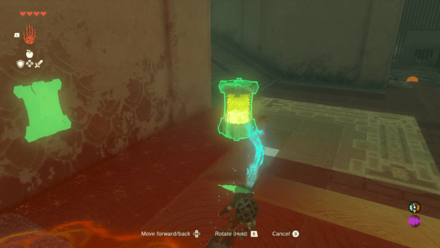
Once the light in the battery is full, pick it up and bring it across the room to the locked section across the water.
5. Use the Battery

Place the Battery down on the platform, this half of the circuit should light up.
6. Move the Chained Balls
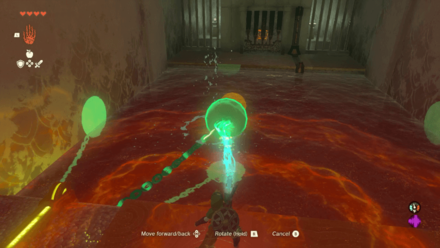
With the circuit lit up, move both balls closer together to complete the circuit and open the door!
7. Open the Chest

Open the chest to receive an Opal!
8. Recharge the Battery
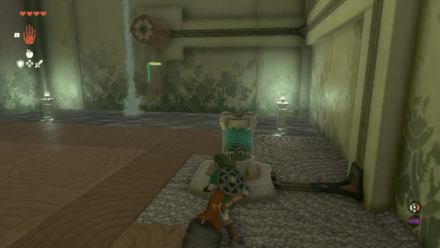
Once used, you will need to recharge the battery. Simply bring it back to the waterfall and repeat the process.
9. Grab the Chest
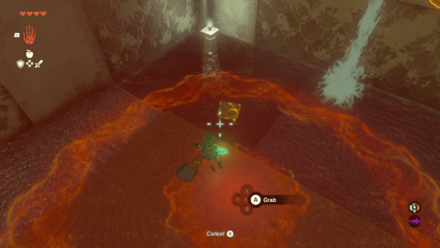
While it's charging, look into the water on the left side of the waterfall and use Ultrahand to grab the chest there!
10. Open the Chest
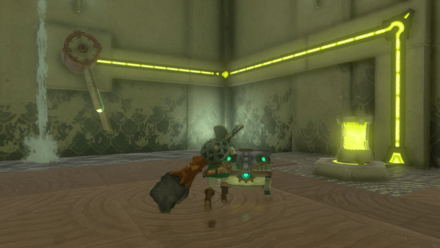
Open the chest to receive a Magic Scepter!
11. Place the Battery on the Pedestal
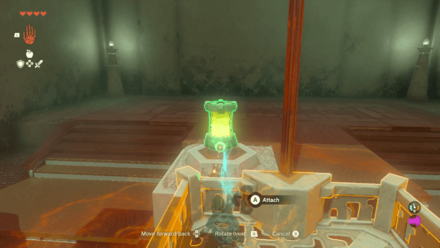
You'll need to be inside the basket when you place the battery on the Pedestal as it will begin to ascend.
12. Ride the Elevator
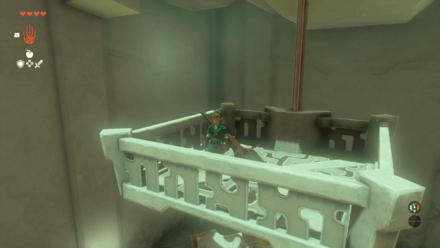
Simply wait for the elevator to reach the top and hop off.
13. Examine the Shrine
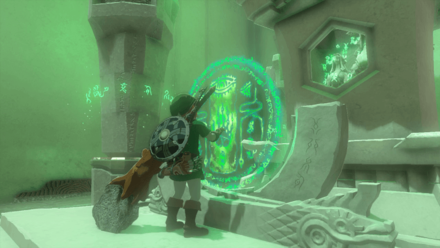
Examine the Shrine to receive your reward!
Mogawak Shrine Rewards and Chest Locations
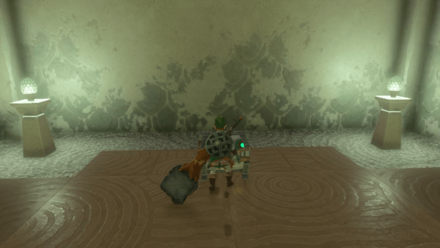
Opal
| Chest Location | Chest Contents |
|---|---|
 |
 |
After opening the locked section across the water, place the charged battery on the pedestal before the 2 chain balls in the water. Move both closer together to connect the circuit! Once it's connected, the door should open to reveal the chest containing an Opal!
Magic Scepter
| Chest Location | Chest Contents |
|---|---|
 |
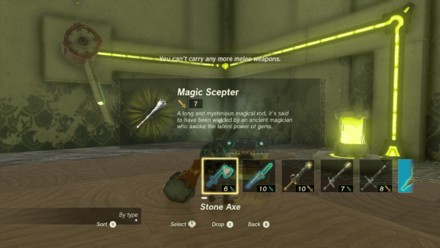 |
On the space where you charge the battery, look in the water to the right of the waterfall! Use Ultrahand to bring it out of the water and snag the Magic Scepter!
The Legend of Zelda: Tears of the Kingdom Related Guides

Shrines Lists
| Shrines Lists | |
|---|---|
| All Shrines | All Shrine Quests |
All Great Sky Island Shrines
| Great Sky Island Shrines | ||
|---|---|---|
| Ukouh Shrine | In-isa Shrine | Gutanbac Shrine |
| Nachoyah Shrine | - | - |
All Hyrule Field Shrines
All Tabantha Shrines
| Tabantha Shrines | ||
|---|---|---|
| Oromuwak Shrine | Gatakis Shrine | Nouda Shrine |
| Wao-os Shrine | Iun-orok Shrine | Turakawak Shrine |
| Gasas Shrine | Mayausiy Shrine | Ikatak Shrine |
| Ga-ahisas Shrine | Ganos Shrine | Taunhiy Shrine |
All Hebra Shrines
All Great Hyrule Forest Shrines
| Great Hyrule Forest Shrines | ||
|---|---|---|
| Sakunbomar Shrine | Pupunke Shrine | Ninjis Shrine |
| Musanokir Shrine | Kikakin Shrine | Kiuyoyou Shrine |
| Ekochiu Shrine | Mayam Shrine | Simosiwak Shrine |
All Akkala Shrines
All Eldin Shrines
All Lanayru Shrines
All Necluda Shrines
All Faron Shrines
| Faron Shrines | ||
|---|---|---|
| Jiukoum Shrine | Ishokin Shrine | Utsushok Shrine |
| Joku-u Shrine | Joku-usin Shrine | - |
All Gerudo Shrines
Comment
Author
The Legend of Zelda: Tears of the Kingdom Walkthrough & Guides Wiki
Mogawak Shrine Location and Walkthrough
Rankings
- We could not find the message board you were looking for.
Gaming News
Popular Games

Genshin Impact Walkthrough & Guides Wiki

Honkai: Star Rail Walkthrough & Guides Wiki

Umamusume: Pretty Derby Walkthrough & Guides Wiki

Pokemon Pokopia Walkthrough & Guides Wiki

Resident Evil Requiem (RE9) Walkthrough & Guides Wiki

Monster Hunter Wilds Walkthrough & Guides Wiki

Wuthering Waves Walkthrough & Guides Wiki

Arknights: Endfield Walkthrough & Guides Wiki

Pokemon FireRed and LeafGreen (FRLG) Walkthrough & Guides Wiki

Pokemon TCG Pocket (PTCGP) Strategies & Guides Wiki
Recommended Games

Diablo 4: Vessel of Hatred Walkthrough & Guides Wiki

Cyberpunk 2077: Ultimate Edition Walkthrough & Guides Wiki

Fire Emblem Heroes (FEH) Walkthrough & Guides Wiki

Yu-Gi-Oh! Master Duel Walkthrough & Guides Wiki

Super Smash Bros. Ultimate Walkthrough & Guides Wiki

Pokemon Brilliant Diamond and Shining Pearl (BDSP) Walkthrough & Guides Wiki

Elden Ring Shadow of the Erdtree Walkthrough & Guides Wiki

Monster Hunter World Walkthrough & Guides Wiki

The Legend of Zelda: Tears of the Kingdom Walkthrough & Guides Wiki

Persona 3 Reload Walkthrough & Guides Wiki
All rights reserved
© Nintendo. The Legend of Zelda and Nintendo Switch are trademarks of Nintendo.
The copyrights of videos of games used in our content and other intellectual property rights belong to the provider of the game.
The contents we provide on this site were created personally by members of the Game8 editorial department.
We refuse the right to reuse or repost content taken without our permission such as data or images to other sites.


![Monster Hunter Stories 3 Review [First Impressions] | Simply Rejuvenating](https://img.game8.co/4438641/2a31b7702bd70e78ec8efd24661dacda.jpeg/thumb)


