Isisim Shrine Puzzle Solution
▲ Get Pristine Weapons from the depths!
△ All 1000 Koroks | All 4 Great Fairies
▲ 81 Addison Signs | 147 Caves | 58 Wells
△ Tips: Farm Rupees | Starting Armor
▲ Best Weapons | Best Armor | Best Food
Isisim Shrine (Proving Grounds: In Reverse) in The Legend of Zelda: Tears of the Kingdom (TotK) can be found inside YunoboCo HQ East Cave in the Eldin Canyon Region. Read on to learn its location, puzzle solution, as well as all treasure chest locations in Isisim Shrine.
List of Contents
Isisim Shrine Location
North of Eldin Canyon, Inside YunoboCo HQ East Cave
Isisim Shrine can be found inside YunoboCo HQ East Cave which is directly north of Goron City in the Eldin Canyon region. The exact coordinates of the shrine is at 1841, 2841, 0363.
Accessing the cave requires partial completion of Yunobo of Goron City quest as you'll need Yunobo's ability to clear the large red rocks that are blocking the entrance to the cave.
Additionally, you'll need to equip fire resistant armor such as the Flamebreaker set or bring an abundance of Fireproof Elixirs before entering.
Travel to Eldin Canyon Skyview Tower, and launch yourself from there to glide north towards Isisim Shrine.
Proving Grounds
This is a Proving Grounds Shrine where your combat skills and resourcefulness will be tested.
Use the weapons and items inside the Shrine to defeat enemies and clear the area!
Isisim Shrine Puzzle Solution
- Grab All Equipment by the Entrance
- Go Up the First Ramp to the Left
- Pick Up the Bow by the Ramp
- Use Recall on the Gear
- Throw Back the Bombs Using Recall
- Go Up the Ramp Leading to the Last Floor
- Use Bombs to Defeat the Last Constructs
- Claim Your Rewards in the Altar Chamber
1. Grab All Equipment by the Entrance
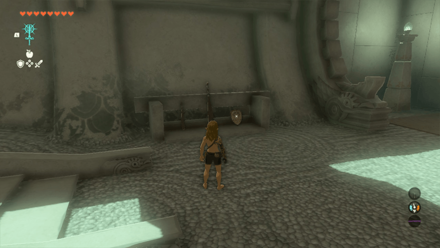
Similar to other Proving Grounds trials, this shrine will strip you off all your weapons and armor upon entering. The only equipment you can use are the ones in the shrine.
Before proceeding, grab the Thick Stick, Wooden Stick, and Old Wooden Shield to your left.
2. Go Up the First Ramp to the Left
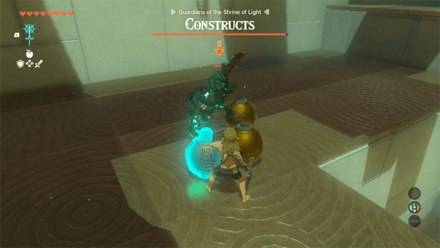
After going through the archway, run up the first ramp to your left, and defeat the enemy Construct either by hitting the Time Bombs near it and waiting for them to explode, or by simply using your melee attacks on it.
3. Pick Up the Bow by the Ramp

Grab the Construct Bow right beside the ramp as this will come in handy later on for the last floor. Don't forget to also Fuse your weapons with the materials left behind by the enemy!
4. Use Recall on the Gear
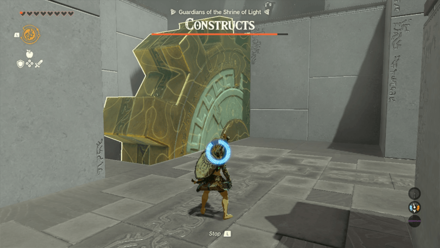
Head back down to the first level and use Recall on the gear. Then, hop on it to get to the upper level.
Avoid the Time Bombs that are being thrown at you by the enemies up on the higher levels.
5. Throw Back the Bombs Using Recall
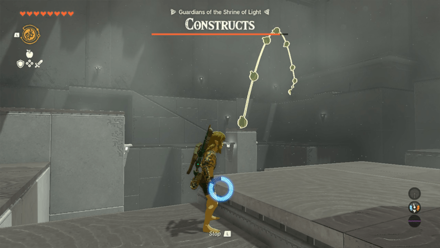
A neat trick you can do to avoid those pesky Time Bombs being thrown at you is to use Recall on them while they're still mid-air. This will send the bombs flying back to the enemy in time for detonation.
6. Go Up the Ramp Leading to the Last Floor
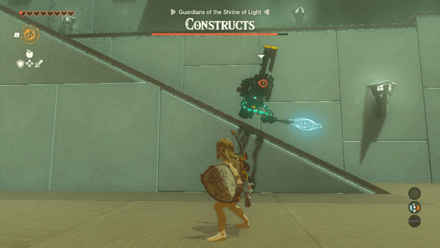
After going up using the gear, turn around, and go up the ramp where another enemy will be awaiting you.
Defeat it, and grab the Zonaite Longsword, which deals better damage than the weapons that you got at the start.
7. Use Bombs to Defeat the Last Constructs
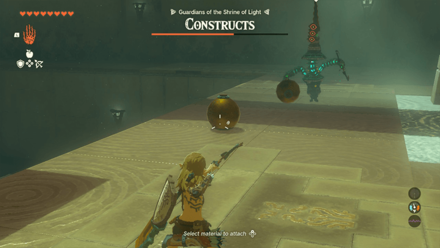
The last two enemies on the highest floor will be tougher than the ones you encountered earlier.
There will be Time Bombs scattered around the floor on this level. Lure the Constructs near them, and use your bow that you got earlier to shoot the bombs. Wait for them to detonate to deal massive damage.
8. Claim Your Rewards in the Altar Chamber
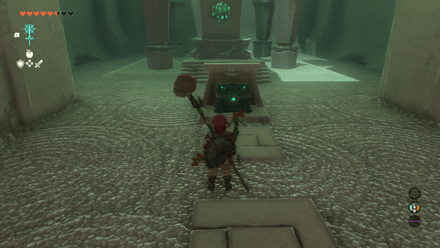
After defeating all enemy Constructs in the room, go inside the altar chamber. Open the chest inside to get a Magic Rod. Then, examine the altar to get a Light of Blessing.
Isisim Shrine Rewards and Chest Locations
Magic Rod
| Chest Location | Chest Contents |
|---|---|
 |
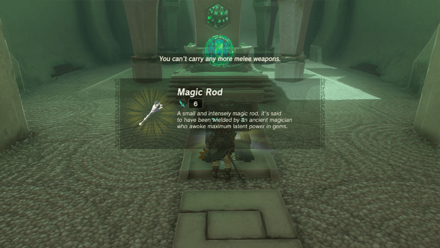 |
Defeat all enemy Constructs in the area, and open the chest inside the altar chamber to get a Magic Rod.
How to Get Magic Rod: Stats and Effects
The Legend of Zelda: Tears of the Kingdom Related Guides

Shrines Lists
| Shrines Lists | |
|---|---|
| All Shrines | All Shrine Quests |
All Great Sky Island Shrines
| Great Sky Island Shrines | ||
|---|---|---|
| Ukouh Shrine | In-isa Shrine | Gutanbac Shrine |
| Nachoyah Shrine | - | - |
All Hyrule Field Shrines
All Tabantha Shrines
| Tabantha Shrines | ||
|---|---|---|
| Oromuwak Shrine | Gatakis Shrine | Nouda Shrine |
| Wao-os Shrine | Iun-orok Shrine | Turakawak Shrine |
| Gasas Shrine | Mayausiy Shrine | Ikatak Shrine |
| Ga-ahisas Shrine | Ganos Shrine | Taunhiy Shrine |
All Hebra Shrines
All Great Hyrule Forest Shrines
| Great Hyrule Forest Shrines | ||
|---|---|---|
| Sakunbomar Shrine | Pupunke Shrine | Ninjis Shrine |
| Musanokir Shrine | Kikakin Shrine | Kiuyoyou Shrine |
| Ekochiu Shrine | Mayam Shrine | Simosiwak Shrine |
All Akkala Shrines
All Eldin Shrines
All Lanayru Shrines
All Necluda Shrines
All Faron Shrines
| Faron Shrines | ||
|---|---|---|
| Jiukoum Shrine | Ishokin Shrine | Utsushok Shrine |
| Joku-u Shrine | Joku-usin Shrine | - |
All Gerudo Shrines
Comment
Author
The Legend of Zelda: Tears of the Kingdom Walkthrough & Guides Wiki
Isisim Shrine Puzzle Solution
improvement survey
03/2026
improving Game8's site?

Your answers will help us to improve our website.
Note: Please be sure not to enter any kind of personal information into your response.

We hope you continue to make use of Game8.
Rankings
- We could not find the message board you were looking for.
Gaming News
Popular Games

Genshin Impact Walkthrough & Guides Wiki

Honkai: Star Rail Walkthrough & Guides Wiki

Umamusume: Pretty Derby Walkthrough & Guides Wiki

Pokemon Pokopia Walkthrough & Guides Wiki

Resident Evil Requiem (RE9) Walkthrough & Guides Wiki

Monster Hunter Wilds Walkthrough & Guides Wiki

Wuthering Waves Walkthrough & Guides Wiki

Arknights: Endfield Walkthrough & Guides Wiki

Pokemon FireRed and LeafGreen (FRLG) Walkthrough & Guides Wiki

Pokemon TCG Pocket (PTCGP) Strategies & Guides Wiki
Recommended Games

Diablo 4: Vessel of Hatred Walkthrough & Guides Wiki

Cyberpunk 2077: Ultimate Edition Walkthrough & Guides Wiki

Fire Emblem Heroes (FEH) Walkthrough & Guides Wiki

Yu-Gi-Oh! Master Duel Walkthrough & Guides Wiki

Super Smash Bros. Ultimate Walkthrough & Guides Wiki

Pokemon Brilliant Diamond and Shining Pearl (BDSP) Walkthrough & Guides Wiki

Elden Ring Shadow of the Erdtree Walkthrough & Guides Wiki

Monster Hunter World Walkthrough & Guides Wiki

The Legend of Zelda: Tears of the Kingdom Walkthrough & Guides Wiki

Persona 3 Reload Walkthrough & Guides Wiki
All rights reserved
© Nintendo. The Legend of Zelda and Nintendo Switch are trademarks of Nintendo.
The copyrights of videos of games used in our content and other intellectual property rights belong to the provider of the game.
The contents we provide on this site were created personally by members of the Game8 editorial department.
We refuse the right to reuse or repost content taken without our permission such as data or images to other sites.


![Monster Hunter Stories 3 Review [First Impressions] | Simply Rejuvenating](https://img.game8.co/4438641/2a31b7702bd70e78ec8efd24661dacda.jpeg/thumb)


