Tears of the Kingdom Shrine Locations
▲ Get Pristine Weapons from the depths!
△ All 1000 Koroks | All 4 Great Fairies
▲ 81 Addison Signs | 147 Caves | 58 Wells
△ Tips: Farm Rupees | Starting Armor
▲ Best Weapons | Best Armor | Best Food
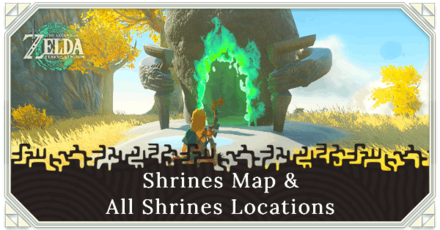
Check out our Shrines map for all 152 Shrine locations grouped by region in the Legend of Zelda: Tears of the Kingdom (TotK). Learn how many Shrines there are in the game and view all Shrines map, all Surface Shrines, all Sky and Great Sky Island Shrines, their locations, coordinates, rewards, and tips for finding Shrines.
| Shrines Lists | |
|---|---|
| All Shrines | All Shrine Quests |
List of Contents
All Shrines Map
Tip: Toggle between Surface and Sky map.
Tears of the Kingdom has a total of 120 Shrines on the Surface and 32 Shrines on the Sky. Check out the map above to see what Shrines you're still missing and mark each one you've already found to clear up the map!
Shrine Icon Explanation
| Shrine Icons | Explanation |
|---|---|
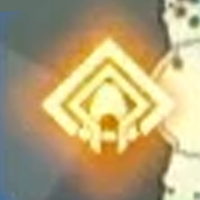 |
A shrine with an orange outline and an orange center is a shrine you have visited before but have not yet unlocked. It can't be used as a fast travel point. |
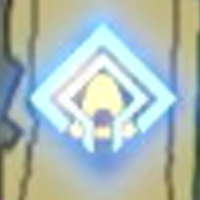 |
A shrine with a blue outline and orange center is a shrine that you have visited and unlocked before but have not yet cleared. Despite not being cleared, it can still be used as a fast travel point. |
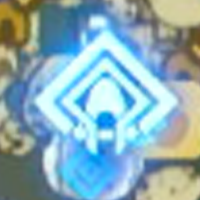 |
A shrine with a blue outline and blue center represents a shrine that you have cleared. It can be used as a fast travel point. |
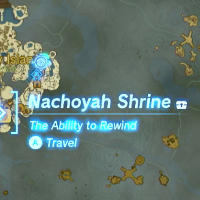 |
If the name of the shrine is followed by a chest at the end, it means you have obtained all available chests in that shrine. |
List of Shrines by Region
All Great Sky Island Shrines
| Great Sky Island Shrine Map |
|---|
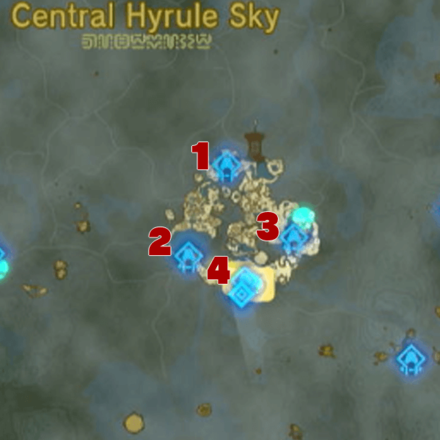 View Full Map Image |
| # | Shrine | Overview |
|---|---|---|
| 1 |
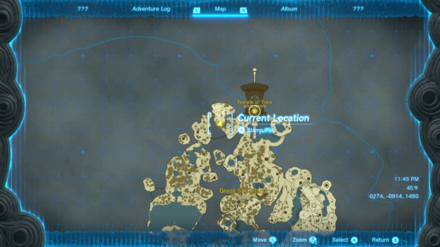 Ukouh Shrine Ukouh Shrine
|
Trial:
The Ability to Create
Location / XYZ Coordinates: Great Sky Island / 0274, -0914, 1460 Rewards: ・Amber |
| 2 |
 In-isa Shrine In-isa Shrine
|
Trial:
The Ability to Combine
Location / XYZ Coordinates: Great Sky Island / 0024, -1503, 1408 Rewards: ・Arrow x5 |
| 3 |
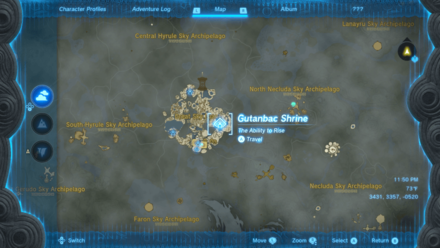 Gutanbac Shrine Gutanbac Shrine
|
Trial:
The Ability to Rise
Location / XYZ Coordinates: Great Sky Island / 0709, -1383, 1584 Rewards: ・Stone Axe ・Construct Bow |
| 4 |
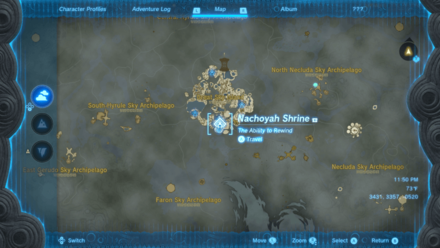 Nachoyah Shrine Nachoyah Shrine
|
Trial:
The Ability to Rewind
Location / XYZ Coordinates: Great Sky Island / 0389, -1661, 2299 Rewards: ・Arrow x10 |
Tears of the Kingdom starts you off on the Great Sky Island as you learn the mechanics of the game. Similar to the Great Plateau from Breath of the Wild, this starting area has four shrines that teach the basics of Link's new arm abilities.
All Abilities and How to Unlock
All Hyrule Field Shrines
| Hyrule Field Region Shrine Map |
|---|
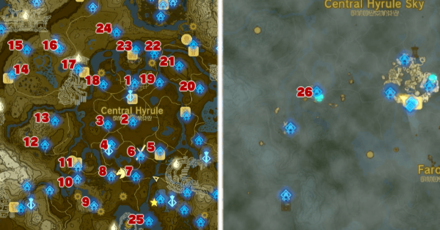 View Full Map Image |
| # | Shrine | Overview |
|---|---|---|
| 1 |
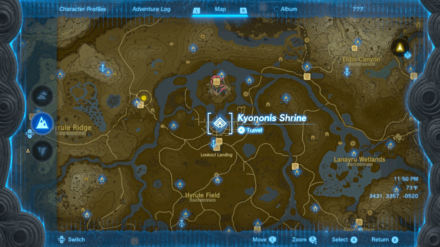 Kyononis Shrine Kyononis Shrine
|
Trial:
Combat Training
Location / XYZ Coordinates: Central Square / -0204, 0451, 0020 Rewards: ・Zonaite Sword |
| 2 |
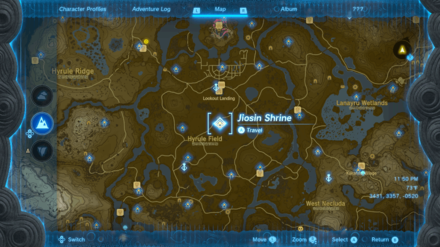 Jiosin Shrine Jiosin Shrine
|
Trial:
Shape Rotation
Location / XYZ Coordinates: Hyrule Field Chasm / -0240, -0371, 0027 Rewards: ・Hasty Elixir |
| 4 |
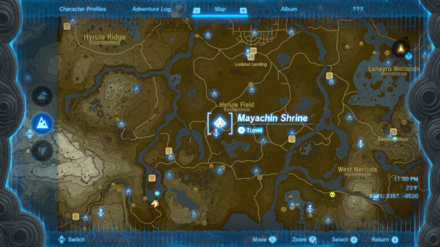 Mayachin Shrine Mayachin Shrine
|
Trial:
A Fixed Device
Location / XYZ Coordinates: Exchange Ruins / -0705, -0869, 0031 Rewards: ・Energizing Elixir |
| 12 |
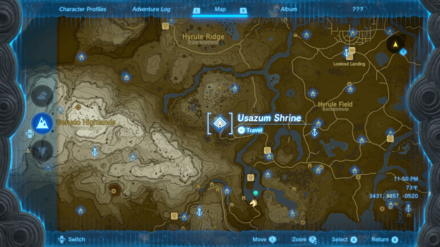 Usazum Shrine Usazum Shrine
|
Trial:
Rauru's Blessing
Location / XYZ Coordinates: Satori Mountain Foothill Cave / -2139, -0873, 0093 Rewards: ・Mighty Zonaite Spear |
| 13 |
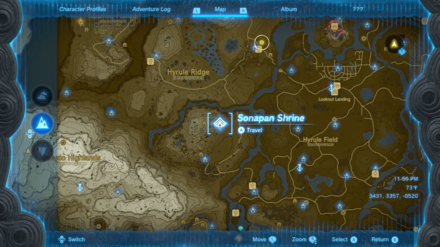 Sonapan Shrine Sonapan Shrine
|
Trial:
Missing Pathways
Location / XYZ Coordinates: Satori Mountain / -1921, -0357, 0228 Rewards: ・Arrow x5 |
| 14 |
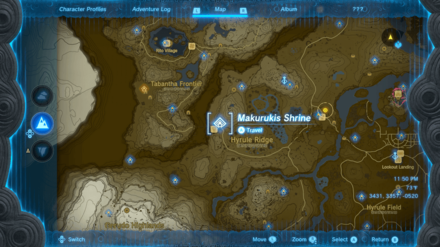 Makurukis Shrine Makurukis Shrine
|
Trial:
Combat Training: Archery
Location / XYZ Coordinates: Tabantha Bridge Stable / -2846, 0630, 0233 Rewards: ・Strong Construct Bow |
| 15 |
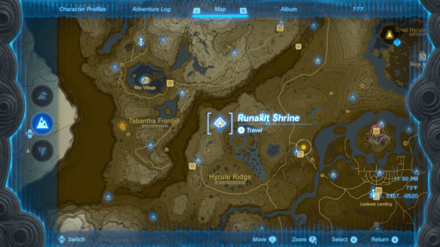 Runakit Shrine Runakit Shrine
|
Trial:
Built to Carry
Location / XYZ Coordinates: Upland Lindor / -2530, 1169, 0178 Rewards: ・Construct Bow |
| 16 |
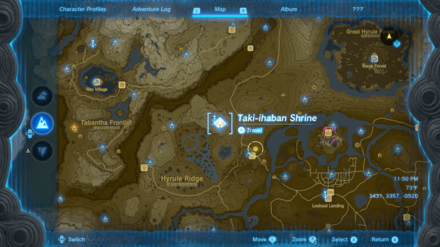 Taki-Ihaban Shrine Taki-Ihaban Shrine
|
Trial:
Rauru's Blessing
Location / XYZ Coordinates: Lindor's Brow Cave / -1830, 1149, 0147 Rewards: ・Large Zonai Charge |
| 17 |
 Sinakawak Shrine Sinakawak Shrine
|
Trial:
An Uplifting Device
Location / XYZ Coordinates: New Serenne Stable / -1413, 0757, 0089 Rewards: ・Opal |
| 23 |
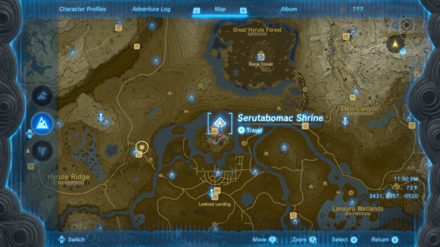 Serutabomac Shrine Serutabomac Shrine
|
Trial:
The Way Up
Location / XYZ Coordinates: Hyrule Castle / -0178, 1169, 0280 Rewards: ・Magic Rod |
| 25 |
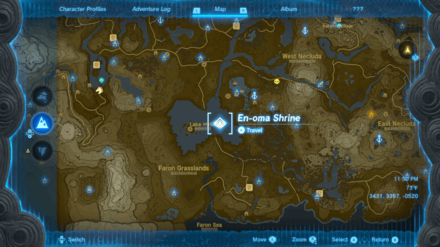 En-oma Shrine En-oma Shrine
|
Trial:
Rauru's Blessing
Location / XYZ Coordinates: Lake Hylia Whirlpool Cave / 0104, -2517, -0087 Rewards: ・Mighty Zonaite Sword |
| 26 |
 Jinodok Shrine Jinodok Shrine
|
Trial:
Rauru's Blessing
Location / XYZ Coordinates: South Hyrule Sky Archipelago / -1257, -1488, 1008 Rewards: ・Diamond |
All Tabantha Shrines
| Tabantha Region Shrine Map |
|---|
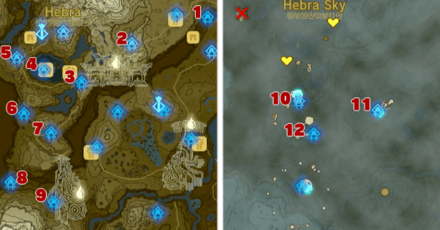 View Full Map Image |
| # | Shrine | Overview |
|---|---|---|
| 1 |
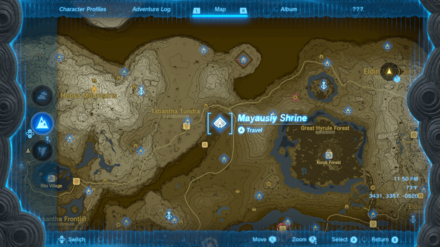 Mayausiy Shrine Mayausiy Shrine
|
Trial:
Building Blocks
Location / XYZ Coordinates: Forgotten Temple / -1169, 2602, -0083 Rewards: ・Large Zonai Charge |
| 2 |
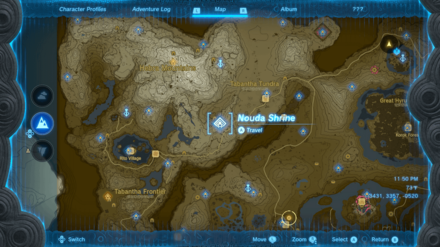 Nouda Shrine Nouda Shrine
|
Trial:
Proving Grounds: Intermediate
Location / XYZ Coordinates: Kopeeki Drifts Cave / -2318, 2201, 0173 Rewards: ・Hearty Elixir |
| 3 |
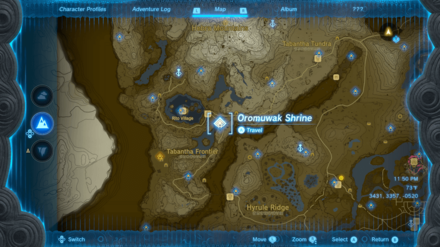 Oromuwak Shrine Oromuwak Shrine
|
Trial:
A Launching Device
Location / XYZ Coordinates: Kolami Bridge / -3079, 1617, 0243 Rewards: ・Ruby |
| 4 |
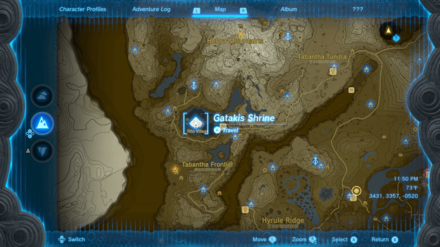 Gatakis Shrine Gatakis Shrine
|
Trial:
Ride the Winds
Location / XYZ Coordinates: Rito Village / -3652, 1806, 0168 Rewards: ・Strong Construct Bow |
| 5 |
 Wao-os Shrine Wao-os Shrine
|
Trial:
Lever Power
Location / XYZ Coordinates: West Lake Totori Cave / -4059, 1990, 0183 Rewards: ・Spicy Elixir |
| 6 |
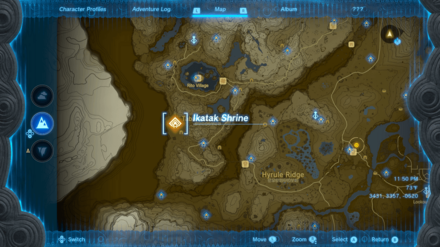 Ikatak Shrine Ikatak Shrine
|
Trial:
Rauru's Blessing
Location / XYZ Coordinates: Gisa Crater / -3950, 1138, 0112 Rewards: ・Big Battery |
| 7 |
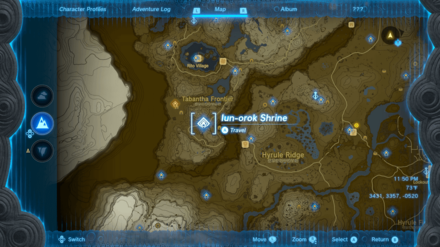 Iun-orok Shrine Iun-orok Shrine
|
Trial:
The Right Roll
Location / XYZ Coordinates: Tanagar Canyon West Cave / -3538, 0850, -0133 Rewards: ・Arrow x10 |
| 8 |
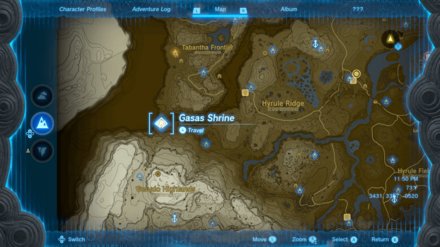 Gasas Shrine Gasas Shrine
|
Trial:
Well-Timed Cuts
Location / XYZ Coordinates: Tanagar Canyon / -4152, 0098, 0040 Rewards: ・Large Zonai Charge |
| 9 |
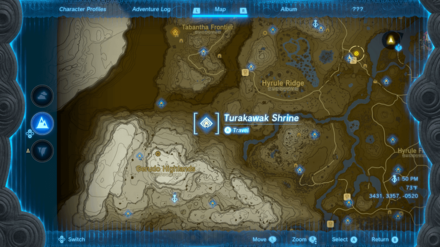 Turakawak Shrine Turakawak Shrine
|
Trial:
Stacking a Path
Location / XYZ Coordinates: Lake Illumeni / -3496, -0197, 0066 Rewards: ・Magic Rod |
| 10 |
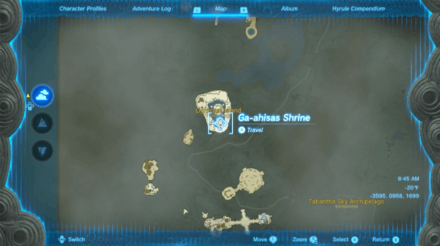 Ga-ahisas Shrine Ga-ahisas Shrine
|
Trial:
Rauru's Blessing
Location / XYZ Coordinates: Tabantha Sky Archipelago / -3596, 0962, 1699 Rewards: ・Star Fragment |
| 11 |
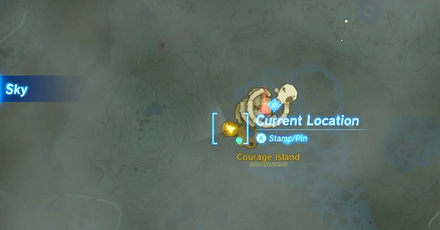 Taunhiy Shrine Taunhiy Shrine
|
Trial:
Combat Training: Archery
Location / XYZ Coordinates: Courage Island / -2402, 0825, 0615 Rewards: ・Strong Construct Bow |
| 12 |
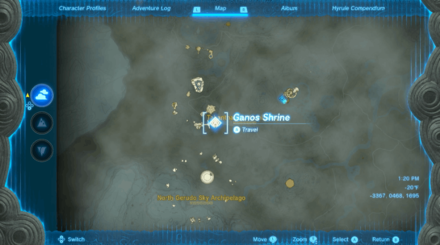 Ganos Shrine Ganos Shrine
|
Trial:
Rauru's Blessing
Location / XYZ Coordinates: TBD / -3370, 0466, 1695 Rewards: ・Diamond |
All Hebra Shrines
| Hebra Region Shrine Map |
|---|
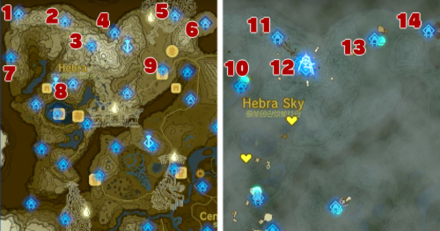 View Full Map Image |
| # | Shrine | Overview |
|---|---|---|
| 1 |
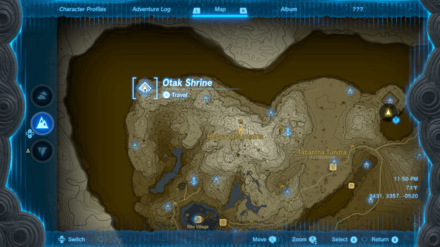 Otak Shrine Otak Shrine
|
Trial:
Proving Grounds: Traps
Location / XYZ Coordinates: Icefall Foothills Cave / -4391, 3714, 0212 Rewards: ・Mighty Construct Bow |
| 2 |
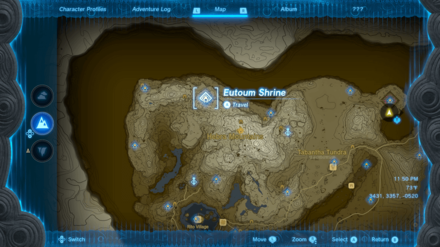 Eutoum Shrine Eutoum Shrine
|
Trial:
Proving Grounds: Infiltration
Location / XYZ Coordinates: Goflam's Secret Hot Spring / -3506, 3570, 0387 Rewards: ・Sapphire |
| 3 |
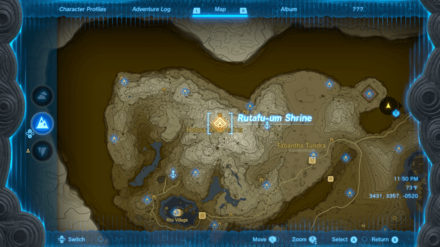 Rutafu-um Shrine Rutafu-um Shrine
|
Trial:
Rauru's Blessing
Location / XYZ Coordinates: Hebra Mountains Northwest Cave / -2998, 3105, 0514 Rewards: ・Topaz |
| 4 |
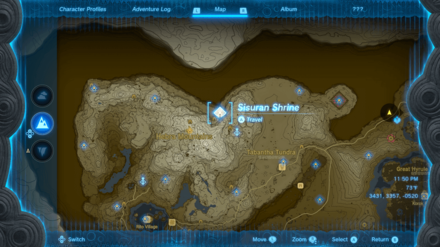 Sisuran Shrine Sisuran Shrine
|
Trial:
Rauru's Blessing
Location / XYZ Coordinates: Pikida Stonegrove Skyview Tower / -2556, 3354, 0245 Rewards: ・Sapphire |
| 5 |
 Oshozan-u Shrine Oshozan-u Shrine
|
Trial:
Mallet Smash
Location / XYZ Coordinates: North Tabantha Snowfield / -1405, 3677, 0288 Rewards: ・Zonaite Bow |
| 6 |
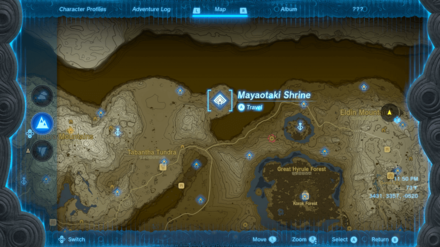 Mayaotaki Shrine Mayaotaki Shrine
|
Trial:
Rauru's Blessing
Location / XYZ Coordinates: North Lomei Labyrinth / -0823, 3535, 0235 Rewards: ・Diamond |
| 7 |
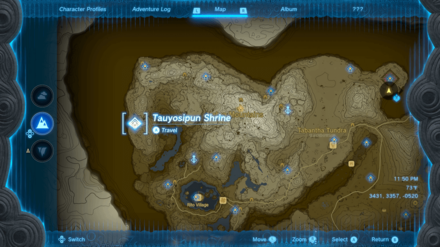 Tauyosipun Shrine Tauyosipun Shrine
|
Trial:
Forward or Backward?
Location / XYZ Coordinates: Sturnida Basin / -4536, 2878, 0262 Rewards: ・Strong Construct Bow |
| 8 |
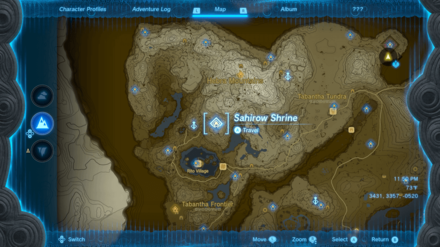 Sahirow Shrine Sahirow Shrine
|
Trial:
Aid From Above
Location / XYZ Coordinates: Corvash Peak / -3358, 2392, 0359 Rewards: ・Spicy Elixir |
| 9 |
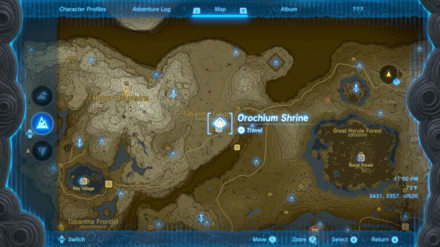 Orochium Shrine Orochium Shrine
|
Trial:
Courage to Fall
Location / XYZ Coordinates: Forgotten Temple / -1635, 2640, 0239 Rewards: ・Arrow x5 |
| 10 |
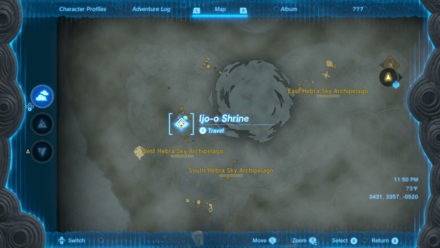 Ijo-o Shrine Ijo-o Shrine
|
Trial:
More Than Defense
Location / XYZ Coordinates: West Hebra Sky Archipelago / -3860, 2682, 0702 Rewards: ・Arrow x5 |
| 11 |
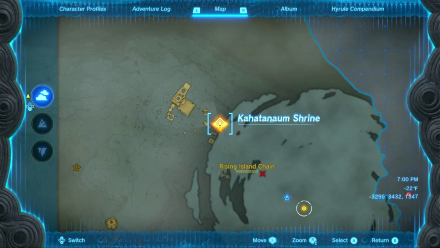 Kahatanaum Shrine Kahatanaum Shrine
|
Trial:
Rauru's Blessing
Location / XYZ Coordinates: Rising Island Chain / -3296, 3432, 1347 Rewards: ・Large Zonai Charge |
| 12 |
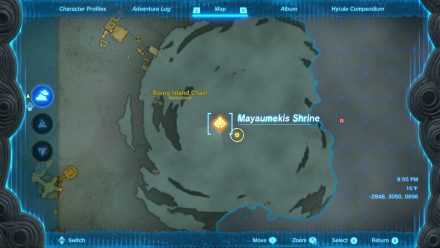 Mayaumekis Shrine Mayaumekis Shrine
|
Trial:
Downward Force
Location / XYZ Coordinates: Rising Island Chain / -2948, 3050, 0896 Rewards: ・Arrow x10 |
| 13 |
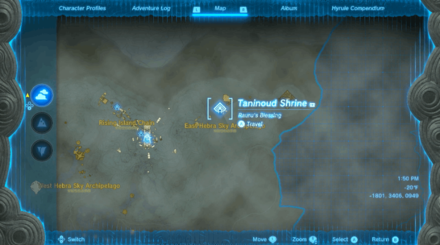 Taninoud Shrine Taninoud Shrine
|
Trial:
Rauru's Blessing
Location / XYZ Coordinates: East Hebra Sky Archipelago / -1801, 3406, 0949 Rewards: ・Topaz |
| 14 |
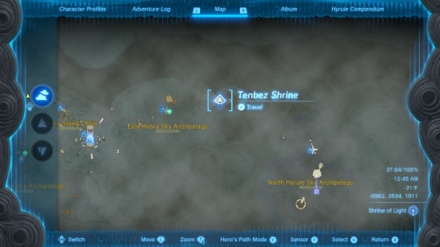 Tenbez Shrine Tenbez Shrine
|
Trial:
Gravity and Velocity
Location / XYZ Coordinates: North Lomei Castle Top Floor / -0968, 3535, 1011 Rewards: ・Large Zonai Charge |
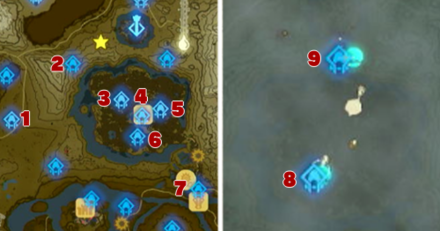
All Great Hyrule Forest Shrines
| Great Hyrule Forest Region Shrine Map |
|---|
 View Full Map Image |
| # | Shrine | Overview |
|---|---|---|
| 1 |
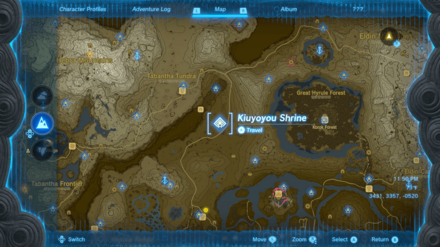 Kiuyoyou Shrine Kiuyoyou Shrine
|
Trial:
Fire and Ice
Location / XYZ Coordinates: Forgotten Temple / -1106, 2086, 0104 Rewards: ・Zonaite Spear |
| 2 |
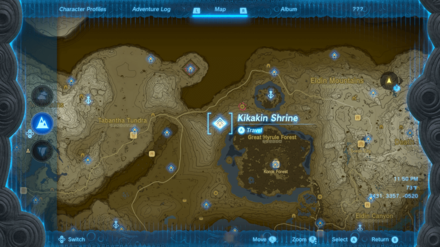 Kikakin Shrine Kikakin Shrine
|
Trial:
Shining in Darkness
Location / XYZ Coordinates: Mount Drena / -0395, 2736, 0287 Rewards: ・Amber ・Zonaite Bow ・Luminous Stone ・Opal |
| 3 |
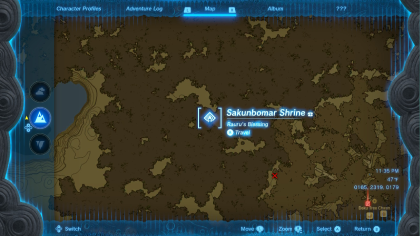 Sakunbomar Shrine Sakunbomar Shrine
|
Trial:
Rauru's Blessing
Location / XYZ Coordinates: Korok Forest / 0165, 2314, 0178 Rewards: ・Diamond |
| 4 |
 Musanokir Shrine Musanokir Shrine
|
Trial:
Swing to Hit
Location / XYZ Coordinates: Korok Forest / 0408, 2133, 0144 Rewards: ・Large Zonai Charge |
| 5 |
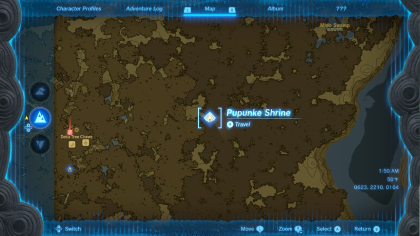 Pupunke Shrine Pupunke Shrine
|
Trial:
Rauru's Blessing
Location / XYZ Coordinates: Korok Forest / 0615, 2213, 0163 Rewards: ・Mighty Zonaite Sword |
| 6 |
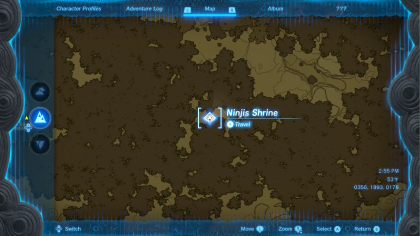 Ninjis Shrine Ninjis Shrine
|
Trial:
Rauru's Blessing
Location / XYZ Coordinates: Korok Forest / 0353, 1891, 0178 Rewards: ・Mighty Construct Bow |
| 7 |
 Ekochiu Shrine Ekochiu Shrine
|
Trial:
Rise and Fall
Location / XYZ Coordinates: Woodland Stable / 1062, 1281, 0045 Rewards: ・Zonaite Shield |
| 8 |
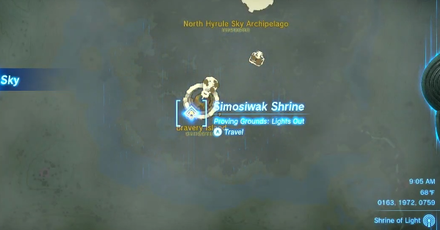 Simosiwak Shrine Simosiwak Shrine
|
Trial:
Proving Grounds: Lights Out
Location / XYZ Coordinates: Bravery Island / 0163, 1972, 0759 Rewards: ・Bright Elixir |
| 9 |
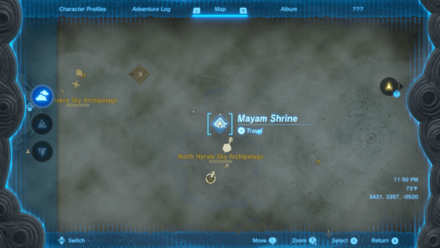 Mayam Shrine Mayam Shrine
|
Trial:
Rauru's Blessing
Location / XYZ Coordinates: North Hyrule Sky Archipelago / 0340, 2815, 1821 Rewards: ・Magic Rod |
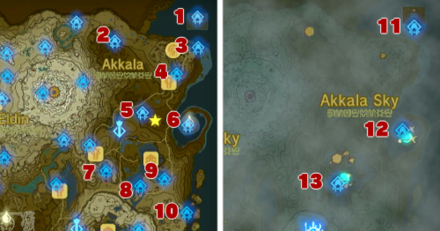
All Akkala Shrines
| Akkala Region Shrine Map |
|---|
 View Full Map Image |
| # | Shrine | Overview |
|---|---|---|
| 1 |
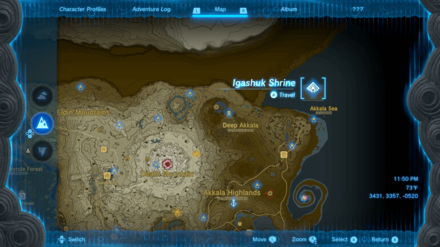 Igashuk Shrine Igashuk Shrine
|
Trial:
Rauru's Blessing
Location / XYZ Coordinates: Lomei Labyrinth Island / 4654, 3712, 0131 Rewards: ・Large Zonai Charge |
| 2 |
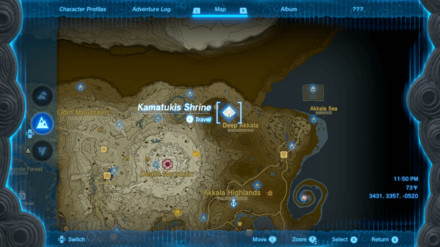 Kamatukis Shrine Kamatukis Shrine
|
Trial:
A Precise Strike
Location / XYZ Coordinates: Tempest Gulch / 3430, 3356, 0071 Rewards: ・Mighty Zonaite Longsword |
| 3 |
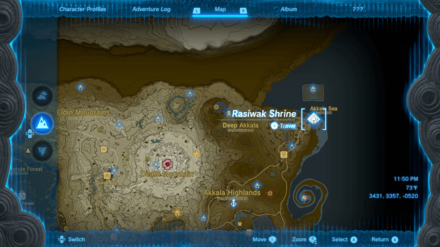 Rasiwak Shrine Rasiwak Shrine
|
Trial:
Flotational Brilliance
Location / XYZ Coordinates: Akkala Ancient Tech Lab / 4666, 3257, 0001 Rewards: ・Magic Scepter |
| 4 |
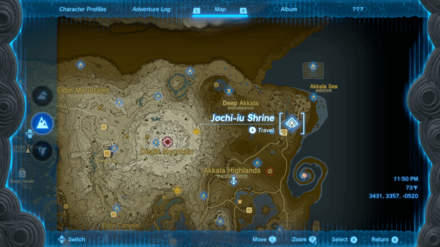 Jochi-iu Shrine Jochi-iu Shrine
|
Trial:
Courage to Pluck
Location / XYZ Coordinates: East Akkala Stable / 4353, 2877, 0164 Rewards: ・Zonaite Bow ・Large Zonaite |
| 5 |
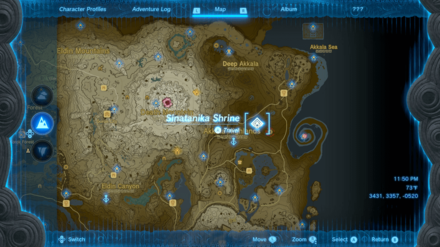 Sinatanika Shrine Sinatanika Shrine
|
Trial:
Combat Training: Sneakstrike
Location / XYZ Coordinates: Ulri Mountain / 3842, 2300, 0048 Rewards: ・Sneaky Elixir |
| 6 |
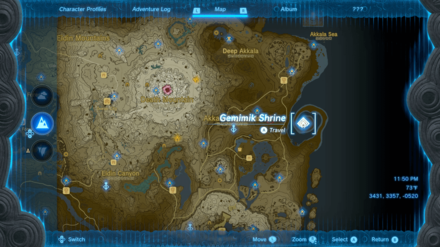 Gemimik Shrine Gemimik Shrine
|
Trial:
Turbine Power
Location / XYZ Coordinates: East Akkala Stable / 4511, 2114, 0001 Rewards: ・Mighty Zonaite Shield |
| 7 |
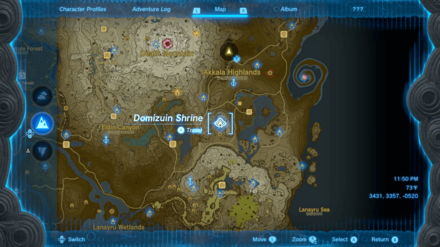 Domizuin Shrine Domizuin Shrine
|
Trial:
A Prone Pathway
Location / XYZ Coordinates: Akkala Citadel Ruins / 3305, 1443, 0426 Rewards: ・Arrow x10 ・Zonai Charge ・Strong Zonaite Shield |
| 8 |
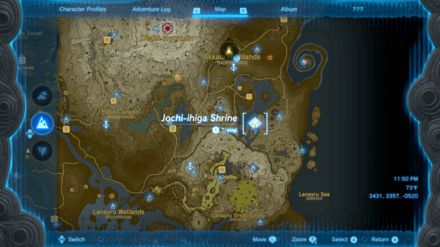 Jochi-ihiga Shrine Jochi-ihiga Shrine
|
Trial:
Rauru's Blessing
Location / XYZ Coordinates: Akkala Falls / 3809, 1219, 0090 Rewards: ・Diamond |
| 9 |
 Rasitakiwak Shrine Rasitakiwak Shrine
|
Trial:
Proving Grounds: Vehicles
Location / XYZ Coordinates: Tarrey Town / 4166, 1323, 0229 Rewards: ・Magic Rod |
| 10 |
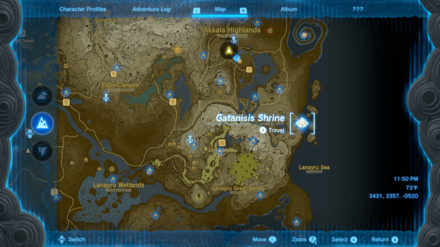 Gatanisis Shrine Gatanisis Shrine
|
Trial:
A Well-Timed Bounce
Location / XYZ Coordinates: Knuckel Island / 4498, 0825, 0095 Rewards: ・Bomb Flower x5 |
| 11 |
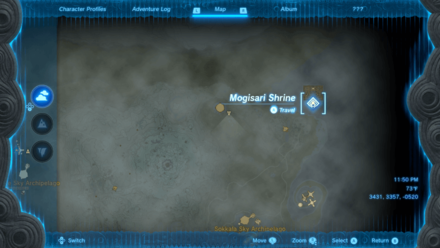 Mogisari Shrine Mogisari Shrine
|
Trial:
Courage to Jump
Location / XYZ Coordinates: Lomei Sky Labyrinth / 4655, 3501, 1010 Rewards: ・Mighty Zonaite Shield |
| 12 |
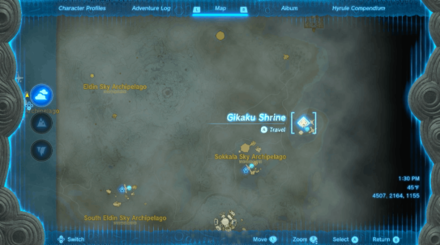 Gikaku Shrine Gikaku Shrine
|
Trial:
Rauru's Blessing
Location / XYZ Coordinates: Sky Mine / 4506, 2165, 1155 Rewards: ・Ruby |
| 13 |
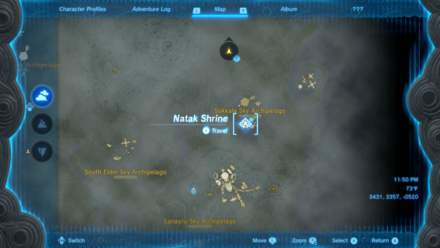 Natak Shrine Natak Shrine
|
Trial:
Rauru's Blessing
Location / XYZ Coordinates: Sokkala Sky Archipelago / 3671, 1484, 1158 Rewards: ・Enduring Elixir |
All Eldin Shrines
| Eldin Region Shrine Map |
|---|
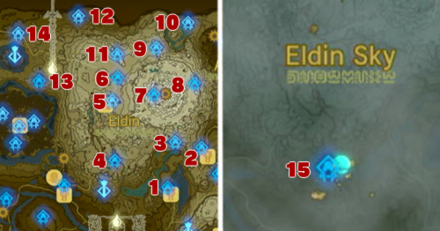 View Full Map Image |
| # | Shrine | Overview |
|---|---|---|
| 1 |
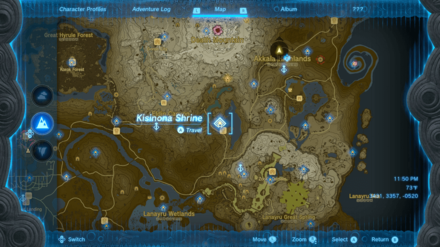 Kisinona Shrine Kisinona Shrine
|
Trial:
Wind Power
Location / XYZ Coordinates: Foothill Stable / 2567, 1246, 0173 Rewards: ・Mighty Construct Bow |
| 2 |
 Mayachideg Shrine Mayachideg Shrine
|
Trial:
Proving Grounds: The Hunt
Location / XYZ Coordinates: Kanalet Ridge / 3062, 1823, 0216 Rewards: ・Captain III Spear |
| 3 |
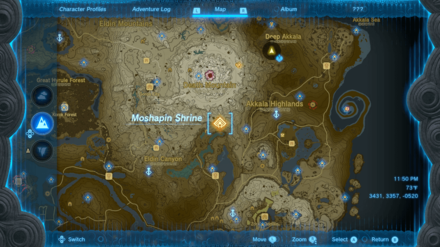 Moshapin Shrine Moshapin Shrine
|
Trial:
Rauru's Blessing
Location / XYZ Coordinates: Lake Intenoch Cave / 2678, 1905, 0131 Rewards: ・Mighty Zonaite Shield |
| 4 |
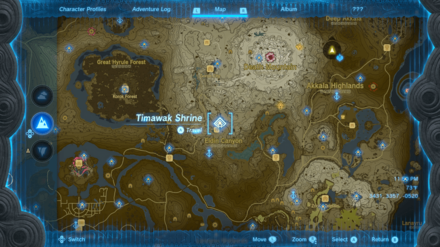 Timawak Shrine Timawak Shrine
|
Trial:
Against the Flow
Location / XYZ Coordinates: Bedrock Bistro / 1799, 1638, 0311 Rewards: ・Strong Zonaite Shield |
| 5 |
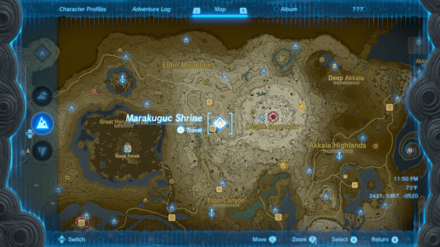 Marakuguc Shrine Marakuguc Shrine
|
Trial:
Wheeled Wonders
Location / XYZ Coordinates: Goron City / 1762, 2510, 0436 Rewards: ・Strong Construct Bow |
| 6 |
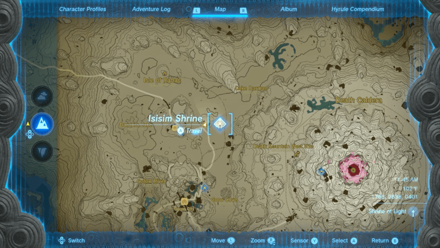 Isisim Shrine Isisim Shrine
|
Trial:
Proving Grounds: In Reverse
Location / XYZ Coordinates: YunoboCo HQ East Cave / 1841, 2841, 0363 Rewards: ・Magic Rod |
| 7 |
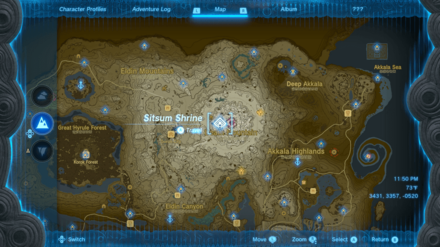 Sitsum Shrine Sitsum Shrine
|
Trial:
A Controlling Device
Location / XYZ Coordinates: Death Mountain / 2369, 2595, 0790 Rewards: ・Mighty Construct Bow |
| 8 |
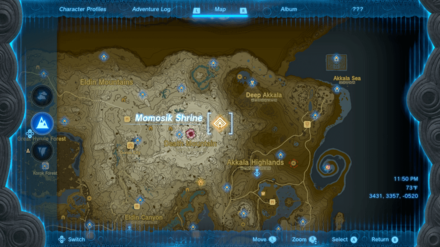 Momosik Shrine Momosik Shrine
|
Trial:
Rauru's Blessing
Location / XYZ Coordinates: Death Caldera / 2959, 2758, 0524 Rewards: ・Big Battery |
| 9 |
 Sibajitak Shrine Sibajitak Shrine
|
Trial:
Alignment
Location / XYZ Coordinates: Death Caldera / 2399, 3274, 0402 Rewards: ・Mighty Zonaite Longsword |
| 10 |
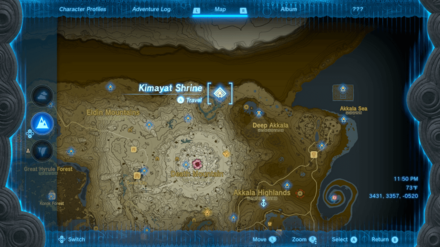 Kimayat Shrine Kimayat Shrine
|
Trial:
Proving Grounds: Smash
Location / XYZ Coordinates: Skull Lake / 2863, 3637, 0241 Rewards: ・Captain II Reaper |
| 11 |
 Jiotak Shrine Jiotak Shrine
|
Trial:
Rauru's Blessing
Location / XYZ Coordinates: Isle of Rabac Gallery / 1833, 3179, 0257 Rewards: ・Magic Staff |
| 12 |
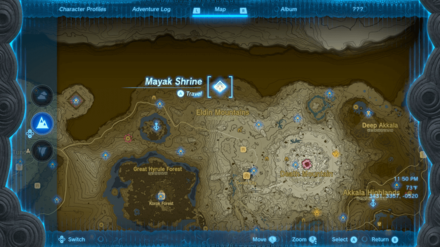 Mayak Shrine Mayak Shrine
|
Trial:
Timely Catches
Location / XYZ Coordinates: East Deplian Badlands / 1270, 3733, 0106 Rewards: ・Large Zonai Charge |
| 13 |
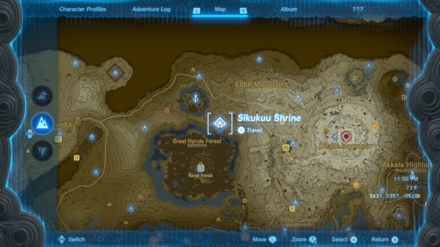 Sikukuu Shrine Sikukuu Shrine
|
Trial:
Spinning Gears
Location / XYZ Coordinates: Thyphylo Ruins / 0699, 2793, 0226 Rewards: ・Zonaite Longsword |
| 14 |
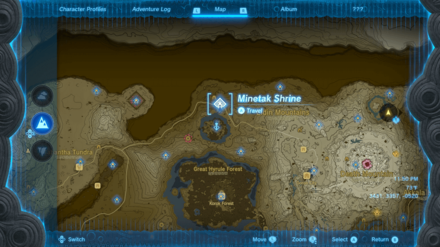 Minetak Shrine Minetak Shrine
|
Trial:
Rauru's Blessing
Location / XYZ Coordinates: Deplian Badlands Cave / 0393, 3485, 0068 Rewards: ・Big Battery |
| 15 |
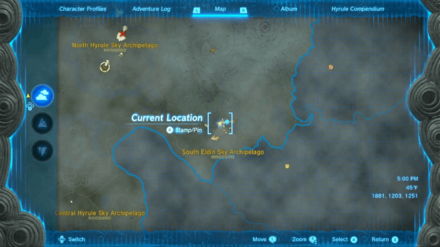 Kadaunar Shrine Kadaunar Shrine
|
Trial:
Water Makes A Way
Location / XYZ Coordinates: South Eldin Sky Archipelago / 1881, 1203, 1251 Rewards: ・Strong Construct Bow |
All Lanayru Shrines
| Lanayru Region Shrine Map |
|---|
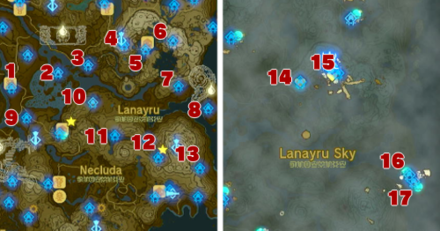 View Full Map Image |
| # | Shrine | Overview |
|---|---|---|
| 1 |
 Tukarok Shrine Tukarok Shrine
|
Trial:
Forward Force
Location / XYZ Coordinates: Wetland Stable / 0915, -0252, 0034 Rewards: ・Strong Zonaite Sword |
| 2 |
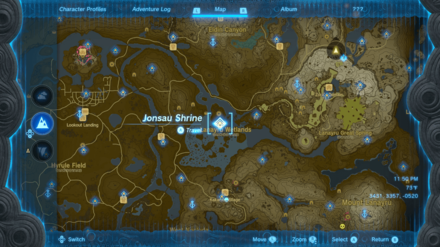 Jonsau Shrine Jonsau Shrine
|
Trial:
Deep Force
Location / XYZ Coordinates: Mercay Island / 1744, 0017, 0025 Rewards: ・Strong Construct Bow |
| 3 |
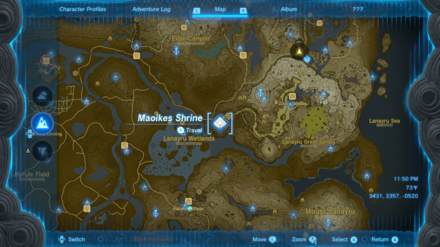 Maoikes Shrine Maoikes Shrine
|
Trial:
Rauru's Blessing
Location / XYZ Coordinates: Bone Pond East Cave / 2275, 0147, 0079 Rewards: ・Diamond |
| 4 |
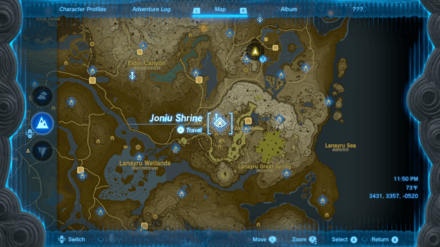 Joniu Shrine Joniu Shrine
|
Trial:
Rauru's Blessing
Location / XYZ Coordinates: Ralis Channel / 2918, 0509, 0155 Rewards: ・Large Zonai Charge |
| 5 |
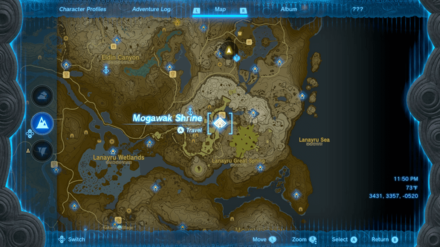 Mogawak Shrine Mogawak Shrine
|
Trial:
The Power of Water
Location / XYZ Coordinates: Zora's Domain / 3298, 0424, 0112 Rewards: ・Opal ・Magic Scepter |
| 6 |
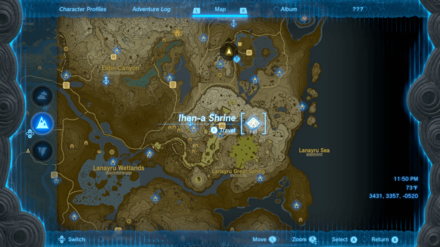 Ihen-a Shrine Ihen-a Shrine
|
Trial:
Midair Perch
Location / XYZ Coordinates: Zora's Domain / 3787, 0577, 0486 Rewards: ・Arrow x5 |
| 7 |
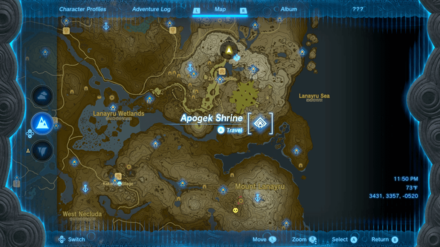 Apogek Shrine Apogek Shrine
|
Trial:
Wings on the Wind
Location / XYZ Coordinates: East Reservoir Lake / 3887, -0217, 0164 Rewards: ・Strong Zonaite Spear |
| 8 |
 Yomizuk Shrine Yomizuk Shrine
|
Trial:
Rauru's Blessing
Location / XYZ Coordinates: Tarm Point Cave / 4413, -0614, 0034 Rewards: ・Diamond |
| 9 |
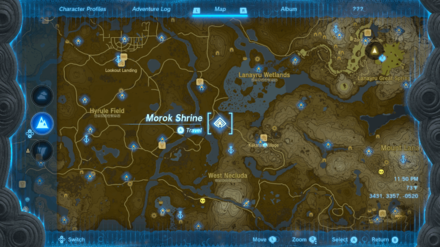 Morok Shrine Morok Shrine
|
Trial:
A Bouncy Device
Location / XYZ Coordinates: Sahasra Slope / 1182, -0779, 0133 Rewards: ・Sneaky Elixir |
| 10 |
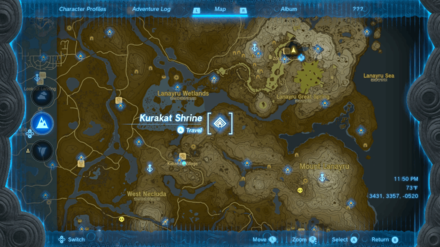 Kurakat Shrine Kurakat Shrine
|
Trial:
Rauru's Blessing
Location / XYZ Coordinates: Quatta's Shelf / 2362, -0511, 0156 Rewards: ・Magic Scepter |
| 11 |
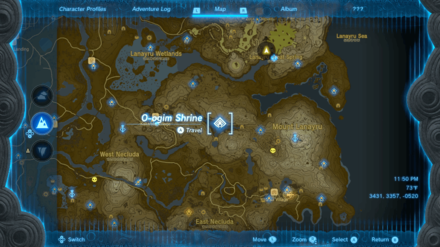 O-ogim Shrine O-ogim Shrine
|
Trial:
Rauru's Blessing
Location / XYZ Coordinates: Lanayru Heights / 2755, -1090, 0100 Rewards: ・Big Battery |
| 12 |
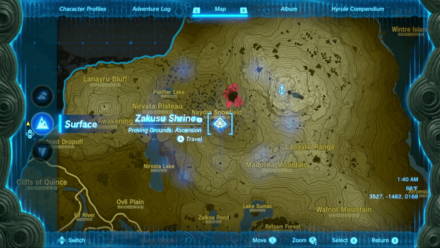 Zakusu Shrine Zakusu Shrine
|
Trial:
Proving Grounds: Ascension
Location / XYZ Coordinates: Naydra Snowfield / 3527, -1482, 0168 Rewards: ・Soldier III Spear |
| 13 |
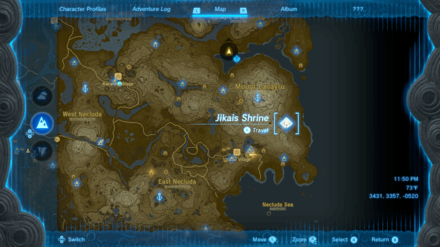 Jikais Shrine Jikais Shrine
|
Trial:
Jailbreak
Location / XYZ Coordinates: Lanayru Range / 4266, -1674, 0182 Rewards: ・Magic Staff |
| 14 |
 Jirutagumac Shrine Jirutagumac Shrine
|
Trial:
A Flying Device
Location / XYZ Coordinates: Lanayru Sky Archipelago / 2917, 0532, 0951 Rewards: ・Large Zonaite |
| 15 |
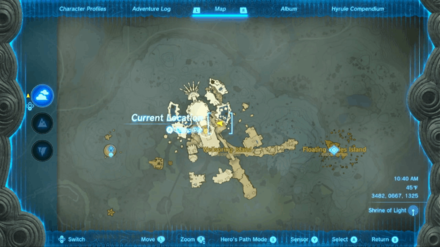 Igoshon Shrine Igoshon Shrine
|
Trial:
Orbs of Water
Location / XYZ Coordinates: Wellspring Island / 3482, 0667, 1325 Rewards: ・Large Zonai Charge |
| 16 |
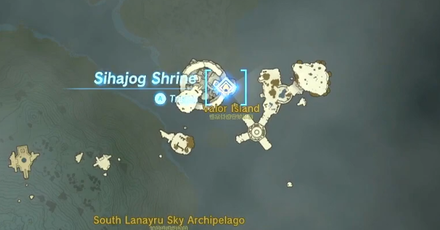 Sihajog Shrine Sihajog Shrine
|
Trial:
Rauru's Blessing
Location / XYZ Coordinates: Valor Island / 4548, -0846, 1120 Rewards: ・Diamond |
| 17 |
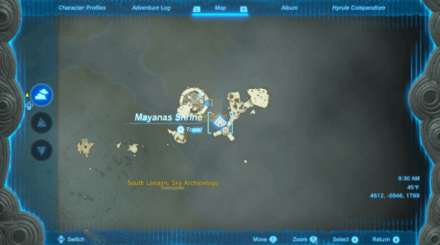 Mayanas Shrine Mayanas Shrine
|
Trial:
The Ice Guides You
Location / XYZ Coordinates: Valor Island / 4613, -0947, 1790 Rewards: ・Mighty Zonai Shield |
All Necluda Shrines
| Necluda Region Shrine Map |
|---|
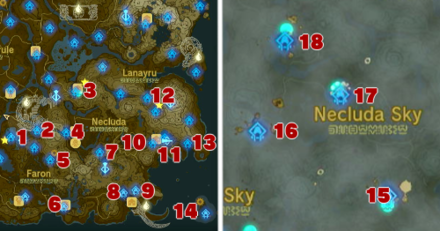 View Full Map Image |
| # | Shrine | Overview |
|---|---|---|
| 1 |
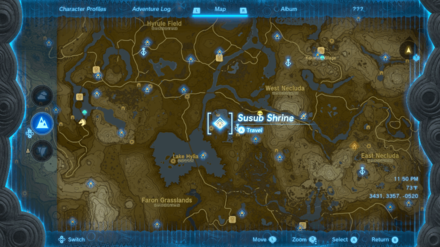 Susub Shrine Susub Shrine
|
Trial:
Rauru's Blessing
Location / XYZ Coordinates: Popla Foothills / 0348, -2050, -0026 Rewards: ・Magic Staff |
| 2 |
 Jochisiu Shrine Jochisiu Shrine
|
Trial:
Rauru's Blessing
Location / XYZ Coordinates: Squabble River / 0931, -1902, 0030 Rewards: ・Big Battery |
| 3 |
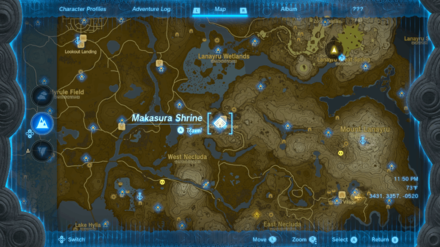 Makasura Shrine Makasura Shrine
|
Trial:
An Upright Device
Location / XYZ Coordinates: Kakariko Village / 1770, -1051, 0166 Rewards: ・Fairy Tonic |
| 4 |
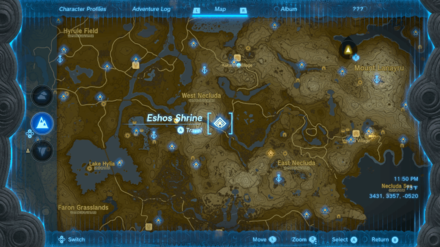 Eshos Shrine Eshos Shrine
|
Trial:
Combat Training: Shields
Location / XYZ Coordinates: Dueling Peaks / 1564, -1943, 0157 Rewards: ・Mighty Zonaite Shield |
| 5 |
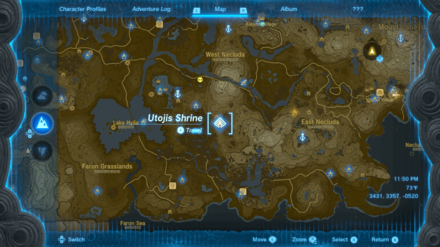 Utojis Shrine Utojis Shrine
|
Trial:
Rauru's Blessing
Location / XYZ Coordinates: Tobio’s Hollow / 1217, -2542, 0096 Rewards: ・Large Zonai Charge |
| 6 |
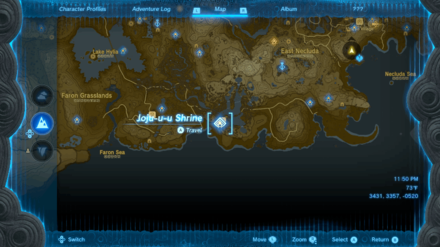 Joju-u-u Shrine Joju-u-u Shrine
|
Trial:
Building Bridges
Location / XYZ Coordinates: Ubota Point / 1513, -3577, 0142 Rewards: ・Large Zonaite |
| 7 |
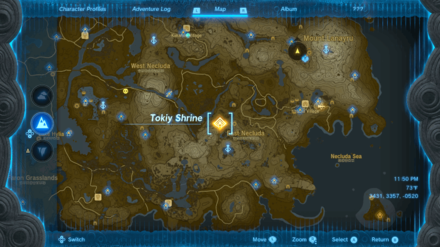 Tokiy Shrine Tokiy Shrine
|
Trial:
Rauru's Blessing
Location / XYZ Coordinates: Oakle's Navel Cave / 2304, -2377, -0028 Rewards: ・Large Zonai Charge |
| 8 |
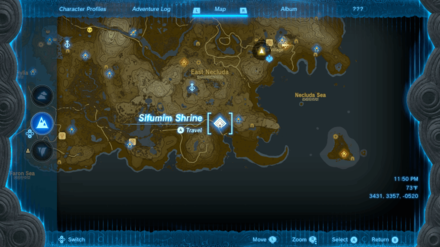 Sifumim Shrine Sifumim Shrine
|
Trial:
Proving Grounds: Flow
Location / XYZ Coordinates: Lurelin Village / 2826, -3271, 0078 Rewards: ・Captain II Reaper |
| 9 |
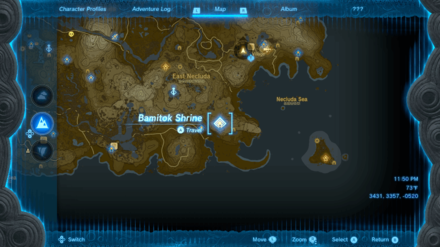 Bamitok Shrine Bamitok Shrine
|
Trial:
Rauru's Blessing
Location / XYZ Coordinates: Mount Dunsel Cave / 3094, -3209, 0082 Rewards: ・Big Battery |
| 10 |
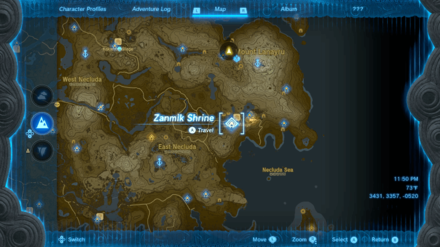 Zanmik Shrine Zanmik Shrine
|
Trial:
Scoop It Out
Location / XYZ Coordinates: Hateno Village / 3469, -2179, 0148 Rewards: ・Strong Zonaite Longsword |
| 11 |
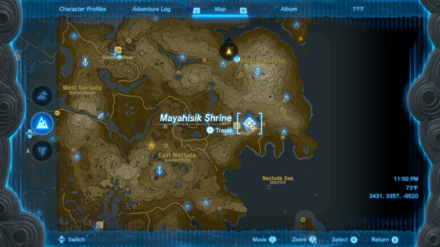 Mayahisik Shrine Mayahisik Shrine
|
Trial:
Rauru's Blessing
Location / XYZ Coordinates: Kakariko Village / 3727, -2058, 0189 Rewards: ・Magic Scepter |
| 12 |
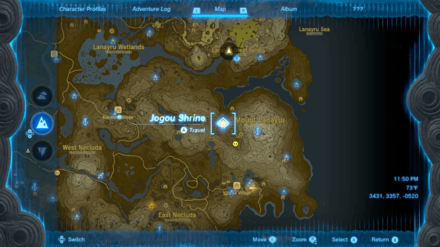 Jogou Shrine Jogou Shrine
|
Trial:
Rauru's Blessing
Location / XYZ Coordinates: Lanayru Road East Cave / 3346, -1187, 0057 Rewards: ・Hearty Elixir |
| 13 |
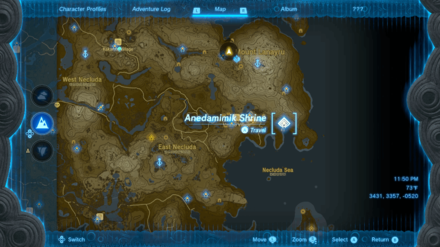 Anedamimik Shrine Anedamimik Shrine
|
Trial:
A Retraced Path
Location / XYZ Coordinates: Deepback Bay Cave / 4231, -2178, -0012 Rewards: ・Large Zonai Charge |
| 14 |
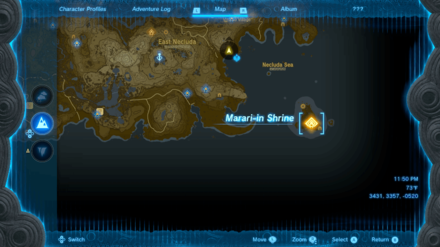 Marari-in Shrine Marari-in Shrine
|
Trial:
Rauru's Blessing
Location / XYZ Coordinates: Eventide Island Cave / 4632, -3712, 0018 Rewards: ・Ruby |
| 15 |
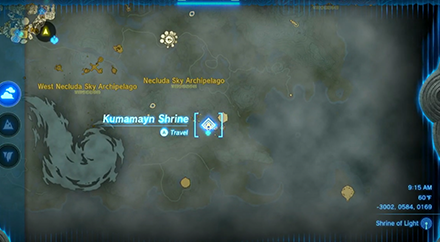 Kumamayn Shrine Kumamayn Shrine
|
Trial:
Rauru's Blessing
Location / XYZ Coordinates: Necluda Sky Archipelago / 2856, -2857, 1212 Rewards: ・Zonaite Bow |
| 16 |
 Ukoojisi Shrine Ukoojisi Shrine
|
Trial:
Rauru's Blessing
Location / XYZ Coordinates: West Necluda Sky Archipelago / 1464, -2165, 0585 Rewards: ・Mighty Zonaite Shield |
| 17 |
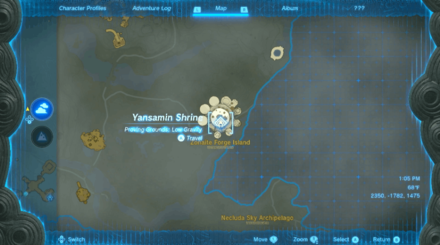 Yansamin Shrine Yansamin Shrine
|
Trial:
Proving Grounds: Low Gravity
Location / XYZ Coordinates: Zonaite Forge Island / 2353, -1783, 1475 Rewards: ・Large Zonaite |
| 18 |
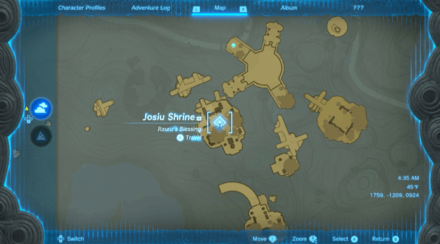 Josiu Shrine Josiu Shrine
|
Trial:
Rauru's Blessing
Location / XYZ Coordinates: North Necluda Sky Archipelago / 1759, -1209, 0924 Rewards: ・Large Zonai Charge |
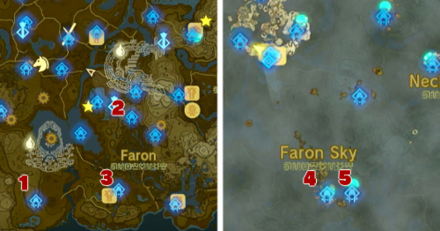
All Faron Shrines
| Faron Region Shrine Map |
|---|
 View Full Map Image |
| # | Shrine | Overview |
|---|---|---|
| 1 |
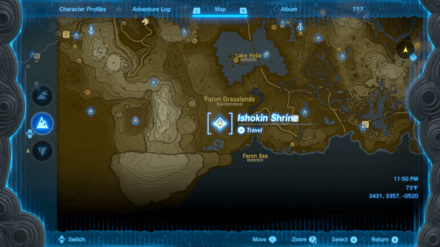 Ishokin Shrine Ishokin Shrine
|
Trial:
Rauru's Blessing
Location / XYZ Coordinates: Oseira Plains / -0565, -3524, 0129 Rewards: ・Topaz |
| 2 |
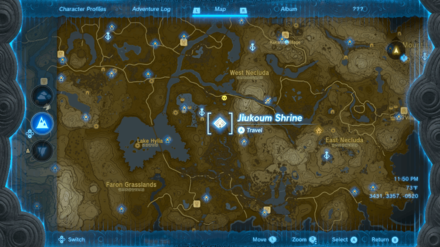 Jiukoum Shrine Jiukoum Shrine
|
Trial:
Built For Rails
Location / XYZ Coordinates: Spring of Courage / 0867, -2279, 0141 Rewards: ・Sticky Elixir |
| 3 |
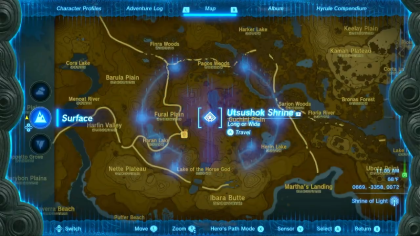 Utsushok Shrine Utsushok Shrine
|
Trial:
Long or Wide
Location / XYZ Coordinates: Guchini Plain / 0669, -3358, 0072 Rewards: ・Sneaky Elixir |
| 4 |
 Joku-usin Shrine Joku-usin Shrine
|
Trial:
Proving Grounds: Short Circuit
Location / XYZ Coordinates: Thunderhead Isles / 1077, -3349, 0786 Rewards: ・Electro Elixir |
| 5 |
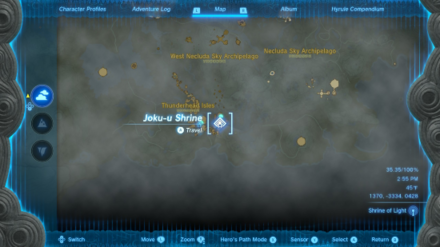 Joku-u Shrine Joku-u Shrine
|
Trial:
Rauru's Blessing
Location / XYZ Coordinates: Dragonhead Island / 1375, -3339, 0429 Rewards: ・Diamond |
All Gerudo Shrines
| Gerudo Region Shrine Map |
|---|
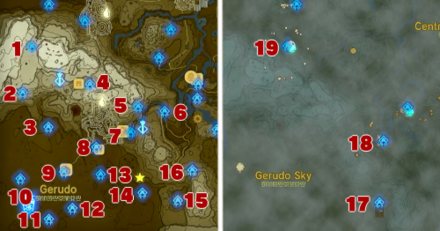 View Full Map Image |
| # | Shrine | Overview |
|---|---|---|
| 1 |
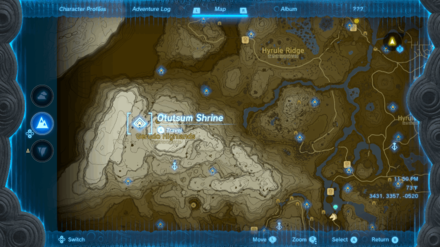 Otutsum Shrine Otutsum Shrine
|
Trial:
Rauru's Blessing
Location / XYZ Coordinates: Gerudo Summit / -4468, -0670, 0509 Rewards: ・Topaz |
| 2 |
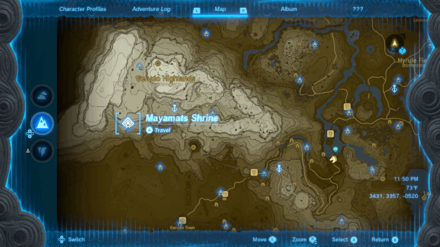 Mayamats Shrine Mayamats Shrine
|
Trial:
A Route For a Ball
Location / XYZ Coordinates: Rutimala Hill / -4637, -1514, 0452 Rewards: ・Large Zonai Charge |
| 3 |
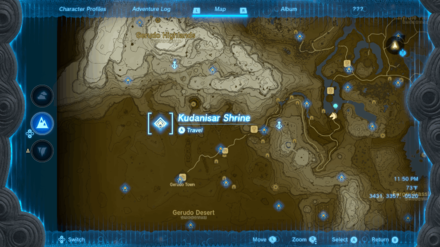 Kudanisar Shrine Kudanisar Shrine
|
Trial:
Bridging the Sands
Location / XYZ Coordinates: Karusa Valley / -4168, -2140, 0050 Rewards: ・Hasty Elixir ・Arrow x10 |
| 4 |
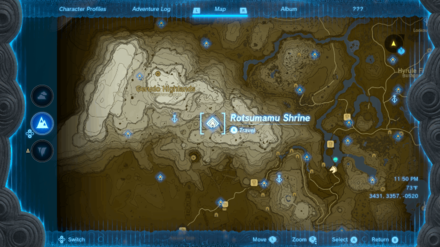 Rotsumamu Shrine Rotsumamu Shrine
|
Trial:
A Balanced Plan
Location / XYZ Coordinates: Yiga Clan Hideout Chasm / -3406, -1364, 0335 Rewards: ・Large Zonaite |
| 5 |
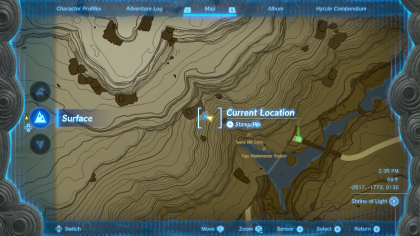 Suariwak Shrine Suariwak Shrine
|
Trial:
Rauru's Blessing
Location / XYZ Coordinates: Yiga Blademaster Station / -2323, -1770, 0131 Rewards: ・Big Battery |
| 6 |
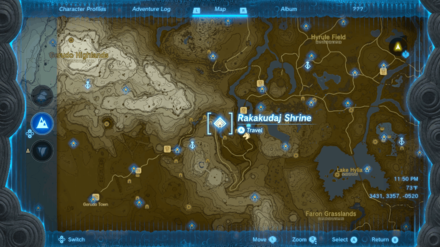 Rakakudaj Shrine Rakakudaj Shrine
|
Trial:
Rauru's Blessing
Location / XYZ Coordinates: Koukot Plateau / -2037, -1851, 0064 Rewards: ・Mighty Zonaite Longsword |
| 7 |
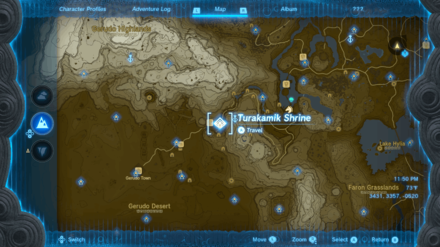 Turakamik Shrine Turakamik Shrine
|
Trial:
Hidden Metal
Location / XYZ Coordinates: Spectacle Rock / -2658, -2236, 0067 Rewards: ・Strong Zonaite Shield |
| 8 |
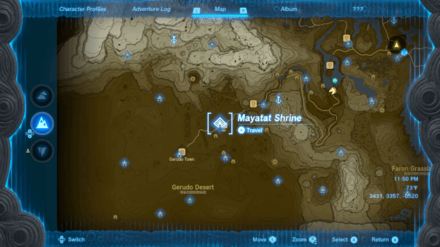 Mayatat Shrine Mayatat Shrine
|
Trial:
A Sliding Device
Location / XYZ Coordinates: Kara Kara Bazaar / -3290, -2512, 0024 Rewards: ・Arrow x10 |
| 9 |
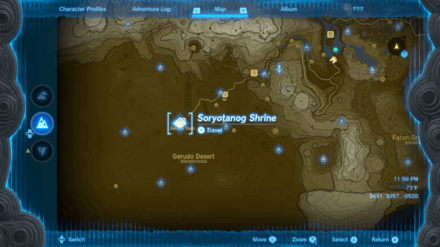 Soryotanog Shrine Soryotanog Shrine
|
Trial:
Buried Light
Location / XYZ Coordinates: Gerudo Town / -3883, -2963, 0123 Rewards: ・Arrow x10 |
| 10 |
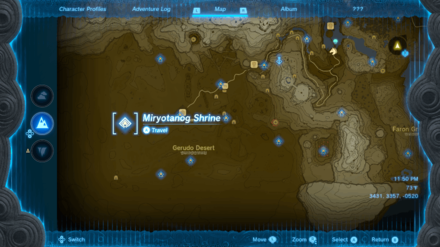 Miryotanog Shrine Miryotanog Shrine
|
Trial:
Proving Grounds: Lure
Location / XYZ Coordinates: Gerudo Town / -4679, -3087, 0054 Rewards: ・Captain II Blade |
| 11 |
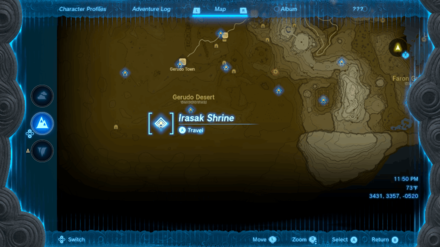 Irasak Shrine Irasak Shrine
|
Trial:
Rauru's Blessing
Location / XYZ Coordinates: Arbiter's Grounds / -4159, -3824, 0028 Rewards: ・Large Zonai Charge |
| 12 |
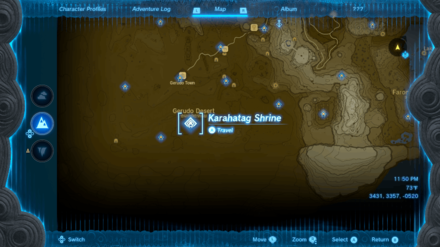 Karahatag Shrine Karahatag Shrine
|
Trial:
Drifting Flame
Location / XYZ Coordinates: Southern Oasis / -3726, -3625, 0043 Rewards: ・Mighty Construct Bow |
| 13 |
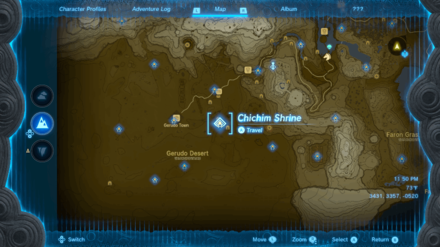 Chichim Shrine Chichim Shrine
|
Trial:
Rauru's Blessing
Location / XYZ Coordinates: Ancient Prison Ruins / -3211, -3007, -0049 Rewards: ・Mighty Zonaite Spear |
| 14 |
 Siwakama Shrine Siwakama Shrine
|
Trial:
Moving the Spheres
Location / XYZ Coordinates: East Barrens / -2445, -3345, 0041 Rewards: ・Bomb Flower x5 |
| 15 |
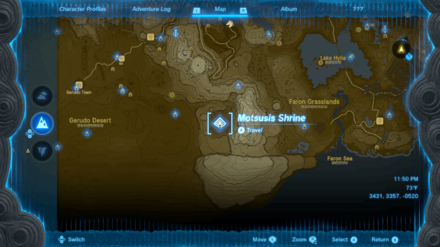 Motsusis Shrine Motsusis Shrine
|
Trial:
Rauru's Blessing
Location / XYZ Coordinates: South Lomei Labyrinth / -1795, -3485, 0045 Rewards: ・Large Zonai Charge |
| 16 |
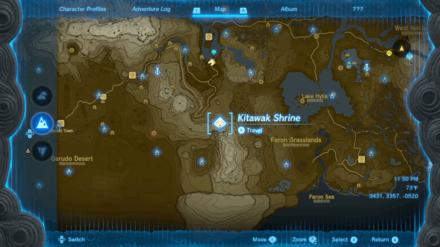 Kitawak Shrine Kitawak Shrine
|
Trial:
Upward and Forward
Location / XYZ Coordinates: East Gerudo Mesa / -1529, -2928, 0321 Rewards: ・Arrow x10 |
| 17 |
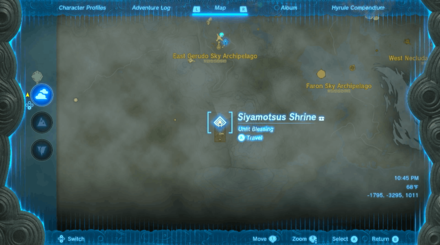 Siyamotsus Shrine Siyamotsus Shrine
|
Trial:
Unlit Blessing
Location / XYZ Coordinates: South Lomei Castle Top Floor / -1794, -3297, 1011 Rewards: ・Mighty Construct Bow |
| 18 |
 Rakashog Shrine Rakashog Shrine
|
Trial:
A Reflective Device
Location / XYZ Coordinates: East Gerudo Sky Archipelago / -1713, -2120, 1149 Rewards: ・Large Zonai Charge |
| 19 |
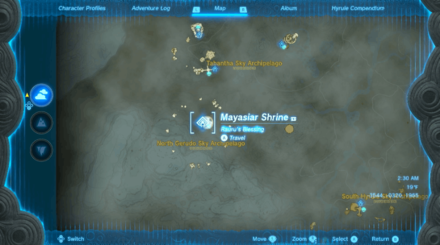 Mayasiar Shrine Mayasiar Shrine
|
Trial:
Rauru's Blessing
Location / XYZ Coordinates: North Gerudo Sky Archipelago / -3541, -0322, 1964 Rewards: ・Star Fragment Staff |
How Many Shrines are in Tears of the Kingdom?
152 Shrines In Total
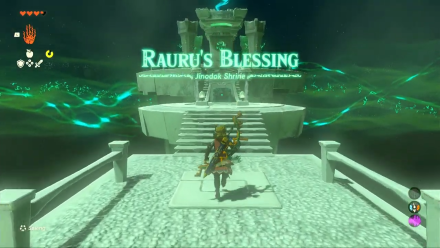
There are 120 Surface Shrines and 32 Sky Shrines in Tears of the Kingdom. In total, you need to visit a total of 152 Shrines in the game. This gives you plenty of opportunities to increase your hearts and stamina!
How to Increase Maximum Hearts and Stamina
Reward for Getting All Shrines
Ancient Hero's Aspect
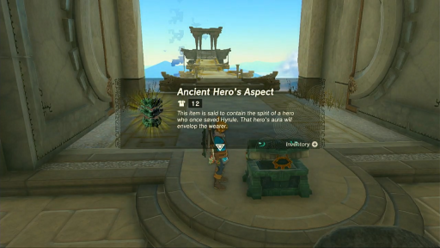
After completing your 152nd Shrine of Light, Rauru's voice will tell you to revisit the Temple of Time in the sky to receive a reward. After hearing his voice, the side quest The Shrine Explorer unlocks.
Go to the Temple of Time and open the chest behind the statue of the Goddess Hylia to receive the Ancient Hero's Aspect.
Note that this is one of the best armor in the game in terms of defense once fully upgraded. However, you cannot equip other armor once this is equipped.
How to Get the Ancient Hero's Aspect
Tips for Finding Shrines
| Tips for Finding Shrines |
|---|
Get the Shrine Sensor
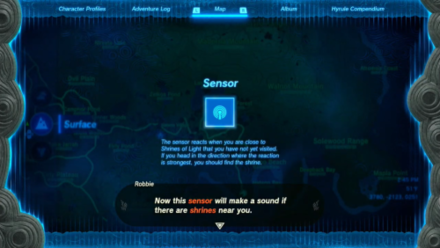
Add the Sensor feature to your Purah Pad by completing the Hateno Village Research Lab Side Adventure. To start this Side Adventure, talk to Robbie after completing the Main Quest A Mystery in the Depths.
The Sensor allows you to detect any nearby shrines as long as you are moving. If you're near a Shrine, you'll start to hear beeping sounds. The faster the beeping, the closer you are. The Sensor can also tell if the Shrine is above or below you. This makes it easier to find Shrines that may be hidden in caves.
Skydive at Night

As long as the weather is clear, Shrines can be much easier to spot in the darkness of night. Shrines that haven't been completed have a glowing spiral swirling on top of them that can be easily seen from afar. Jump from a Sky Island to see if you can find any on the land down below!
Look for Shrines Near Towns and Stables

Other than Lookout Landing, every town and stable has a Shrine nearby that serves as an easy fast travel point to those prime locations. There are often Shrines near Chasms as well, though they may share a Shrine with another notable location if they're near one, like the Chasm near Kakariko Village.
Make sure to find the respective Shrine every time you visit one of these locations!
Use Lightroot Positions From Depths Map
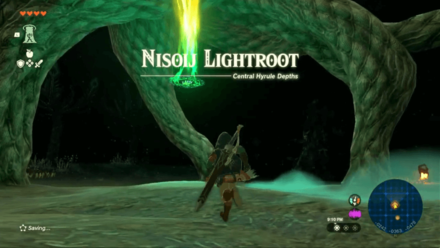
Lightroot locations in the Depths actually reflect the Shrines on the Surface—almost like they're the roots of these Shrines.
Check if your Lightroots have corresponding Shrines on the Surface. If there's a Lightroot activated on your map but no shrine in the same position on the surface, you can find your missing shrine in that location.
Explore Caves
Some Shrines are hidden well away within caves. The Shrine Sensor may not even be able to detect them until you're inside the cave.
If you're having trouble finding the entrances to these caves, Blupees can often be found outside of them. The Blupee can then lead you to the cave entrance when approached.
You can also leave fruit by the Cherry Blossom trees scattered across Hyrule to reveal all the cave entrances nearby for a brief period of time.
What are Shrines?
Puzzle or Combat Trials
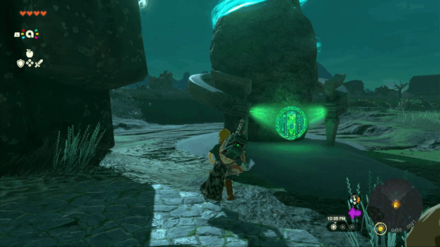
Shrines are puzzle or combat trials that can be found in the overworld. Successfully clearing the trial will reward you with a Light of Blessing, which you can spend to get more heart containers or stamina wheels.
Each Shrine also contains a hidden chest that will reward you with useful items when found!
How to Increase Health and Stamina
Shrine Types
There are four types of Shrines that you can find in Tears of the Kingdom. Each presents a challenge you need to clear to get the Shrine's Light of Blessing.
Puzzle Shrines are those that hold simple to complex puzzles which you need to solve using Link's Abilities to clear the area.
Combat Training Shrines are meant to be areas to teach players about some of the mechanics present in the game, like Sneakstrikes and parrying.
Proving Grounds are Shrines that aim to test your mettle. Once you enter these Shrines, you will be temporarily stripped of your armor, weapons, and items as you can only use those found inside the area.
Lastly, Shrines labelled with Rauru's Blessing serve as end areas for Shrine Quests, which you need to complete to access the Shrines.
Some Shrines Can be Unlocked by Doing Shrine Quests
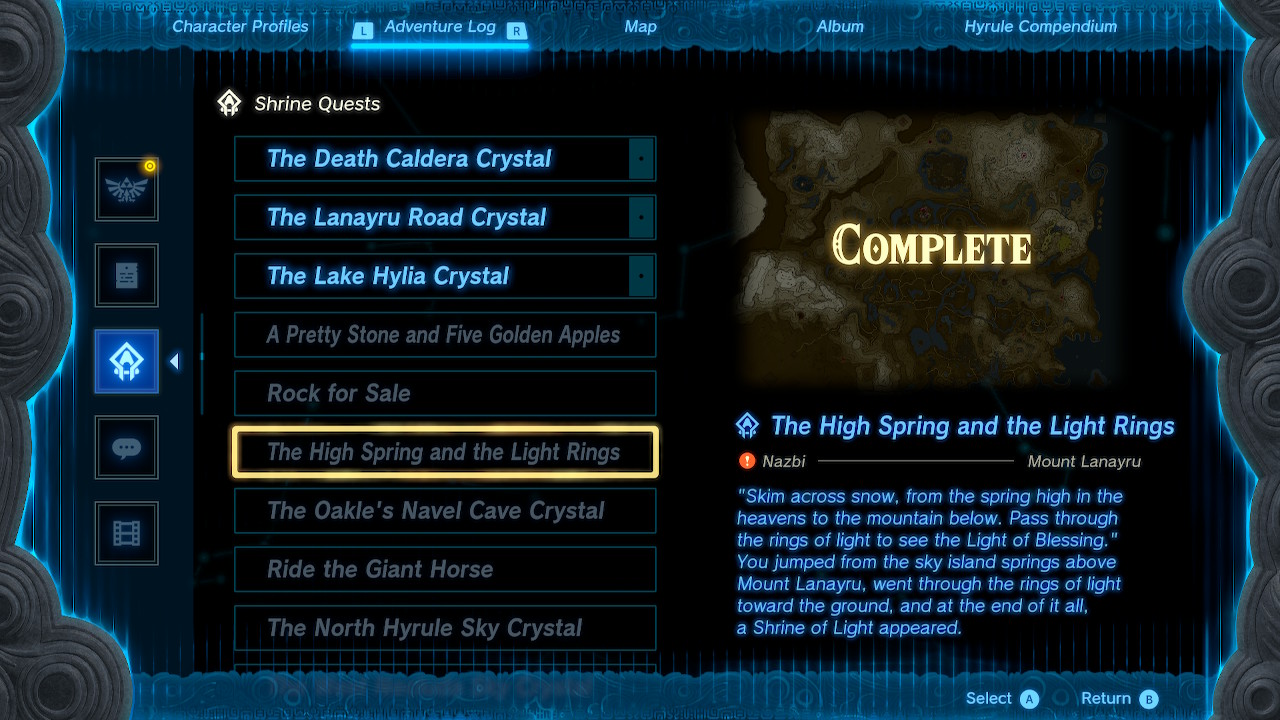
Shrine Quests contain information about the shrines they are linked to so players can seek these shrines out as they are typically harder to find, and some shrines are only revealed upon completing a challenge.
The Legend of Zelda: Tears of the Kingdom Related Guides

The Legend of Zelda: Tears of the Kingdom
Walkthrough Top Page
Other Maps
| Collectible and Area Maps | |||
|---|---|---|---|
 Korok Seeds Korok Seeds |
 Skyview Towers Skyview Towers |
 Shrines Shrines |
 Stables Stables |
Author
The Legend of Zelda: Tears of the Kingdom Walkthrough & Guides Wiki
Tears of the Kingdom Shrine Locations
Rankings
- We could not find the message board you were looking for.
Gaming News
Popular Games

Genshin Impact Walkthrough & Guides Wiki

Honkai: Star Rail Walkthrough & Guides Wiki

Umamusume: Pretty Derby Walkthrough & Guides Wiki

Pokemon Pokopia Walkthrough & Guides Wiki

Resident Evil Requiem (RE9) Walkthrough & Guides Wiki

Monster Hunter Wilds Walkthrough & Guides Wiki

Wuthering Waves Walkthrough & Guides Wiki

Arknights: Endfield Walkthrough & Guides Wiki

Pokemon FireRed and LeafGreen (FRLG) Walkthrough & Guides Wiki

Pokemon TCG Pocket (PTCGP) Strategies & Guides Wiki
Recommended Games

Diablo 4: Vessel of Hatred Walkthrough & Guides Wiki

Cyberpunk 2077: Ultimate Edition Walkthrough & Guides Wiki

Fire Emblem Heroes (FEH) Walkthrough & Guides Wiki

Yu-Gi-Oh! Master Duel Walkthrough & Guides Wiki

Super Smash Bros. Ultimate Walkthrough & Guides Wiki

Pokemon Brilliant Diamond and Shining Pearl (BDSP) Walkthrough & Guides Wiki

Elden Ring Shadow of the Erdtree Walkthrough & Guides Wiki

Monster Hunter World Walkthrough & Guides Wiki

The Legend of Zelda: Tears of the Kingdom Walkthrough & Guides Wiki

Persona 3 Reload Walkthrough & Guides Wiki
All rights reserved
© Nintendo. The Legend of Zelda and Nintendo Switch are trademarks of Nintendo.
The copyrights of videos of games used in our content and other intellectual property rights belong to the provider of the game.
The contents we provide on this site were created personally by members of the Game8 editorial department.
We refuse the right to reuse or repost content taken without our permission such as data or images to other sites.
 Zelda Notes
 Main Quests
 Tips and Tricks
 Side Adventures
 Side Quests
 Maps
Maps Towers
 Shrines
 Temples and Dungeons
 Caves
Caves Wells
Wells Stables
 Armor
Armor Weapons and Equipment
 Items
Items Cooking
 Bosses
 Enemies
 Abilities
 Schematics
 Characters
 News
News Message Boards


![Monster Hunter Stories 3 Review [First Impressions] | Simply Rejuvenating](https://img.game8.co/4438641/2a31b7702bd70e78ec8efd24661dacda.jpeg/thumb)


I think this article is missing two shrines, the Ganos Shrine and the Ga-ahisas Shrine, both located in the Tabantha Sky Archipelago.