Momosik Shrine Quest Puzzle Solution
▲ Get Pristine Weapons from the depths!
△ All 1000 Koroks | All 4 Great Fairies
▲ 81 Addison Signs | 147 Caves | 58 Wells
△ Tips: Farm Rupees | Starting Armor
▲ Best Weapons | Best Armor | Best Food

Momosik Shrine (Rauru's Blessing) in The Legend of Zelda: Tears of the Kingdom (TotK) can be unlocked by completing The Death Caldera Crystal Shrine Quest in the Eldin Canyon Region. Read on to learn how to unlock Momosik Shrine, its location, puzzle solution, as well as all treasure chest locations in Momosik Shrine!
List of Contents
Momosik Shrine Location
Death Caldera, Eldin Canyon
Momosik Shrine can be found near Death Caldera in the Eldin Canyon region. The exact coordinates of the Momosik Shrine is at 2959, 2758, 0524.
The Momosik Shrine is surrounded by a rocky terrain, given that it is located in the Eldin Canyon region.
Travel to Ulri Mountain Skyview Tower, and launch yourself from there to glide northwest towards the Death Caldera.
Rauru's Blessing
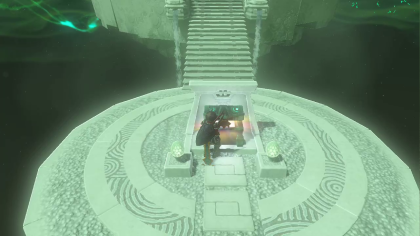
This is a Rauru's Blessing Shrine with a treasure chest inside as well as a Light of Blessing at the altar.
The Death Caldera Crystal Shrine Quest Walkthrough
- Activate the Shrine Entrance
- Follow the Beam of Light
- Attach a Zonai Fan to a Mining Cart
- Hit the Fan
- Reach for the Green Crystal
- Water is Your Friend
- Hit the Green Crystal
- Attach the Green Crystal to the Mining Cart
- Follow the Beam of Light
- Proceed to the Shrine
Video Guide
1. Activate the Shrine Entrance
Head towards Momosik Shrine, and activate the entrance. You will see a green beam of light emitting from the location of the shrine.
2. Follow the Beam of Light
Follow the Beam of Light until you reach an area blocked by a bluish, rock wall.
Use Yunobo, Mineru (equipped with a Zonai Cannon, Spiked-Iron-Ball or Boulder), Flower Bombs, or Boulder-Fused Weapons to destroy the rock wall.
3. Attach a Zonai Fan to a Mining Cart
Equip the Flamebreaker Set or consume a Fireproof Elixir before entering the area.
Once you're inside the Death Mountain East Tunnel, grab a mining cart near the vicinity, and attach a Zonai Fan to the back of it.
4. Hit the Fan
From there, place the mining cart on the rail track. Board the mining cart, and hit the Zonai Fan to make the cart move.
5. Reach for the Green Crystal
When you reach the end of the rail track, get off the mining cart and reach for the green crystal on top of the magma-infused rock structure.
The rock structure will begin to move once you're on top and reveal itself to be an Igneo Talus.
6. Water is Your Friend
Using Sidon, Splash Fruits, Ice Fruits, or Ice-Based Weapons to hit the Igneo Talus will cause it to be immobilized temporarily.
7. Hit the Green Crystal
Once the Igneo Talus is immobilized, climb up onto it, and hit the green crystal as many times as you can.
Repeat the process of immobilizing it and hitting the green crystal until you defeat the Igneo Talus.
8. Attach the Green Crystal to the Mining Cart
Use Ultrahand to attach the green crystal to the mining cart you used earlier.
From there, adjust the position of the mining cart, so that it would head back to where you came from.
9. Follow the Beam of Light
When you reach the end of the rail track, unstick the green crystal from the mining cart. You can carry the crystal or use Ultrahand to bring the crystal to the shrine entrance.
10. Proceed to the Shrine
Place the green crystal near the shrine entrance, and begin the Momosik Shrine.
Momosik Shrine Puzzle Solution
1. Collect Your Reward Straight Ahead
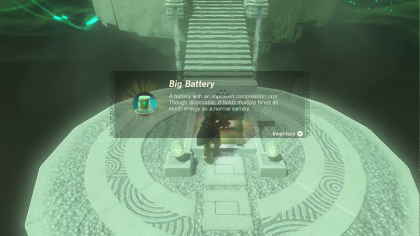
Proceed towards the area, and claim the Big Battery inside the chest straight ahead.
2. Proceed to the Altar
After collecting your reward, continue to the altar, and complete the Momosik Shrine.
Momosik Shrine Rewards and Chest Locations
Big Battery
| Chest Location | Chest Contents |
|---|---|
 |
 |
Proceed towards the area to open the chest, and claim the Big Battery inside.
The Legend of Zelda: Tears of the Kingdom Related Guides

Shrines Lists
| Shrines Lists | |
|---|---|
| All Shrines | All Shrine Quests |
All Great Sky Island Shrines
| Great Sky Island Shrines | ||
|---|---|---|
| Ukouh Shrine | In-isa Shrine | Gutanbac Shrine |
| Nachoyah Shrine | - | - |
All Hyrule Field Shrines
All Tabantha Shrines
| Tabantha Shrines | ||
|---|---|---|
| Oromuwak Shrine | Gatakis Shrine | Nouda Shrine |
| Wao-os Shrine | Iun-orok Shrine | Turakawak Shrine |
| Gasas Shrine | Mayausiy Shrine | Ikatak Shrine |
| Ga-ahisas Shrine | Ganos Shrine | Taunhiy Shrine |
All Hebra Shrines
All Great Hyrule Forest Shrines
| Great Hyrule Forest Shrines | ||
|---|---|---|
| Sakunbomar Shrine | Pupunke Shrine | Ninjis Shrine |
| Musanokir Shrine | Kikakin Shrine | Kiuyoyou Shrine |
| Ekochiu Shrine | Mayam Shrine | Simosiwak Shrine |
All Akkala Shrines
All Eldin Shrines
All Lanayru Shrines
All Necluda Shrines
All Faron Shrines
| Faron Shrines | ||
|---|---|---|
| Jiukoum Shrine | Ishokin Shrine | Utsushok Shrine |
| Joku-u Shrine | Joku-usin Shrine | - |
All Gerudo Shrines
Comment
Author
The Legend of Zelda: Tears of the Kingdom Walkthrough & Guides Wiki
Momosik Shrine Quest Puzzle Solution
improvement survey
03/2026
improving Game8's site?

Your answers will help us to improve our website.
Note: Please be sure not to enter any kind of personal information into your response.

We hope you continue to make use of Game8.
Rankings
- We could not find the message board you were looking for.
Gaming News
Popular Games

Genshin Impact Walkthrough & Guides Wiki

Honkai: Star Rail Walkthrough & Guides Wiki

Umamusume: Pretty Derby Walkthrough & Guides Wiki

Pokemon Pokopia Walkthrough & Guides Wiki

Resident Evil Requiem (RE9) Walkthrough & Guides Wiki

Monster Hunter Wilds Walkthrough & Guides Wiki

Wuthering Waves Walkthrough & Guides Wiki

Arknights: Endfield Walkthrough & Guides Wiki

Pokemon FireRed and LeafGreen (FRLG) Walkthrough & Guides Wiki

Pokemon TCG Pocket (PTCGP) Strategies & Guides Wiki
Recommended Games

Diablo 4: Vessel of Hatred Walkthrough & Guides Wiki

Cyberpunk 2077: Ultimate Edition Walkthrough & Guides Wiki

Fire Emblem Heroes (FEH) Walkthrough & Guides Wiki

Yu-Gi-Oh! Master Duel Walkthrough & Guides Wiki

Super Smash Bros. Ultimate Walkthrough & Guides Wiki

Pokemon Brilliant Diamond and Shining Pearl (BDSP) Walkthrough & Guides Wiki

Elden Ring Shadow of the Erdtree Walkthrough & Guides Wiki

Monster Hunter World Walkthrough & Guides Wiki

The Legend of Zelda: Tears of the Kingdom Walkthrough & Guides Wiki

Persona 3 Reload Walkthrough & Guides Wiki
All rights reserved
© Nintendo. The Legend of Zelda and Nintendo Switch are trademarks of Nintendo.
The copyrights of videos of games used in our content and other intellectual property rights belong to the provider of the game.
The contents we provide on this site were created personally by members of the Game8 editorial department.
We refuse the right to reuse or repost content taken without our permission such as data or images to other sites.


![Monster Hunter Stories 3 Review [First Impressions] | Simply Rejuvenating](https://img.game8.co/4438641/2a31b7702bd70e78ec8efd24661dacda.jpeg/thumb)


