Wind Temple Walkthrough and Puzzle Solutions
▲ Get Pristine Weapons from the depths!
△ All 1000 Koroks | All 4 Great Fairies
▲ 81 Addison Signs | 147 Caves | 58 Wells
△ Tips: Farm Rupees | Starting Armor
▲ Best Weapons | Best Armor | Best Food
This guide will show you how to solve the Gear Lock Puzzle and defeat Colgera to clear the Wind Temple in The Legend of Zelda: Tears of the Kingdom (TotK). This walkthrough also contains chest locations, puzzle solutions, and more!
List of Contents
Preparing For the Wind Temple
Things to Prepare
| Things to Prepare for the Wind Temple | |||
|---|---|---|---|
 Archaic Warm Greaves Archaic Warm Greaves
|
 Snowquill Tunic Snowquill Tunic
|
 Snowquill Trousers Snowquill Trousers
|
 Snowquill Headdress Snowquill Headdress
|
 Vah Medoh Divine Helm Vah Medoh Divine Helm
|
 Ruby Circlet Ruby Circlet
|
 Spicy Elixir Spicy Elixir
|
 Energizing Elixir Energizing Elixir
|
The Wind Temple boasts cold, chilly winds which can hamper your progress as you run around the dungeon. It is advised to stock up on a lot of meals or elixirs which give you Cold Resistance.
You can also purchase the Snowquill Armor Set at Rito Village to ensure that you have Cold Resistance all the time!
Progress through the Tulin of Rito Village Quest
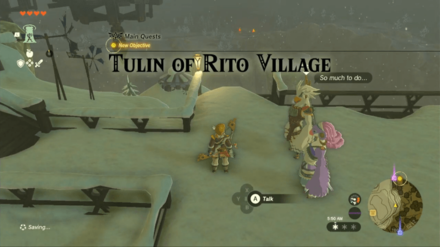
The only way to get to the sky islands above Rito Village and the Wind Temple is through the help of Tulin's ability. This can only be unlocked once you progress far enough in the Tulin of Rito VIllage main quest.
Tulin of Rito Village Walkthrough
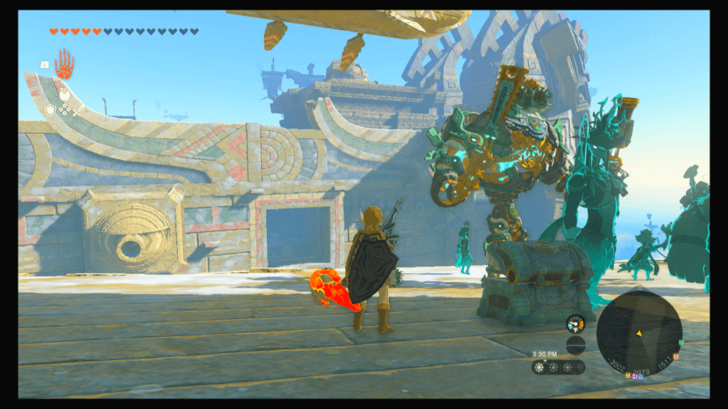
How to Get to the Wind Temple
| 1 |
 You can get to the Sky Island through the floating ruins (and debris) in Hebra Peak. Go there and get up using the ruins, your abilities, and help from Tulin. You can unlock the Mayaumekis Shrine in the first part of the climb. It can serve as a reset point going up, so do your best to get there! |
|---|---|
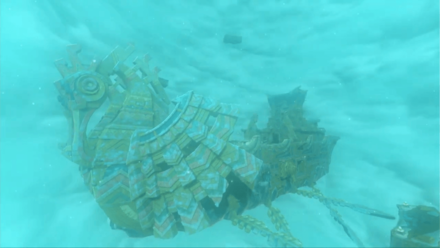
| 2 |
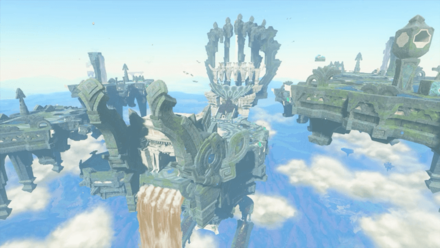
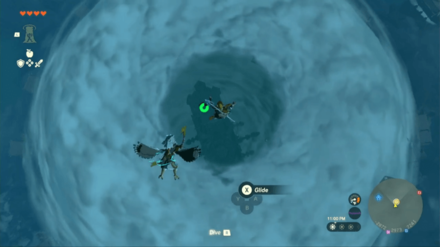 You will eventually reach the area where the ships are floating around, near Kahataum Shrine. Jump onto the sail to boost yourself in the air and see the opening of the clouds at the top. |
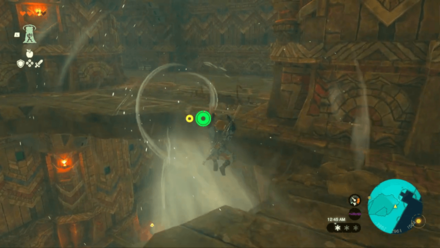
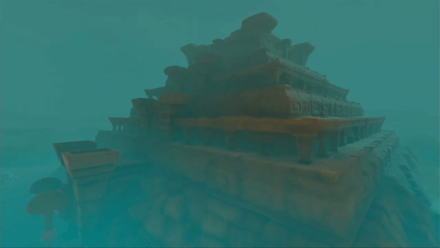
| 3 | Glide down to the hole in the cloud to reach the Wind Temple! |
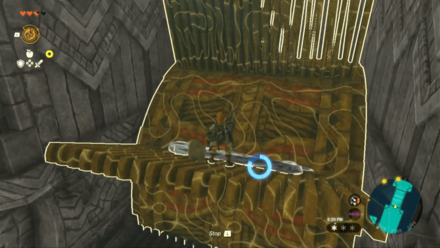
Wind Temple Map
The Wind Temple is pretty straightforward considering it only has three levels. Players will have to jumpstart five gear locks using Tulin's ability.
1F
B1

B2
Activating the Five Gear Locks
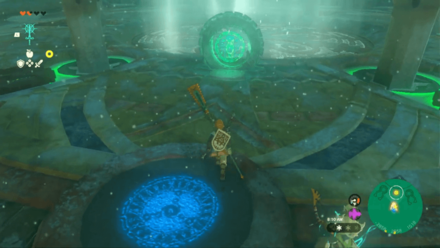
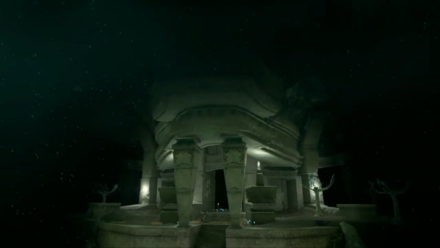
Once you land at the deck of the ship, interact with the Zonai terminal in the middle of the deck. This will activate a teleport waypoint which allows you to return to that same spot which can be handy if you lose your way. Keep in mind that the Gear Locks can be activated in any order.
| Wind Temple Gear Locks | ||||
|---|---|---|---|---|
| 1F North Lock | B1 East Lock | B2 Gear Lock | 1F South Lock | B1 North Lock |
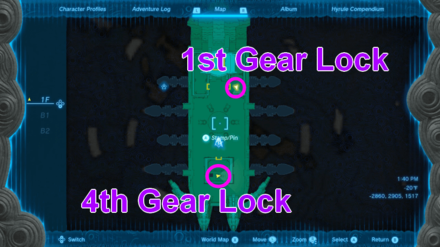
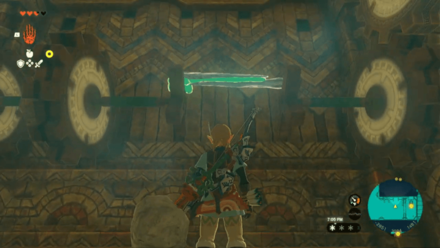
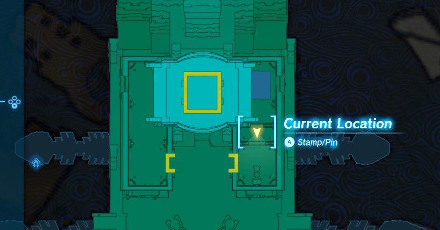
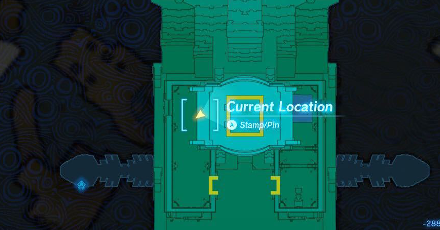
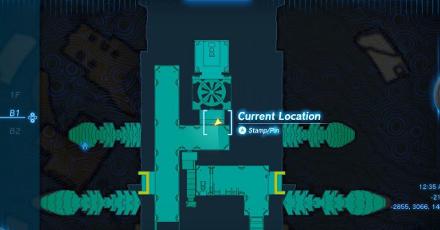
1F North Lock
At 1F, walk towards the northern half of the ship until you see two rooms with metal gates facing each other.
You can also use any long object. Attach it to the broken lever with Ultrahand and pull it. This will raise the metal gate. Head inside the room to find the first lock.
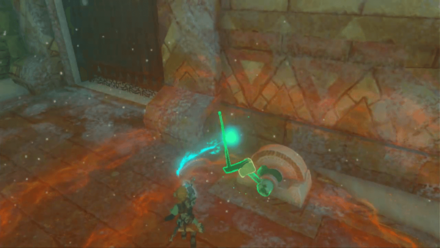
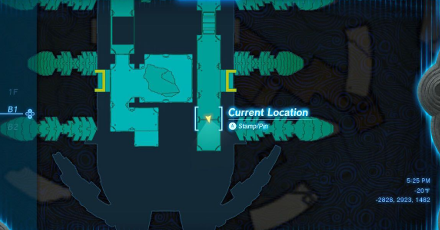
B1 East Lock
Once you are on the east side of B1, you will encounter a big spinning device at the corridor. To get past it, use Recall to reverse its direction and ride it to reach the other side.
Once you are on the other end of the corridor, use Ultrahand to connect the gears on the wall using the icicles you can find nearby. This will open the metal gate.
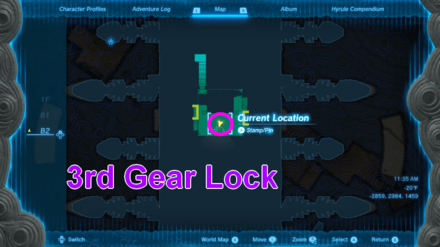
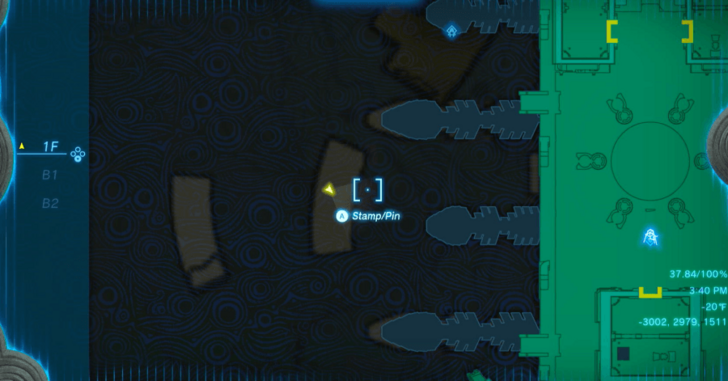
B2 Gear Lock
From the second lock at B1, use the lever to open the metal gate on your left. Jump down from it and use your paraglider to reach B2, which is the ship's lowest section.
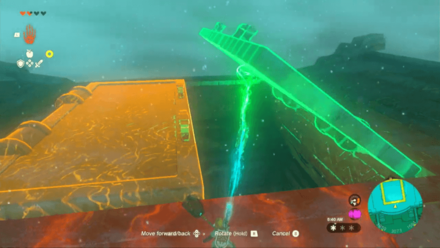
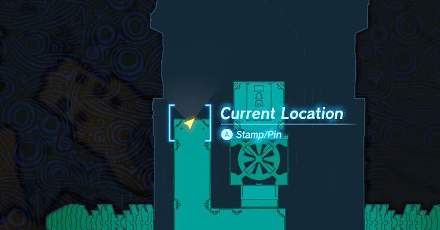
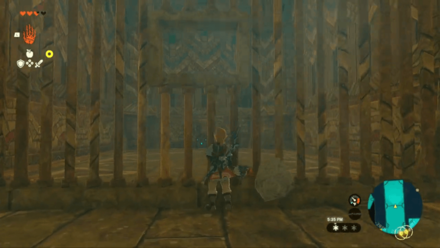
1F South Lock
Use Ascend on the room with the collapsed roof on the lower left side of B1 to reach the second level of the room

Use Ultrahand to attach four stone tablets on the pole. You can find the tablets near the area. The end product should look like a propeller.
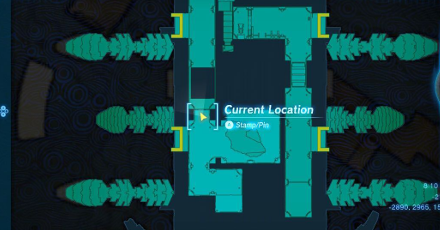
B1 North Lock
Glide your way to the top of the tall structure north of the ship where you will spot a metal hatch. Use Ultrahand to open it.

Jump down to reach the bottom part of the structure. Avoid hitting the lasers as this will prevent you from reaching the fifth lock. You can easily navigate through this fall by sticking to the upper section.
Note that if you do hit the lasers, simply bring out your glider and fly upwards to reset the puzzle.
Wind Temple Chest Locations
| # | How to Get Treasure Chests |
|---|---|
| 1 |
 1F - Soldier II Spear |
| 2 |
 B1 - Zonaite Shield |
| 3 |
 1F - Opal |
| 4 |
 1F - Arrow x10 |
| 5 |
 B1 - Sapphire |
| 6 |
 B1 - Ruby |
| 7 |
 B1 - Captain I Reaper |
| 8 |
 B1 - Soldier Blade |
| 9 |
 1F - Construct Bow |
| 10 |
 1F - Large Zonaite |
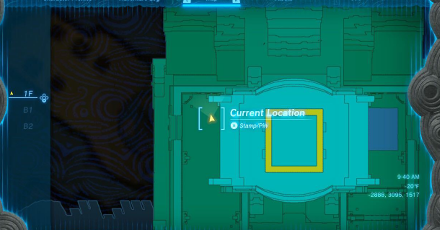
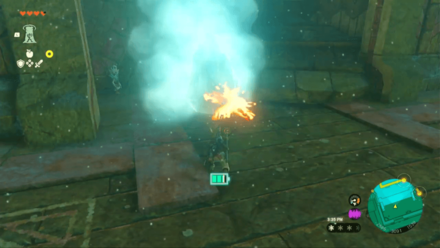
Soldier II Spear - 1F
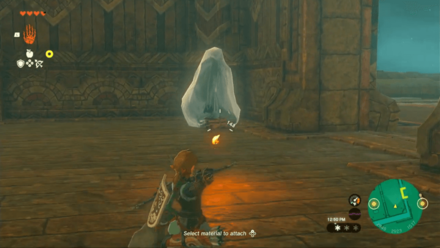
Head to the southern most room on the first floor to find the chest trapped in ice. Melt the ice using flame-emitting weapons to get the chest.
Open the chest to get a Soldier II Spear.
Zonaite Shield - B1

Head to the area highlighted on the image above. Melt the ice and go down the hole to find a level stuck in ice. Melt that as well to open the door.
Inside is a chest containing Zonaite Shield.
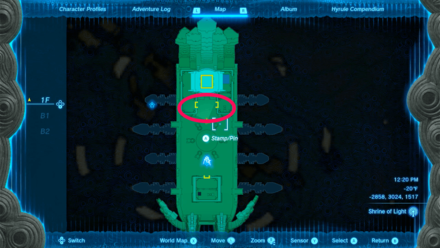
Opal - 1F
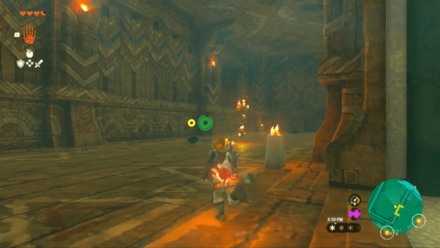
From the first floor, head to the northernmost building and enter the left side where players will find a chest at the end of the hallway.
Open the chest to find an Opal.
Arrows - 1F
On the same building as the third treasure, go to its second level to find a chest trapped in ice.
Melt the chest using flame-emitting weapons to find Arrows.
Sapphire - B1
Using Ultrahand, stick the icicle to the chest and slide it out of the hole.
Inside the chest is a Sapphire.
Ruby - B1
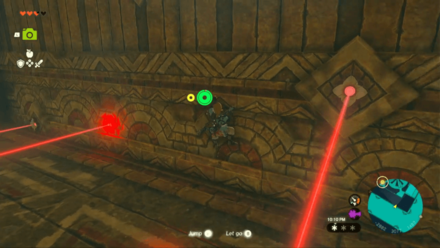
Head to the upper left wing of B1 to find a hallway full of lasers with a chest at the end. Avoid the lasers to get to the chest.
When opening the chest, players will find a Ruby.
Captain I Reaper - B1
Use Ascend on the collapsed room in the lower left part of B1. The chest will be buried under rubble which players can take off using Ultrahand.
For getting the chest, players are rewarded with a Captain I Reaper.
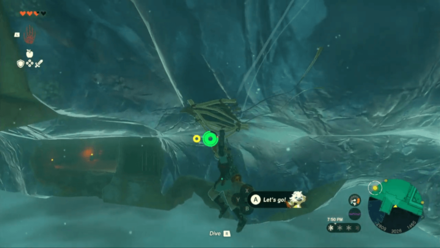
Soldier Blade - B1
Dive down the same structure where the fifth gear lock is located at. The chest will be in front of the gear. Be sure to avoid the lasers when diving down.
Opening the chest will reward players with a Soldier Blade.
Construct Bow
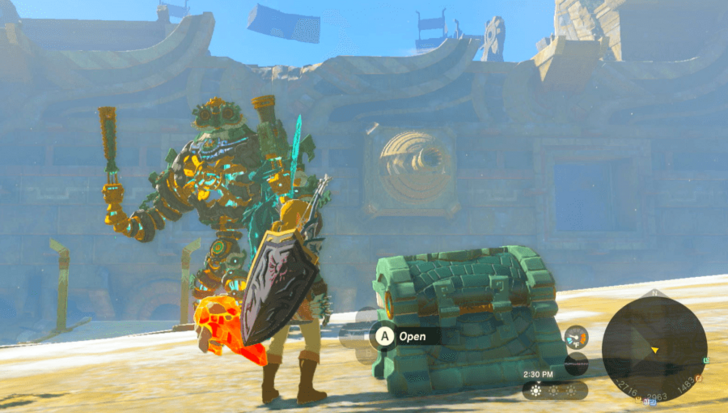
From the entrance platform, jump and glide east to a floating stone platform. Use Tulin's Sage power to extend your glide if necessary.
A Construct Bow can be found in the chest, though this will be updated to the Strong Construct Bow or Mighty Construct Bow depending on when in the game you open it.
Large Zonaite
From the entrance platform, use your paraglider to fly west to a floating stone platform. Use Tulin's Sage power to extend your glide if necessary.
Pick up some Large Zonaite from the chest.
How to Beat the Wind Temple Boss (Colgera)

| Colgera Strategies |
|---|
How to Beat Colgera (Wind Temple Boss)
Phase 1
Colgera has three weak spots total, which are the rounded parts of its body. Each weak spot is protected by a shell of spikes but is exposed on its underbelly side. Either pass through the holes when the boss exposes it or hit it with arrows to deal massive damage.
Phase 2
Phase 2 is pretty much similar to the first phase of Colgers except that it adds two more attacks; namely its tornadoes, and its upwards pincer attack. Both can be avoided pretty easily by using the Tulin's power.
Hit the three weakspots again to finally defeat Colgera.
The Legend of Zelda: Tears of the Kingdom Dungeon Walkthroughs

All Temple Locations and Dungeon Guides
All Temple Guides
| List of All Temples | |
|---|---|
 Wind Temple Wind Temple |
 Lightning Temple Lightning Temple |
 Fire Temple Fire Temple |
 Water Temple Water Temple |
 Hyrule Castle Hyrule Castle |
 Spirit Temple Spirit Temple |
Author

The Legend of Zelda: Tears of the Kingdom Walkthrough & Guides Wiki
Wind Temple Walkthrough and Puzzle Solutions
Rankings
- We could not find the message board you were looking for.
Gaming News


![Monster Hunter Stories 3 Review [First Impressions] | Simply Rejuvenating](https://img.game8.co/4438641/2a31b7702bd70e78ec8efd24661dacda.jpeg/thumb)
Popular Games

Genshin Impact Walkthrough & Guides Wiki
Honkai: Star Rail Walkthrough & Guides Wiki
Umamusume: Pretty Derby Walkthrough & Guides Wiki
Pokemon Pokopia Walkthrough & Guides Wiki
Resident Evil Requiem (RE9) Walkthrough & Guides Wiki
Monster Hunter Wilds Walkthrough & Guides Wiki
Wuthering Waves Walkthrough & Guides Wiki
Arknights: Endfield Walkthrough & Guides Wiki
Pokemon FireRed and LeafGreen (FRLG) Walkthrough & Guides Wiki
Pokemon TCG Pocket (PTCGP) Strategies & Guides Wiki


Recommended Games
Diablo 4: Vessel of Hatred Walkthrough & Guides Wiki
Cyberpunk 2077: Ultimate Edition Walkthrough & Guides Wiki
Fire Emblem Heroes (FEH) Walkthrough & Guides Wiki
Yu-Gi-Oh! Master Duel Walkthrough & Guides Wiki
Super Smash Bros. Ultimate Walkthrough & Guides Wiki
Pokemon Brilliant Diamond and Shining Pearl (BDSP) Walkthrough & Guides Wiki
Elden Ring Shadow of the Erdtree Walkthrough & Guides Wiki
Monster Hunter World Walkthrough & Guides Wiki
The Legend of Zelda: Tears of the Kingdom Walkthrough & Guides Wiki
Persona 3 Reload Walkthrough & Guides Wiki


All rights reserved
© Nintendo. The Legend of Zelda and Nintendo Switch are trademarks of Nintendo.
The copyrights of videos of games used in our content and other intellectual property rights belong to the provider of the game.
The contents we provide on this site were created personally by members of the Game8 editorial department.
We refuse the right to reuse or repost content taken without our permission such as data or images to other sites.
There are 10 chest