This survey will take about 1 minute.
Your answers will help us to improve our website.
Zelda: Tears of the Kingdom (TotK)
Find Princess Zelda Walkthrough
▲ Get Pristine Weapons from the depths!
△ All 1000 Koroks | All 4 Great Fairies
▲ 81 Addison Signs | 147 Caves | 58 Wells
△ Tips: Farm Rupees | Starting Armor
▲ Best Weapons | Best Armor | Best Food
Find Princess Zelda is a Main Quest in The Legend of Zelda: Tears of the Kingdom (TotK) that starts in the Garden of Time. Read on for a detailed walkthrough of Find Princess Zelda, its location and rewards, as well as other tips and strategies on how to complete this Main Quest!
| ◄ Previous Quest | Current Quest | Next Quest ▶ |
|---|---|---|
| Prologue | Part 1 | The Closed Door |
| The Closed Door | Part 2 | To the Kingdom of Hyrule |
| To the Kingdom of Hyrule | Part 3 | Crisis at Hyrule Castle |
List of Contents
How to Unlock Find Princess Zelda
Obtain the Purah Pad
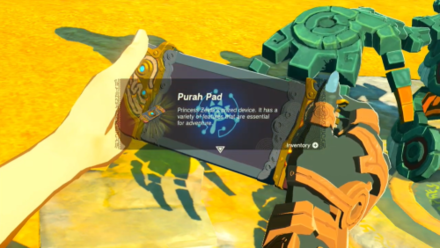
Find Princess Zelda is unlocked after getting the Purah Pad from the Steward Construct in the Great Sky Island.
Great Sky Island - Garden of Time
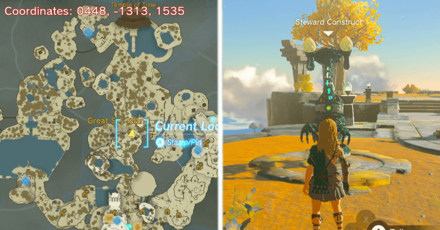
The exact coordinates for this quest on the map are 0448, -1313, 1535.
Rewards
| There doesn't seem to be any reward for this quest... *sad Korok noises* |
Find Princess Zelda Walkthrough
| All Find Princess Zelda Guides | ||
|---|---|---|
| Part 1 | Part 2 | Part 3 |
Find Princess Zelda Part 1 Walkthrough
| Find Princess Zelda Walkthrough |
|---|
Find Zelda
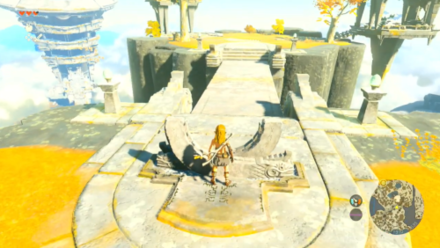
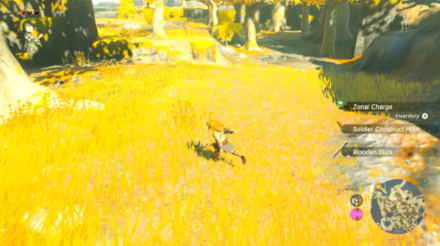
Interact with the glowing terminal next to the Steward Construct to draw a bridge out to the next small island. Cross to the other side and head to the north edge to find a ledge you can dive down from.
Before you cannonball down, check the decayed construct next to the tree for a Zonai Charge!
Find the Staircase
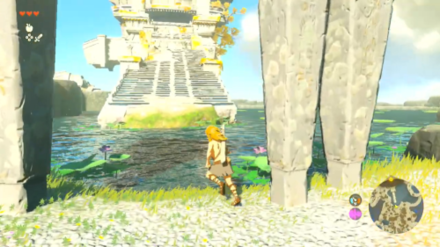
Once you're on the large island below, walk north until you find a big staircase in a pond.
You can also improve the restorative effect of your food items (like Apples) before you proceed by roasting them on the nearby campfire.
Pick Up Zonai Charges From Decayed Constructs
Examine the decayed constructs you find to easily get Zonai Charges. These can be collected and used to restore power to Energy Cells, trade Zonai items, or roll the Device Dispenser later on to obtain Zonai Materials—items needed to build functional contraptions with Ultrahand.
Zonai Charges can also be obtained by defeating Constructs.
Roast Food Items to Improve Effect
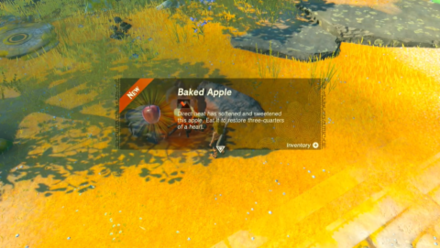
Throwing food items like Apples and Skyshrooms into a fire or a cooking pot increases their restorative effect. This is a good way to stock up on healing items especially when you don't have enough materials yet to prepare a dish!
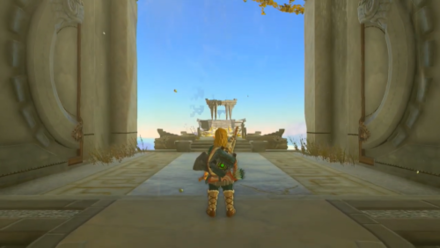
Reach Temple of Time
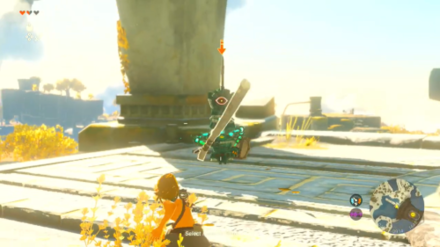
At the top of the stairs is the entrance to the Temple of Time, guarded by another Soldier Construct I. Throw one of your weapons at the guard to stun and disarm it, making it easier to defeat.
Approach the gate and interact with the glowing symbol when you're done sparring to receive a cutscene and your next objective.
How to Throw Items and Materials
Unlock the Temple of Time
The door will only unlock after your arm regains enough of its power. You must complete the new Main Quest, The Closed Door, by visiting the three shrines in the island and clearing their trials.
In the process, you will gain three new abilities: Ultrahand, Fuse, and Ascend.
| ◄ Previous Quest | Next Quest ▶ |
|---|---|
| Prologue | The Closed Door |
Find Princess Zelda Part 2 Walkthrough
| Find Princess Zelda Walkthrough |
|---|
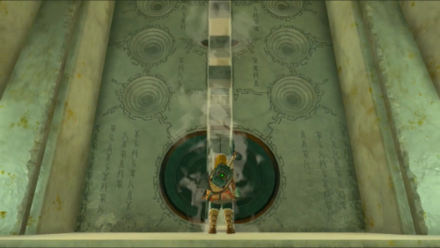
Proceed through the Temple of Time
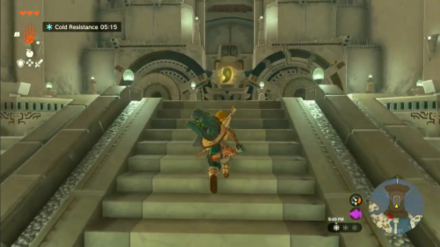
Now that the arm is revitalized, the seal can finally be undone to unlock the Temple of Time. Approach the golden bead on the pedestal for a cutscene, as well as receive the Recall ability.
Use this newly gained ability on the gears in front of you to reverse the direction to which they rotate, and use them to get on the upper floor.
Open the Big Door
There's a Goddess Statue ahead, but you can't do anything with it yet with only three Light of Blessing. Walk towards the large door behind the statue and try to open it. Ta-da! You're now down to a quarter heart and the door didn't even budge. Rauru says you need one more Light of Blessing to increase your heart limit.
Your hearts will be fully replenished, by the way, so don't worry.
Fast Travel to Nachoyah Shrine
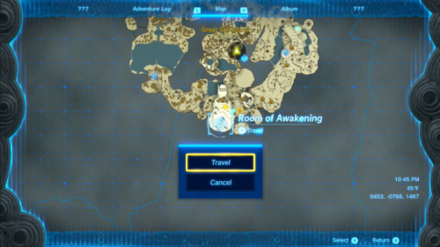
Remember the blue circles on the ground inside the Room of Awakening and outside the shrines you unlocked? You can now use them as fast travel points to move instantaneously across the map! Open the map with the minus (-) button and fast travel back to the Room of Awakening.
Unlock more shrines to add more fast travel points, and when you need to get to an area far from your current location, check if there are any nearby points you can teleport to!
Fast Travel Guide: How to Warp
Clear Nachoyah Shrine

The fourth shrine is actually within the Room of Awakening, with the coordinates of 0389, -1661, 2299.
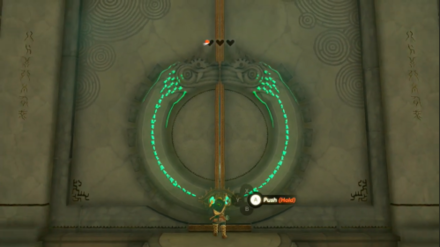
Use Recall on the Moving Gears
Use Recall on the gears to reverse their rotation and get to the opening on the other side. Follow the tunnel to find the next shrine.
There's a Steward Construct and a crystal refinery outside the shrine where you can trade Crystallized Charges for Energy Wells—items that increase the capacity of your Energy Cell.
Master the Recall Ability
Now's the time to practice using the Recall ability. Enter Nachoyah Shrine and complete The Ability to Rewind trial to obtain the fourth blessing.
The Recall ability allows you to rewind the movement of objects, like reversing the direction of which an object moves or send a projectile back to where it came from.
Open the Second Door
Return to the Temple of Time and offer four Lights of Blessing for an additional Heart Container. This should be enough to open the door at the back.
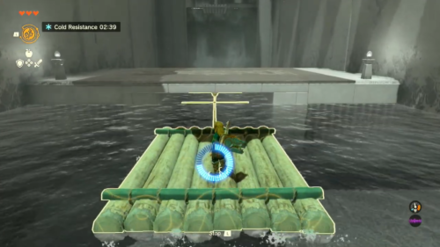
Examine the Final Altar
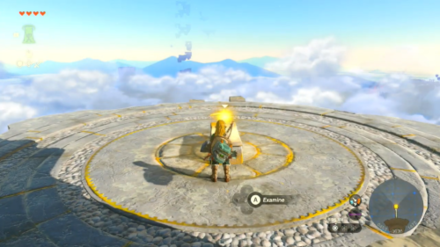
Head outside and cross through the bridge segments with Ascend. Approach the altar and examine the orb to complete this part of your search for Zelda and receive the next main quest.
Return to Hyrule
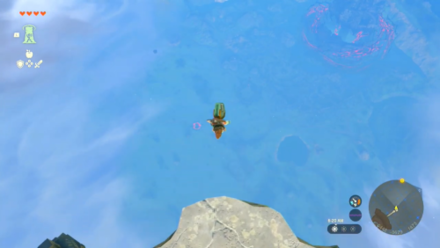
You will now need to dive down from the Great Sky Island back to Hyrule Kingdom. Follow the To the Kingdom of Hyrule Main Quest to complete this objective.
| ◄ Previous Quest | Next Quest ▶ |
|---|---|
| The Closed Door | To the Kingdom of Hyrule |
Find Princess Zelda Part 3 Walkthrough
| Find Princess Zelda Walkthrough |
|---|
Investigate the Strange Phenomena
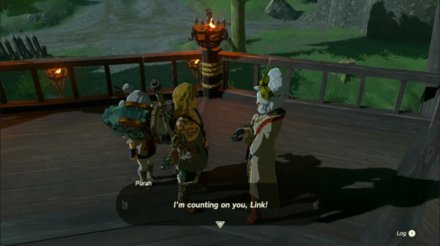
Purah will direct you to four locations within Hyrule that are affected by a strange phenomena, which happens as you complete the Crisis at Hyrule Castle Main Quest.
Crisis at Hyrule Castle Walkthrough
| ◄ Previous Quest | Next Quest ▶ |
|---|---|
| To the Kingdom of Hyrule | Crisis at Hyrule Castle |
The Legend of Zelda: Tears of the Kingdom Related Guides

List of All Walkthroughs
| All Quest Types | ||
|---|---|---|
 Main Quests Main Quests |
 Side Quests Side Quests |
 Side Adventures Side Adventures |
List of All Main Quests
| Recommended Main Quest Order | |
|---|---|
| 0 | Prologue |
| 1 | Find Princess Zelda |
| 2 | The Closed Door |
| 3 | Find Princess Zelda (Part 2) |
| 4 | To the Kingdom of Hyrule |
| 5 | Find Princess Zelda (Part 3) |
| 6 | Crisis at Hyrule Castle |
| 7 | Regional Phenomena |
| 8 | Camera Work in the Depths |
| 9 | Impa and the Geoglyphs |
| 10 | Tulin of Rito Village |
| 11 | A Mystery in the Depths |
| 12 | Riju of Gerudo Town |
| 13 | Yunobo of Goron City |
| 14 | The Sludge-Covered Statue |
| 15 | Sidon of the Zora |
| 16 | The Broken Slate |
| 17 | Clues to the Sky |
| 18 | Sidon of the Zora (Part 2) |
| 19 | Restoring the Zora Armor |
| 20 | Sidon of the Zora (Part 3) |
| 21 | Regional Phenomena (Part 2) |
| 22 | Crisis at Hyrule Castle (Part 2) |
| 23 | The Dragon's Tears |
| 24 | Find the Fifth Sage |
| 25 | Secret of the Ring Ruins |
| 26 | Guidance from Ages Past |
| 27 | Trail of the Master Sword |
| 28 | Recovering the Hero's Sword |
| 29 | Find the Fifth Sage (Part 2) |
| 30 | Destroy Ganondorf |
Comment
Author

The Legend of Zelda: Tears of the Kingdom Walkthrough & Guides Wiki
Find Princess Zelda Walkthrough
Please participate in our site
improvement survey
03/2026
improvement survey
03/2026
Would you assist in
improving Game8's site?
improving Game8's site?

×
We are listening to our users' valuable opinions and discussing how to act on them.
The information collected through this survey will be used for the purpose of improving our services. In addition, the information will only be disclosed a part of a statistic in a format that will not allow identification of personal information.
Begin Survey
Not Now
×
Please rate each item regarding Game8.co's Advertisements.
Amount of Ads
Very Dissatisfied
Somewhat Dissatisfied
Fine
Somewhat Satisfied
Highly Satisfied
Placement of Ads
Timing of Ad Display
Ad Loading Speed
Safeness of Ads
Content of Ads
×
Please rate each item regarding Game8.co's Quality of Articles.
Amount of information
Very Dissatisfied
Somewhat Dissatisfied
Fine
Somewhat Satisfied
Highly Satisfied
Frequency of updates
Speed of new information
Accuracy of articles
Understandibility of articles
Readability of sentences
×
Please rate each item regarding Game8.co's Usability of the Site.
Ease of finding information
Very Dissatisfied
Somewhat Dissatisfied
Fine
Somewhat Satisfied
Highly Satisfied
Loading Speed
Use of Color
Font Size
Visibility of Images
Easy to Understand Layout
×
Please rate each item regarding Game8.co's Message Boards, Comments.
Ease of Writing
Very Dissatisfied
Somewhat Dissatisfied
Fine
Somewhat Satisfied
Highly Satisfied
Readability
Ease in Finding Information
Comment Quality
Comment Quantity
Admin Response
×
Please rate each item regarding Game8.co's Site's new design.
Please rate our site's new design
Very Dissatisfied
Somewhat Dissatisfied
Fine
Somewhat Satisfied
Highly Satisfied
Do you think that the website's design change makes the site easier to use?
Has the new design made it easier for you to find information on the site?
Has the new design improved the overall visual appeal of the site?
How would you rate your overall satisfaction with the new design of the site?
×
How likely are you to recommend Game8 to someone you know?
Very Unlikely
0
1
2
3
4
5
6
7
8
9
10
Very Likely
If you have other opinions regarding potential improvement to the website, please share them with us. We would appreciate your honest opinion.
Note: This is a free response section, so you can proceed without entering anything.
Note: Please be sure not to enter any kind of personal information into your response.
Note: Please be sure not to enter any kind of personal information into your response.
×
Thank You
×
Thank you for participating in our survey! Your answers will help us to improve the quality of our website and services.
We hope you continue to make use of Game8.
We hope you continue to make use of Game8.
Close
Rankings
- We could not find the message board you were looking for.
Gaming News


![Monster Hunter Stories 3 Review [First Impressions] | Simply Rejuvenating](https://img.game8.co/4438641/2a31b7702bd70e78ec8efd24661dacda.jpeg/thumb)
Popular Games

Genshin Impact Walkthrough & Guides Wiki
Honkai: Star Rail Walkthrough & Guides Wiki
Umamusume: Pretty Derby Walkthrough & Guides Wiki
Pokemon Pokopia Walkthrough & Guides Wiki
Resident Evil Requiem (RE9) Walkthrough & Guides Wiki
Monster Hunter Wilds Walkthrough & Guides Wiki
Wuthering Waves Walkthrough & Guides Wiki
Arknights: Endfield Walkthrough & Guides Wiki
Pokemon FireRed and LeafGreen (FRLG) Walkthrough & Guides Wiki
Pokemon TCG Pocket (PTCGP) Strategies & Guides Wiki


Recommended Games
Diablo 4: Vessel of Hatred Walkthrough & Guides Wiki
Fire Emblem Heroes (FEH) Walkthrough & Guides Wiki
Yu-Gi-Oh! Master Duel Walkthrough & Guides Wiki
Super Smash Bros. Ultimate Walkthrough & Guides Wiki
Pokemon Brilliant Diamond and Shining Pearl (BDSP) Walkthrough & Guides Wiki
Elden Ring Shadow of the Erdtree Walkthrough & Guides Wiki
Monster Hunter World Walkthrough & Guides Wiki
The Legend of Zelda: Tears of the Kingdom Walkthrough & Guides Wiki
Persona 3 Reload Walkthrough & Guides Wiki
Cyberpunk 2077: Ultimate Edition Walkthrough & Guides Wiki


All rights reserved
© Nintendo. The Legend of Zelda and Nintendo Switch are trademarks of Nintendo.
The copyrights of videos of games used in our content and other intellectual property rights belong to the provider of the game.
The contents we provide on this site were created personally by members of the Game8 editorial department.
We refuse the right to reuse or repost content taken without our permission such as data or images to other sites.