Mayanas Shrine Quest Puzzle Solution
▲ Get Pristine Weapons from the depths!
△ All 1000 Koroks | All 4 Great Fairies
▲ 81 Addison Signs | 147 Caves | 58 Wells
△ Tips: Farm Rupees | Starting Armor
▲ Best Weapons | Best Armor | Best Food

Mayanas Shrine (The Ice Guides You) in The Legend of Zelda: Tears of the Kingdom (TotK) can be unlocked by completing The South Lanayru Sky Crystal Shrine Quest in the Lanayru Sea Sky Region. Read on to learn how to unlock Mayanas Shrine, its location, puzzle solution, as well as all treasure chest locations in Mayanas Shrine!
List of Contents
Mayanas Shrine Location
South Lanayru Sky Archipelago, Lanayru Sea Sky
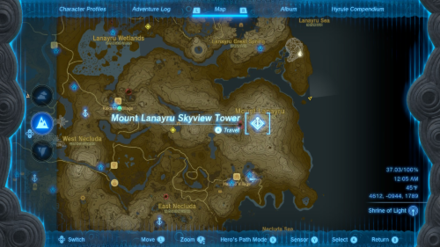
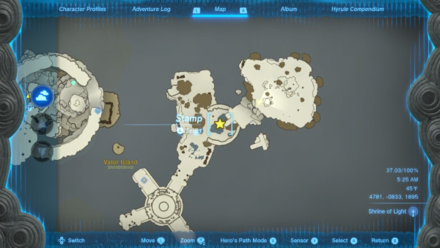
Mayanas Shrine can be found on one of the islands at the South Lanayru Sky Archipelago in the Lanayru Sea Sky Region, but it will stay hidden until you've completed The South Lanayru Sky Crystal Shrine Quest.
The exact coordinates of the Mayanas Shrine is at 4613, -0947, 1790.
You can reach the Shrine quicker by launching yourself skyward from the Mount Lanayru Skyview Tower and gliding northeast.
Puzzle Shrine
This is a Puzzle type Shrine, so you need to solve the puzzle to reach the end and get a Light of Blessing.
Try to look around the area to find a way to move forward, and remember to use Link's Ultrahand, Ascend, or Recall abilities!
All Abilities and How to Unlock
How to Reach Mayanas Shrine
- Propel Yourself Skyward From Mount Lanayru Skyview Tower
- Glide Northeast Towards One of the Islands with a Flying Vehicle
- Examine the Terminal at Mayanas Shrine
1. Propel Yourself Skyward From Mount Lanayru Skyview Tower

Fast travel to Mount Lanayru Skyview Tower and launch yourself skyward to reach South Lanayru Sky Archipelago.
2. Glide Northeast Towards One of the Islands with a Flying Vehicle

Upon reaching the skies, glide northeast and land on one of the nearby sky islands.
There are ready-made flying devices on each island marked on the map above. Use these devices to hop on the different islands eastward until you reach the island Mayanas Shrine is on.
3. Examine the Terminal at Mayanas Shrine
Upon reaching Mayanas Shrine, examine its terminal to start “The South Hyrule Sky Crystal“ Shrine Quest.
The South Lanayru Sky Crystal Shrine Quest Walkthrough
- Go to the Easternmost Part of the Island
- Use the Hoverboard to Reach the Higher Island
- Cut the Vines With a Blade
- Create a Zonai Wing Vehicle and Attach the Crystal
- Return to the Shrine With the Green Crystal
1. Go to the Easternmost Part of the Island

After unlocking “The South Hyrule Sky Crystal“ Shrine Quest, go to the easternmost part of the island where you'll find a ready-made hoverboard.
2. Use the Hoverboard to Reach the Higher Island
Use Ultrahand to grab the hoverboard nearby and place it safely on an elevated edge just below the higher island.
Afterwards, hop onto the hoverboard, and use its steering wheel to navigate it towards direction of the beam.
Once you've reached a high enough altitude, look for a bunch of wooden vines by a ledge and jump onto it.
3. Cut the Vines With a Blade
Next, cut the wooden vines with a bladed weapon to expose a room. Venture into the room deeper and cut another set of wooden vines to expose the green crystal.
4. Create a Zonai Wing Vehicle and Attach the Crystal
Create a flying vehicle using the Zonai Wing, Sled, Fans, Steering Stick, and Batteries nearby. Then, grab the green crystal from the back room, and attach it on top of your flying vehicle.
5. Return to the Shrine With the Green Crystal
Bring your flying vehicle to the edge of the cliff, and start controlling the Steering Stick. Carefully navigate the vehicle to where the shrine is, then hop off and take the green crystal to Mayanas Shrine.
This completes the Shrine Quest “The South Hyrule Sky Crystal“ and unlocks Mayanas Shrine.
Mayanas Shrine Puzzle Solution
- Create Ice Plates
- Hit the Target with an Ice Plate
- Go Past the Altar and Towards the Chest
- Create More Ice Plates
- Use the Metal Plates as a Guide
- Drop an Ice Plate Down the Ramp
- Claim Your Rewards
1. Create Ice Plates
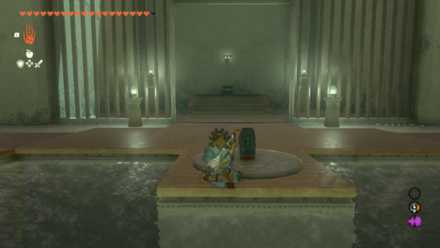
In this Shrine, the objective is to hit the moving targets using ice plates.
The first step you need to do is to create ice plates by throwing Ice Fruit into the water or by directing the Frost Emitters towards the water.
Make sure to create multiple ice plates, since hitting the moving target up ahead takes a bit of trial and error.
2. Hit the Target with an Ice Plate
Grab one of the ice plates using Ultrahand, and slide it down the ramp up ahead. Time it well so that the ice plate hits the moving target!
3. Go Past the Altar and Towards the Chest
Hitting the moving target opens the door to the altar chamber. However, you can go past the altar for now, and go straight to the back of the room where a chest is waiting for you.
4. Create More Ice Plates
Just like in the previous room, you need to hit the target past the spikes to open the door to the room with the chest.
Create multiple ice plates using Ice Fruits just like you did in the first room.
5. Use the Metal Plates as a Guide
Next, use Ultrahand to make a long platform using the square metal plates nearby.
Then, take it to the spiky platform and place it in a slanted position near the right wall. Try to place it as far as possible as well! This will serve as a guide for the ice plate you'll drop down the ramp later on.
6. Drop an Ice Plate Down the Ramp
Grab an ice plate using Ultrahand, and drop it down the ramp near the right wall. Make sure that it hits the metal platform you made earlier so it slides to the left and hits the target below the spikes.
This will take a couple of tries, so do not hesitate to experiment with the metal platform's position and where you decide to drop the ice plates.
7. Claim Your Rewards
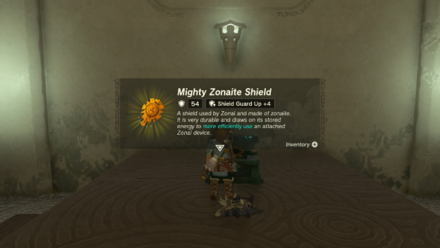
Once the target has been hit, the door to the chest opens. Open the chest to receive a Mighty Zonaite Shield, then go to the altar to receive a Light of Blessing.
Mayanas Shrine Rewards and Chest Locations
Mighty Zonaite Shield
| Chest Location | Chest Contents |
|---|---|
 |
 |
To unlock the room of the chest, create an ice plate inside the altar chamber, and slide it down the spiky platform so it hits the target up ahead.
You can use Ultrahand to attach the nearby square metal plates and create a long platform. You can then place this platform in a slanted position by the right wall of the spiky platform so it guides the ice plate to the target.
This allows you to get the chest containing a Mighty Zonaite Shield.
The Legend of Zelda: Tears of the Kingdom Related Guides

Shrines Lists
| Shrines Lists | |
|---|---|
| All Shrines | All Shrine Quests |
All Great Sky Island Shrines
| Great Sky Island Shrines | ||
|---|---|---|
| Ukouh Shrine | In-isa Shrine | Gutanbac Shrine |
| Nachoyah Shrine | - | - |
All Hyrule Field Shrines
All Tabantha Shrines
| Tabantha Shrines | ||
|---|---|---|
| Oromuwak Shrine | Gatakis Shrine | Nouda Shrine |
| Wao-os Shrine | Iun-orok Shrine | Turakawak Shrine |
| Gasas Shrine | Mayausiy Shrine | Ikatak Shrine |
| Ga-ahisas Shrine | Ganos Shrine | Taunhiy Shrine |
All Hebra Shrines
All Great Hyrule Forest Shrines
| Great Hyrule Forest Shrines | ||
|---|---|---|
| Sakunbomar Shrine | Pupunke Shrine | Ninjis Shrine |
| Musanokir Shrine | Kikakin Shrine | Kiuyoyou Shrine |
| Ekochiu Shrine | Mayam Shrine | Simosiwak Shrine |
All Akkala Shrines
All Eldin Shrines
All Lanayru Shrines
All Necluda Shrines
All Faron Shrines
| Faron Shrines | ||
|---|---|---|
| Jiukoum Shrine | Ishokin Shrine | Utsushok Shrine |
| Joku-u Shrine | Joku-usin Shrine | - |
All Gerudo Shrines
Comment
Author
The Legend of Zelda: Tears of the Kingdom Walkthrough & Guides Wiki
Mayanas Shrine Quest Puzzle Solution
Rankings
- We could not find the message board you were looking for.
Gaming News
Popular Games

Genshin Impact Walkthrough & Guides Wiki

Honkai: Star Rail Walkthrough & Guides Wiki

Arknights: Endfield Walkthrough & Guides Wiki

Umamusume: Pretty Derby Walkthrough & Guides Wiki

Wuthering Waves Walkthrough & Guides Wiki

Pokemon TCG Pocket (PTCGP) Strategies & Guides Wiki

Abyss Walkthrough & Guides Wiki

Zenless Zone Zero Walkthrough & Guides Wiki

Digimon Story: Time Stranger Walkthrough & Guides Wiki

Clair Obscur: Expedition 33 Walkthrough & Guides Wiki
Recommended Games

Fire Emblem Heroes (FEH) Walkthrough & Guides Wiki

Pokemon Brilliant Diamond and Shining Pearl (BDSP) Walkthrough & Guides Wiki

Diablo 4: Vessel of Hatred Walkthrough & Guides Wiki

Super Smash Bros. Ultimate Walkthrough & Guides Wiki

Yu-Gi-Oh! Master Duel Walkthrough & Guides Wiki

Elden Ring Shadow of the Erdtree Walkthrough & Guides Wiki

Monster Hunter World Walkthrough & Guides Wiki

The Legend of Zelda: Tears of the Kingdom Walkthrough & Guides Wiki

Persona 3 Reload Walkthrough & Guides Wiki

Cyberpunk 2077: Ultimate Edition Walkthrough & Guides Wiki
All rights reserved
© Nintendo. The Legend of Zelda and Nintendo Switch are trademarks of Nintendo.
The copyrights of videos of games used in our content and other intellectual property rights belong to the provider of the game.
The contents we provide on this site were created personally by members of the Game8 editorial department.
We refuse the right to reuse or repost content taken without our permission such as data or images to other sites.


![Animal Crossing: New Horizons Review [Switch 2] | Needlessly Crossing Over to a New Generation](https://img.game8.co/4391759/47d0408b0b8a892e453a0b90f54beb8a.png/show)


