Kumamayn Shrine Quest Location and Walkthrough
▲ Get Pristine Weapons from the depths!
△ All 1000 Koroks | All 4 Great Fairies
▲ 81 Addison Signs | 147 Caves | 58 Wells
△ Tips: Farm Rupees | Starting Armor
▲ Best Weapons | Best Armor | Best Food

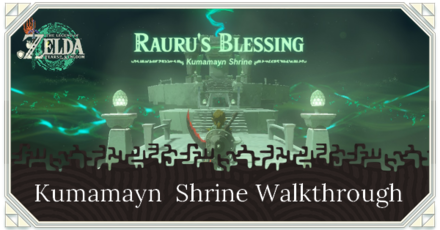
Kumamayn Shrine (Rauru's Blessing) in The Legend of Zelda: Tears of the Kingdom (TotK) can be unlocked by completing The Necluda Sky Crystal Shrine Quest in the East Necluda Sky Region. Read on to learn how to unlock Kumamayn Shrine, its location, puzzle solution, as well as all treasure chest locations in Kumamayn Shrine!
List of Contents
Kumamayn Shrine Location
Necluda Sky Archipelago, East Necluda Sky Region
Kumamayn Shrine can be found on the Necluda Sky Archipelago in the East Necluda Sky Region.
The shrine's exact coordinates are 2856, -2857,1212 but you will need to complete The Necluda Sky Crystal Shrine Quest first before the shrine reveals itself.
The island the shrine is on can be reached by paragliding east from Rabella Wetlands Skyview Tower.
Rauru's Blessing
This is a Rauru's Blessing Shrine with a treasure chest inside as well as a Light of Blessing at the altar.
Necluda Sky Crystal Shrine Quest Walkthrough
- Fast Travel to Rabella Wetlands Tower
- Glide East to the Island with Zonai Springs
- Examine the Shrine
- Launch to the Direction of the Beam
- Defeat the Flux Construct III
- Launch the Green Crystal to Kumamayn Shrine
- Offer the Green Crystal to the Shrine
Video Walkthrough
1. Fast Travel to Rabella Wetlands Tower
Since Kumamayn Shrine is on a sky island, we'll need a Skyview Tower to reach it.
Fast travel to Rabella Wetlands Skyview Tower and examine its terminal to launch yourself skyward.
2. Glide East to Reach the Island with Zonai Springs
Once you're able to take out your paraglider, start paragliding east and drop down on a floating platform with Zonai Springs on it.
You can then use these stacked springs to launch yourself upward and reach the island Kumamayn Shrine is on.
3. Examine the Shrine
Upon reaching your destination, go to the shrine and examine it to unlock The Necluda Sky Crystal Shrine Quest.
4. Launch to the Direction of the Beam
After unlocking the shrine, go to the moving platform at the center of the island and use it to launch yourself towards the direction of the beam.
5. Defeat the Flux Construct III
Approach the Flux Construct III and start to whittle its health by damaging the glowing block on its body.
You can use Ultrahand to grab pieces of this enemy and disassemble it. You can even go straight for the glowing block on its body and grab it using Ultrahand until the Flux Construct crumbles into many pieces.
You can also use Recall on the blocks it throws at you so you can reach it when it's high up in the sky!
6. Launch the Green Crystal to Kumamayn Shrine
After defeating the Flux Construct III, head for the southern extension of the island you're on and find a launch pad made of two Zonai Springs, a Zonai Stake, and a few platforms.
Position it in a 30-degree angle, with the springs facing the direction of the island Kumamayn Shrine is on. Make sure the stake is buried in the ground as well so the launch pad will be stable.
When everything is all set, pick up the Green Crystal using Ultrahand and place it on the launch pad. Climb on board, then hit the launch pad so it launches you and the Green Crystal back to the previous island.
7. Offer the Green Crystal to the Shrine
Finally, offer the Green Crystal to the shrine to unlock Kumamayn Shrine.
Kumamayn Shrine Walkthrough
Claim Your Rewards
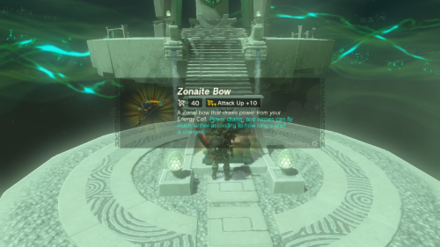
Luckily, there are no puzzles that you need to solve inside the shrine. Simply take the Zonaite Bow from the chest, then examine the altar to get a Light of Blessing.
Kumamayn Shrine Rewards and Chest Locations
Zonaite Bow
| Chest Location | Chest Contents |
|---|---|
 |
 |
Enter the shrine and open the chest inside to get a Zonaite Bow.
The Legend of Zelda: Tears of the Kingdom Related Guides

Shrines Lists
| Shrines Lists | |
|---|---|
| All Shrines | All Shrine Quests |
All Great Sky Island Shrines
| Great Sky Island Shrines | ||
|---|---|---|
| Ukouh Shrine | In-isa Shrine | Gutanbac Shrine |
| Nachoyah Shrine | - | - |
All Hyrule Field Shrines
All Tabantha Shrines
| Tabantha Shrines | ||
|---|---|---|
| Oromuwak Shrine | Gatakis Shrine | Nouda Shrine |
| Wao-os Shrine | Iun-orok Shrine | Turakawak Shrine |
| Gasas Shrine | Mayausiy Shrine | Ikatak Shrine |
| Ga-ahisas Shrine | Ganos Shrine | Taunhiy Shrine |
All Hebra Shrines
All Great Hyrule Forest Shrines
| Great Hyrule Forest Shrines | ||
|---|---|---|
| Sakunbomar Shrine | Pupunke Shrine | Ninjis Shrine |
| Musanokir Shrine | Kikakin Shrine | Kiuyoyou Shrine |
| Ekochiu Shrine | Mayam Shrine | Simosiwak Shrine |
All Akkala Shrines
All Eldin Shrines
All Lanayru Shrines
All Necluda Shrines
All Faron Shrines
| Faron Shrines | ||
|---|---|---|
| Jiukoum Shrine | Ishokin Shrine | Utsushok Shrine |
| Joku-u Shrine | Joku-usin Shrine | - |
All Gerudo Shrines
Comment
Author
The Legend of Zelda: Tears of the Kingdom Walkthrough & Guides Wiki
Kumamayn Shrine Quest Location and Walkthrough
improvement survey
03/2026
improving Game8's site?

Your answers will help us to improve our website.
Note: Please be sure not to enter any kind of personal information into your response.

We hope you continue to make use of Game8.
Rankings
- We could not find the message board you were looking for.
Gaming News
Popular Games

Genshin Impact Walkthrough & Guides Wiki

Honkai: Star Rail Walkthrough & Guides Wiki

Umamusume: Pretty Derby Walkthrough & Guides Wiki

Pokemon Pokopia Walkthrough & Guides Wiki

Resident Evil Requiem (RE9) Walkthrough & Guides Wiki

Monster Hunter Wilds Walkthrough & Guides Wiki

Wuthering Waves Walkthrough & Guides Wiki

Arknights: Endfield Walkthrough & Guides Wiki

Pokemon FireRed and LeafGreen (FRLG) Walkthrough & Guides Wiki

Pokemon TCG Pocket (PTCGP) Strategies & Guides Wiki
Recommended Games

Diablo 4: Vessel of Hatred Walkthrough & Guides Wiki

Cyberpunk 2077: Ultimate Edition Walkthrough & Guides Wiki

Fire Emblem Heroes (FEH) Walkthrough & Guides Wiki

Yu-Gi-Oh! Master Duel Walkthrough & Guides Wiki

Super Smash Bros. Ultimate Walkthrough & Guides Wiki

Pokemon Brilliant Diamond and Shining Pearl (BDSP) Walkthrough & Guides Wiki

Elden Ring Shadow of the Erdtree Walkthrough & Guides Wiki

Monster Hunter World Walkthrough & Guides Wiki

The Legend of Zelda: Tears of the Kingdom Walkthrough & Guides Wiki

Persona 3 Reload Walkthrough & Guides Wiki
All rights reserved
© Nintendo. The Legend of Zelda and Nintendo Switch are trademarks of Nintendo.
The copyrights of videos of games used in our content and other intellectual property rights belong to the provider of the game.
The contents we provide on this site were created personally by members of the Game8 editorial department.
We refuse the right to reuse or repost content taken without our permission such as data or images to other sites.


![Monster Hunter Stories 3 Review [First Impressions] | Simply Rejuvenating](https://img.game8.co/4438641/2a31b7702bd70e78ec8efd24661dacda.jpeg/thumb)


