This survey will take about 1 minute.
Your answers will help us to improve our website.
Zelda: Tears of the Kingdom (TotK)
Destroy Ganondorf Walkthrough
▲ Get Pristine Weapons from the depths!
△ All 1000 Koroks | All 4 Great Fairies
▲ 81 Addison Signs | 147 Caves | 58 Wells
△ Tips: Farm Rupees | Starting Armor
▲ Best Weapons | Best Armor | Best Food
Destroy Ganondorf is the last Main Quest in The Legend of Zelda: Tears of the Kingdom (TotK) that starts in Lookout Landing. Read on for a detailed walkthrough of Destroy Ganondorf, its location and rewards, as well as other tips and strategies on how to complete this Main Quest!
| ◄ Previous Quest | Next Quest ▶ |
|---|---|
| Find the Fifth Sage (Part 2) | - |
| Ganondorf Related Pages | ||
|---|---|---|
| Destroy Ganondorf Main Quest |
Demon King Ganondorf Boss Guide |
Ganondorf Profile |
List of Contents
How to Unlock Destroy Ganondorf
Find the Fifth Sage and Return to Purah
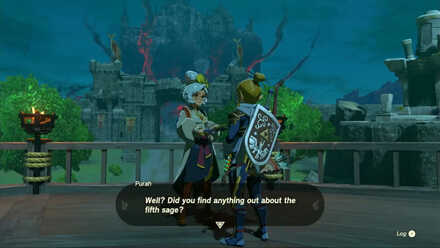
Destroy Ganondorf is unlocked after finding the Fifth Sage and recovering the Master Sword before reporting back to Purah in Lookout Landing.
Thing to Prepare Before Starting Destroy Ganondorf Quest
| Thing to Prepare |
|---|
|
|
Get All Sages and Vows
Before you actually face Ganondorf in battle, you will encounter tough enemies as you make your way through the final quest marker. You will also face waves of enemies and fight the Temple bosses, if you skipped any.
It is therefore recommended to beat every Temple in Hyrule and get all five Sages and their Vows before jumping down the big hole under Hyrule Castle, which you can do by simply following the game's Main Quests.
Not only will you have teammates to fight with, but you can also use their abilities in combat. Additionally, you will also skip the boss fights since you've already defeated them in their respective Temples.
All Sage Abilities and How to Use Them
Power Up Sages

If you want to maximize the potential of the Sages in combat, you can upgrade their damage output with Sage's Wills which you can find across Hyrule's Sky map.
You need four Sage's Wills to upgrade one Sage; you need to collect all 20 Sage's Wills if you want to level up everyone.
You can upgrade Sages at any Goddess Statue in Hyrule.
All 20 Sage's Will Locations and Map
Get the Master Sword
Getting the Master Sword will not only make this quest more symbolic, but it will also help you a lot when fighting enemies or Ganondorf himself.
You can also increase the damage you can deal with the Master Sword if you fuse a material with high Fuse Attack Power, like a Silver Lynel Saber Horn.
Bring Other Strong Weapons
The Master Sword is not of infinite use and will lose power at some point, so it is recommended to bring other weapons as backup.
The Champion and amiibo weapons, as well as several late game loot like the Royal Claymore can serve you well during this quest.
Like with the Master Sword, make sure to fuse materials with high Fuse Attack Power to your weapons to bolster them even more!
Best Weapons and How to Get Them
Bring Durable Shields
The most effective way of fighting Ganondorf is by parrying his attacks, so you'll be using your shield a lot during the boss fight.
The best shield for this fight is the Hylian Shield, which is the most durable among all shields in the game.
If you found the Hylian Shield early on and have been using it as you progress through the game, it is a good idea to get another sturdy shield in case it breaks during the fight. Choices include the Savage Lynel Shield, Sea-Breeze Shield, or Royal Guard's Shield.
Bring Items with Gloom Resistance
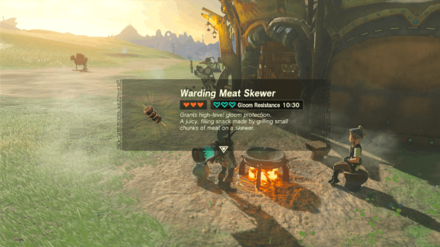
You will be dealing with a ton of Gloom-infested areas and enemies as you go deeper in the Depths, so make sure to prepare dishes and elixirs with Dark Clumps which give Link Gloom Resistance.
You can also wear the Depths Armor Set, which also gives Link the same effect.
How to Get the Depths Set, Location, and Set Bonus
Restore Hearts with Sundelion Dishes
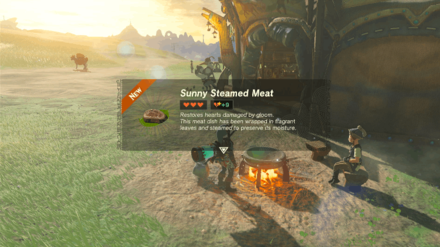
During this quest, Link can be easily afflicted with Gloom and reduce his maximum hearts due to the overwhelming number of enemies in the quest.
Dishes with Sundelion will restore these lost hearts, so prepare some before progressing through the quest.
New Gloom Status Condition: How to Cure
Keep Ganondorf From Deleting Hearts
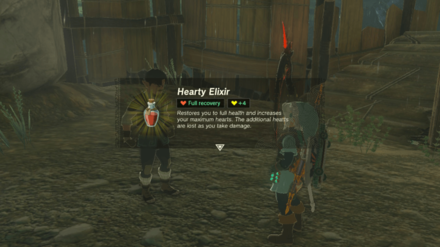
One additional difficulty during this final set of battles is the fact that Ganondorf can delete your hearts outright, by damaging them after inflicting them with Gloom. These hearts remain missing until the end of the boss fight, making you vulnerable to being killed by single attacks.
To prevent this, heal Gloom-afflicted hearts as soon as possible with Sundelion meals, and add temporary hearts by consuming Hearty food and elixirs. Ganondorf's attacks will consume temporary hearts first, giving you a shield against Gloom infection.
Bring Muddle Buds and Bomb Flowers
Throwing Muddle Buds at enemies to turn them against each other or blasting them with Bomb Flowers are great methods of dealing Ganondorf's underlings if you don't want to pick them off one by one.
You can find Muddle Buds and Bomb Flowers in the Depths, so you can explore around and pick them up on the ground before heading to the quest marker.
Destroy Ganondorf Walkthrough Guide
| Destroy Ganondorf Walkthrough |
|---|
|
|
Reach Gloom's Lair
| Destroy Ganondorf Walkthrough |
|---|
|
|
Find Ganondorf
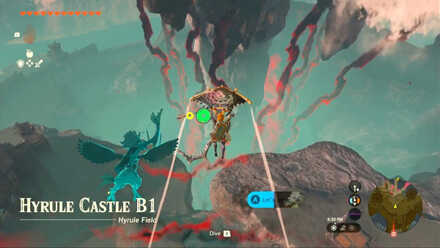
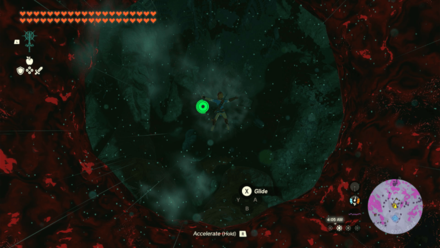
Dive down the chasm beneath Hyrule Castle until you reach the base of the stone pillar and discover Gloom's Approach. Walk south and you will find gloom-covered Shock Likes on the wall. You can take these out first for a safer descent.
No Depths Exploration Needed
Though the closing of the previous quests implies you need to find more clues to locate Ganondorf by working with Josha and exploring the depths, it's possible to dive into the Hyrule Castle Chasm without seeking those additional clues.
You can simply drop down whenever you feel ready to take on the challenge.
Defeat the Shock Likes and Horriblins
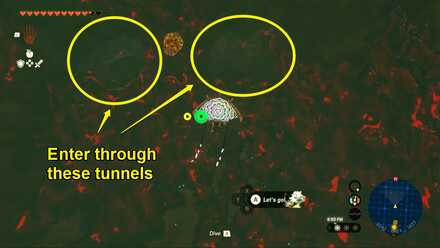
Drop down the cliff where the Shock Likes are (or were) and head south through one of the tunnels. You'll find Horriblins clinging on the walls in the next room.
Once it's clear climb through the next tunnels leading south.
Move Past the White Lynel
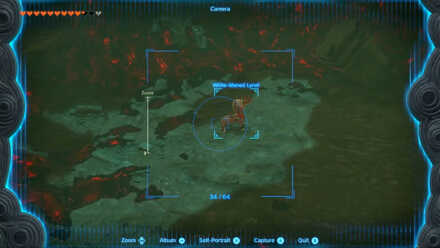
Watch out for the Electric Keeses hiding below as they can surprise you if you jump down right away. A few more steps to the south is a White-Maned Lynel pit. You can fight the Lynel or avoid it and go straight for the next room to the south.
Defeat the Ice Likes and Ice Keeses
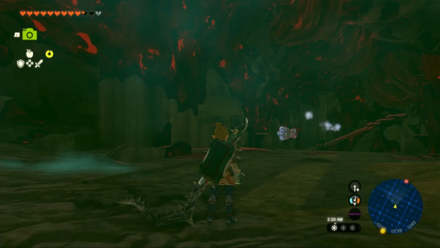
Before you pass through this tunnel, shoot down the Ice Keeses and remove the Ice Likes from the walls with fire arrows. You can avoid the gloom by hopping on Mineru's construct.
Proceed to the next room and reach the bottom of the long shaft, a place where none of the sages' avatars can reach.
Build a Fan Plane

Turn north and you will spot a Silver Moblin on the far end of the next room. Grab some parts from the room on your left and build a fanplane that can carry you across.
Reach the Forgotten Foundation
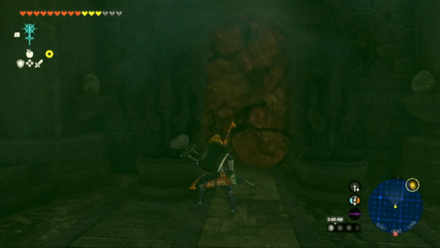
Follow the tunnel down to the Forgotten Foundation and keep heading down this kinda familiar path until you reach a blocked doorway. Clear the rocks using a hammer-type weapon and enter the mural room.
Reach the Imprisoning Chamber

Here you can see more of the mural from earlier by breaking the rocks. The rightmost chunk of rocks hides the passageway to the Imprisoning Chamber.
Jump down the ledge and you will reach Gloom's Lair.
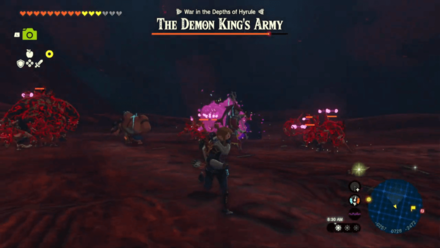
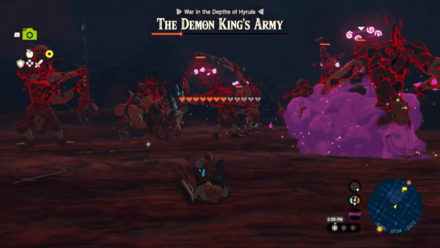
Defeat the Demon King's Army
| Destroy Ganondorf - The Demon King's Army |
|---|
|
|
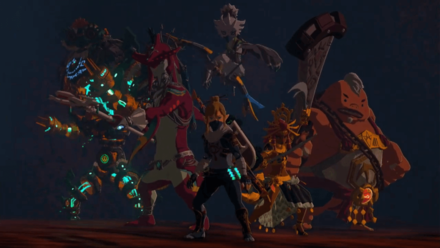
Ganondorf has more aces up in his sleeve, and will require you to face his Gloom-stricken army.
Defeat the Demon King Army
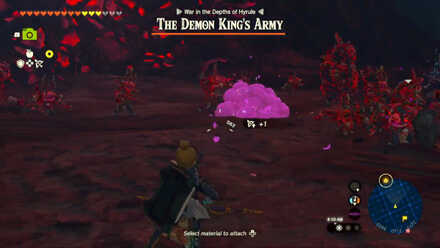
Jump down the chasm and land on Gloom's Lair. Walk (or use a Cart Shield) towards the chasm at the end of this tunnel and prepare to fight the Demon King's Army upon arriving at the bottom.
You will face four enemy waves comprised of Bokoblins, Lizalfos, Gibdos and Moblins.
If you skipped any Temples and didn't face the respective boss in the dungeon, they will appear here!
All Temple Locations and Dungeon Guides
Mind the Number of Enemies
During this fight, you will face four waves of enemies consisting of Bokoblins, Lizalfos, Gibdos, and Moblins. The health bar on the top of the screen displays their collective health bar, and you will not progress through the wave if there are any enemies left.
Do not underestimate the number of enemies you're facing, as you can easily get overwhelmed, even if you have your Sages fighting with you.
Reach Gloom's Origin
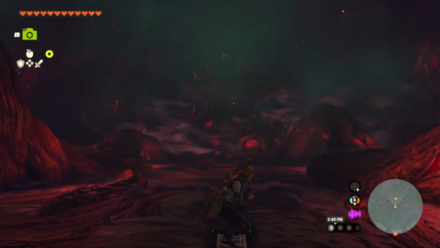
After the rumble, follow the path through Gloom's Origin until you find Ganondorf.
Defeat Ganondorf
| Defeat Ganondorf |
|---|
|
|
After defeating his forces, you'll now come face-to-face with the Demon King!
Defeat Ganondorf
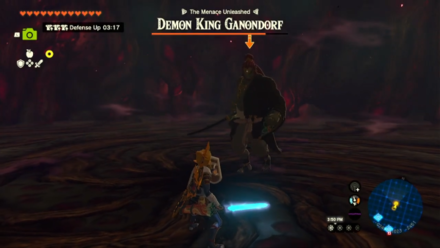
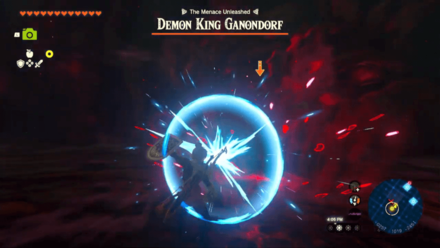
You weren't expecting a Smash stage, were you? You are now against the game's final boss, Demon King Ganondorf. This fight consists of two phases:
In the first phase, Ganondorf will take it easy and fight you with melee weapons and slow melee attacks.
He will then go Saiyan-mode in the second phase—breaking the health bar length limit, becoming more aggressive, and calling in Phantoms of himself.
In his third phase, Ganondorf will blast away your Sages and absorb his Phantoms, bringing the fight back to a one-on-one.
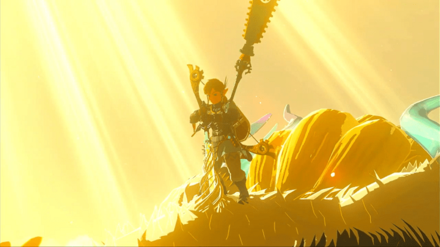
Defeat the Demon Dragon

As his final resort, Ganondorf will transform into the Demon Dragon and break out to the skies.Destroy the Demon King's ultimate form to save Hyrule and complete this quest.
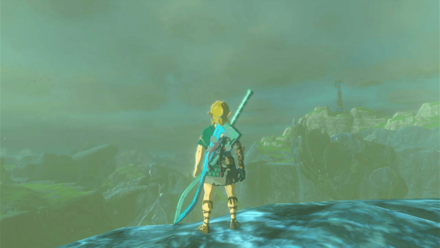
Save Princess Zelda

After the cutscene, you will be nearing the end of your quest to Find Princess Zelda. Quickly dive down and catch her to complete your first and most important quest and finish the game!
| ◄ Previous Quest | Next Quest ▶ |
|---|---|
| Find the Fifth Sage (Part 2) | - |
Now that you have finished the main story and saved Princess Zelda, you can continue on searching for the adorable (and maybe a bit annoying) Koroks, conquer the Shrine challenges, help the people of Hyrule through Side Quests and Side Adventures, and other game activities!
How to Beat the Demon King's Army
Use Muddle Buds
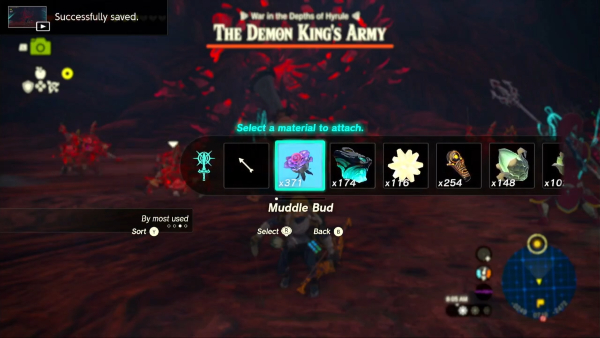
As soon as the fight starts, load each of your arrows with Muddle Buds, which can be found near large trees in the Depths. Shooting an enemy with an arrow fused with this plant will cause it to turn against other enemies.
Just rain down the enemies with Muddle Bud arrows and this fight is thrown completely out of the window. But don't forget that Gibdos are only vulnerable once attacked with elemental arrows!
Muddle Buds Locations and Where to Farm
Throw Bomb Flowers
If you want to deal extra damage as Ganondorf's army fights each other, you can throw Bomb Flowers at them to deal AoE damage, though be mindful of your distance as you may get hit!
Bomb Flowers Locations and Where to Farm
How to Beat Demon King Ganondorf
Keep on Flurry Rushing
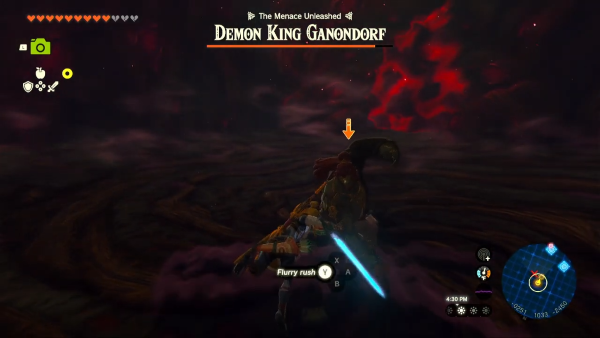
At the start of the fight, you can keep your shield up and memorize the timing of his attacks. Once you got it, you can start attempting to perform a Flurry Rush to deal massive damage.
How to Perfect Dodge and Flurry Rush
Dodge His Counterattacks on the Second Phase
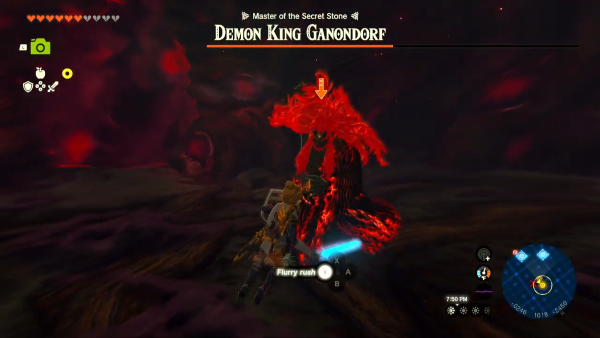
Cutting his health bar by half on the second phase will change the setting back to a one-on-one. This time, Ganondorf can dodge your Flurry Rush and counter you with a lunge.
Dodge this counterattack perfectly to trigger another Flurry Rush, which he won't be able to evade.
Hit Demon Dragon's Weakpoints
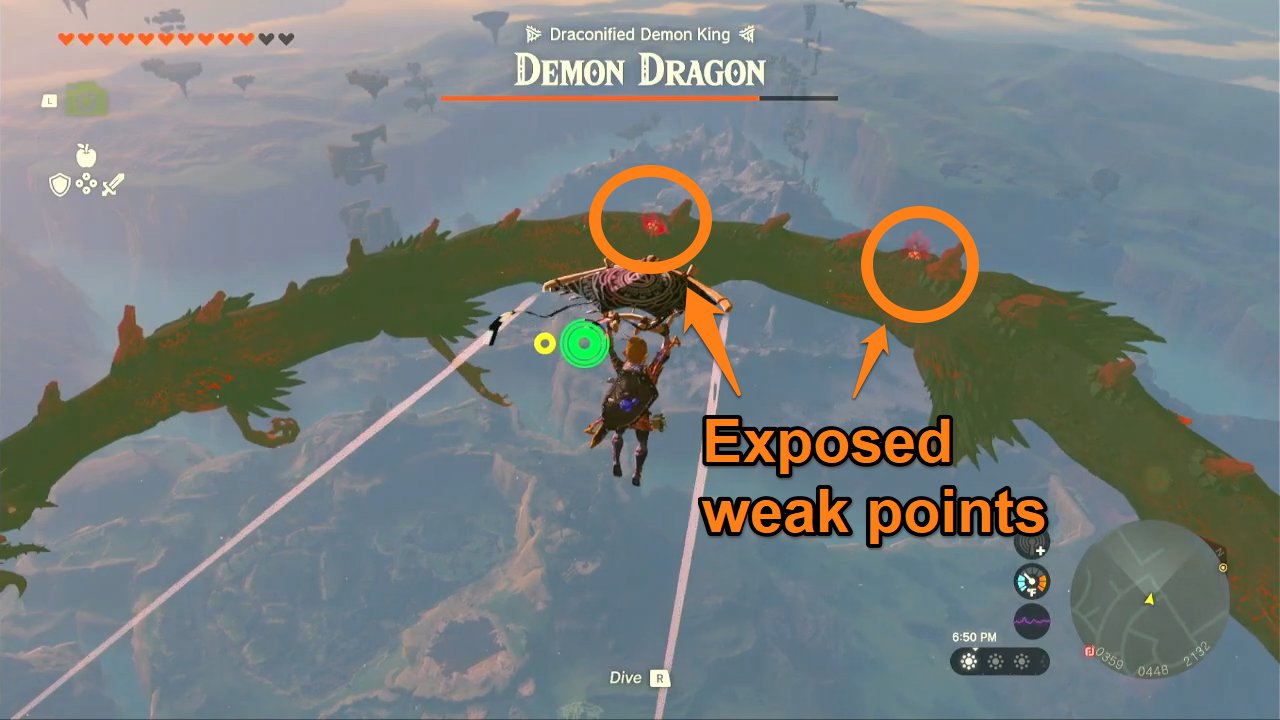
In the last phase of the fight and when Ganondorf transforms into a dragon, wait until the Light Dragon lifts you above the Demon Dragon before gliding down. Try to land on the exposed weak points themselves instead of the rest of the dragon's body as it will damage your hearts.
The Demon Dragon's weak points are covered in eyes (classic Zelda boss design) and their glow stands out from the red spikes so they're easy to spot. Destroy these weak points, including the last one on the dragon's forehead, to defeat the boss.
How to Beat Demon King Ganondorf and Demon Dragon Boss
The Legend of Zelda: Tears of the Kingdom Related Guides
List of All Walkthroughs
| All Quest Types | ||
|---|---|---|
 Main Quests Main Quests |
 Side Quests Side Quests |
 Side Adventures Side Adventures |
List of All Main Quests
Comment
Author

The Legend of Zelda: Tears of the Kingdom Walkthrough & Guides Wiki
Destroy Ganondorf Walkthrough
Please participate in our site
improvement survey
03/2026
improvement survey
03/2026
Would you assist in
improving Game8's site?
improving Game8's site?

×
We are listening to our users' valuable opinions and discussing how to act on them.
The information collected through this survey will be used for the purpose of improving our services. In addition, the information will only be disclosed a part of a statistic in a format that will not allow identification of personal information.
Begin Survey
Not Now
×
Please rate each item regarding Game8.co's Advertisements.
Amount of Ads
Very Dissatisfied
Somewhat Dissatisfied
Fine
Somewhat Satisfied
Highly Satisfied
Placement of Ads
Timing of Ad Display
Ad Loading Speed
Safeness of Ads
Content of Ads
×
Please rate each item regarding Game8.co's Quality of Articles.
Amount of information
Very Dissatisfied
Somewhat Dissatisfied
Fine
Somewhat Satisfied
Highly Satisfied
Frequency of updates
Speed of new information
Accuracy of articles
Understandibility of articles
Readability of sentences
×
Please rate each item regarding Game8.co's Usability of the Site.
Ease of finding information
Very Dissatisfied
Somewhat Dissatisfied
Fine
Somewhat Satisfied
Highly Satisfied
Loading Speed
Use of Color
Font Size
Visibility of Images
Easy to Understand Layout
×
Please rate each item regarding Game8.co's Message Boards, Comments.
Ease of Writing
Very Dissatisfied
Somewhat Dissatisfied
Fine
Somewhat Satisfied
Highly Satisfied
Readability
Ease in Finding Information
Comment Quality
Comment Quantity
Admin Response
×
Please rate each item regarding Game8.co's Site's new design.
Please rate our site's new design
Very Dissatisfied
Somewhat Dissatisfied
Fine
Somewhat Satisfied
Highly Satisfied
Do you think that the website's design change makes the site easier to use?
Has the new design made it easier for you to find information on the site?
Has the new design improved the overall visual appeal of the site?
How would you rate your overall satisfaction with the new design of the site?
×
How likely are you to recommend Game8 to someone you know?
Very Unlikely
0
1
2
3
4
5
6
7
8
9
10
Very Likely
If you have other opinions regarding potential improvement to the website, please share them with us. We would appreciate your honest opinion.
Note: This is a free response section, so you can proceed without entering anything.
Note: Please be sure not to enter any kind of personal information into your response.
Note: Please be sure not to enter any kind of personal information into your response.
×
Thank You
×
Thank you for participating in our survey! Your answers will help us to improve the quality of our website and services.
We hope you continue to make use of Game8.
We hope you continue to make use of Game8.
Close
Rankings
- We could not find the message board you were looking for.
Gaming News


Popular Games

Genshin Impact Walkthrough & Guides Wiki
Honkai: Star Rail Walkthrough & Guides Wiki
Umamusume: Pretty Derby Walkthrough & Guides Wiki
Pokemon Pokopia Walkthrough & Guides Wiki
Resident Evil Requiem (RE9) Walkthrough & Guides Wiki
Monster Hunter Wilds Walkthrough & Guides Wiki
Wuthering Waves Walkthrough & Guides Wiki
Arknights: Endfield Walkthrough & Guides Wiki
Pokemon FireRed and LeafGreen (FRLG) Walkthrough & Guides Wiki
Pokemon TCG Pocket (PTCGP) Strategies & Guides Wiki


Recommended Games
Diablo 4: Vessel of Hatred Walkthrough & Guides Wiki
Fire Emblem Heroes (FEH) Walkthrough & Guides Wiki
Yu-Gi-Oh! Master Duel Walkthrough & Guides Wiki
Super Smash Bros. Ultimate Walkthrough & Guides Wiki
Pokemon Brilliant Diamond and Shining Pearl (BDSP) Walkthrough & Guides Wiki
Elden Ring Shadow of the Erdtree Walkthrough & Guides Wiki
Monster Hunter World Walkthrough & Guides Wiki
The Legend of Zelda: Tears of the Kingdom Walkthrough & Guides Wiki
Persona 3 Reload Walkthrough & Guides Wiki
Cyberpunk 2077: Ultimate Edition Walkthrough & Guides Wiki


All rights reserved
© Nintendo. The Legend of Zelda and Nintendo Switch are trademarks of Nintendo.
The copyrights of videos of games used in our content and other intellectual property rights belong to the provider of the game.
The contents we provide on this site were created personally by members of the Game8 editorial department.
We refuse the right to reuse or repost content taken without our permission such as data or images to other sites.