Sinakawak Shrine Puzzle Solution
▲ Get Pristine Weapons from the depths!
△ All 1000 Koroks | All 4 Great Fairies
▲ 81 Addison Signs | 147 Caves | 58 Wells
△ Tips: Farm Rupees | Starting Armor
▲ Best Weapons | Best Armor | Best Food
Sinakawak Shrine (An Uplifting Device) in The Legend of Zelda: Tears of the Kingdom (TotK) can be found northwest of the Serenne Stable in the Hyrule Field Region. Read on to learn its location, puzzle solution, as well as all treasure chest locations in Sinakawak Shrine.
List of Contents
Sinakawak Shrine Location
New Serenne Stable
Sinakawak Shrine can be found northwest of the New Serenne Stable in the Hyrule Field Region. The exact coordinates of the shrine is at -1413, 0757, 0089.
The Sinakawak shrine is surrounded by grassy plains, given that it is located near New Serenne Stable.
Travel to Lindor Brow's Skyview Tower and launch yourself from there to glide southeast towards Sinakawak Shrine.
Puzzle Shrine
This is a Puzzle type Shrine, so you need to solve the puzzle to reach the end and get a Light of Blessing.
Try to look around the area to find a way to move forward, and remember to use Link's Ultrahand, Ascend, or Recall abilities!
All Abilities and How to Unlock
Sinakawak Shrine Puzzle Solution
- Create a Makeshift Hot Air Balloon
- Ride the Hot Air Balloon
- Create Another Hot Air Balloon in the Next Section
- Go Down the Lowest Section in the Next Room
- Stack the Orbs on Top of Each Other
- Attach a Balloon on Top of the Orbs
- Attach a Flame Emitter to the Balloon
- Go to the Higher Platform
- Place the Bigger Orb on the Right Vessel
- Place the Smaller Orb on the Left Vessel
Sinakawak Shrine Video Guide
1. Create a Makeshift Hot Air Balloon

Enter the shrine and go up the stairs up ahead. When you reach the next platform, create a makeshift hot air balloon by using Ultrahand on a Balloon, wooden platform, and a lit pillar.
2. Ride the Hot Air Balloon
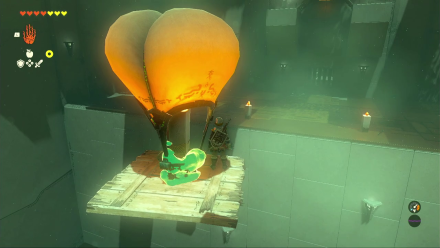
Step on the wooden platform of your makeshift hot air balloon and ride it until you're high enough to glide towards the next section.
3. Create Another Hot Air Balloon in the Next Section
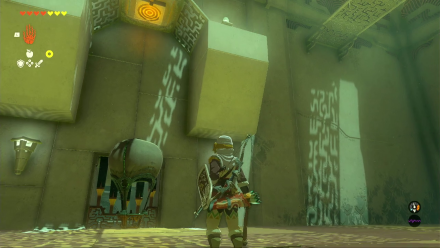
When you reach the next section, create another makeshift hot air balloon and place it in front of the closed gate. The fire will make it float upwards and push the button on the ceiling.
Enter the next room once it opens.
4. Go Down the Lowest Section in the Next Room

The next room will have two sections - a higher one with vessels for the orbs and a lower one where you can get the orbs.
Use your paraglider or the ladder to reach the lower section of the next room. Here you'll find two orbs, a couple of Balloons, 4 Flame Emitters, and lit pillars.
5. Stack the Orbs on Top of Each Other
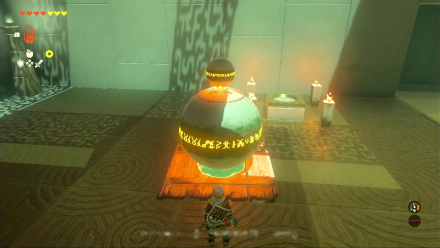
Next, pick up the bigger orb from one side of the room and stack the smaller orb on top of it using Ultrahand.
6. Attach a Balloon on Top of the Orbs
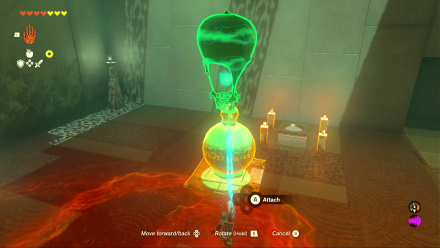
Using Ultrahand, pick up a Balloon and attach it on the stacked orbs.
7. Attach a Flame Emitter to the Balloon
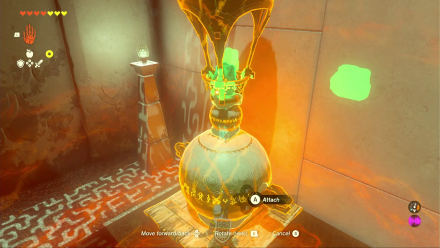
Next, grab one of the Flame Emitters and attach it to the balloon. Then, place your contraption near the wall where the higher platform is.
8. Go to the Higher Platform
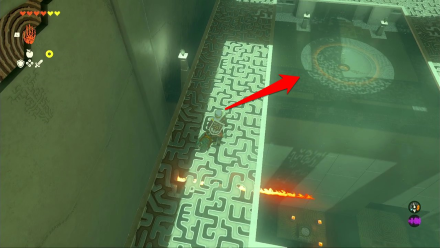
As your contraption rises, climb the ladder once again and jump to the higher platform. Wait for your contraption to reach the higher platform, then grab it using Ultrahand when it's within reach.
9. Place the Bigger Orb on the Right Vessel
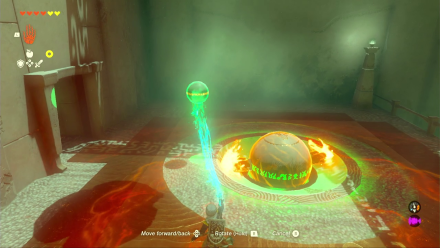
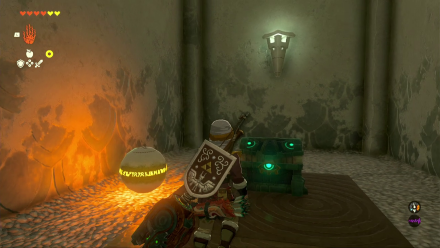
Next, disassemble your contraption and place the bigger orb on the vessel to your right to open the closed room nearby. Enter the room and open the chest to get an Opal.
10. Place the Smaller Orb on the Left Vessel
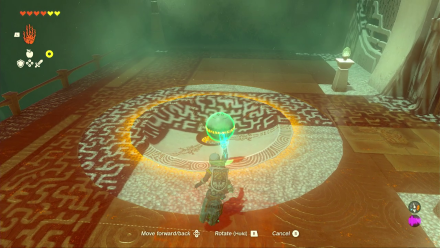
Finally, place the smaller orb on the left vessel to open the gate to the altar. Examine the altar to get a Light of Blessing.
Sinakawak Shrine Rewards and Chest Locations
Opal
| Chest Location | Chest Contents |
|---|---|
 |
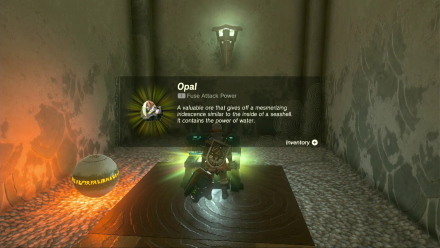 |
In the last room of the shrine, grab the bigger orb from the lower level and place it on the right vessel on the higher platform. This will open a room with a chest inside. Open it to get an Opal.
The Legend of Zelda: Tears of the Kingdom Related Guides

Shrines Lists
| Shrines Lists | |
|---|---|
| All Shrines | All Shrine Quests |
All Great Sky Island Shrines
| Great Sky Island Shrines | ||
|---|---|---|
| Ukouh Shrine | In-isa Shrine | Gutanbac Shrine |
| Nachoyah Shrine | - | - |
All Hyrule Field Shrines
All Tabantha Shrines
| Tabantha Shrines | ||
|---|---|---|
| Oromuwak Shrine | Gatakis Shrine | Nouda Shrine |
| Wao-os Shrine | Iun-orok Shrine | Turakawak Shrine |
| Gasas Shrine | Mayausiy Shrine | Ikatak Shrine |
| Ga-ahisas Shrine | Ganos Shrine | Taunhiy Shrine |
All Hebra Shrines
All Great Hyrule Forest Shrines
| Great Hyrule Forest Shrines | ||
|---|---|---|
| Sakunbomar Shrine | Pupunke Shrine | Ninjis Shrine |
| Musanokir Shrine | Kikakin Shrine | Kiuyoyou Shrine |
| Ekochiu Shrine | Mayam Shrine | Simosiwak Shrine |
All Akkala Shrines
All Eldin Shrines
All Lanayru Shrines
All Necluda Shrines
All Faron Shrines
| Faron Shrines | ||
|---|---|---|
| Jiukoum Shrine | Ishokin Shrine | Utsushok Shrine |
| Joku-u Shrine | Joku-usin Shrine | - |
All Gerudo Shrines
Comment
Author
The Legend of Zelda: Tears of the Kingdom Walkthrough & Guides Wiki
Sinakawak Shrine Puzzle Solution
Rankings
- We could not find the message board you were looking for.
Gaming News
Popular Games

Genshin Impact Walkthrough & Guides Wiki

Honkai: Star Rail Walkthrough & Guides Wiki

Umamusume: Pretty Derby Walkthrough & Guides Wiki

Pokemon Pokopia Walkthrough & Guides Wiki

Resident Evil Requiem (RE9) Walkthrough & Guides Wiki

Monster Hunter Wilds Walkthrough & Guides Wiki

Wuthering Waves Walkthrough & Guides Wiki

Arknights: Endfield Walkthrough & Guides Wiki

Pokemon FireRed and LeafGreen (FRLG) Walkthrough & Guides Wiki

Pokemon TCG Pocket (PTCGP) Strategies & Guides Wiki
Recommended Games

Diablo 4: Vessel of Hatred Walkthrough & Guides Wiki

Cyberpunk 2077: Ultimate Edition Walkthrough & Guides Wiki

Fire Emblem Heroes (FEH) Walkthrough & Guides Wiki

Yu-Gi-Oh! Master Duel Walkthrough & Guides Wiki

Super Smash Bros. Ultimate Walkthrough & Guides Wiki

Pokemon Brilliant Diamond and Shining Pearl (BDSP) Walkthrough & Guides Wiki

Elden Ring Shadow of the Erdtree Walkthrough & Guides Wiki

Monster Hunter World Walkthrough & Guides Wiki

The Legend of Zelda: Tears of the Kingdom Walkthrough & Guides Wiki

Persona 3 Reload Walkthrough & Guides Wiki
All rights reserved
© Nintendo. The Legend of Zelda and Nintendo Switch are trademarks of Nintendo.
The copyrights of videos of games used in our content and other intellectual property rights belong to the provider of the game.
The contents we provide on this site were created personally by members of the Game8 editorial department.
We refuse the right to reuse or repost content taken without our permission such as data or images to other sites.


![Monster Hunter Stories 3 Review [First Impressions] | Simply Rejuvenating](https://img.game8.co/4438641/2a31b7702bd70e78ec8efd24661dacda.jpeg/thumb)


