Domizuin Shrine Puzzle Walkthrough
▲ Get Pristine Weapons from the depths!
△ All 1000 Koroks | All 4 Great Fairies
▲ 81 Addison Signs | 147 Caves | 58 Wells
△ Tips: Farm Rupees | Starting Armor
▲ Best Weapons | Best Armor | Best Food
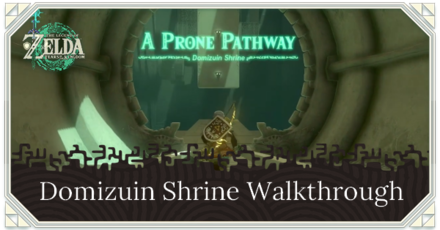
Domizuin Shrine (A Prone Pathway) in The Legend of Zelda: Tears of the Kingdom (TotK) can be found south of South Akkala Stable in the Akkala Highlands Region. Read on to learn its location, puzzle solution, as well as all treasure chest locations in Domizuin Shrine.
List of Contents
Domizuin Shrine Location
South of South Akkala Stable
Domizuin Shrine can be found by travelling south of South Akkala Stable. Alternatively, you can also paraglide south of Ulri Mountain Skyview Tower to reach the shrine.
The exact coordinates of the Domizuin Shrine is at 3305, 1443, 0426.
The Domizuin Shrine is surrounded by autumn trees and old cannons, given that it is located in the Akkala Citadel Ruins.
Travel to Ulri Mountain Skyview Tower, and launch yourself from there to glide south towards the Domizun Shrine.
Puzzle Shrine
This is a Puzzle type Shrine, so you need to solve the puzzle to reach the end and get a Light of Blessing.
Try to look around the area to find a way to move forward, and remember to use Link's Ultrahand, Ascend, or Recall abilities!
All Abilities and How to Unlock
Domizuin Shrine Puzzle Solution
- Use Ascend on the Pillar
- Hit the Switch
- Ascend the Short Pillar to Your Right
- Hit the Switch Once
- Drop Down the Ledge
- Climb the Ladder and Open the Chest
- Ascend to the Bigger Room
- Hit the Switch Three Times and Run to the Chest
- Hit the Outside Switch Once and the Inside Switch Thrice
- Ascend the Tall Pillar
- Hit the Outside Switch Three Times
Domizuin Shrine Video Guide
1. Use Ascend on the Pillar
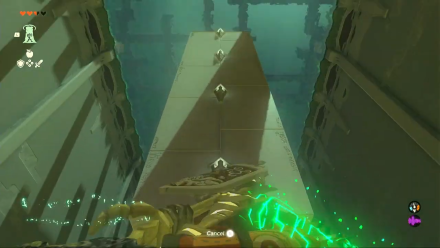
Walk towards the pillar up ahead and use Ascend to reach the top.
2. Hit the Switch
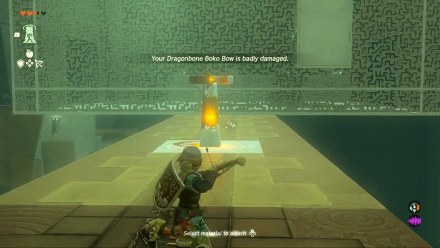
Continue walking forward until you're near the switch. Hit it to move the big room in front of you.
Enter the big room next.
3. Ascend the Short Pillar to Your Right
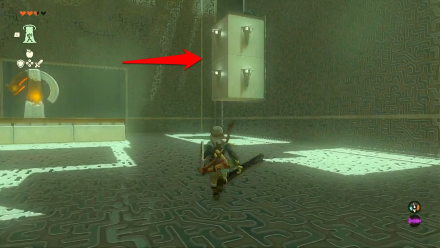
Upon entering the big room, look to your right to see a short pillar. Use Ascend under it to reach the chest at the top. Open it to get Arrows x10.
4. Hit the Switch Once
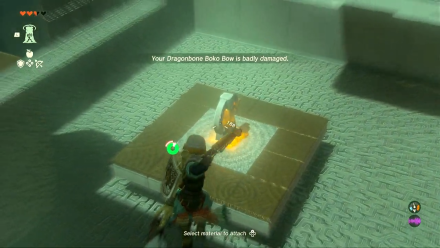
Jump down from the short pillar, then hit the switch once to rotate the room.
5. Drop Down the Ledge
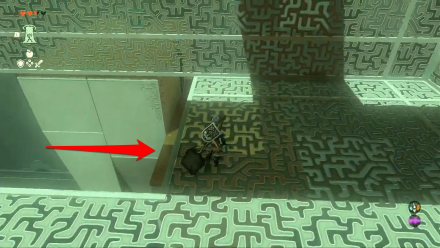
After the room is done rotating, go towards the hole on the floor and drop on the ledge.
6. Climb the Ladder and Open the Chest
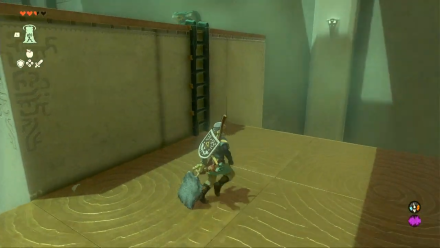
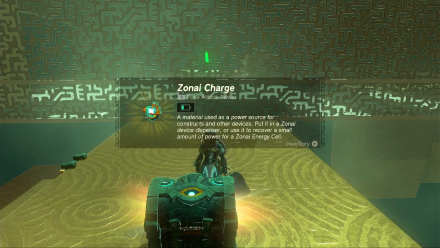
Continue walking until you see a ladder to your left. Climb it and open the chest on top to get a Zonai Charge.
7. Ascend to the Bigger Room
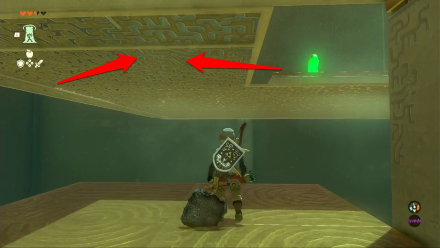
After getting the Zonai Charge, go down to the ledge again and use Ascend on the floor of the big room to get back in there again.
8. Hit the Switch Three Times and Run to the Chest
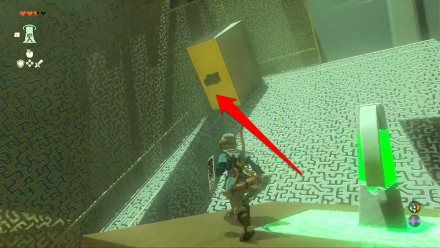
When you're back in the big room, walk towards the switch and hit it three times. Then, quickly run towards the pillar with a chest.on top. Open it to get a Strong Zonaite Shield.
9. Hit the Outside Switch Once and the Inside Switch Thrice
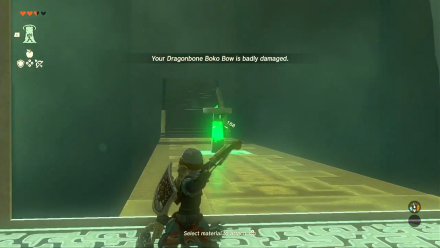
After getting the Strong Zonaite Shield, shoot the outside switch once with a bow and arrow. Note that you need to shoot it from inside the big room.
Afterwards, hit the switch inside the big room three times.
10. Ascend the Tall Pillar
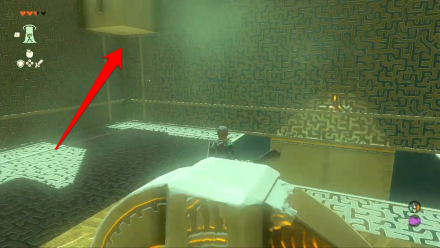
Once the room stops rotating, walk towards the tall pillar and use Ascend underneath it. This will let you reach the top of the room but there will be a gap between you and the altar.
11. Hit the Outside Switch Three Times
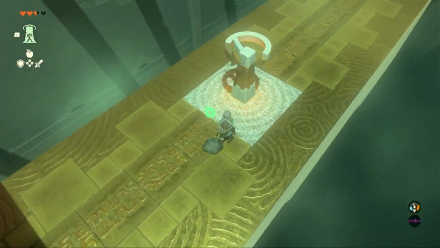
Hit the outside switch three times to rotate the room and close the gap between you and the altar.
Domizuin Shrine Rewards and Chest Locations
Arrow x10
| Chest Location | Chest Contents |
|---|---|
 |
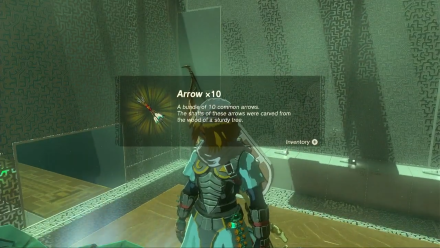 |
Upon entering the big room, look to your right to see a short pillar on the right side of the wall. Use Ascend under it to reach the chest at the top. Open it to get Arrows x10.
Zonai Charge
| Chest Location | Chest Contents |
|---|---|
 |
 |
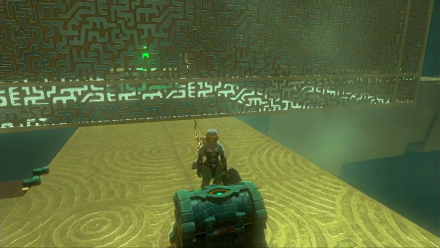
From atop the pillar where you got the Arrows, shoot the switch with a bow and arrow to rotate the room. After the room is done rotating, go towards the hole on the floor and drop on the ledge.
Continue walking across the ledge until you see a ladder to your left. Climb it and open the chest on top to get a Zonai Charge.
Strong Zonaite Shield
| Chest Location | Chest Contents |
|---|---|
 |
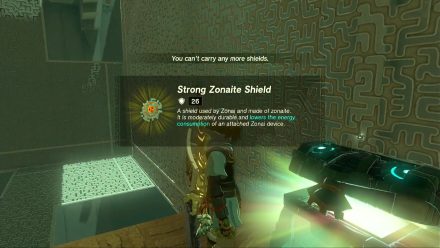 |
After getting the Zonai Charge, go back to the big room and hit the switch three times. Then, quickly run towards the pillar with a chest on top. Open it to get a Strong Zonaite Shield.
The Legend of Zelda: Tears of the Kingdom Related Guides

Shrines Lists
| Shrines Lists | |
|---|---|
| All Shrines | All Shrine Quests |
All Great Sky Island Shrines
| Great Sky Island Shrines | ||
|---|---|---|
| Ukouh Shrine | In-isa Shrine | Gutanbac Shrine |
| Nachoyah Shrine | - | - |
All Hyrule Field Shrines
All Tabantha Shrines
| Tabantha Shrines | ||
|---|---|---|
| Oromuwak Shrine | Gatakis Shrine | Nouda Shrine |
| Wao-os Shrine | Iun-orok Shrine | Turakawak Shrine |
| Gasas Shrine | Mayausiy Shrine | Ikatak Shrine |
| Ga-ahisas Shrine | Ganos Shrine | Taunhiy Shrine |
All Hebra Shrines
All Great Hyrule Forest Shrines
| Great Hyrule Forest Shrines | ||
|---|---|---|
| Sakunbomar Shrine | Pupunke Shrine | Ninjis Shrine |
| Musanokir Shrine | Kikakin Shrine | Kiuyoyou Shrine |
| Ekochiu Shrine | Mayam Shrine | Simosiwak Shrine |
All Akkala Shrines
| Akkala Shrines | ||
|---|---|---|
| Rasiwak Shrine | Jochi-iu Shrine | Igashuk Shrine |
| Sinatanika Shrine | Rasitakiwak Shrine | Jochi-ihiga Shrine |
| Gatanisis Shrine | Domizuin Shrine | Kamatukis Shrine |
| Gemimik Shrine | Gikaku Shrine | Mogisari Shrine |
| Natak Shrine | - | - |
All Eldin Shrines
All Lanayru Shrines
All Necluda Shrines
All Faron Shrines
| Faron Shrines | ||
|---|---|---|
| Jiukoum Shrine | Ishokin Shrine | Utsushok Shrine |
| Joku-u Shrine | Joku-usin Shrine | - |
All Gerudo Shrines
Comment
Author
The Legend of Zelda: Tears of the Kingdom Walkthrough & Guides Wiki
Domizuin Shrine Puzzle Walkthrough
improvement survey
03/2026
improving Game8's site?

Your answers will help us to improve our website.
Note: Please be sure not to enter any kind of personal information into your response.

We hope you continue to make use of Game8.
Rankings
- We could not find the message board you were looking for.
Gaming News
Popular Games

Genshin Impact Walkthrough & Guides Wiki

Honkai: Star Rail Walkthrough & Guides Wiki

Umamusume: Pretty Derby Walkthrough & Guides Wiki

Pokemon Pokopia Walkthrough & Guides Wiki

Resident Evil Requiem (RE9) Walkthrough & Guides Wiki

Monster Hunter Wilds Walkthrough & Guides Wiki

Wuthering Waves Walkthrough & Guides Wiki

Arknights: Endfield Walkthrough & Guides Wiki

Pokemon FireRed and LeafGreen (FRLG) Walkthrough & Guides Wiki

Pokemon TCG Pocket (PTCGP) Strategies & Guides Wiki
Recommended Games

Diablo 4: Vessel of Hatred Walkthrough & Guides Wiki

Cyberpunk 2077: Ultimate Edition Walkthrough & Guides Wiki

Fire Emblem Heroes (FEH) Walkthrough & Guides Wiki

Yu-Gi-Oh! Master Duel Walkthrough & Guides Wiki

Super Smash Bros. Ultimate Walkthrough & Guides Wiki

Pokemon Brilliant Diamond and Shining Pearl (BDSP) Walkthrough & Guides Wiki

Elden Ring Shadow of the Erdtree Walkthrough & Guides Wiki

Monster Hunter World Walkthrough & Guides Wiki

The Legend of Zelda: Tears of the Kingdom Walkthrough & Guides Wiki

Persona 3 Reload Walkthrough & Guides Wiki
All rights reserved
© Nintendo. The Legend of Zelda and Nintendo Switch are trademarks of Nintendo.
The copyrights of videos of games used in our content and other intellectual property rights belong to the provider of the game.
The contents we provide on this site were created personally by members of the Game8 editorial department.
We refuse the right to reuse or repost content taken without our permission such as data or images to other sites.


![Monster Hunter Stories 3 Review [First Impressions] | Simply Rejuvenating](https://img.game8.co/4438641/2a31b7702bd70e78ec8efd24661dacda.jpeg/thumb)


