This survey will take about 1 minute.
Your answers will help us to improve our website.
Zelda: Tears of the Kingdom (TotK)
The Closed Door Walkthrough
▲ Get Pristine Weapons from the depths!
△ All 1000 Koroks | All 4 Great Fairies
▲ 81 Addison Signs | 147 Caves | 58 Wells
△ Tips: Farm Rupees | Starting Armor
▲ Best Weapons | Best Armor | Best Food
The Closed Door is a Main Quest in The Legend of Zelda: Tears of the Kingdom (TotK) that starts in Temple of Time. Read on for a detailed walkthrough of The Closed Door, its location and rewards, as well as other tips and strategies on how to complete this Main Quest!
| ◄ Previous Quest | Next Quest ▶ |
|---|---|
| Find Princess Zelda | Find Princess Zelda (Part 2) |
List of Contents
How to Unlock The Closed Door
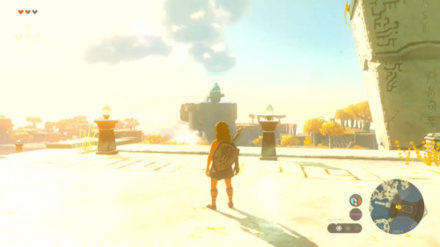
Reach the Temple of Time
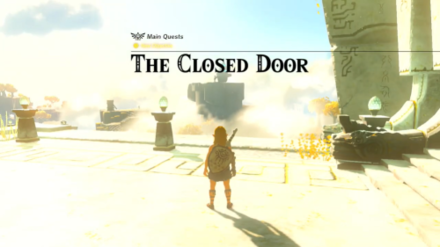
The Closed Door starts automatically after touching the symbol on the Temple of Time's locked door.
Great Sky Island - Temple of Time

The exact coordinates for this quest on the map are 0452, -0859, 1450.
Rewards
| Rewards |
|---|
| ・Energy Cell |
The Closed Door Walkthrough Guide
| The Closed Door Guides | ||
|---|---|---|
| Part 1 | Part 2 | Part 3 |
The Closed Door Part 1 Walkthrough
| The Closed Door Part 1 Walkthrough Guide |
|---|
Clear Ukuoh Shrine
Oopsie. The door's locked and your
arm needs to be revitalized first to undo the seal. Rauru will tell you to visit the island's shrines and clear their trials to regain the arm's power.
Place a map pin on the shrine where Rauru points you to and make your way there. Its coordinates are 0274, -0914, 1460.
Obtaining the Ultrahand
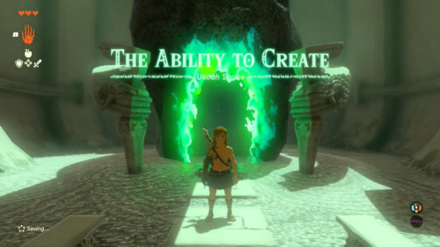
Touch the symbol in front of the shrine to unlock it and activate its fast travel point (Sweet! You won't be able to use it yet, though...). Enter Ukouh Shrine and complete The Ability to Create trial.
You'll also get the Ultrahand ability before the trial begins.
Clear In-isa Shrine
You now need to complete the other two trials, which are located on the far corners of the island. The second shrine's coordinates are 0024, -1503, 1408.
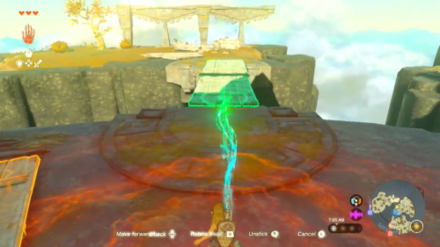
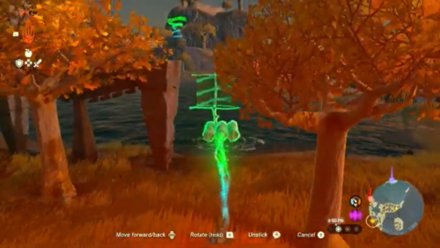
Now that you can attach stuff to other stuff, head a bit north to find some wooden boards that you can use to form a makeshift bridge with Ultrahand.
This will get you to the west cluster of islands.
Learning Woodcutting
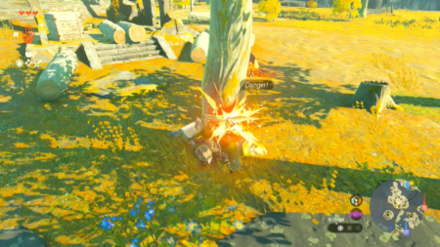
Walk south to find a Maker Construct who will tell you about woodcutting. Grab the Stone Axe nearby and cut some trees (sorry Mother Hylia) for logs.
You can then attach two logs to create a simple bridge to cross the next island south.
Crossing the Lake
Now this is a tough lake to swim across with just a wheel of stamina. Head south a bit more to find trees you can chop, logs, and sails that can be used to build a boat (Coordinates: 0073, 1304, 1389).
Place your boat on the water and make sure it's close enough to the shore so you can jump on it before it moves away!
Obtaining Fuse
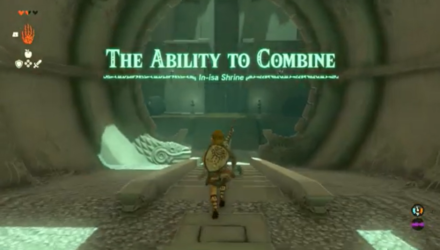
Climb the stairs to reach In-isa Shrine for The Ability to Combine trial. You'll also get the Fuse ability right away.
After clearing the shrine, the Steward Construct will meet you outside and give you the Energy Cell. This key item is used to power Zonai Devices on your contraptions. You can increase its capacity later on!
Clear Gutanbac Shrine
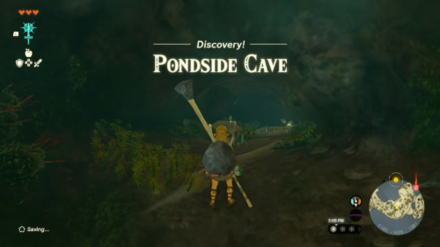
The next shrine is located east of In-isa Shrine, with the coordinates of 0709, -1383, 1584. The path to the third one will first take you through Pondside Cave, located on the southwest corner of the large island.
Just before the east exit of the Pondside Cave is a chest containing the Archaic Tunic (Coordinates: 0239, -1558, 1364).
The Closed Door Part 2 Walthrough
| The Closed Door Part 2 Walkthrough Guide |
|---|
|
|
Using Zonai Fans
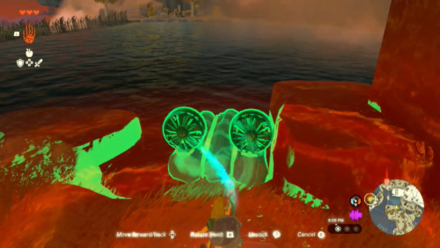
Back outside, you will immediately spot more Maker Constructs and a fan, one of the Zonai Devices. Create a raft using the logs lying around and attach a fan on each side facing backwards. Place the raft on the water, hop on, and hit the fans to activate them, propelling you to the other side of the pond.
Navigating the Mining Cave
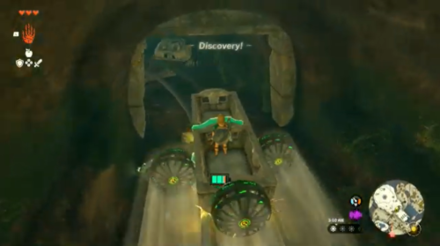
Use the winding path to get to the top where you'll find a cave entrance. Place a cart on the rail using Ultrahand and attach a fan to it. Hop on the cart and ride it through the Mining Cave until you hit a block.
Pick up some Brightbloom Seeds around and attach it to your arrows. These arrows will now sprout a brightbloom on the point of impact that will light your path through this dark cave.
The Forge Construct
Continue following the cave path until you reach a room with some more friendly constructs. You can talk to the Forge Construct to learn about processing Zonaites, where you can get Zonai Charges and Crystallized Charges.
Talk to the Mining Construct near the carts to obtain Zonai Capsules containing portable fans. Since there aren't any fans lying around, you can take one out from the capsules instead and attach it to the cart to reach the next island.
The Device Dispenser

Upon arriving, you'll find Rauru again and a strange machine just across. This is a Device Dispenser where you can use Zonai Charges and other Zonai materials to obtain random Zonai Capsules.
Continue heading north until you find the entrance to the Pit Cave. Like what the Ranger Construct will tell you, the next area is extremely cold. Prepare a warming dish before pushing through.
The Bottomless Cave
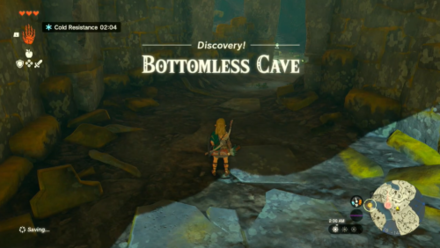
Continue heading north of the snowfield until you reach another cave named Bottomless Cave. Make your way up this cave while defeating Like Likes (which are weak to fire and will drop a chest upon death) along the way until you reach the exit to another snowfield.
As soon as you exit, turn around and climb the giant roots until you reach the top where the shrine is.
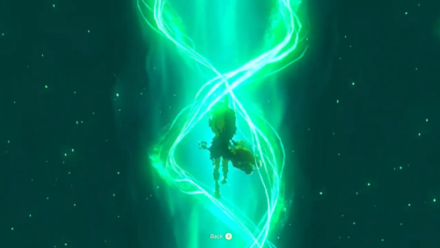
Obtaining Ascend
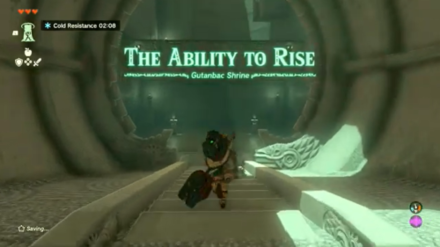
Enter Gutanbac Shrine, gain the Ascend ability, and clear The Ability to Rise trial.
The Closed Door Part 3 Walkthrough
| The Closed Door Part 3 Walkthrough Guide |
|---|
|
|
Return to the Temple of Time
IT'S TEMPLIN' TIME! Walk a little to the east and use Ascend on the long rock extending from the other side.
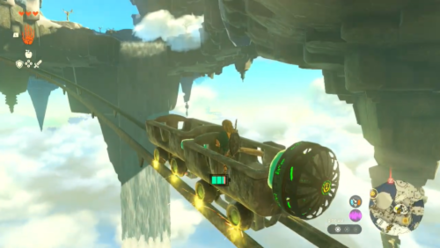
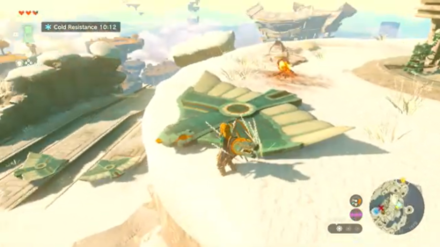
Continue moving north to find large gliders that look like small bomber planes (actually called Wings) and another device dispenser above.
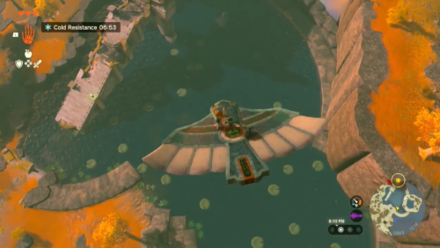
Glide with Zonai Wings
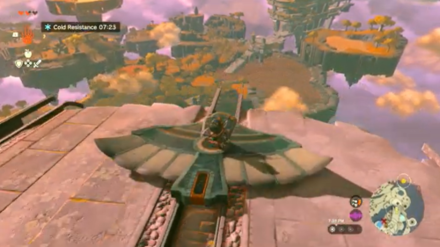
Grab a wing with Ultrahand and place it one one of the gaps on the floor. No need to attach a fan or any Zonai device on it. It will immediately start sliding towards the edge of the runway so quickly hop on it and use it to glide down to the temple.
Another option is to let the wing glide straight then just dive down when you're above the lake surrounding the temple.
Enter the Temple of Time
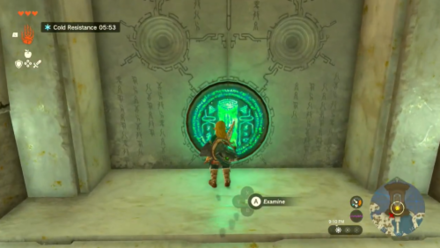
Walk up to the temple's closed door and touch the symbol to unlock it and complete the quest.
| ◄ Previous Quest | Next Quest ▶ |
|---|---|
| Find Princess Zelda | Find Princess Zelda (Part 2) |
The Closed Door Tips & Tricks
| The Closed Door Tips & Tricks |
|---|
|
|
Placing Map Pins
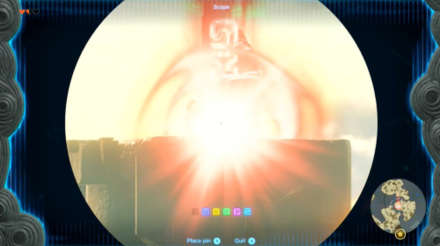
Need to mark something you see but unsure where exactly the spot is on your map? The Purah Pad can help you with that by placing map pins!
Pull out the pad by pressing the R button, point the camera on the location or object you want to mark, then press the A button to place a beacon. This mark will appear on your map and minimap so you can easily navigate to it!
Using the Ultrahand Ability
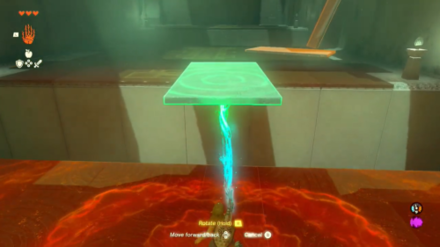
The Ultrahand ability allows you to move and rotate objects, as well as stick them to another. This is a handy ability that you will use a lot in the game to complete puzzles and quests, especially when creating vehicles, contraptions, and other makeshift objects.
Using the Fuse Ability
The Fuse ability, on the other hand, attaches an object to a weapon or a shield. A fused weapon or shield will gain attack/defense bonus and even special effects!
For example, attaching a Keese Eyeball on an Arrow gives it a small damage boost and make it a homing projectile!
Navigating the Dark Mining Cave
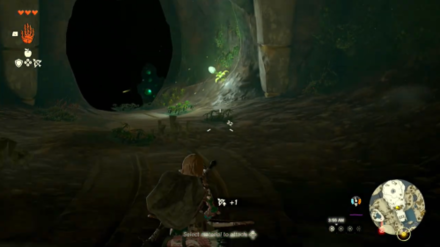
The Mining Cave found on the southern part of the Great Sky Island is way darker than the Pondside Cave. Luckily, there are Brightbloom Seeds inside you can pluck and use to light your way through.
Attach a Brightbloom Seed to you an arrow with Fuse then shoot the ground or cave walls with it. A Brightbloom will sprout on the spot where the arrow hits that will illuminate the area around it!
Zonai Charges and Crystallized Charges
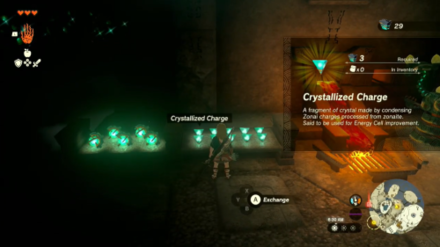
Several Zonai Charges and Crystallized Charges will be produced shortly after talking to the Forge Construct at the Mining Cave's exit. Each charge costs a couple of Zonaites, which can find by destroying Zonaite deposits.
Zonai Charges are consumables that can replenish power to an Energy Cell while the Crystallized Charges are key items that can increase the maximum number of Energy Cells you can carry—a feature you will unlock later on.
Cook Dishes With Cold Resistance
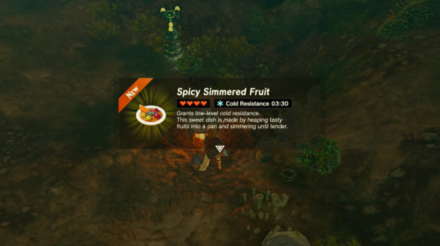
Upon reaching Pit Cave, a Ranger Construct will tell you that the snowy mountain ahead is extremely cold and you will need something to warm you, lest you rapidly lose hearts.
Pluck some Spicy Pepper nearby and throw it into the pot along with another edible ingredient, like an Apple or an Ancient Arowana. This will result in a dish that gives cold resistance. Prepare a couple of this dish and be sure to chow down only when you're on the cold area to avoid wasting its duration!
Take note that you can also improve the duration of the cold resistance effect by adding more Spicy Pepper to the mix. You can even toss in five Spicy Peppers for a 12-minute warmth!
Check the Thermometer
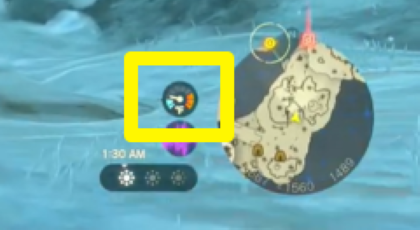
You'll know if you're experiencing unbearable cold or heat by checking the thermometer at the lower right side of the screen, left of the minimap. Once the hand moves on the blue or orange zone, you will start to lose hearts.
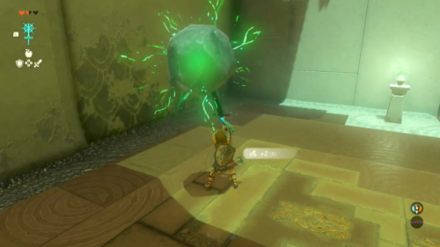
Using the Ascend Ability
Ascend allows you to pass through ceilings or any horizontal surface above you. This is useful for reaching high platforms easily or getting out of enclosed rooms in dungeons or caves.
Move Around the Wing to Control Its Flight
You can control the flight of the Wing Zonai Device by moving around it as it glides. Be sure to gauge your distance from the center of the wing, as walking too close to the device's edge might cause it to flip over and drop you.
| Direction | Movement |
|---|---|
| Steer right | Walk to the right wing |
| Steer left | Walk to the left wing |
| Descend | Walk to the nose |
| Ascend | Walk to the tail |
The Legend of Zelda: Tears of the Kingdom Related Guides

List of All Walkthroughs
| All Quest Types | ||
|---|---|---|
 Main Quests Main Quests |
 Side Quests Side Quests |
 Side Adventures Side Adventures |
List of All Main Quests
Comment
Author

The Legend of Zelda: Tears of the Kingdom Walkthrough & Guides Wiki
The Closed Door Walkthrough
Please participate in our site
improvement survey
03/2026
improvement survey
03/2026
Would you assist in
improving Game8's site?
improving Game8's site?

×
We are listening to our users' valuable opinions and discussing how to act on them.
The information collected through this survey will be used for the purpose of improving our services. In addition, the information will only be disclosed a part of a statistic in a format that will not allow identification of personal information.
Begin Survey
Not Now
×
Please rate each item regarding Game8.co's Advertisements.
Amount of Ads
Very Dissatisfied
Somewhat Dissatisfied
Fine
Somewhat Satisfied
Highly Satisfied
Placement of Ads
Timing of Ad Display
Ad Loading Speed
Safeness of Ads
Content of Ads
×
Please rate each item regarding Game8.co's Quality of Articles.
Amount of information
Very Dissatisfied
Somewhat Dissatisfied
Fine
Somewhat Satisfied
Highly Satisfied
Frequency of updates
Speed of new information
Accuracy of articles
Understandibility of articles
Readability of sentences
×
Please rate each item regarding Game8.co's Usability of the Site.
Ease of finding information
Very Dissatisfied
Somewhat Dissatisfied
Fine
Somewhat Satisfied
Highly Satisfied
Loading Speed
Use of Color
Font Size
Visibility of Images
Easy to Understand Layout
×
Please rate each item regarding Game8.co's Message Boards, Comments.
Ease of Writing
Very Dissatisfied
Somewhat Dissatisfied
Fine
Somewhat Satisfied
Highly Satisfied
Readability
Ease in Finding Information
Comment Quality
Comment Quantity
Admin Response
×
Please rate each item regarding Game8.co's Site's new design.
Please rate our site's new design
Very Dissatisfied
Somewhat Dissatisfied
Fine
Somewhat Satisfied
Highly Satisfied
Do you think that the website's design change makes the site easier to use?
Has the new design made it easier for you to find information on the site?
Has the new design improved the overall visual appeal of the site?
How would you rate your overall satisfaction with the new design of the site?
×
How likely are you to recommend Game8 to someone you know?
Very Unlikely
0
1
2
3
4
5
6
7
8
9
10
Very Likely
If you have other opinions regarding potential improvement to the website, please share them with us. We would appreciate your honest opinion.
Note: This is a free response section, so you can proceed without entering anything.
Note: Please be sure not to enter any kind of personal information into your response.
Note: Please be sure not to enter any kind of personal information into your response.
×
Thank You
×
Thank you for participating in our survey! Your answers will help us to improve the quality of our website and services.
We hope you continue to make use of Game8.
We hope you continue to make use of Game8.
Close
Rankings
- We could not find the message board you were looking for.
Gaming News


![Everwind Review [Early Access] | The Shaky First Step to A Very Long Journey](https://img.game8.co/4440226/ab079b1153298a042633dd1ef51e878e.png/thumb)

![Monster Hunter Stories 3 Review [First Impressions] | Simply Rejuvenating](https://img.game8.co/4438641/2a31b7702bd70e78ec8efd24661dacda.jpeg/thumb)
Popular Games

Genshin Impact Walkthrough & Guides Wiki
Honkai: Star Rail Walkthrough & Guides Wiki
Umamusume: Pretty Derby Walkthrough & Guides Wiki
Pokemon Pokopia Walkthrough & Guides Wiki
Resident Evil Requiem (RE9) Walkthrough & Guides Wiki
Monster Hunter Wilds Walkthrough & Guides Wiki
Wuthering Waves Walkthrough & Guides Wiki
Arknights: Endfield Walkthrough & Guides Wiki
Pokemon FireRed and LeafGreen (FRLG) Walkthrough & Guides Wiki
Pokemon TCG Pocket (PTCGP) Strategies & Guides Wiki


Recommended Games
Diablo 4: Vessel of Hatred Walkthrough & Guides Wiki
Fire Emblem Heroes (FEH) Walkthrough & Guides Wiki
Yu-Gi-Oh! Master Duel Walkthrough & Guides Wiki
Super Smash Bros. Ultimate Walkthrough & Guides Wiki
Pokemon Brilliant Diamond and Shining Pearl (BDSP) Walkthrough & Guides Wiki
Elden Ring Shadow of the Erdtree Walkthrough & Guides Wiki
Monster Hunter World Walkthrough & Guides Wiki
The Legend of Zelda: Tears of the Kingdom Walkthrough & Guides Wiki
Persona 3 Reload Walkthrough & Guides Wiki
Cyberpunk 2077: Ultimate Edition Walkthrough & Guides Wiki


All rights reserved
© Nintendo. The Legend of Zelda and Nintendo Switch are trademarks of Nintendo.
The copyrights of videos of games used in our content and other intellectual property rights belong to the provider of the game.
The contents we provide on this site were created personally by members of the Game8 editorial department.
We refuse the right to reuse or repost content taken without our permission such as data or images to other sites.