Orochium Shrine Location and Walkthrough
▲ Get Pristine Weapons from the depths!
△ All 1000 Koroks | All 4 Great Fairies
▲ 81 Addison Signs | 147 Caves | 58 Wells
△ Tips: Farm Rupees | Starting Armor
▲ Best Weapons | Best Armor | Best Food
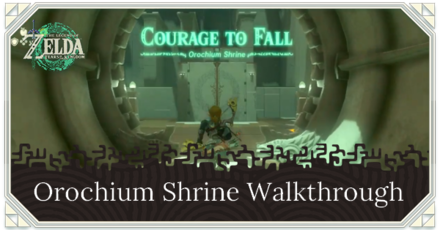
Orochium Shrine (Courage to Fall) in The Legend of Zelda: Tears of the Kingdom (TotK) can be found west of the Forgotten Temple in the Hebra Mountains Region. Read on to learn its location, puzzle solution, as well as all treasure chest locations in Orochium Shrine.
List of Contents
Orochium Shrine Location
West of Forgotten Temple in the Hebra Mountains Region
Orochium Shrine can be found west of the Forgotten Temple at the coordinates -1635, 2640, 0239.
The shrine itself is in the Hebra Mountains Region so make sure you have armor or dishes that provide cold resistance!
To get there, travel to Pikida Stonegrove Skyview Tower, and launch yourself from there to glide southeast towards the Orochium Shrine.
Puzzle Shrine
This is a Puzzle type Shrine, so you need to solve the puzzle to reach the end and get a Light of Blessing.
Try to look around the area to find a way to move forward, and remember to use Link's Ultrahand, Ascend, or Recall abilities!
All Abilities and How to Unlock
Orochium Shrine Puzzle Solution
- Open the Big Door with Ultrahand
- Go to the Left Corner of the Room
- Use Ascend Under the Ledge on the Wall to Your Right
- Enter the Small Hole
- Turn Right and Drop Down
- Go to the Rightmost Corner of the Room
- Open the Door Up the Stairs
- Continue Forward While Avoiding the Lasers
- Ascend From Under the Platform
- Use Ascend on the Ceiling
- Use the Small Key to Open the Door That Houses an Orb
- Take the Orb and Ride One of the Moving Platforms
- Place the Orb at the Vessel
- Attach the Orb to the Zonai Wing
- Place the Zonai Wing on the Rails
- Place the Orb in Its Vessel
Video Guide
1. Open the Big Door with Ultrahand
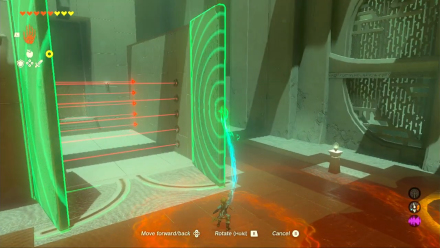
Upon entering the shrine, you'll notice an orb vessel to your left and a big door up ahead.
Use Ultrahand to open the big door. You'll find a couple of lasers inside and touching one makes the ground beneath you open up - making you fall to the void.
2. Go to the Left Corner of the Room
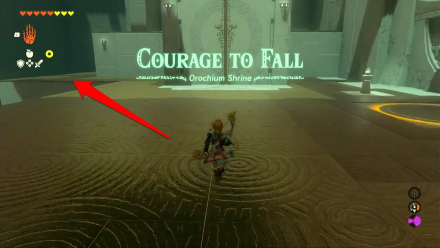
There's no way you can enter the room with lasers, so just go to the left corner of the room. Continue forward and defeat the Soldier Construct II blocking the way.
3. Use Ascend Under the Ledge on the Wall to Your Right
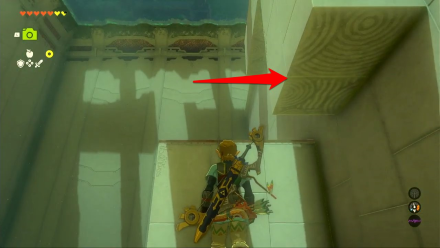
After defeating the Soldier Construct II, look for a ledge on the wall to your right. Use Ascend underneath it to get to the top of the ledge. Climb the ladder up ahead after exiting the surface of the ledge.
4. Enter the Small Hole
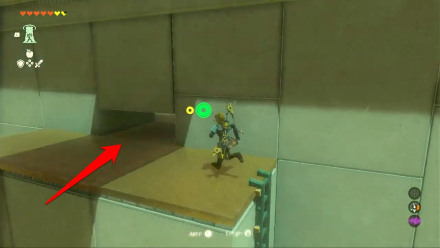
Next, crouch and enter the small hole to your right. This will take you to the other side of the right wall.
5. Turn Right and Drop Down
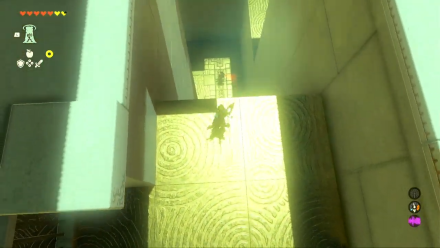
Turn right after exiting the small hole and drop down to lowest level of the room. Defeat the enemy Construct waiting for you in the next section.
6. Go to the Rightmost Corner of the Room
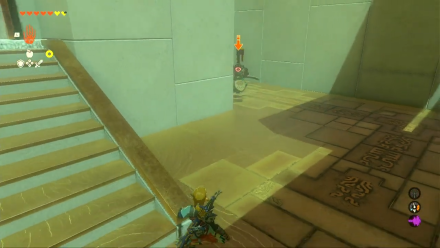
After defeating the Construct, go straight to the rightmost corner of the room and defeat the enemy Construct guarding a chest.
Open the chest afterwards to get Arrow x5.
7. Open the Door Up the Stairs
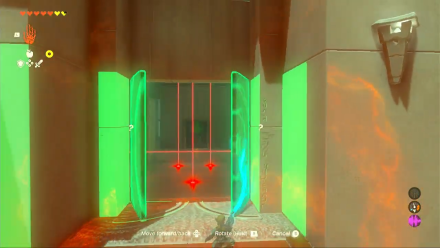
Next, open the door up the stairs using Ultrahand, then intentionally touch the lasers to collapse the floor beneath you. This takes you to a room below the floor.
8. Continue Forward While Avoiding the Lasers

Continue walking towards the end of the room while carefully avoiding the lasers.
9. Ascend From Under the Platform
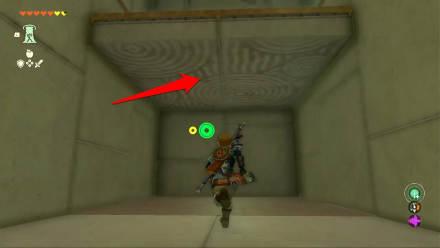
Once you reach the end of the room, use Ascend under the platform to reach the chest on the other side. Open it to get the Shrine Key.
10. Use Ascend on the Ceiling
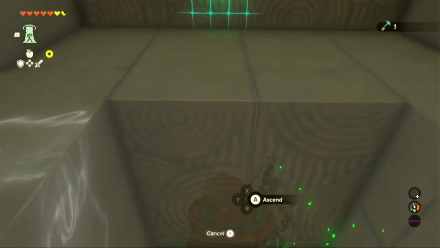
After getting the Small Key, use Ascend on the ceiling to go back to the main room.
11. Use the Small Key to Open the Door That Houses an Orb

Go towards the center of the room to find a door with an orb and a few enemy constructs. Defeat the enemy constructs, then open the door using the Small Key.
12. Take the Orb and Ride One of the Moving Platforms
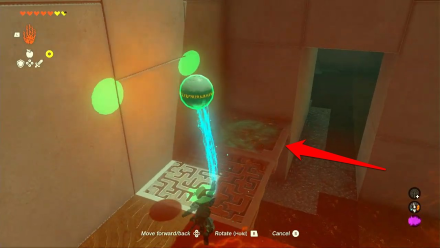
Take the orb from the small enclosure, then ride one of the moving platforms at the back of the room to get to the upper level once again.
13. Place the Orb at the Vessel
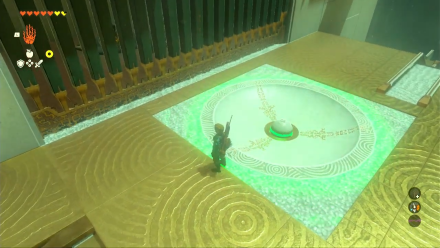
Once you're on the upper level, look for the orb vessel and place the orb there. This opens a gate with a Zonai Wing inside.
14. Attach the Orb to the Zonai Wing
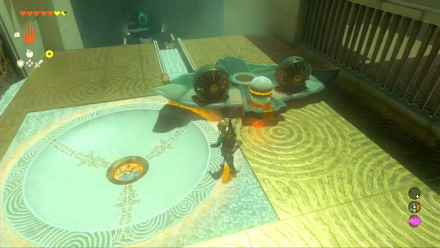
Take the Zonai Wing from its enclosue and the orb from its vessel. Then, attach the orb to the Zonai Wing.
15. Place the Zonai Wing on the Rails
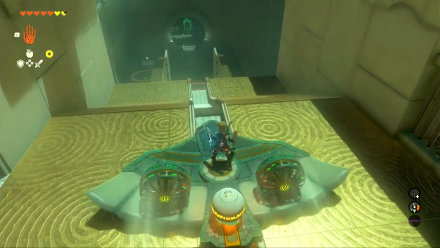
Place the Zonai Wing on the rails afterwards, then hit the fans to get the Zonai Wing moving. This takes you to the entrance of the shrine.
16. Place the Orb in Its Vessel
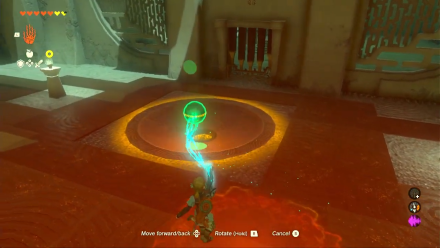
Once you've landed, take the orb from the Zonai Wing and place it in the vessel in front of the altar room.
When the door opens, enter the room and examine the altar to get a Light of Blessing.
Orochium Shrine Rewards and Chest Locations
Arrow x5
| Chest Location | Chest Contents |
|---|---|
 |
 |
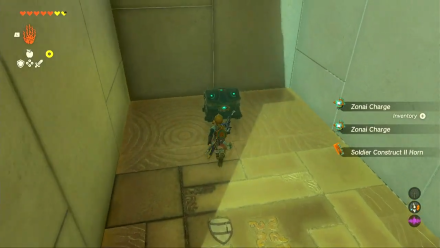
When you get to the other side of the big door with horizontal lasers, go to the rightmost corner of the room and defeat the Construct guarding a chest.
Open the chest afterwards to get Arrow x5.
The Legend of Zelda: Tears of the Kingdom Related Guides

Shrines Lists
| Shrines Lists | |
|---|---|
| All Shrines | All Shrine Quests |
All Great Sky Island Shrines
| Great Sky Island Shrines | ||
|---|---|---|
| Ukouh Shrine | In-isa Shrine | Gutanbac Shrine |
| Nachoyah Shrine | - | - |
All Hyrule Field Shrines
All Tabantha Shrines
| Tabantha Shrines | ||
|---|---|---|
| Oromuwak Shrine | Gatakis Shrine | Nouda Shrine |
| Wao-os Shrine | Iun-orok Shrine | Turakawak Shrine |
| Gasas Shrine | Mayausiy Shrine | Ikatak Shrine |
| Ga-ahisas Shrine | Ganos Shrine | Taunhiy Shrine |
All Hebra Shrines
All Great Hyrule Forest Shrines
| Great Hyrule Forest Shrines | ||
|---|---|---|
| Sakunbomar Shrine | Pupunke Shrine | Ninjis Shrine |
| Musanokir Shrine | Kikakin Shrine | Kiuyoyou Shrine |
| Ekochiu Shrine | Mayam Shrine | Simosiwak Shrine |
All Akkala Shrines
All Eldin Shrines
All Lanayru Shrines
All Necluda Shrines
All Faron Shrines
| Faron Shrines | ||
|---|---|---|
| Jiukoum Shrine | Ishokin Shrine | Utsushok Shrine |
| Joku-u Shrine | Joku-usin Shrine | - |
All Gerudo Shrines
Comment
Author
The Legend of Zelda: Tears of the Kingdom Walkthrough & Guides Wiki
Orochium Shrine Location and Walkthrough
Rankings
- We could not find the message board you were looking for.
Gaming News
Popular Games

Genshin Impact Walkthrough & Guides Wiki

Umamusume: Pretty Derby Walkthrough & Guides Wiki

Crimson Desert Walkthrough & Guides Wiki

Monster Hunter Stories 3: Twisted Reflection Walkthrough & Guides Wiki

Honkai: Star Rail Walkthrough & Guides Wiki

Pokemon Pokopia Walkthrough & Guides Wiki

The Seven Deadly Sins: Origin Walkthrough & Guides Wiki

Wuthering Waves Walkthrough & Guides Wiki

Zenless Zone Zero Walkthrough & Guides Wiki

Arknights: Endfield Walkthrough & Guides Wiki
Recommended Games

Fire Emblem Heroes (FEH) Walkthrough & Guides Wiki

Diablo 4: Vessel of Hatred Walkthrough & Guides Wiki

Cyberpunk 2077: Ultimate Edition Walkthrough & Guides Wiki

Yu-Gi-Oh! Master Duel Walkthrough & Guides Wiki

Super Smash Bros. Ultimate Walkthrough & Guides Wiki

Pokemon Brilliant Diamond and Shining Pearl (BDSP) Walkthrough & Guides Wiki

Elden Ring Shadow of the Erdtree Walkthrough & Guides Wiki

Monster Hunter World Walkthrough & Guides Wiki

The Legend of Zelda: Tears of the Kingdom Walkthrough & Guides Wiki

Persona 3 Reload Walkthrough & Guides Wiki
All rights reserved
© Nintendo. The Legend of Zelda and Nintendo Switch are trademarks of Nintendo.
The copyrights of videos of games used in our content and other intellectual property rights belong to the provider of the game.
The contents we provide on this site were created personally by members of the Game8 editorial department.
We refuse the right to reuse or repost content taken without our permission such as data or images to other sites.


![Death Stranding 2: On The Beach Review [PC] | A Port That Delivers](https://img.game8.co/4447392/15310a0c9aa1b6843bb713b2ea216930.jpeg/show)


![Death Stranding 2: On The Beach Review [PC] | A Port That Delivers](https://img.game8.co/4447392/15310a0c9aa1b6843bb713b2ea216930.jpeg/thumb)


