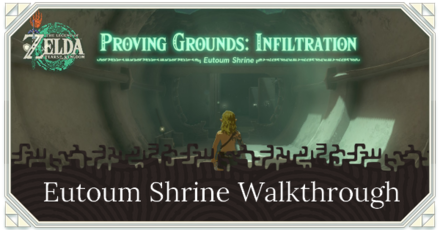
Eutoum Shrine Location and Walkthrough
▲ Get Pristine Weapons from the depths!
△ All 1000 Koroks | All 4 Great Fairies
▲ 81 Addison Signs | 147 Caves | 58 Wells
△ Tips: Farm Rupees | Starting Armor
▲ Best Weapons | Best Armor | Best Food

Eutoum Shrine (Proving Grounds: Infiltration) in The Legend of Zelda: Tears of the Kingdom (TotK) can be found inside Goflam's Secret Hot Spring in the Hebra Mountains Region. Read on to learn its location, puzzle solution, as well as all treasure chest locations in Eutoum Shrine.
List of Contents
Eutoum Shrine Location
Goflam's Secret Hot Spring, Hebra Mountains Region
Eutoum Shrine can be found inside Goflam's Secret Hot Spring in the northern area of Hebra Mountains Region.
The exact coordinates of its location are -3506, 3570, 0387.
Travel to Pikida Stonegrove Skyview Location, and launch yourself from there to glide northeast towards Eutoum Shrine.
Proving Grounds
This is a Proving Grounds Shrine where your combat skills and resourcefulness will be tested.
Use the weapons and items inside the Shrine to defeat enemies and clear the area!
Eutoum Shrine Walkthrough
- Pick Up Equipment in the Entrance
- Ascend on the Ledge
- Sneakstrike the Enemy Below
- Augment Your Weapon
- Sneakstrike the Construct Near the Inner Room
- Fuse Equipment with the Spikes Nearby
- Lure the Construct
- Lure Another Construct Out of the Inner Room
- Enter the Room and Defeat the Last Construct
- Open the Chest and Get a Light of Blessing
1. Pick Up Equipment in the Entrance
Just like the other Proving Grounds trials, this shrine will strip you off of all your equipment.
The only ones you can use are those by the entrance, so take all of them before entering the main room.
2. Ascend on the Ledge
Enter the main room, then crouch to avoid getting the attention of the Constructs. Sneak to the right corridor and Ascend on the ledge nearby.
3. Sneakstrike the Enemy Below
Now that you're at a good vantage point, time your jump carefully and glide down towards the enemy when its back is turned. Aim to perform a sneakstrike on the Construct to take out a huge chunk of its health.
Doing so won't likely kill it but taking down the Construct with much of its HP removed will be much easier than taking it down from full health.
4. Augment Your Weapon
Take the Long Stick the Construct will drop after defeating it, then Fuse one of your weapons with the Soldier Construct Horn that the Construct will also drop.
5. Sneakstrike the Construct Near the Inner Room
Next, Ascend on the ledge once more and go towards the direction of the Construct that's guarding outside the inner room.
This Construct will attack with a bow and arrow if it notices you but we don't have to worry about that since this particular Construct can be taken down in just one sneakstrike.
You can do so by gliding down to it carefully and positioning yourself behind the Construct. Perform a sneakstrike once it's within range, then pick up all the loot it will drop.
6. Fuse Equipment with the Spikes Nearby
Once the perimeter is clear, carefully approach the spikes on the floor and Fuse them with your shield and weapon of choice.
7. Lure the Construct
After augmenting your weapons with the spikes, shoot the Construct nearest to the entrance of the inner room with a bow and arrow to lure it outside.
Fight it in an area far away from the entrance so you won't alert the other Constructs nearby. Take its loot after defeating it to add more weapons to your arsenal.
8. Lure Another Construct Out of the Inner Room
Lure another Construct outside of the room and defeat it to get its loot.
9. Enter the Room and Defeat the Last Construct
After defeating 4 Constructs in total, there should only be one left inside the room. Defeat it to open the gate to the altar door.
10. Open the Chest and Get a Light of Blessing
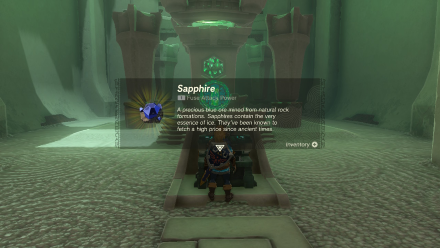
Enter the altar chamber once the gate opens, then get a Sapphire inside the chest.
Don't forget to examine the altar to get a Light of Blessing and complete the shrine!
Eutoum Shrine Rewards and Chest Locations
Sapphire
| Chest Location | Chest Contents |
|---|---|
 |
 |
Defeat all Constructs in the shrine, then open the chest inside the altar room to get a Sapphire.
The Legend of Zelda: Tears of the Kingdom Related Guides

Shrines Lists
| Shrines Lists | |
|---|---|
| All Shrines | All Shrine Quests |
All Great Sky Island Shrines
| Great Sky Island Shrines | ||
|---|---|---|
| Ukouh Shrine | In-isa Shrine | Gutanbac Shrine |
| Nachoyah Shrine | - | - |
All Hyrule Field Shrines
All Tabantha Shrines
| Tabantha Shrines | ||
|---|---|---|
| Oromuwak Shrine | Gatakis Shrine | Nouda Shrine |
| Wao-os Shrine | Iun-orok Shrine | Turakawak Shrine |
| Gasas Shrine | Mayausiy Shrine | Ikatak Shrine |
| Ga-ahisas Shrine | Ganos Shrine | Taunhiy Shrine |
All Hebra Shrines
All Great Hyrule Forest Shrines
| Great Hyrule Forest Shrines | ||
|---|---|---|
| Sakunbomar Shrine | Pupunke Shrine | Ninjis Shrine |
| Musanokir Shrine | Kikakin Shrine | Kiuyoyou Shrine |
| Ekochiu Shrine | Mayam Shrine | Simosiwak Shrine |
All Akkala Shrines
All Eldin Shrines
All Lanayru Shrines
All Necluda Shrines
All Faron Shrines
| Faron Shrines | ||
|---|---|---|
| Jiukoum Shrine | Ishokin Shrine | Utsushok Shrine |
| Joku-u Shrine | Joku-usin Shrine | - |
All Gerudo Shrines
Comment
Author
The Legend of Zelda: Tears of the Kingdom Walkthrough & Guides Wiki
Eutoum Shrine Location and Walkthrough
improvement survey
03/2026
improving Game8's site?

Your answers will help us to improve our website.
Note: Please be sure not to enter any kind of personal information into your response.

We hope you continue to make use of Game8.
Rankings
- We could not find the message board you were looking for.
Gaming News
Popular Games

Genshin Impact Walkthrough & Guides Wiki

Honkai: Star Rail Walkthrough & Guides Wiki

Umamusume: Pretty Derby Walkthrough & Guides Wiki

Pokemon Pokopia Walkthrough & Guides Wiki

Resident Evil Requiem (RE9) Walkthrough & Guides Wiki

Monster Hunter Wilds Walkthrough & Guides Wiki

Wuthering Waves Walkthrough & Guides Wiki

Arknights: Endfield Walkthrough & Guides Wiki

Pokemon FireRed and LeafGreen (FRLG) Walkthrough & Guides Wiki

Pokemon TCG Pocket (PTCGP) Strategies & Guides Wiki
Recommended Games

Diablo 4: Vessel of Hatred Walkthrough & Guides Wiki

Cyberpunk 2077: Ultimate Edition Walkthrough & Guides Wiki

Fire Emblem Heroes (FEH) Walkthrough & Guides Wiki

Yu-Gi-Oh! Master Duel Walkthrough & Guides Wiki

Super Smash Bros. Ultimate Walkthrough & Guides Wiki

Pokemon Brilliant Diamond and Shining Pearl (BDSP) Walkthrough & Guides Wiki

Elden Ring Shadow of the Erdtree Walkthrough & Guides Wiki

Monster Hunter World Walkthrough & Guides Wiki

The Legend of Zelda: Tears of the Kingdom Walkthrough & Guides Wiki

Persona 3 Reload Walkthrough & Guides Wiki
All rights reserved
© Nintendo. The Legend of Zelda and Nintendo Switch are trademarks of Nintendo.
The copyrights of videos of games used in our content and other intellectual property rights belong to the provider of the game.
The contents we provide on this site were created personally by members of the Game8 editorial department.
We refuse the right to reuse or repost content taken without our permission such as data or images to other sites.


![Monster Hunter Stories 3 Review [First Impressions] | Simply Rejuvenating](https://img.game8.co/4438641/2a31b7702bd70e78ec8efd24661dacda.jpeg/thumb)


