Ga-ahisas Shrine Location and Walkthrough
▲ Get Pristine Weapons from the depths!
△ All 1000 Koroks | All 4 Great Fairies
▲ 81 Addison Signs | 147 Caves | 58 Wells
△ Tips: Farm Rupees | Starting Armor
▲ Best Weapons | Best Armor | Best Food

Ga-ahisas Shrine (Rauru's Blessing) in The Legend of Zelda: Tears of the Kingdom (TotK) can be found on Lightcast Island in the Tabantha Frontier Sky Region. Read on to learn its location, how to get to it, its puzzle solution, as well as all treasure chest locations in Ga-ahisas Shrine.
List of Contents
Ga-ahisas Shrine Location
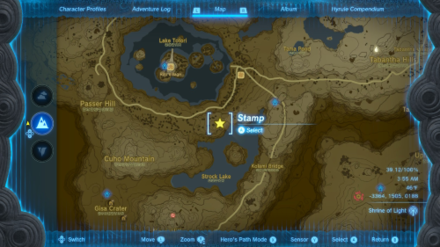
Lightcast Island, Tabantha Frontier Sky Region
Ga-ahisas Shrine can be found on Lighcast Island in the Tabantha Sky Archipelago but it can't be unlocked unless you've completed the mirror puzzle on the island.
The exact coordinates of the shrine is at -3596, 0962, 1699 and getting to it requires a bit of sky island hopping.
You will also need the Zora Armor so you could swim up a waterfall and reach the North Tabantha Sky Archipelago.
Tabantha Frontier Sky Region Map
Rauru's Blessing
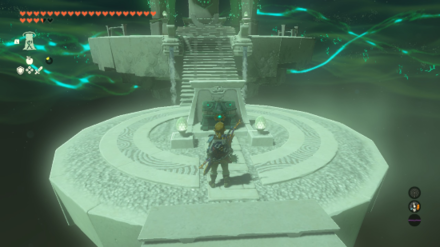
This is a Rauru's Blessing Shrine with a treasure chest inside as well as a Light of Blessing at the altar.
How to Reach Ga-ahisas Shrine
- Go Southeast of Rito Village
- Wait For a Boulder to Fall Down From the Sky
- Wear the Zora Armor and Glide to the Waterfall
- Ride a Minecart to the Next Island
- Create an Aircraft
- Ride Your Aircraft to the Next Island
- Launch Yourself Upward Using Zonai Springs
- Launch the Floating Platform Upwards
- Glide to Lightcast Island
1. Go Southeast of Rito Village

Your journey to Ga-ahisas Shrine starts southeast of Rito Village. Head there by fast traveling to Oromuwak Shrine, then head to the place marked on the map above.
2. Wait For a Boulder to Fall Down From the Sky
When you reach your destination, wait for a few minutes until a boulder falls down from the sky and lands near your area. Go to the boulder, hop on it, then Recall it so it takes you back to the sky.
3. Wear the Zora Armor and Glide to the Waterfall
As you go up, face west and look for a waterfall falling from the sky.
Wear your Zora armor and glide towards the waterfall so it takes you up to its source.
4. Ride a Minecart to the Next Island
Land on the island that's the source of the waterfall and walk past the pond. Continue forward until you see rails and two minecarts.
Place the minecart on the rails and attach the nearby rockets to it. Then, hit the minecart with a weapon and ride it to the next island.
5. Create an Aircraft
In the next island, you'll need to create an aircraft that can take you to a higher island. Grab the Zonai Wing nearby, and attach fans and rockets to it.
If you have a Steering Stick, you can also attach it to your aircraft for easier navigation.
6. Ride Your Aircraft to the Next Island
Next, place your aircraft on the runway nearby and make sure that its front is facing south. Then, hit it with a weapon to launch it to the sky. Carefully maneuver it to the next island marked on the video above.
7. Launch Yourself Upward Using Zonai Springs
Hop off your aircraft once you reach the next island and look for a couple of springs nearby.
Stack a Spring on top of the other, then place it by the southern cliff. Hop on top of the stacked springs, then hit it with a weapon to launch yourself upwards.
Wait until you've reached the peak of your jump, then take out your paraglider and head south. You should see a floating platform nearby with an enemy Construct on top of it. Head towards that floating platform and defeat the enemy Construct on it.
8. Launch the Floating Platform Upwards
After landing safely on the floating platform, take the Rockets on it and attach them to the platform pointing upwards.
Then, hit the rockets to launch you and the platform higher into the sky. Once you've reached the peak, you should see Lightcast Island north of where you are.
9. Glide to Lightcast Island
Lightcast Island might still seem a bit far from the platform you're on but the strange gravity in this area can help you reach the island easily.
Although, we do recommend summoning Tulin to help you get to the island faster.
How to Unlock Ga-ahisas Shrine
- Examine the Terminal at Lightcast Island
- Enter the Cave at the Center
- Use a Mirror to Shine Light to Another Mirror
- Shine Light to Another Mirror Due South
- Shine Light to the Eastern Mirror
- Shine Light to the Mirror Inside the Inner Cave
- Defeat the Enemy Construct in the Inner Cave
- Shine Light on the Orange Hexagon
- Grab a Zonaite Helm From the Treasure Chest
- Go Down the Spiral Stairs to Reach the Shrine
1. Examine the Terminal at Lightcast Island
Look for the terminal at the northern end of Lightcast Island and examine it to drain the water at the center of the island.
Be wary of foes roaming the area!
2. Enter the Cave at the Center
Next, approach the central island and enter the cave that's being shone with a light from a big mirror.
Take care of the enemy near the cave entrance, then use a Bomb Flower to blow up the boulders blocking the entrance. Enter the cave afterwards.
Optional: You Can Use Brightbloom Seeds to Light Your Surroundings
The cave isn't well lit save for the light that's shining from the outside. If you're not comfortable with the darkness, you can opt to use Brightbloom Seeds to light your surroundings.
3. Use a Mirror to Shine Light to Another Mirror Due West
In order to unlock Ga-ahisas Shrine, you need to solve the mirror puzzle in the island first. This puzzle requires you to redirect light using mirrors to a cave deep inside the island.
You can start by grabbing a Mirror from the pedestal near the entrance using Ultrahand, and placing it on the floor where the light from outside can shine on it.
Then, position it in a way that it shines light to another Mirror due west.
4. Shine Light to Another Mirror Due South
Go to the western Mirror, then use Ultrahand again to reposition it.
Make sure that the Mirror is pointing south and hitting another Mirror in that direction.
5. Shine Light to the Eastern Mirror
Head for the southern Mirror next, then position it in a way that it shines light to another Mirror due east.
6. Shine Light to the Mirror Inside the Inner Cave
Go to the eastern Mirror, and use Ultrahand once more to reposition it.
Aim the light it reflects to the Mirror on the ceiling of the inner cave to the south.
7. Defeat the Enemy Construct in the Inner Cave
Glide down to the inner cave to find an enemy Construct. Defeat it and take its loot.
8. Shine Light on the Orange Hexagon
Grab the Mirror Shield the enemy dropped and use it to shine light on the orange hexagon nearby. Doing so will cause the walls around you to drop down and let light into the room.
9. Grab a Zonaite Helm From the Treasure Chest
Before exiting the room, use Ascend on the ledge above the hexagon to reach a chest. Open it to receive a Zonaite Helm.
10. Go Down the Spiral Stairs to Reach the Shrine
Finally, go down the spiral stairs past the hexagon until you reach the shrine.
All you need to do next is to unlock it by examining its terminal.
Ga-ahisas Shrine Puzzle Solution
Receive Rauru's Blessing
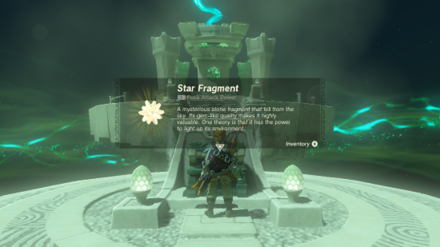
Fortunately, you don't have to do any puzzles inside the shrine. Simply open the chest inside to receive a Star Fragment, then go to the altar to get yourself a Light of Blessing.
Ga-ahisas Shrine Rewards and Chest Locations
Star Fragment
| Chest Location | Chest Contents |
|---|---|
 |
 |
Enter the shrine and open the chest inside to get a Star Fragment.
The Legend of Zelda: Tears of the Kingdom Related Guides

Shrines Lists
| Shrines Lists | |
|---|---|
| All Shrines | All Shrine Quests |
All Great Sky Island Shrines
| Great Sky Island Shrines | ||
|---|---|---|
| Ukouh Shrine | In-isa Shrine | Gutanbac Shrine |
| Nachoyah Shrine | - | - |
All Hyrule Field Shrines
All Tabantha Shrines
| Tabantha Shrines | ||
|---|---|---|
| Oromuwak Shrine | Gatakis Shrine | Nouda Shrine |
| Wao-os Shrine | Iun-orok Shrine | Turakawak Shrine |
| Gasas Shrine | Mayausiy Shrine | Ikatak Shrine |
| Ga-ahisas Shrine | Ganos Shrine | Taunhiy Shrine |
All Hebra Shrines
All Great Hyrule Forest Shrines
| Great Hyrule Forest Shrines | ||
|---|---|---|
| Sakunbomar Shrine | Pupunke Shrine | Ninjis Shrine |
| Musanokir Shrine | Kikakin Shrine | Kiuyoyou Shrine |
| Ekochiu Shrine | Mayam Shrine | Simosiwak Shrine |
All Akkala Shrines
All Eldin Shrines
All Lanayru Shrines
All Necluda Shrines
All Faron Shrines
| Faron Shrines | ||
|---|---|---|
| Jiukoum Shrine | Ishokin Shrine | Utsushok Shrine |
| Joku-u Shrine | Joku-usin Shrine | - |
All Gerudo Shrines
Comment
Author
The Legend of Zelda: Tears of the Kingdom Walkthrough & Guides Wiki
Ga-ahisas Shrine Location and Walkthrough
Rankings
Gaming News
Popular Games

Genshin Impact Walkthrough & Guides Wiki

Honkai: Star Rail Walkthrough & Guides Wiki

Umamusume: Pretty Derby Walkthrough & Guides Wiki

Pokemon Pokopia Walkthrough & Guides Wiki

Resident Evil Requiem (RE9) Walkthrough & Guides Wiki

Monster Hunter Wilds Walkthrough & Guides Wiki

Wuthering Waves Walkthrough & Guides Wiki

Arknights: Endfield Walkthrough & Guides Wiki

Pokemon FireRed and LeafGreen (FRLG) Walkthrough & Guides Wiki

Pokemon TCG Pocket (PTCGP) Strategies & Guides Wiki
Recommended Games

Diablo 4: Vessel of Hatred Walkthrough & Guides Wiki

Cyberpunk 2077: Ultimate Edition Walkthrough & Guides Wiki

Fire Emblem Heroes (FEH) Walkthrough & Guides Wiki

Yu-Gi-Oh! Master Duel Walkthrough & Guides Wiki

Super Smash Bros. Ultimate Walkthrough & Guides Wiki

Pokemon Brilliant Diamond and Shining Pearl (BDSP) Walkthrough & Guides Wiki

Elden Ring Shadow of the Erdtree Walkthrough & Guides Wiki

Monster Hunter World Walkthrough & Guides Wiki

The Legend of Zelda: Tears of the Kingdom Walkthrough & Guides Wiki

Persona 3 Reload Walkthrough & Guides Wiki
All rights reserved
© Nintendo. The Legend of Zelda and Nintendo Switch are trademarks of Nintendo.
The copyrights of videos of games used in our content and other intellectual property rights belong to the provider of the game.
The contents we provide on this site were created personally by members of the Game8 editorial department.
We refuse the right to reuse or repost content taken without our permission such as data or images to other sites.


![Monster Hunter Stories 3 Review [First Impressions] | Simply Rejuvenating](https://img.game8.co/4438641/2a31b7702bd70e78ec8efd24661dacda.jpeg/thumb)


