This survey will take about 1 minute.
Your answers will help us to improve our website.
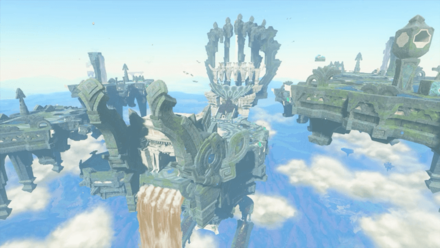
Zelda: Tears of the Kingdom (TotK)
Lightning Temple Walkthrough and Puzzle Solutions
▲ Get Pristine Weapons from the depths!
△ All 1000 Koroks | All 4 Great Fairies
▲ 81 Addison Signs | 147 Caves | 58 Wells
△ Tips: Farm Rupees | Starting Armor
▲ Best Weapons | Best Armor | Best Food
This guide will show you how to charge all four batteries and defeat Queen Gibdo to clear the Lightning Temple in The Legend of Zelda: Tears of the Kingdom (TotK). This walkthrough also contains chest locations, puzzle solutions, and more!
List of Contents
Preparing For the Lightning Temple
Things to Prepare
| Things to Prepare for the Lightning Temple | |||
|---|---|---|---|
 Steel Lizal Bow Steel Lizal Bow
|
 Dusk Bow Dusk Bow
|
 Fierce Deity Sword Fierce Deity Sword
|
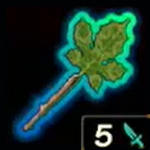 Korok-Frond Guster Korok-Frond Guster
|
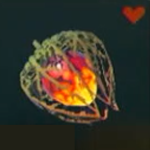 Fire Fruit Fire Fruit
|
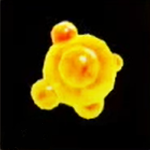
 Yellow Chuchu Jelly Yellow Chuchu Jelly
|
 Red Chuchu Jelly Red Chuchu Jelly
|
 White Chuchu Jelly White Chuchu Jelly
|
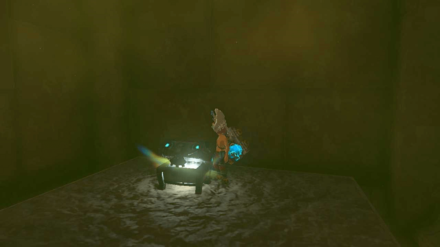
The Lightning Temple heavily relies on the use of bows, so make sure to bring as many as you can before entering. It is also recommended to bring wind weapons like the Korok-Frond Guster to uncover items buried in sand mounds.
In addition to these weapons, you also need to stock up on arrows and explosives like Fire Fruit, Rare Gems, and Chuchu Jellies.
Progress through the Riju of Gerudo Town Quest
To access the Lightning Temple, you need to complete the first parts of the Riju of Gerudo Town main quest first. This means that you need to find the Gerudo Secret Hideout and help Riju protect Gerudo Town from the massive Gibdo infestation first before proceeding to the temple.
Riju of Gerudo Town Walkthrough
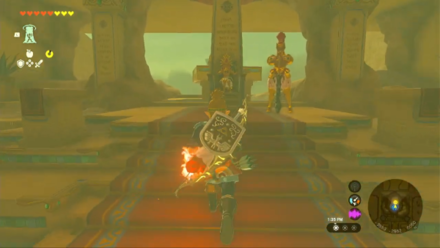
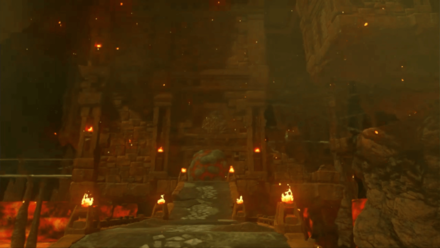
How to Get to the Lightning Temple
| 1 |
 After defeating the swarm of Gibdo, go back to the underground shelter and head southwest to find the mural. |
|---|---|
| 2 |
 Complete the Pillars Puzzle to reveal the Lightning Temple. This puzzle requires you to find the light pillars outside Gerudo Town and arrange them in a triangle formation to unlock the temple. |
| 3 |
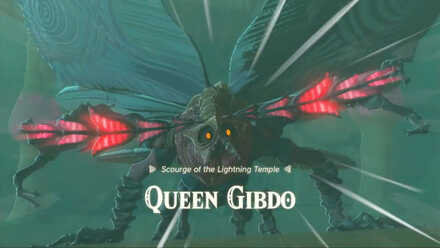 Fight Queen Gibdo to clear the entrance. You don't need to fully defeat her here as she will eventually retreat back to the temple after inflicting some damage. |
| 4 |
 Use Riju's Lightning to destroy the Gibdo Hive blocking the entrance. |
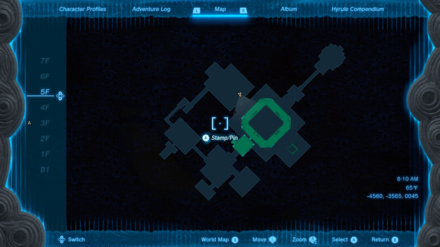
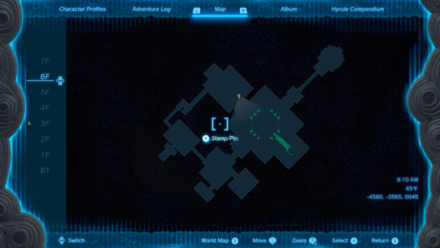
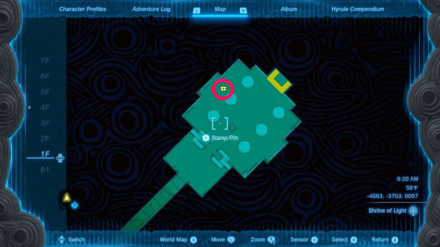
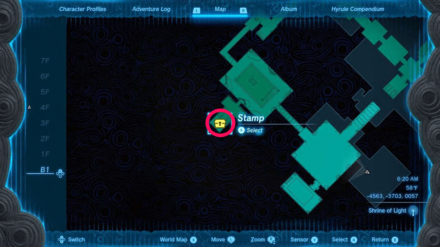
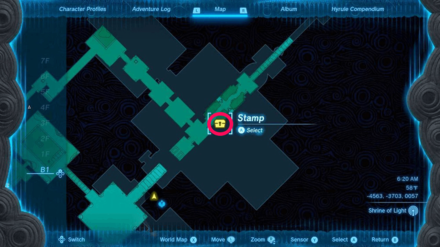
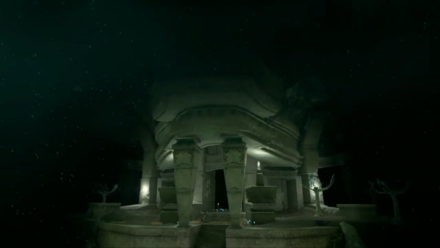
Lightning Temple Map
The Lightning Temple requires you to charge four batteries to reach the final floor. It has a total of eight floors and only half of these will have the batteries.
B1
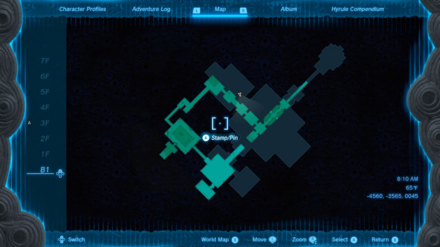
1F
2F
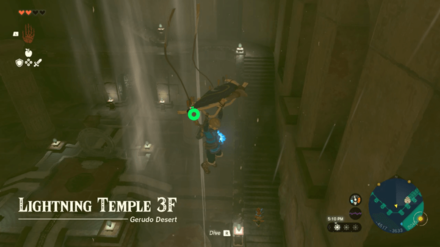
3F

4F
5F
6F
7F

Charging the Four Batteries
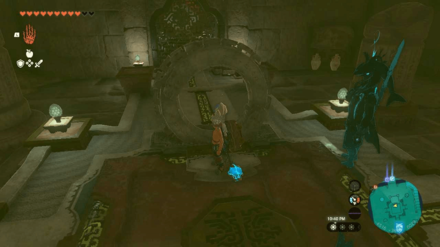
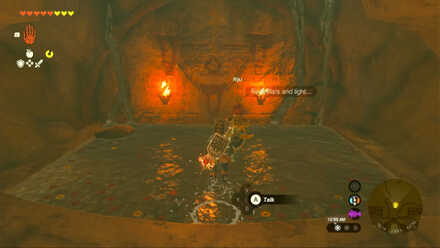
To start doing the puzzles of the Lightning Temple, make sure to activate the Zonai Terminal first.
After that, you can start looking for all the four batteries to unlock the final floor. You can do this in any order.
| Lightning Temple Gongs | ||||
|---|---|---|---|---|
| 1F Battery | 2F Battery | 3F Battery | 4F Battery | |
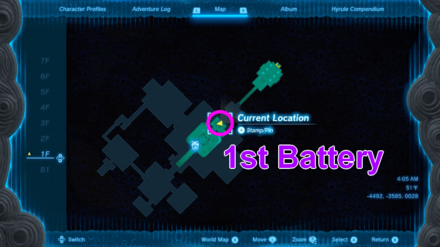
1F Battery
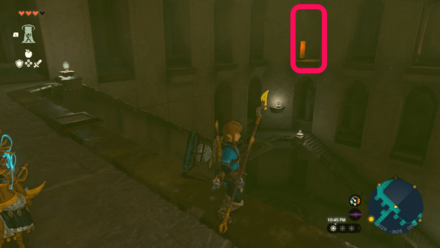
On the first floor, find the two vases on the right side of the gate. Move the block above with your Ultrahand to reveal a small entrance. Enter this gap to see the first battery.
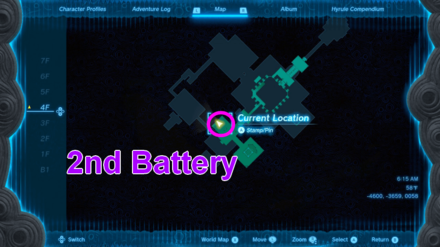
2F Battery
Also on the first floor, head southeast and find the movable block on the floor. Use your Ultrahand on this to free up an updraft.
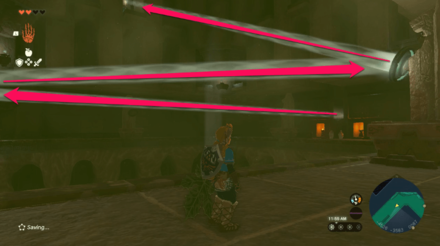
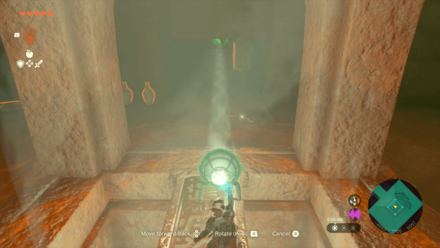
Uncover the light from the fifth floor and reflect it up to activate the orange circle on the sixth floor. After that, find a way to reach the floor by either climbing or using a rocket shield. Enter the room and drop down to the second floor to see the next battery.
3F Battery
Go back to the fifth floor and rearrange the light to activate the orange circle on the lower floor. Once unlocked, enter the room and look for the Zonai Balloon.
Create a makeshift hot-air balloon with the metal block and attach a mirror on it. Ascend up to the Hover-Stone in the air. From there, lift the platform up and place it on top of the pillar next to you.
Go down to the floor and ascend to the top platform to hold the balloon and reflect the light on the orange circle. This will help you unlock the door to the next battery.
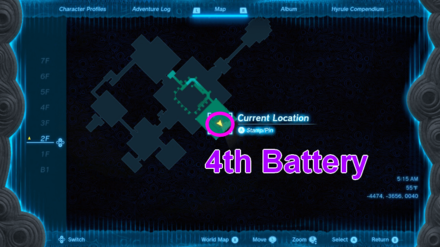
4F Battery
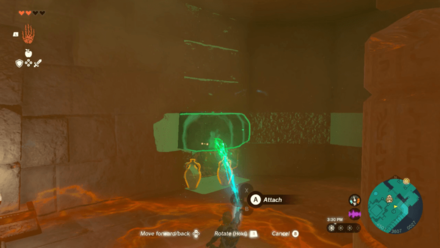
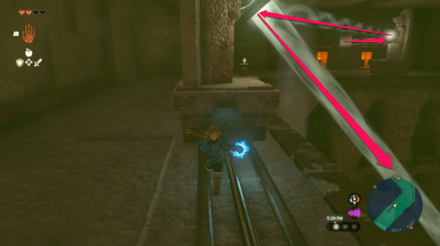
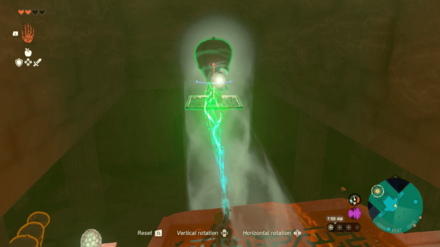
Climb the stairs up to the fourth floor and look across to see a gap in the wall on the opposite side. Use Recall on the moving gaps to unlock the room across it. Follow the path until you reach a room with spinning walls which you can stop by inserting a stake.
Use Ascend and reflect the light to the other room to unlock the battery. You can also find and use the stakes on the left to stop the trap from dropping.
Lightning Temple Chest Locations
| # | How to Get Treasure Chest |
|---|---|
| 1 |
 B1 - Zonai Flame Emitter |
| 2 |
 B1 - Topaz |
| 3 |
 B1 - Mighty Zonaite Shield |
| 4 |
 B1 - Large Zonai Charge |
| 5 |
 B1 - Mighty Construct Bow |
Zonai Flame Emitter - B1
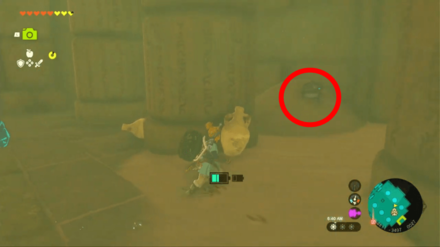
Pick up the Korok-Frond Guster nearby and use it to fan the sand off the treasure chest. Open it to get a Zonai Flame Emitter.
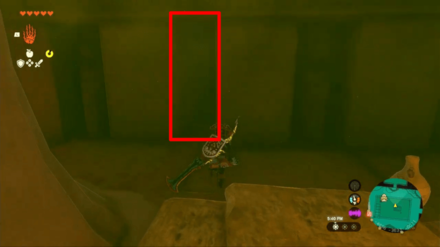
Topaz - B1

From the entrance, continue walking until you reach the end of the hallway. Use Ultrahand to move the blocks away to get the treasure chest containing a Topaz.
Mighty Zonaite Shield - B1
Go to the Room of Hopeful Light and take the stairs to go down. Look for the small gap on the left side and enter it to find the next treasure chest containing a Mighty Zonaite Shield.
Large Zonai Charge - B1
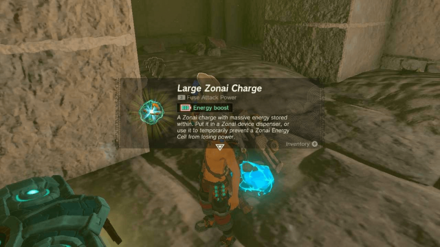
Go back to the main entrance hall and drop down from the left side of the bridge. You can find a treasure chest here containing one Large Zonai Charge.
Mighty Construct Bow - B1
Head back to the Room of Hopeful Light and look south to see the hole in the wall. Enter this to find the treasure chest containing a Mighty Construct Bow.
How to Beat Lightning Temple Boss (Queen Gibdo)
| Queen Gibdo Strategies |
|---|
Phase 1
Using Riju's Lightning, hit Queen Gibdo to turn her white. This will make her vulnerable to attacks, making it easier to do damage. Elemental explosives such as Fire Fruit, Topaz, Chuchu Jellies will work as well.
Queen Gibdo Always Falls on Second Explosions
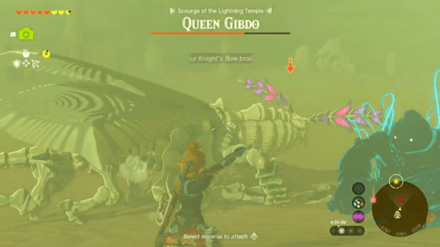
Queen Gibdo will always fall on every second elemental explosion she takes. Keep this in mind during the combat so you can carefully strategize your second hit. Once she's down, use your melee weapons to inflict damage.
Phase 2
Focus on clearing the Gibdo Hives first. This will eliminate the added obstacles so you can focus more on attacking Queen Gibdo. After that, follow the same steps as the first one. Hit Queen Gibdo with Riju's Lightning as much as you can to make her vulnerable.
The Legend of Zelda: Tears of the Kingdom Dungeon Walkthroughs

All Temple Locations and Dungeon Guides
All Temple Guides
| List of All Temples | |
|---|---|
 Wind Temple Wind Temple |
 Lightning Temple Lightning Temple |
 Fire Temple Fire Temple |
 Water Temple Water Temple |
 Hyrule Castle Hyrule Castle |
 Spirit Temple Spirit Temple |
Comment
1  Impulse2152 almost 3 years
You're missing a chest or two. I'm using the Sensor+ and still hearing beeps. There appears to be a hidden light activated statue, hiding a room on 2F in the hallway leading to the Balloon room.
Author

The Legend of Zelda: Tears of the Kingdom Walkthrough & Guides Wiki
Lightning Temple Walkthrough and Puzzle Solutions
Please participate in our site
improvement survey
03/2026
improvement survey
03/2026
Would you assist in
improving Game8's site?
improving Game8's site?

×
We are listening to our users' valuable opinions and discussing how to act on them.
The information collected through this survey will be used for the purpose of improving our services. In addition, the information will only be disclosed a part of a statistic in a format that will not allow identification of personal information.
Begin Survey
Not Now
×
Please rate each item regarding Game8.co's Advertisements.
Amount of Ads
Very Dissatisfied
Somewhat Dissatisfied
Fine
Somewhat Satisfied
Highly Satisfied
Placement of Ads
Timing of Ad Display
Ad Loading Speed
Safeness of Ads
Content of Ads
×
Please rate each item regarding Game8.co's Quality of Articles.
Amount of information
Very Dissatisfied
Somewhat Dissatisfied
Fine
Somewhat Satisfied
Highly Satisfied
Frequency of updates
Speed of new information
Accuracy of articles
Understandibility of articles
Readability of sentences
×
Please rate each item regarding Game8.co's Usability of the Site.
Ease of finding information
Very Dissatisfied
Somewhat Dissatisfied
Fine
Somewhat Satisfied
Highly Satisfied
Loading Speed
Use of Color
Font Size
Visibility of Images
Easy to Understand Layout
×
Please rate each item regarding Game8.co's Message Boards, Comments.
Ease of Writing
Very Dissatisfied
Somewhat Dissatisfied
Fine
Somewhat Satisfied
Highly Satisfied
Readability
Ease in Finding Information
Comment Quality
Comment Quantity
Admin Response
×
Please rate each item regarding Game8.co's Site's new design.
Please rate our site's new design
Very Dissatisfied
Somewhat Dissatisfied
Fine
Somewhat Satisfied
Highly Satisfied
Do you think that the website's design change makes the site easier to use?
Has the new design made it easier for you to find information on the site?
Has the new design improved the overall visual appeal of the site?
How would you rate your overall satisfaction with the new design of the site?
×
How likely are you to recommend Game8 to someone you know?
Very Unlikely
0
1
2
3
4
5
6
7
8
9
10
Very Likely
If you have other opinions regarding potential improvement to the website, please share them with us. We would appreciate your honest opinion.
Note: This is a free response section, so you can proceed without entering anything.
Note: Please be sure not to enter any kind of personal information into your response.
Note: Please be sure not to enter any kind of personal information into your response.
×
Thank You
×
Thank you for participating in our survey! Your answers will help us to improve the quality of our website and services.
We hope you continue to make use of Game8.
We hope you continue to make use of Game8.
Close
Rankings
- We could not find the message board you were looking for.
Gaming News


![Monster Hunter Stories 3 Review [First Impressions] | Simply Rejuvenating](https://img.game8.co/4438641/2a31b7702bd70e78ec8efd24661dacda.jpeg/thumb)
Popular Games

Genshin Impact Walkthrough & Guides Wiki
Honkai: Star Rail Walkthrough & Guides Wiki
Umamusume: Pretty Derby Walkthrough & Guides Wiki
Pokemon Pokopia Walkthrough & Guides Wiki
Resident Evil Requiem (RE9) Walkthrough & Guides Wiki
Monster Hunter Wilds Walkthrough & Guides Wiki
Wuthering Waves Walkthrough & Guides Wiki
Arknights: Endfield Walkthrough & Guides Wiki
Pokemon FireRed and LeafGreen (FRLG) Walkthrough & Guides Wiki
Pokemon TCG Pocket (PTCGP) Strategies & Guides Wiki


Recommended Games
Diablo 4: Vessel of Hatred Walkthrough & Guides Wiki
Cyberpunk 2077: Ultimate Edition Walkthrough & Guides Wiki
Fire Emblem Heroes (FEH) Walkthrough & Guides Wiki
Yu-Gi-Oh! Master Duel Walkthrough & Guides Wiki
Super Smash Bros. Ultimate Walkthrough & Guides Wiki
Pokemon Brilliant Diamond and Shining Pearl (BDSP) Walkthrough & Guides Wiki
Elden Ring Shadow of the Erdtree Walkthrough & Guides Wiki
Monster Hunter World Walkthrough & Guides Wiki
The Legend of Zelda: Tears of the Kingdom Walkthrough & Guides Wiki
Persona 3 Reload Walkthrough & Guides Wiki


All rights reserved
© Nintendo. The Legend of Zelda and Nintendo Switch are trademarks of Nintendo.
The copyrights of videos of games used in our content and other intellectual property rights belong to the provider of the game.
The contents we provide on this site were created personally by members of the Game8 editorial department.
We refuse the right to reuse or repost content taken without our permission such as data or images to other sites.
I keep dying to the sand blast while aiming the lightning (I hate this stupid fight).