Nouda Shrine Location and Walkthrough
▲ Get Pristine Weapons from the depths!
△ All 1000 Koroks | All 4 Great Fairies
▲ 81 Addison Signs | 147 Caves | 58 Wells
△ Tips: Farm Rupees | Starting Armor
▲ Best Weapons | Best Armor | Best Food

Nouda Shrine (Proving Grounds: Intermediate) in The Legend of Zelda: Tears of the Kingdom (TotK) can be found inside Kopeeki Drifts Cave in the Tabantha Frontier Region. Read on to learn how to reach it, its location, puzzle solution, as well as all treasure chest locations in Nouda Shrine.
Nouda Shrine Location
Kopeeki Drifts Cave, Tabantha Frontier
Nouda Shrine can be found inside Kopeeki Drifts Cave in the Tabantha Frontier Region.
The exact coordinates of the Nouda Shrine is at -2318, 2201, 0173.
Travel to Pikida Stonegrove Skyview Tower, and launch yourself from there to glide south towards the Kopeeki Drifts Cave.
You may need to equip the Snowquill Set or prepare dishes that prevent freezing, given that the Kopeeki Drifts Cave is located in the Tabantha Frontier Region.
Proving Grounds
This is a Proving Grounds Shrine where your combat skills and resourcefulness will be tested.
Use the weapons and items inside the Shrine to defeat enemies and clear the area!
How to Reach Nouda Shrine
1. Find the Cave Entrance

In order to find Nouda Shrine, you'll need to head to Kopeeki Drifts to the location on the map. It will be just north of the shrine location on the map.
2. Enter the Cave

At the location, you'll find a stone entrance to an icy cave, with the shrine visible in the back. Enter the cave and head to the right side!
3. Take Ice Sheets
In the right side of the cave, you'll find an Ice Like. Each time it uses its breath, it will create sheets of ice. You can pick these up with Ultrahand and bring them to the next room.
4. Create a Path
Attach the Ice Sheets together using Ultrahand and create a path towards the shrine. If you do not have any means of creating a vehicle, you can take time to forge a bridge. If you need more sheets, head back to the Ice Like!
5. Enter the Shrine
At the end of the path, hop off to the shrine. Be sure that you have enough space to hop off or you may fall in the water and quickly lose your health.
Nouda Shrine Puzzle Solution
- Grab Your Weapons
- Defeat the Construct on the Platform
- Snag the Halberd
- Defeat the Shield Construct
- Defeat the Shock Construct
- Burn the Platform
- Fuse the Shock Emitter
- Fuse Materials to Your Shield
- Stun the Construct
- Defeat the Final Constructs
- Open the Chest
- Examine the Shrine
Video Guide
1. Grab Your Weapons
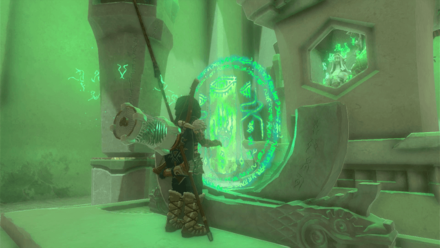
With this shrine being a Proving Grounds trial, you will not be allowed to use your own weapons or equipment, so you'll need to make do with what's available.
2. Defeat the Construct on the Platform
To your immediate right upon entering the chamber is a construct. Climb up from behind the platform and defeat them! Grab some materials too while you're at it.
3. Snag the Halberd
At this point, 2 constructs might reach you. One with a halberd and one with a shield. Focus on snagging the Halberd first by defeating the Construct.
4. Defeat the Shield Construct
Once you have the Halberd you can quite easily take out the Shield Construct without taking damage! Take their weapon and shield to protect yourself from the next construct.
You can take some of the materials lying around and Fuse them to your weapons to give extra damage!
5. Defeat the Shock Construct
The last construct for this floor throws shock attacks which can be very deadly. You can perform a sneakstrike on the construct in order to get the jump on them without taking damage!
6. Burn the Platform
Once the first floor is safe, use a Fire Fruit to burn the leaves on the wall to drop the platform.
7. Fuse the Shock Emitter
Fuse the Shock Emitter with your weapon of choice as this will be very useful later on!
8. Fuse Materials to Your Shield
Use what you have and Fuse Items to your shield to get ready for one of the more difficult constructs.
9. Stun the Construct
This is the most difficult of the Constructs and can pack quite a punch so be sure to use the Shock Emitter to stun it. Then, swap to a more powerful weapon to deal damage! Doing this quickly should allow you to keep it stun locked until you defeat it.
10. Defeat the Final Constructs
With the main one out of the way, turn your attention to the 2 constructs above you and defeat them with your arrows to to open the door!
11. Open the Chest

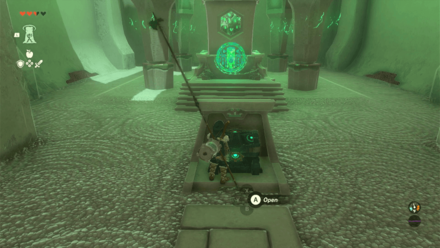
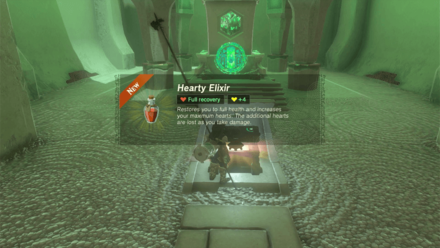
Enter the final room to find the shrine and a chest before it. Open the chest to receive a Hearty Elixir.
12. Examine the Shrine

Examine the Shrine to receive your reward!
Nouda Shrine Rewards and Chest Locations
Hearty Elixir
| Chest Location | Chest Contents |
|---|---|
 |
 |
You'll need to clear the main chamber of all constructs in order to open the door leading to the chest. Open the chest to receive a Hearty Elixir.
The Legend of Zelda: Tears of the Kingdom Related Guides

Shrines Lists
| Shrines Lists | |
|---|---|
| All Shrines | All Shrine Quests |
All Great Sky Island Shrines
| Great Sky Island Shrines | ||
|---|---|---|
| Ukouh Shrine | In-isa Shrine | Gutanbac Shrine |
| Nachoyah Shrine | - | - |
All Hyrule Field Shrines
All Tabantha Shrines
| Tabantha Shrines | ||
|---|---|---|
| Oromuwak Shrine | Gatakis Shrine | Nouda Shrine |
| Wao-os Shrine | Iun-orok Shrine | Turakawak Shrine |
| Gasas Shrine | Mayausiy Shrine | Ikatak Shrine |
| Ga-ahisas Shrine | Ganos Shrine | Taunhiy Shrine |
All Hebra Shrines
All Great Hyrule Forest Shrines
| Great Hyrule Forest Shrines | ||
|---|---|---|
| Sakunbomar Shrine | Pupunke Shrine | Ninjis Shrine |
| Musanokir Shrine | Kikakin Shrine | Kiuyoyou Shrine |
| Ekochiu Shrine | Mayam Shrine | Simosiwak Shrine |
All Akkala Shrines
All Eldin Shrines
All Lanayru Shrines
All Necluda Shrines
All Faron Shrines
| Faron Shrines | ||
|---|---|---|
| Jiukoum Shrine | Ishokin Shrine | Utsushok Shrine |
| Joku-u Shrine | Joku-usin Shrine | - |
All Gerudo Shrines
Comment
Author
The Legend of Zelda: Tears of the Kingdom Walkthrough & Guides Wiki
Nouda Shrine Location and Walkthrough
improvement survey
03/2026
improving Game8's site?

Your answers will help us to improve our website.
Note: Please be sure not to enter any kind of personal information into your response.

We hope you continue to make use of Game8.
Rankings
- We could not find the message board you were looking for.
Gaming News
Popular Games

Genshin Impact Walkthrough & Guides Wiki

Honkai: Star Rail Walkthrough & Guides Wiki

Umamusume: Pretty Derby Walkthrough & Guides Wiki

Pokemon Pokopia Walkthrough & Guides Wiki

Resident Evil Requiem (RE9) Walkthrough & Guides Wiki

Monster Hunter Wilds Walkthrough & Guides Wiki

Wuthering Waves Walkthrough & Guides Wiki

Arknights: Endfield Walkthrough & Guides Wiki

Pokemon FireRed and LeafGreen (FRLG) Walkthrough & Guides Wiki

Pokemon TCG Pocket (PTCGP) Strategies & Guides Wiki
Recommended Games

Diablo 4: Vessel of Hatred Walkthrough & Guides Wiki

Cyberpunk 2077: Ultimate Edition Walkthrough & Guides Wiki

Fire Emblem Heroes (FEH) Walkthrough & Guides Wiki

Yu-Gi-Oh! Master Duel Walkthrough & Guides Wiki

Super Smash Bros. Ultimate Walkthrough & Guides Wiki

Pokemon Brilliant Diamond and Shining Pearl (BDSP) Walkthrough & Guides Wiki

Elden Ring Shadow of the Erdtree Walkthrough & Guides Wiki

Monster Hunter World Walkthrough & Guides Wiki

The Legend of Zelda: Tears of the Kingdom Walkthrough & Guides Wiki

Persona 3 Reload Walkthrough & Guides Wiki
All rights reserved
© Nintendo. The Legend of Zelda and Nintendo Switch are trademarks of Nintendo.
The copyrights of videos of games used in our content and other intellectual property rights belong to the provider of the game.
The contents we provide on this site were created personally by members of the Game8 editorial department.
We refuse the right to reuse or repost content taken without our permission such as data or images to other sites.


![Monster Hunter Stories 3 Review [First Impressions] | Simply Rejuvenating](https://img.game8.co/4438641/2a31b7702bd70e78ec8efd24661dacda.jpeg/thumb)


