Otak Shrine Location and Walkthrough
▲ Get Pristine Weapons from the depths!
△ All 1000 Koroks | All 4 Great Fairies
▲ 81 Addison Signs | 147 Caves | 58 Wells
△ Tips: Farm Rupees | Starting Armor
▲ Best Weapons | Best Armor | Best Food
Otak Shrine (Proving Grounds: Traps) in The Legend of Zelda: Tears of the Kingdom (TotK) can be found inside the Icefall Foothills Cave in the Hebra Mountains Region. Read on to learn how to reach it, its location, puzzle solution, as well as all treasure chest locations in Otak Shrine.
Otak Shrine Location
Icefall Foothills Cave, Hebra Mountains Region
Otak Shrine can be found inside the Icefall Foothills Cave in the Hebra Mountains region. The exact coordinates of the Otak Shrine is at -4391, 3714, 0212.
It is recommended to either equip the Snowquill Set or consume dishes that prevent you from freezing before proceeding to this area.
The entrance of the Icefall Foothills Cave will be blocked by pillars of ice. Use Bomb Flowers, Fire Fruits, or a Flaming Torch to melt the icy obstruction in front of you.
Travel to Rospro Pass Skyview Tower, and launch yourself from there to glide northwest towards the Otak Shrine.
Hebra Mountains Region Map
Proving Grounds
This is a Proving Grounds Shrine where your combat skills and resourcefulness will be tested.
Use the weapons and items inside the Shrine to defeat enemies and clear the area!
How to Reach Otak Shrine
- Head to Icefall Foothills
- Glide Down from the Mountain
- Fire it Up
- Optional: Melt Your Enemies
- Melt the Next Ice
- Break the Ice
- Focus on the Archer
- Incapacitate Your Enemies
- Take Down the Final Enemy
- Melt the Ice One Last Time
- Enter the Shrine
1. Head to Icefall Foothills
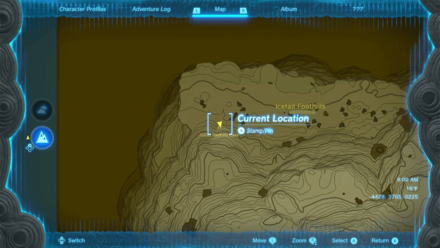
It's a long trek to find Icefall Foothills so pack up on items to keep you warm and get ready to climb and glide to reach the northwestern-most region of the map.
2. Glide Down from the Mountain
From the top of the mountains, glide down to the spot on the map and you should see the Icefall Foothills Cave entrance being blocked by ice.
The exact coordinates of the Icefall Foothills Cave is at -4429, 3752, 0224.
3. Fire it Up
Use a torch or an item on fire to slowly melt the ice. You can simply stand next to it to melt it.
4. Optional: Melt Your Enemies
There are 2 enemies in this section that can be melted out of the ice with the campfire or by standing near them with fire. You can defeat them one by one before proceeding or ignore them completely.
5. Melt the Next Ice
In order to proceed, you'll need to melt the ice blocking the entrance to the next section.
6. Break the Ice
Jump on the ice in the center to break it and enter the next section. Be warned that you will need quite a few hearts to deal with the enemies here. Go in with your weapons and shields ready.
7. Focus on the Archer
For those lacking in hearts, getting hit by the Archer or the Black Bokoblin can be very very deadly. They're not too hard to deal with, but you'll have to dodge the other 2 while doing so, so use items that can get many enemies at once like a Flame Emitter.
8. Incapacitate Your Enemies
With the Archer taken care of, you'll have to deal with the two melee enemies. While the staff Bokoblin isn't too much of an issue, it can still pose as threat if it knocks you down while fighting the Black Bokoblin. Incapacitate them with a Shock Emitter to keep them from joining the fight.
9. Take Down the Final Enemy
With the Black Bokoblin taken down, you can use their gear to quickly take down the last one!
10. Melt the Ice One Last Time
Slightly elevated is some ice blocking the path to the shrine. Same as before, stand next to it with fire and it will melt!
11. Enter the Shrine

With the ice gone, you can now approach and enter the shrine!
Otak Shrine Walkthrough
- Take Your Equipment
- Get the Attention of the Constructs
- Deal with the First Construct
- Fuse A New Weapon
- Take Out the First Archer
- Get The Attention of the Next Pair
- Isolate Enemies
- Stun and Take Down
- Use the Equipment
- Open the Chest
- Examine the Altar
1. Take Your Equipment
You will not be allowed to use your own equipment here, so be sure to grab everything to the left of the entrance before proceeding.
2. Get the Attention of the Constructs
There are 6 Constructs in total, split into pairs around the chamber. You'll want to get the ones to the right side first so use your arrows to get their attention. You are likely to get the archer first so duck behind pillars and collect the arrows they send back for more ammo.
3. Deal with the First Construct
At some point, the other construct will come towards you with a spear. You'll want to time your attacks to hit and stun it! This way you can avoid taking damage.
4. Fuse A New Weapon
You'll get some materials and a new weapon to use, so fuse them together to give yourself a better weapon!
5. Take Out the First Archer
Now that you have a new weapon, you can either take out the Archer from a range or run up and take them down. Regardless, it will provide you with more materials.
6. Get The Attention of the Next Pair
Another pair of constructs will be hovering nearby, so use the same method to catch their attention. Once they start chasing, cut the rope of the lamp to add some damage.
7. Isolate Enemies
One of these constructs has a spin attack and shield, making them quite difficult to get near. Try to isolate your enemies to take down the spear construct first! One way to do this is to climb up the platform and hop back down to slow their pursuit.
8. Stun and Take Down
When the construct uses its spinning attack, shoot an arrow at it to stun it and rush forward to take it down. Keep swiping quickly to keep it from attacking you back!
9. Use the Equipment
Now that the Shield construct is down, you can take their items and do the same thing to the last 2 constructs, shielding from their attacks to make the job quicker. Defeat the 2 to open the door.
10. Open the Chest
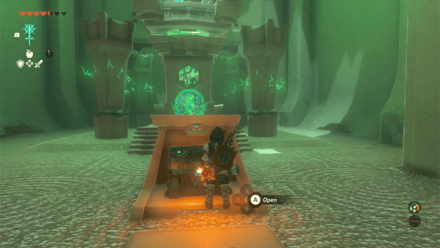
Open the chest in the center to snag a Mighty Construct Bow inside.
11. Examine the Altar
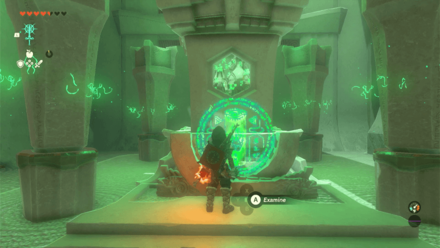
Examine the altar and get a Light of Blessing to complete the Shrine!
Otak Shrine Rewards and Chest Locations
Mighty Construct Bow
| Chest Location | Chest Contents |
|---|---|
 |
 |
After defeating all 6 Constructs, the door will open to reveal a chest before the shrine proper. Opening the shrine will snag you a Mighty Construct Bow!
The Legend of Zelda: Tears of the Kingdom Related Guides

Shrines Lists
| Shrines Lists | |
|---|---|
| All Shrines | All Shrine Quests |
All Great Sky Island Shrines
| Great Sky Island Shrines | ||
|---|---|---|
| Ukouh Shrine | In-isa Shrine | Gutanbac Shrine |
| Nachoyah Shrine | - | - |
All Hyrule Field Shrines
All Tabantha Shrines
| Tabantha Shrines | ||
|---|---|---|
| Oromuwak Shrine | Gatakis Shrine | Nouda Shrine |
| Wao-os Shrine | Iun-orok Shrine | Turakawak Shrine |
| Gasas Shrine | Mayausiy Shrine | Ikatak Shrine |
| Ga-ahisas Shrine | Ganos Shrine | Taunhiy Shrine |
All Hebra Shrines
All Great Hyrule Forest Shrines
| Great Hyrule Forest Shrines | ||
|---|---|---|
| Sakunbomar Shrine | Pupunke Shrine | Ninjis Shrine |
| Musanokir Shrine | Kikakin Shrine | Kiuyoyou Shrine |
| Ekochiu Shrine | Mayam Shrine | Simosiwak Shrine |
All Akkala Shrines
All Eldin Shrines
All Lanayru Shrines
All Necluda Shrines
All Faron Shrines
| Faron Shrines | ||
|---|---|---|
| Jiukoum Shrine | Ishokin Shrine | Utsushok Shrine |
| Joku-u Shrine | Joku-usin Shrine | - |
All Gerudo Shrines
Comment
Author
The Legend of Zelda: Tears of the Kingdom Walkthrough & Guides Wiki
Otak Shrine Location and Walkthrough
improvement survey
03/2026
improving Game8's site?

Your answers will help us to improve our website.
Note: Please be sure not to enter any kind of personal information into your response.

We hope you continue to make use of Game8.
Rankings
- We could not find the message board you were looking for.
Gaming News
Popular Games

Genshin Impact Walkthrough & Guides Wiki

Honkai: Star Rail Walkthrough & Guides Wiki

Umamusume: Pretty Derby Walkthrough & Guides Wiki

Pokemon Pokopia Walkthrough & Guides Wiki

Resident Evil Requiem (RE9) Walkthrough & Guides Wiki

Monster Hunter Wilds Walkthrough & Guides Wiki

Wuthering Waves Walkthrough & Guides Wiki

Arknights: Endfield Walkthrough & Guides Wiki

Pokemon FireRed and LeafGreen (FRLG) Walkthrough & Guides Wiki

Pokemon TCG Pocket (PTCGP) Strategies & Guides Wiki
Recommended Games

Diablo 4: Vessel of Hatred Walkthrough & Guides Wiki

Cyberpunk 2077: Ultimate Edition Walkthrough & Guides Wiki

Fire Emblem Heroes (FEH) Walkthrough & Guides Wiki

Yu-Gi-Oh! Master Duel Walkthrough & Guides Wiki

Super Smash Bros. Ultimate Walkthrough & Guides Wiki

Pokemon Brilliant Diamond and Shining Pearl (BDSP) Walkthrough & Guides Wiki

Elden Ring Shadow of the Erdtree Walkthrough & Guides Wiki

Monster Hunter World Walkthrough & Guides Wiki

The Legend of Zelda: Tears of the Kingdom Walkthrough & Guides Wiki

Persona 3 Reload Walkthrough & Guides Wiki
All rights reserved
© Nintendo. The Legend of Zelda and Nintendo Switch are trademarks of Nintendo.
The copyrights of videos of games used in our content and other intellectual property rights belong to the provider of the game.
The contents we provide on this site were created personally by members of the Game8 editorial department.
We refuse the right to reuse or repost content taken without our permission such as data or images to other sites.


![Monster Hunter Stories 3 Review [First Impressions] | Simply Rejuvenating](https://img.game8.co/4438641/2a31b7702bd70e78ec8efd24661dacda.jpeg/thumb)


