Sitsum Shrine Location and Walkthrough
▲ Get Pristine Weapons from the depths!
△ All 1000 Koroks | All 4 Great Fairies
▲ 81 Addison Signs | 147 Caves | 58 Wells
△ Tips: Farm Rupees | Starting Armor
▲ Best Weapons | Best Armor | Best Food
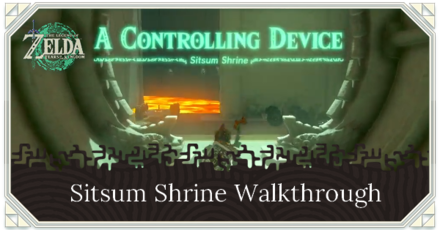
Sitsum Shrine (A Controlling Device) in The Legend of Zelda: Tears of the Kingdom (TotK) can be found southwest of Death Mountain West Tunnel in the Death Mountain Region. Read on to learn its location, puzzle solution, as well as all treasure chest locations in Sitsum Shrine.
List of Contents
Sitsum Shrine Location
Death Mountain West Tunnel, Death Mountain
Sitsum Shrine can be found southwest of Death Mountain West Tunnel in the Death Mountain Region.
The exact coordinates of the shrine is at 2369, 2595, 0790 and you can get there by traveling northwest from Ulri Mountain Skyview Tower.
Puzzle Shrine
This is a Puzzle type Shrine, so you need to solve the puzzle to reach the end and get a Light of Blessing.
Try to look around the area to find a way to move forward, and remember to use Link's Ultrahand, Ascend, or Recall abilities!
All Abilities and How to Unlock
Sitsum Shrine Puzzle Solution
- Grab Wheeled Vehicles
- Ride into the Lava
- Grab the Orb
- Place Orb in the Hole
- Open the Chest
- Clear Enemies
- Take the Controls
- Take Flight
- Examine the Shrine
Video Guide
1. Grab Wheeled Vehicles
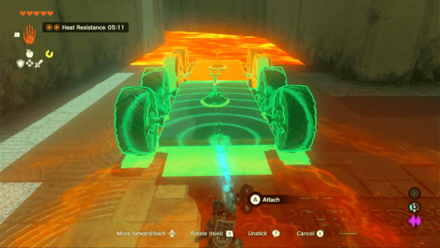
Upon entering the Shrine, use Ultrahand to grab a wheeled vehicle or two and connect them together.
2. Ride into the Lava
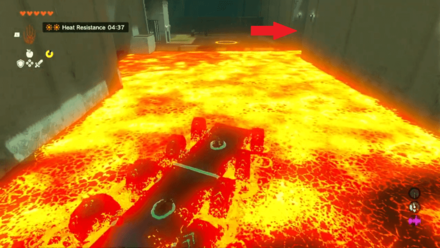
Take the wheeled vehicles into the Lava and follow the path. It will branch off in 3 directions. Take the right path.
3. Grab the Orb
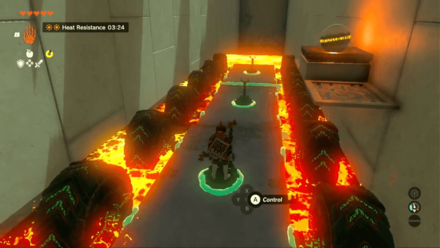
Upon turning right, you'll only see a drop and an orb on a shelf to the right side. Use Ultrahand to pick it up and put it inside the wheeled vehicle.
4. Place Orb in the Hole
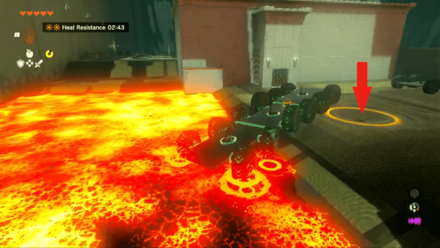
Back up until you're at the intersection once more. You should see an orange ring with a hole in the center. Use Ultrahand to pick up the orb and place it in that hole.
5. Open the Chest
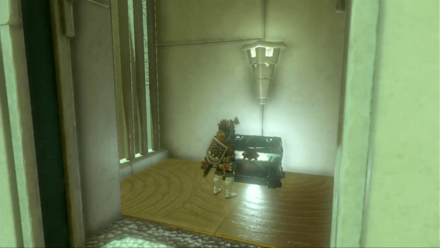
By placing the Orb, the doors blocking the chest will now open! Open the Chest to snag a Mighty Construct Bow!
6. Clear Enemies
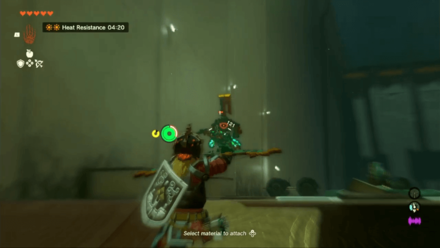
Head to the last section of this chamber where one Construct will be waiting. Defeat it to continue uninterrupted.
7. Take the Controls
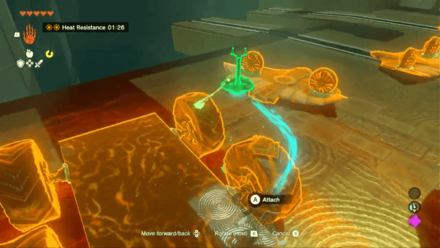
Take the controls from the wheeled vehicle and place it on the planes that are loaded up. Be sure it's facing the right direction.
8. Take Flight
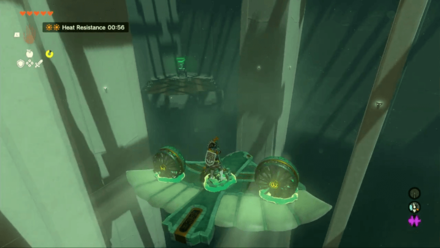
Take the plane and steer to the left of the chamber. You should see the Shrine in the distance. You can land the plane here or hop off and glide down instead!
9. Examine the Shrine
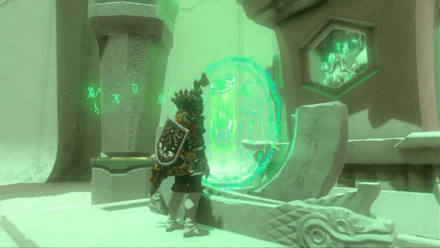
Examine the Shrine to receive your reward!
Sitsum Shrine Rewards and Chest Locations
Mighty Construct Bow
| Chest Location | Chest Contents |
|---|---|
 |
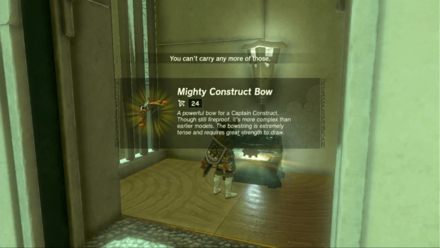 |
You can find this chest by taking the orb from the right side of the lava intersection and placing in the center of the chamber, where the orange ring is! By placing the Orb, the doors blocking the chest will now open! Open the Chest to snag a Mighty Construct Bow!
The Legend of Zelda: Tears of the Kingdom Related Guides

Shrines Lists
| Shrines Lists | |
|---|---|
| All Shrines | All Shrine Quests |
All Great Sky Island Shrines
| Great Sky Island Shrines | ||
|---|---|---|
| Ukouh Shrine | In-isa Shrine | Gutanbac Shrine |
| Nachoyah Shrine | - | - |
All Hyrule Field Shrines
All Tabantha Shrines
| Tabantha Shrines | ||
|---|---|---|
| Oromuwak Shrine | Gatakis Shrine | Nouda Shrine |
| Wao-os Shrine | Iun-orok Shrine | Turakawak Shrine |
| Gasas Shrine | Mayausiy Shrine | Ikatak Shrine |
| Ga-ahisas Shrine | Ganos Shrine | Taunhiy Shrine |
All Hebra Shrines
All Great Hyrule Forest Shrines
| Great Hyrule Forest Shrines | ||
|---|---|---|
| Sakunbomar Shrine | Pupunke Shrine | Ninjis Shrine |
| Musanokir Shrine | Kikakin Shrine | Kiuyoyou Shrine |
| Ekochiu Shrine | Mayam Shrine | Simosiwak Shrine |
All Akkala Shrines
All Eldin Shrines
All Lanayru Shrines
All Necluda Shrines
All Faron Shrines
| Faron Shrines | ||
|---|---|---|
| Jiukoum Shrine | Ishokin Shrine | Utsushok Shrine |
| Joku-u Shrine | Joku-usin Shrine | - |
All Gerudo Shrines
Comment
Author
The Legend of Zelda: Tears of the Kingdom Walkthrough & Guides Wiki
Sitsum Shrine Location and Walkthrough
improvement survey
03/2026
improving Game8's site?

Your answers will help us to improve our website.
Note: Please be sure not to enter any kind of personal information into your response.

We hope you continue to make use of Game8.
Rankings
- We could not find the message board you were looking for.
Gaming News
Popular Games

Genshin Impact Walkthrough & Guides Wiki

Honkai: Star Rail Walkthrough & Guides Wiki

Umamusume: Pretty Derby Walkthrough & Guides Wiki

Pokemon Pokopia Walkthrough & Guides Wiki

Resident Evil Requiem (RE9) Walkthrough & Guides Wiki

Monster Hunter Wilds Walkthrough & Guides Wiki

Wuthering Waves Walkthrough & Guides Wiki

Arknights: Endfield Walkthrough & Guides Wiki

Pokemon FireRed and LeafGreen (FRLG) Walkthrough & Guides Wiki

Pokemon TCG Pocket (PTCGP) Strategies & Guides Wiki
Recommended Games

Diablo 4: Vessel of Hatred Walkthrough & Guides Wiki

Cyberpunk 2077: Ultimate Edition Walkthrough & Guides Wiki

Fire Emblem Heroes (FEH) Walkthrough & Guides Wiki

Yu-Gi-Oh! Master Duel Walkthrough & Guides Wiki

Super Smash Bros. Ultimate Walkthrough & Guides Wiki

Pokemon Brilliant Diamond and Shining Pearl (BDSP) Walkthrough & Guides Wiki

Elden Ring Shadow of the Erdtree Walkthrough & Guides Wiki

Monster Hunter World Walkthrough & Guides Wiki

The Legend of Zelda: Tears of the Kingdom Walkthrough & Guides Wiki

Persona 3 Reload Walkthrough & Guides Wiki
All rights reserved
© Nintendo. The Legend of Zelda and Nintendo Switch are trademarks of Nintendo.
The copyrights of videos of games used in our content and other intellectual property rights belong to the provider of the game.
The contents we provide on this site were created personally by members of the Game8 editorial department.
We refuse the right to reuse or repost content taken without our permission such as data or images to other sites.


![Monster Hunter Stories 3 Review [First Impressions] | Simply Rejuvenating](https://img.game8.co/4438641/2a31b7702bd70e78ec8efd24661dacda.jpeg/thumb)


