Mayaumekis Shrine Location and Walkthrough
▲ Get Pristine Weapons from the depths!
△ All 1000 Koroks | All 4 Great Fairies
▲ 81 Addison Signs | 147 Caves | 58 Wells
△ Tips: Farm Rupees | Starting Armor
▲ Best Weapons | Best Armor | Best Food
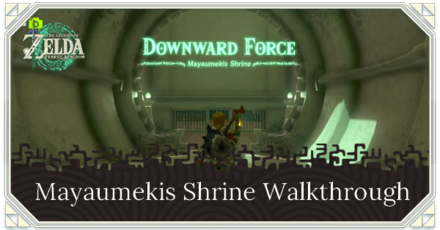
Mayaumekis Shrine (Downward Force) in The Legend of Zelda: Tears of the Kingdom (TotK) can be found at the Rising Island Chain in the Hebra Mountain Sky Region. Read on to learn its location, puzzle solution, as well as all treasure chest locations in Mayaumekis Shrine.
List of Contents
Mayaumekis Shrine Location
Rising Island Chain
Mayaumekis Shrine can be found at the Rising Island Chain in the Hebra Mountain Sky region.
The exact coordinates of the Mayaumekis Shrine is at -2948, 3050, 0896.
You may need to equip the Snowquill Set or prepare dishes that prevent freezing, given that the Shrine is located somewhere with very low temperature.
Travel to Rospro Pass Skyview Tower, and launch yourself from there to glide north towards the islands near Mayaumekis Shrine.
Hebra Mountains Sky Region Map
Puzzle Shrine
This is a Puzzle type Shrine, so you need to solve the puzzle to reach the end and get a Light of Blessing.
Try to look around the area to find a way to move forward, and remember to use Link's Ultrahand, Ascend, or Recall abilities!
All Abilities and How to Unlock
Mayaumekis Shrine Puzzle Solution
- Shoot the Switch with a Bow and Arrow
- Ascend the Stairs in the Next Room
- Bounce on the Flying Boat
- Paraglide Towards the Moving Flying Boat
- Bounce On the Moving Boat to Get the Chest
- Paraglide Towards the Floating Platform
- Shoot the Switch with a Bow and Arrow
- Bounce on the Floating Directly Under the Room
Mayaumekis Shrine Video Guide
1. Shoot the Switch with a Bow and Arrow
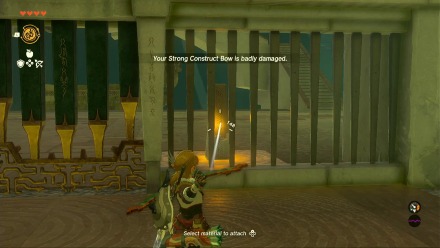
Upon entering the shrine, you'll notice a gate up ahead. Approach it and shoot the switch from the other side with a bow and arrow to open the gate.
2. Ascend the Stairs in the Next Room
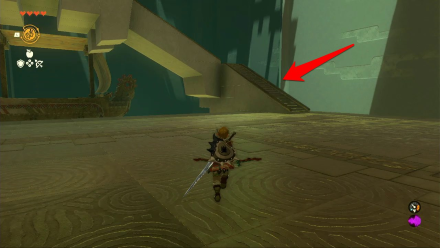
Ascend the stairs in the next room/mid]
Go up the flight of stairs in the next room and defeat the [Soldier Construct II atop.
3. Bounce on the Flying Boat
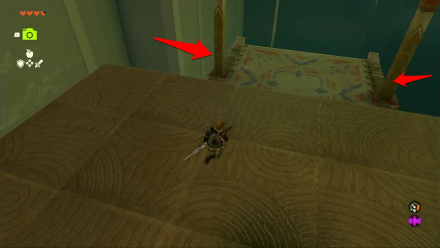
Next, bounce on top the flying boat to propel yourself upwards.
4. Paraglide Towards the Moving Flying Boat
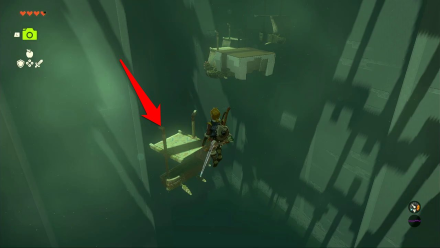
When you reach the higher platform, you'll find another trampoline contraption on top of the flying boat.
Bounce on it and use your paraglide once you reach the highest point of your jump. Then, paraglide towards the moving flying boat.
5. Bounce On the Moving Boat to Get the Chest
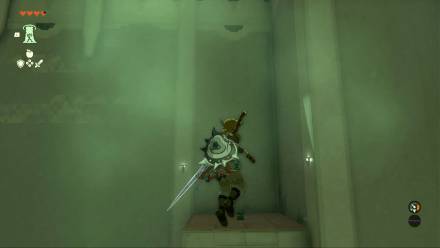
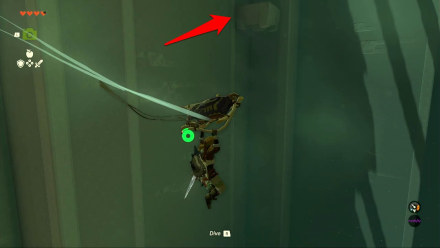
A hidden chest can be found atop a pillar in one corner of the room. When you're neat it, jump atop the moving flying boat and paraglide towards the hidden chest. Open it to get Arrows x10.
6. Paraglide Towards the Floating Platform
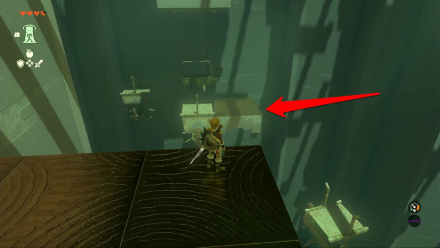
From where the hidden chest is, paraglide towards one of the floating platforms indicated in the image above.
7. Shoot the Switch with a Bow and Arrow
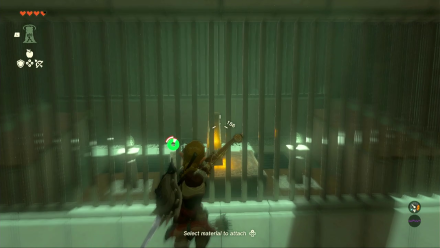
Bounce atop the nearby floating boat, making sure that you are facing the direction of where the switch is.
When you see the switch, take out your bow and arrow to enter bullet time. Then, shoot the switch with a bow and arrow to activate it.
8. Bounce on the Floating Directly Under the Room
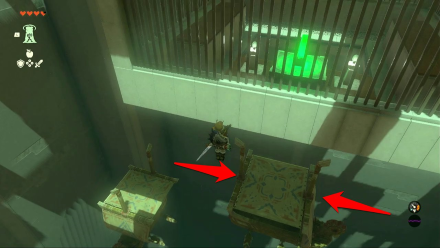
Lastly, bounce on the floating boat directly under the room where the switch is. This will bring you to the room where you'll be rewarded with a Light of Blessing.
Mayaumekis Shrine Rewards and Chest Locations
Arrow x10
| Chest Location | Chest Contents |
|---|---|
 |
 |
Bounce atop the flying boat that's moving around in circles. Make sure to time your jump when you're near the pillar the hidden chest is on.
Use your paraglider when you reach the highest point of your jump, then paraglide towards the hidden chest. Open it to get Arrows x10.
The Legend of Zelda: Tears of the Kingdom Related Guides

Shrines Lists
| Shrines Lists | |
|---|---|
| All Shrines | All Shrine Quests |
All Great Sky Island Shrines
| Great Sky Island Shrines | ||
|---|---|---|
| Ukouh Shrine | In-isa Shrine | Gutanbac Shrine |
| Nachoyah Shrine | - | - |
All Hyrule Field Shrines
All Tabantha Shrines
| Tabantha Shrines | ||
|---|---|---|
| Oromuwak Shrine | Gatakis Shrine | Nouda Shrine |
| Wao-os Shrine | Iun-orok Shrine | Turakawak Shrine |
| Gasas Shrine | Mayausiy Shrine | Ikatak Shrine |
| Ga-ahisas Shrine | Ganos Shrine | Taunhiy Shrine |
All Hebra Shrines
All Great Hyrule Forest Shrines
| Great Hyrule Forest Shrines | ||
|---|---|---|
| Sakunbomar Shrine | Pupunke Shrine | Ninjis Shrine |
| Musanokir Shrine | Kikakin Shrine | Kiuyoyou Shrine |
| Ekochiu Shrine | Mayam Shrine | Simosiwak Shrine |
All Akkala Shrines
All Eldin Shrines
All Lanayru Shrines
All Necluda Shrines
All Faron Shrines
| Faron Shrines | ||
|---|---|---|
| Jiukoum Shrine | Ishokin Shrine | Utsushok Shrine |
| Joku-u Shrine | Joku-usin Shrine | - |
All Gerudo Shrines
Comment
Author
The Legend of Zelda: Tears of the Kingdom Walkthrough & Guides Wiki
Mayaumekis Shrine Location and Walkthrough
improvement survey
03/2026
improving Game8's site?

Your answers will help us to improve our website.
Note: Please be sure not to enter any kind of personal information into your response.

We hope you continue to make use of Game8.
Rankings
- We could not find the message board you were looking for.
Gaming News
Popular Games

Genshin Impact Walkthrough & Guides Wiki

Honkai: Star Rail Walkthrough & Guides Wiki

Umamusume: Pretty Derby Walkthrough & Guides Wiki

Pokemon Pokopia Walkthrough & Guides Wiki

Resident Evil Requiem (RE9) Walkthrough & Guides Wiki

Monster Hunter Wilds Walkthrough & Guides Wiki

Wuthering Waves Walkthrough & Guides Wiki

Arknights: Endfield Walkthrough & Guides Wiki

Pokemon FireRed and LeafGreen (FRLG) Walkthrough & Guides Wiki

Pokemon TCG Pocket (PTCGP) Strategies & Guides Wiki
Recommended Games

Fire Emblem Heroes (FEH) Walkthrough & Guides Wiki

Diablo 4: Vessel of Hatred Walkthrough & Guides Wiki

Yu-Gi-Oh! Master Duel Walkthrough & Guides Wiki

Super Smash Bros. Ultimate Walkthrough & Guides Wiki

Pokemon Brilliant Diamond and Shining Pearl (BDSP) Walkthrough & Guides Wiki

Elden Ring Shadow of the Erdtree Walkthrough & Guides Wiki

Monster Hunter World Walkthrough & Guides Wiki

The Legend of Zelda: Tears of the Kingdom Walkthrough & Guides Wiki

Persona 3 Reload Walkthrough & Guides Wiki

Cyberpunk 2077: Ultimate Edition Walkthrough & Guides Wiki
All rights reserved
© Nintendo. The Legend of Zelda and Nintendo Switch are trademarks of Nintendo.
The copyrights of videos of games used in our content and other intellectual property rights belong to the provider of the game.
The contents we provide on this site were created personally by members of the Game8 editorial department.
We refuse the right to reuse or repost content taken without our permission such as data or images to other sites.


![Slay the Spire 2 Review [Early Access] | Still the Deckbuilder to Beat](https://img.game8.co/4433115/44e19e1fb0b4755466b9e516ec7ffb1e.png/thumb)

![Resident Evil Village Review [Switch 2] | Almost Flawless Port](https://img.game8.co/4432790/e1859f64830960ce4248d898f8cd38d9.jpeg/thumb)


