Kikakin Shrine Puzzle Solution
▲ Get Pristine Weapons from the depths!
△ All 1000 Koroks | All 4 Great Fairies
▲ 81 Addison Signs | 147 Caves | 58 Wells
△ Tips: Farm Rupees | Starting Armor
▲ Best Weapons | Best Armor | Best Food
Kikakin Shrine (Shining in Darkness) in The Legend of Zelda: Tears of the Kingdom (TotK) can be found west of the Great Hyrule Forest and northeast of Mount Drena in the Great Hyrule Forest Region. Read on to learn its location, puzzle solution, as well as the Small Key and all treasure chest locations in Kikakin Shrine.
Kikakin Shrine Location
West of the Great Hyrule Forest
Kikakin Shrine can be found west of the Great Hyrule Forest and northeast of Mount Drena.
The exact coordinates of the shrine is at -0395, 2736, 0287 and it is surrounded by a rocky terrain.
To get there, travel to Thyphlo Ruins Skyview Tower, and launch yourself from there to glide southwest towards the Kikakin Shrine.
Great Hyrule Forest Region Map
Puzzle Shrine
This is a Puzzle type Shrine, so you need to solve the puzzle to reach the end and get a Light of Blessing.
Try to look around the area to find a way to move forward, and remember to use Link's Ultrahand, Ascend, or Recall abilities!
All Abilities and How to Unlock
Kikakin Shrine Key Location
Rightmost Side of the Shrine
If you want to skip locating all treasure chests in Kikakin Shrine and just get the Small Key, simply make your way to the right side of the Shrine.
Follow the corridor leading to the northeastern part of the Shrine until you see a liftable stone slab. The treasure chest underneath it contains the Small Key which you need to clear this Shrine.
Kikakin Shrine Puzzle Solution
- Pick Up the Flashlight
- Enter the Hallway to Your Left
- Turn Right and Get an Amber from a Chest
- Ascend on the Ledge
- Keep Walking Until You See a Bright Room
- Drop Down and Enter the Middle Hallway
- Open the Chest at the End of the Hallway
- Go Back to the Entrance of the Hallway
- Turn Right Again
- Use Ultrahand to Lift the Block
- Go Back to the Entrance of the Hallway
- Turn Left then Right to Where the Lasers Are
- Make Your Way Through the Laser
- Go Back to the Lasers Then Make Two Rights
Video Guide
1. Pick Up the Flashlight
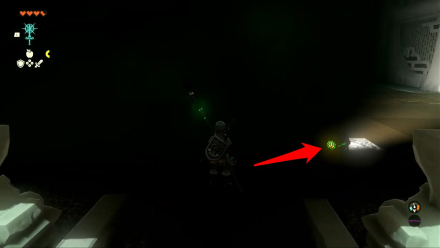
Enter the dark room and pick up the flashlight to your right. You'll see it glow so it should be fairly easy to see.
You'll be bringing this flashlight everywhere as you explore the shrine so always keep it close to you.
2. Enter the Hallway to Your Left
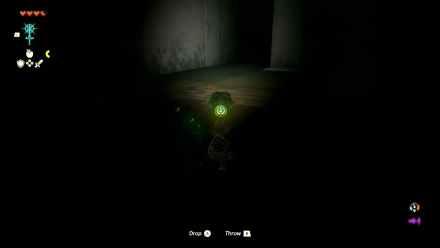
Use your flashlight to shine a light on the left side of the room, then enter the hallway.
If you have Brightbloom Seeds, you can throw them in the dark areas of the shrine to make it brighter.
3. Turn Right and Get an Amber from a Chest

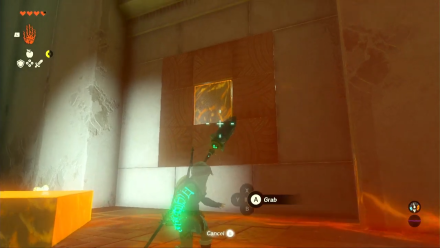
From the left hallway, turn right and activate your Ultrahand to remove the square piece of block from the right wall. You can then use the block as stairs so you can reach the hidden chest containing an Amber.
4. Ascend on the Ledge
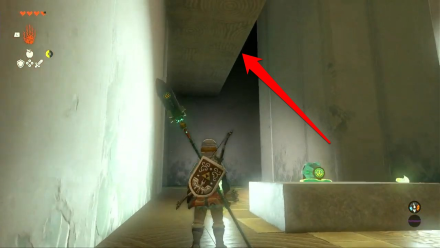
Continue forward and you'll see spikes on the wall ahead. Turn left and look above to find a ledge on the leftside wall. Use Ascend to get to the other side of the ledge above you.
5. Keep Walking Until You See a Bright Room
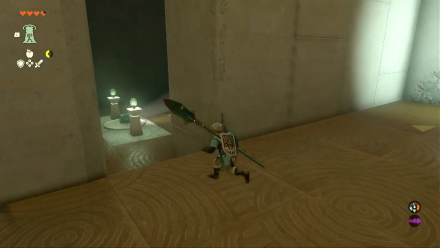
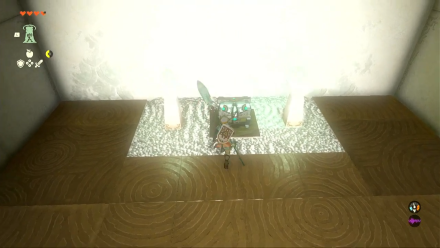
Next, keep walking across the ledge until you see a bright room to your left. Enter it and open the chest inside to get a Zonaite Bow.
6. Drop Down and Enter the Middle Hallway
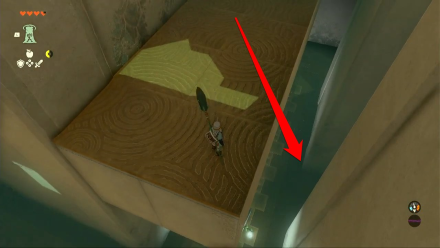
Exit the room and go back to where the ledge is. Drop down from the ledge and enter the hallway near the middle of the ledge.
7. Open the Chest at the End of the Hallway
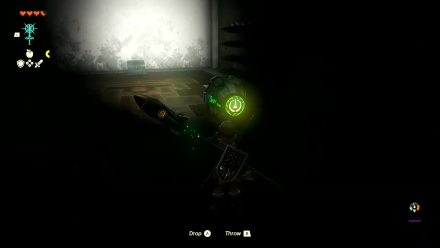
Continue exploring the hallway and open the chest at the end to get a Luminous Stone.
Be careful of the spikes from the left and right side of the wall!
8. Go Back to the Entrance of the Hallway
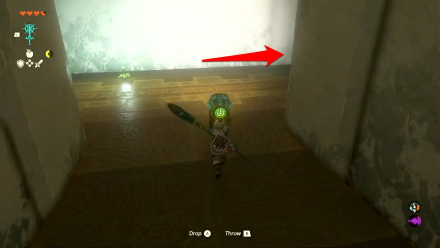
After getting the Luminous Stone, go back to the entrance of the hallway, then turn right.
9. Turn Right Again
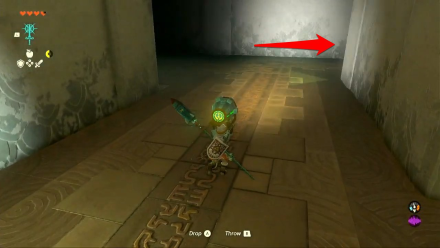
Once you reach the end of the hallway, turn right again. You'll know you're going the right way when you find spikes on the right side of the wall of the hallway.
10. Use Ultrahand to Lift the Block at the End of the Hallway
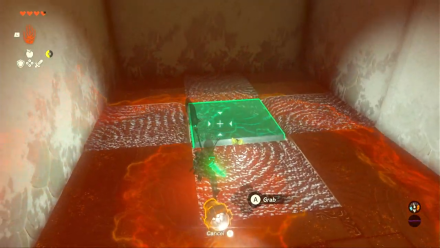
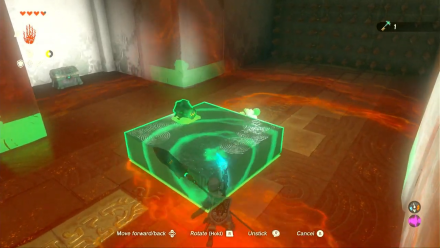
When you reach the end of the hallway, activate your Ultrahand to lift the block from the floor. Open the chest underneath to get a Small Key.
11. Go Back to the Entrance of the Hallway
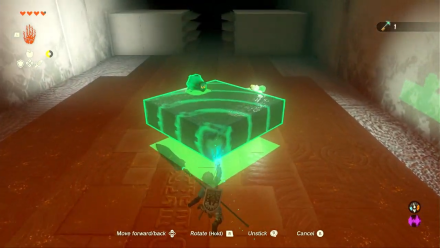
After getting the Small Key, return to the entrance of the hallway you're in and continue forward to the bigger hallway. You'll know you're on the right path when you see two big spikes on both the right and left side of the wall.
12. Turn Left then Right to Where the Lasers Are

After getting past the big spikes, turn left then enter the hallway to you right where the lasers are.
13. Make Your Way Through the Laser

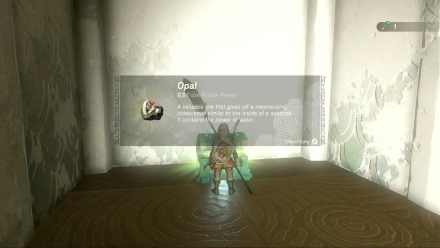
Continue down the hallway while avoiding the lasers, then get the chest at the end of the hallway to get an Opal.
14. Go Back to the Lasers Then Make Two Rights
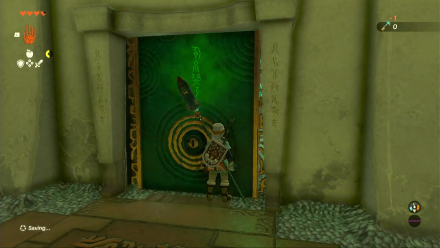
Finally, make your way through the lasers again. When you reach the end of the hallway, turn right. Make another right and continue walking until you're back at the entrance of the shrine.
Use the Small Key to open the door to the altar, then examine it to get a Light of Blessing.
Kikakin Shrine Rewards and Chest Locations
Amber
| Chest Location | Chest Contents |
|---|---|
 |
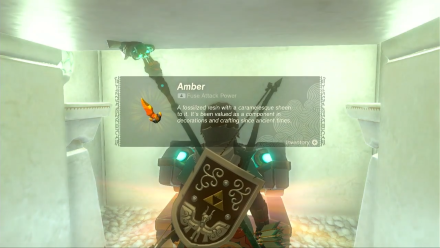 |
From the locked gate where the altar is, enter the hallway to your left then turn right. Use Ultrahand to grab the square piece of block on the wall. Use it as stairs to reach the hidden chest in the compartment. Open it to get an Amber.
Zonaite Bow
| Chest Location | Chest Contents |
|---|---|
 |
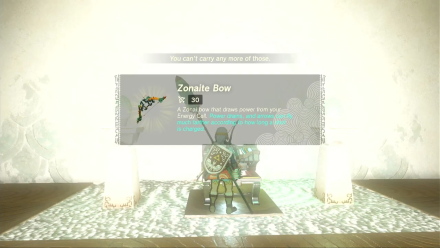 |
Continue forward from where you got the Amber and look above the left side wall to find a ledge. Use Ascend to get on the the other side of the ledge, then keep walking on it until you see a room to your left. Enter it and open the chest that contains a Zonaite Bow.
Luminous Stone
| Chest Location | Chest Contents |
|---|---|
 |
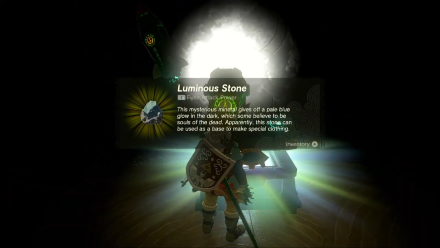 |
After getting the Zonaite Bow, drop down from the ledge and enter the hallway in the middle. Keep exploring it until you see the chest at the end of the hallway. Open it to get a Luminous Stone.
Opal
| Chest Location | Chest Contents |
|---|---|
 |
 |
Exit the hallway where the chest with the Luminous Stone is, then turn right. When you reach the end of the hallway, turn left and continue forward until you get past the spikes.
After getting past the spikes, turn left then enter the hallway with the lasers. Carefully make your way through the lasers, then open the chest at the end of the hallway to get an Opal.
The Legend of Zelda: Tears of the Kingdom Related Guides

Shrines Lists
| Shrines Lists | |
|---|---|
| All Shrines | All Shrine Quests |
All Great Sky Island Shrines
| Great Sky Island Shrines | ||
|---|---|---|
| Ukouh Shrine | In-isa Shrine | Gutanbac Shrine |
| Nachoyah Shrine | - | - |
All Hyrule Field Shrines
All Tabantha Shrines
| Tabantha Shrines | ||
|---|---|---|
| Oromuwak Shrine | Gatakis Shrine | Nouda Shrine |
| Wao-os Shrine | Iun-orok Shrine | Turakawak Shrine |
| Gasas Shrine | Mayausiy Shrine | Ikatak Shrine |
| Ga-ahisas Shrine | Ganos Shrine | Taunhiy Shrine |
All Hebra Shrines
All Great Hyrule Forest Shrines
| Great Hyrule Forest Shrines | ||
|---|---|---|
| Sakunbomar Shrine | Pupunke Shrine | Ninjis Shrine |
| Musanokir Shrine | Kikakin Shrine | Kiuyoyou Shrine |
| Ekochiu Shrine | Mayam Shrine | Simosiwak Shrine |
All Akkala Shrines
All Eldin Shrines
All Lanayru Shrines
All Necluda Shrines
All Faron Shrines
| Faron Shrines | ||
|---|---|---|
| Jiukoum Shrine | Ishokin Shrine | Utsushok Shrine |
| Joku-u Shrine | Joku-usin Shrine | - |
All Gerudo Shrines
Comment
Author
The Legend of Zelda: Tears of the Kingdom Walkthrough & Guides Wiki
Kikakin Shrine Puzzle Solution
improvement survey
03/2026
improving Game8's site?

Your answers will help us to improve our website.
Note: Please be sure not to enter any kind of personal information into your response.

We hope you continue to make use of Game8.
Rankings
- We could not find the message board you were looking for.
Gaming News
Popular Games

Genshin Impact Walkthrough & Guides Wiki

Honkai: Star Rail Walkthrough & Guides Wiki

Umamusume: Pretty Derby Walkthrough & Guides Wiki

Pokemon Pokopia Walkthrough & Guides Wiki

Resident Evil Requiem (RE9) Walkthrough & Guides Wiki

Monster Hunter Wilds Walkthrough & Guides Wiki

Wuthering Waves Walkthrough & Guides Wiki

Arknights: Endfield Walkthrough & Guides Wiki

Pokemon FireRed and LeafGreen (FRLG) Walkthrough & Guides Wiki

Pokemon TCG Pocket (PTCGP) Strategies & Guides Wiki
Recommended Games

Diablo 4: Vessel of Hatred Walkthrough & Guides Wiki

Cyberpunk 2077: Ultimate Edition Walkthrough & Guides Wiki

Fire Emblem Heroes (FEH) Walkthrough & Guides Wiki

Yu-Gi-Oh! Master Duel Walkthrough & Guides Wiki

Super Smash Bros. Ultimate Walkthrough & Guides Wiki

Pokemon Brilliant Diamond and Shining Pearl (BDSP) Walkthrough & Guides Wiki

Elden Ring Shadow of the Erdtree Walkthrough & Guides Wiki

Monster Hunter World Walkthrough & Guides Wiki

The Legend of Zelda: Tears of the Kingdom Walkthrough & Guides Wiki

Persona 3 Reload Walkthrough & Guides Wiki
All rights reserved
© Nintendo. The Legend of Zelda and Nintendo Switch are trademarks of Nintendo.
The copyrights of videos of games used in our content and other intellectual property rights belong to the provider of the game.
The contents we provide on this site were created personally by members of the Game8 editorial department.
We refuse the right to reuse or repost content taken without our permission such as data or images to other sites.


![Monster Hunter Stories 3 Review [First Impressions] | Simply Rejuvenating](https://img.game8.co/4438641/2a31b7702bd70e78ec8efd24661dacda.jpeg/thumb)


