This survey will take about 1 minute.
Your answers will help us to improve our website.
Zelda: Tears of the Kingdom (TotK)
Secret of the Ring Ruins Walkthrough
▲ Get Pristine Weapons from the depths!
△ All 1000 Koroks | All 4 Great Fairies
▲ 81 Addison Signs | 147 Caves | 58 Wells
△ Tips: Farm Rupees | Starting Armor
▲ Best Weapons | Best Armor | Best Food
Talk to Paya in Kakariko Village to start the Secret of the Ring Ruins Main Quest in The Legend of Zelda: Tears of the Kingdom (TotK). Read on for a detailed walkthrough of Secret of the Ring Ruins, its location, rewards and the riddle behind the Ruins from the Age of Legends, as well as other tips and strategies on how to complete this Main Quest!
| ◄ Previous Quest | Next Quest ▶ |
|---|---|
| Find the Fifth Sage | Guidance from Ages Past |
List of Contents
How to Start Secret of the Ring Ruins
West Necluda - Kakariko Village
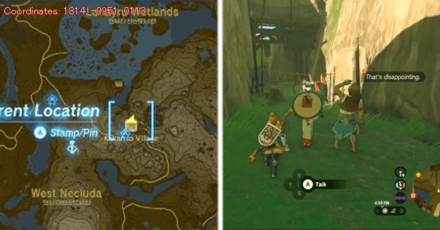
The exact coordinates for this quest on the map are 1814, -0951, 0113.
Rewards
| There doesn't seem to be any reward for this quest... *sad Korok noises* |
Tied to Find the Fifth Sage Main Quest
When doing the Find the Fifth Sage Main Quest, Purah will require you to investigate the Ruins from the Age of Legends as part of its objectives. This is actually refers to the Ring Ruins in Kakariko Village which eventually will trigger this quest after talking to Paya and Tauro.
Find the Fifth Sage Walkthrough
Secret of the Ring Ruins Walkthrough Guide
| Click on a Link to Jump to a Section! | |
|---|---|
| Visit the Ring Ruins | Get Charged Set at Dracozu Lake |
| Explore Thunderhead Isles | Reach Dragonhead Island |
Visit the Ring Ruins
| Visiting the Ruins Walkthrough |
|---|
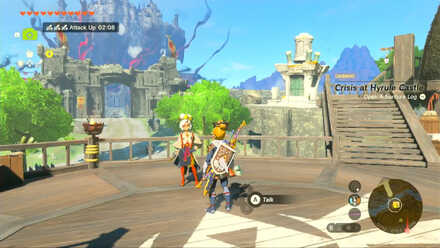
Check the Slab in the Ring Ruins
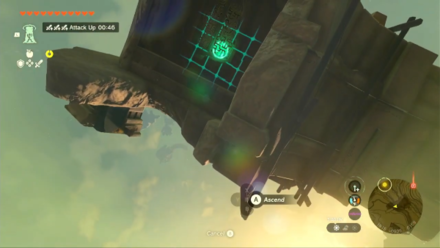
Get up to the Ring Ruins and find the slab. Climb the lower half of the ring and use Ascend on these coordinates (1817, -0908, 0159). Calip will block Link from approaching the ruins if he hasn't completed Regional Phenomena and Crisis at Hyrule Castle.
Check the West Wall
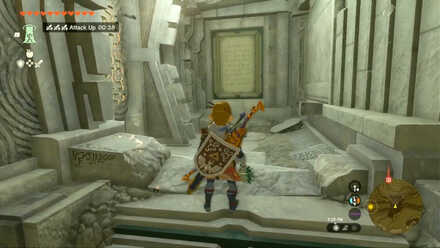
Once inside, look at the west wall and take a picture of the stone slab. A red exclamation point should appear indicating that you have the correct angle. Players will have to have completed Camera Works in the Depths to progress through this part as the Camera app is needed.
Meet Tauro and Calip Near the Ruins

Fast travel to Popla Foothills Skyview Tower, located southwest of Dueling Peaks, and find Calip. He'll tell you that Tauro went in ahead and hasn't come back yet.
Get Charged Set at Dracozu Lake
| Get the Charged Set Walkthrough |
|---|
Enter the Zonai Ruins and Find Tauro
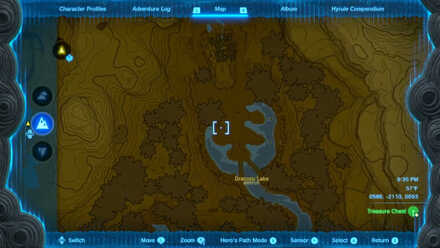
Dracozu Lake is directly southeast of the tower, while the ruins itself is located east of the lake. Use the tower's launch pad and glide towards the direction of the ruins.
Look for the Passageway
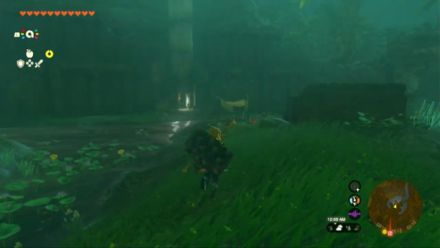
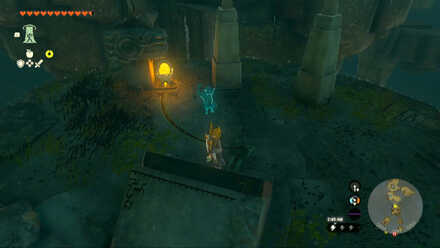
There's a pillar on the east side of the lake with a lit passageway under it. Enter these ruins and talk to Tauro inside.
Get the Charged Shirt

Go up the stairs and open the chest to obtain the Charged Shirt.
Get the Charged Trousers
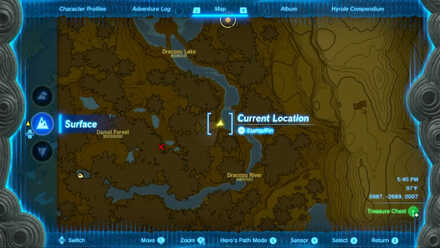
Follow the river south and find another pillar about halfway through (Coordinates: 0987, -2689, 0007). Destroy the rocks blocking the entrance with Yunobo's avatar and grab the Charged Trousers from the chest inside.
Get the Charged Headress
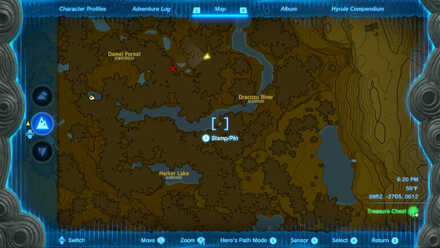
The third pillar is further down the river (Coordinates: 0970, -2803, 0007), directly south of the second pillar. Clear the vines with your weapon and open the chest for the Charged Headdress.
Now that you have the full set of the electric garb
, continue following the river until you get to its tail
. You'll find a fourth pillar (Coordinates: 0672, -2738, 0914) with a pedestal inside.
Wear the full Charged Set then place a Zonai Charge on the pedestal to clear the clouds above the lake and reveal a new sky island.
Explore Thunderhead Isles
| Explore Thunderhead Isles Walkthrough |
|---|
Explore the Thundering Isles

Launch yourself again through the Popla Foothills Skyview Tower and glide south towards the Thundering Isles. You might need to use Tulin's gust and a few stamina recovery dishes to reach it.
Be aware that the entire sky island is plagued by thunderstorm, so unless you have the Lightning Helm equipped, remove all your metal weapons and shield.
Look for the Launcher
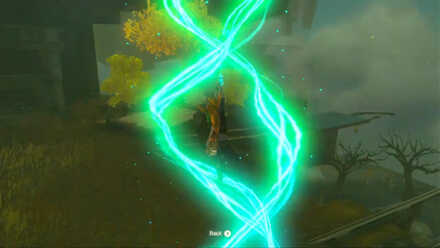
Hop from one island to the next until you reach the one with a launcher and a conductor.
There are two ways to get to the other side: either place a metal object next to the conductor to attract the lightning or use Riju's lightning to strike the conductor while you position yourself on the launcher.
Make a Bridge
Cross to the next island and create a bridge using the wooden boards. Use it to continue south.
The next island might be tough to glide across so try to get to a higher elevation first before gliding and make use of Tulin's gust.
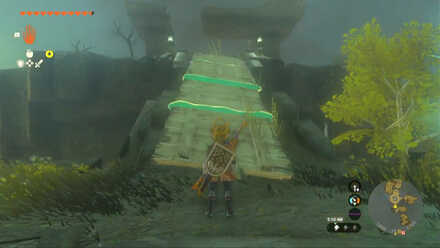
Use Ascend on the Rail Track
Head to the island where the rail track starts and use Ascend to reach the upper level. From here, glide towards the island where the Flux Construct III is (don't get close unless you want to fight it!).
Turn west where you'll find another rail track. Place the T-shaped fused boards on the track and attach a fan to it.
Find Joku-usin Shrine
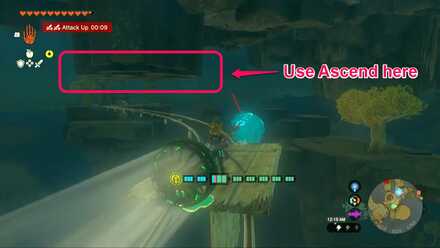
Now that you can ride it across, hop on and turn on the fan. Halfway through the track, you'll notice a horizontal surface that's close to the track. Use Ascend on it to get to the surface of the island above where Joku-usin Shrine is.
Adjust the Launcher
Use Ascend again to get out of the room. South of your position is a platform with a crank at the center, as well as a launcher and a conductor. Turn the crank so that the launcher faces east, step on the launcher, and strike the conductor with Riju's lightning to get to the other side.
Reach Dragonhead Island
| Reach Dragonhead Island Walkthrough |
|---|
Head East to Dragonhead Island
Almost there! To your east is a large island called Dragonhead Island and you must glide down to its eye
to reach your next destination.
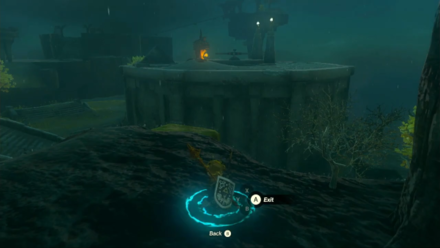
You will find Joku-u Shrine where you land. In front of it is a room with a circular gate similar to the one in The Closed Door.
Unlock the Door

You must have ten and a half hearts to push this door open. If you need more hearts, be sure to at least activate Joku-u Shrine's travel point and complete more Shrines for Lights of Blessing to increase your max hearts.
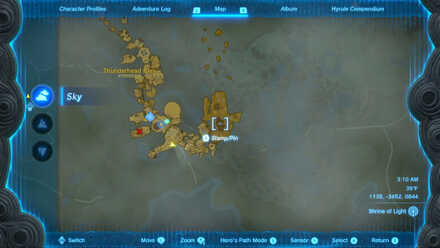
Behind it is a relic that, when interacted with, will open the floor and shoot a beam pinpointing your next destination.
| ◄ Previous Quest | Next Quest ▶ |
|---|---|
| Find the Fifth Sage | Guidance from Ages Past |
The Legend of Zelda: Tears of the Kingdom Related Guides

List of All Walkthroughs
| All Quest Types | ||
|---|---|---|
 Main Quests Main Quests |
 Side Quests Side Quests |
 Side Adventures Side Adventures |
List of All Main Quests
Comment
Author

The Legend of Zelda: Tears of the Kingdom Walkthrough & Guides Wiki
Secret of the Ring Ruins Walkthrough
Please participate in our site
improvement survey
03/2026
improvement survey
03/2026
Would you assist in
improving Game8's site?
improving Game8's site?

×
We are listening to our users' valuable opinions and discussing how to act on them.
The information collected through this survey will be used for the purpose of improving our services. In addition, the information will only be disclosed a part of a statistic in a format that will not allow identification of personal information.
Begin Survey
Not Now
×
Please rate each item regarding Game8.co's Advertisements.
Amount of Ads
Very Dissatisfied
Somewhat Dissatisfied
Fine
Somewhat Satisfied
Highly Satisfied
Placement of Ads
Timing of Ad Display
Ad Loading Speed
Safeness of Ads
Content of Ads
×
Please rate each item regarding Game8.co's Quality of Articles.
Amount of information
Very Dissatisfied
Somewhat Dissatisfied
Fine
Somewhat Satisfied
Highly Satisfied
Frequency of updates
Speed of new information
Accuracy of articles
Understandibility of articles
Readability of sentences
×
Please rate each item regarding Game8.co's Usability of the Site.
Ease of finding information
Very Dissatisfied
Somewhat Dissatisfied
Fine
Somewhat Satisfied
Highly Satisfied
Loading Speed
Use of Color
Font Size
Visibility of Images
Easy to Understand Layout
×
Please rate each item regarding Game8.co's Message Boards, Comments.
Ease of Writing
Very Dissatisfied
Somewhat Dissatisfied
Fine
Somewhat Satisfied
Highly Satisfied
Readability
Ease in Finding Information
Comment Quality
Comment Quantity
Admin Response
×
Please rate each item regarding Game8.co's Site's new design.
Please rate our site's new design
Very Dissatisfied
Somewhat Dissatisfied
Fine
Somewhat Satisfied
Highly Satisfied
Do you think that the website's design change makes the site easier to use?
Has the new design made it easier for you to find information on the site?
Has the new design improved the overall visual appeal of the site?
How would you rate your overall satisfaction with the new design of the site?
×
How likely are you to recommend Game8 to someone you know?
Very Unlikely
0
1
2
3
4
5
6
7
8
9
10
Very Likely
If you have other opinions regarding potential improvement to the website, please share them with us. We would appreciate your honest opinion.
Note: This is a free response section, so you can proceed without entering anything.
Note: Please be sure not to enter any kind of personal information into your response.
Note: Please be sure not to enter any kind of personal information into your response.
×
Thank You
×
Thank you for participating in our survey! Your answers will help us to improve the quality of our website and services.
We hope you continue to make use of Game8.
We hope you continue to make use of Game8.
Close
Rankings
- We could not find the message board you were looking for.
Gaming News


Popular Games

Genshin Impact Walkthrough & Guides Wiki
Honkai: Star Rail Walkthrough & Guides Wiki
Umamusume: Pretty Derby Walkthrough & Guides Wiki
Pokemon Pokopia Walkthrough & Guides Wiki
Resident Evil Requiem (RE9) Walkthrough & Guides Wiki
Monster Hunter Wilds Walkthrough & Guides Wiki
Wuthering Waves Walkthrough & Guides Wiki
Arknights: Endfield Walkthrough & Guides Wiki
Pokemon FireRed and LeafGreen (FRLG) Walkthrough & Guides Wiki
Pokemon TCG Pocket (PTCGP) Strategies & Guides Wiki


Recommended Games
Diablo 4: Vessel of Hatred Walkthrough & Guides Wiki
Fire Emblem Heroes (FEH) Walkthrough & Guides Wiki
Yu-Gi-Oh! Master Duel Walkthrough & Guides Wiki
Super Smash Bros. Ultimate Walkthrough & Guides Wiki
Pokemon Brilliant Diamond and Shining Pearl (BDSP) Walkthrough & Guides Wiki
Elden Ring Shadow of the Erdtree Walkthrough & Guides Wiki
Monster Hunter World Walkthrough & Guides Wiki
The Legend of Zelda: Tears of the Kingdom Walkthrough & Guides Wiki
Persona 3 Reload Walkthrough & Guides Wiki
Cyberpunk 2077: Ultimate Edition Walkthrough & Guides Wiki


All rights reserved
© Nintendo. The Legend of Zelda and Nintendo Switch are trademarks of Nintendo.
The copyrights of videos of games used in our content and other intellectual property rights belong to the provider of the game.
The contents we provide on this site were created personally by members of the Game8 editorial department.
We refuse the right to reuse or repost content taken without our permission such as data or images to other sites.