Crisis at Hyrule Castle Walkthrough
▲ Get Pristine Weapons from the depths!
△ All 1000 Koroks | All 4 Great Fairies
▲ 81 Addison Signs | 147 Caves | 58 Wells
△ Tips: Farm Rupees | Starting Armor
▲ Best Weapons | Best Armor | Best Food
Crisis at Hyrule Castle is a Main Quest in The Legend of Zelda: Tears of the Kingdom (TotK) that starts in Lookout Landing. Read on for a detailed walkthrough of Crisis at Hyrule Castle, where to find Captain Hoz, the quest's location and rewards, as well as other tips and strategies on how to complete this Main Quest!
| ◄ Previous Quest | Current Quest | Next Quest ▶ |
|---|---|---|
| Find Princess Zelda (Part 3) | Part 1 | Regional Phenomena |
| Regional Phenomena (Part 2) | Part 2 | The Dragon's Tears |
List of Contents
How to Unlock Crisis at Hyrule Castle
Find Purah in Lookout Landing
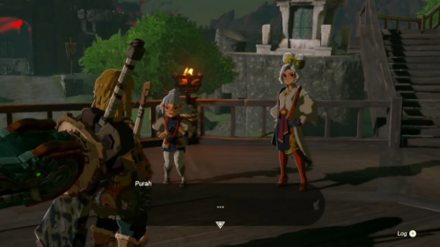
Head to Lookout Landing near the risen Hyrule Castle and find Purah. The Crisis at Hyrule Castle main quest will start after telling Purah what happened so far.
Central Hyrule - Lookout Landing
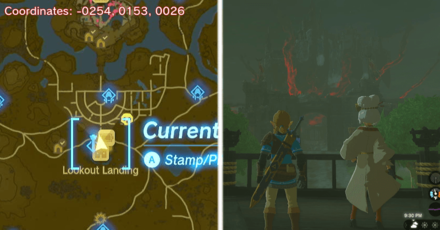
The exact coordinates for this quest on the map are -0254, 0153, 0026.
Rewards
| There doesn't seem to be any reward for this quest... *sad Korok noises* |
Crisis at Hyrule Castle Part 1 Walkthrough
Quest Objectives
| Crisis at Hyrule Castle Part 1 Walkthrough Guide |
|---|
Head to Hyrule Castle
To Hyrule Castle! Head north to the objective marker in Hyrule Castle, passing through the Hyrule Castle Town Ruins and Central Square.
The castle gates will be closed but you can open it with Ultrahand. Remember that the gate opens outwards, so pull it with Ultrahand and you're clear to proceed.
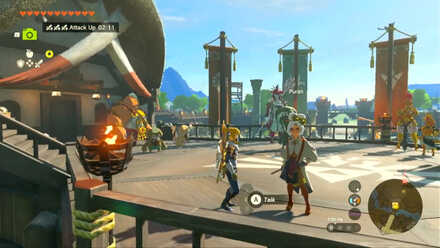
Meet Captain Hoz
Follow the winding road until you reach the First Gatehouse where you'll find Captain Hoz above.
You can only reach him either by using Ascend on a stone horizontal surface within the gatehouse. If you your ascend can't reach it, there are stairs on the side of the gatehouse that you can use to climb it if you have enough stamina.
Report Back to Purah
Drop from the east ledge and take the stairs down. Return to Lookout Landing and report to Purah what happened.
Talk to Scorpis
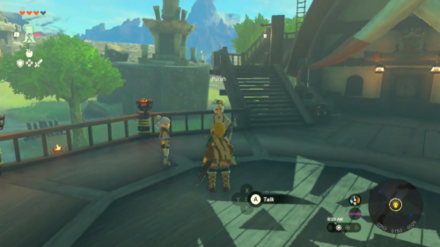
Talk to Scorpis at the center of the landing and he will open the hatch to the Emergency Shelter for you.
Here, you can find a bed where you can restore your hearts and skip time, a cooking pot where you can prepare dishes before you head back out, a Goddess Statue where you can convert blessings into Heart Containers or Stamina Wheels, and other Hylians to ask more info from.
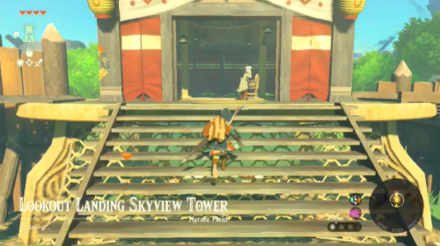
When you're ready, exit the shelter (whispers: try using Ascend!) and meet with Purah at the base of Skyview Tower. Mubs' shop is also open if you need supplies or armor to bump up your defense.
Use the Purah Pad on the Terminal
Interact with the terminal to add Skyview Tower to your map and activate its travel point! Purah will also give you a Paraglider.
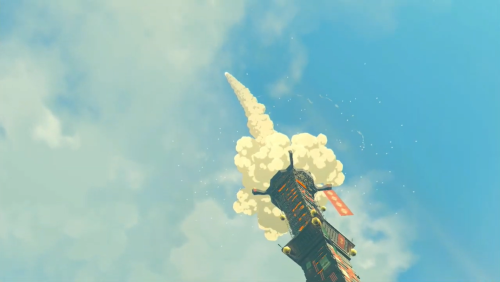
Scan the Surrounding Area

Step on the blue circle in the middle and prepare for launch. Take note that using the Paraglider slowly consumes stamina, and if you completely deplete your wheels midair, it will automatically close and drop you straight to the ground. Always keep an eye on your stamina!
| Button | Paraglider Action |
|---|---|
| X (while in midair) |
Open the Paraglider |
| B (while the Paraglider is open) |
Close the Paraglider |
After scanning the area, dive back down to the Lookout Landing. Don't forget to open your glider before reaching the ground!
Report Back to Purah
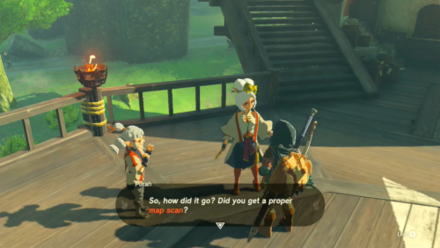
You'll find her again outside her room. Talk to her and she will point you to four locations in Hyrule, triggering the Regional Phenomena Main Quest.
Purchase Armor if You Have Enough Rupees

If you collected enough Rupees on your way to the landing, try purchasing a piece or two of the Hylian Set for a boost in defense, especially if you missed out some of the pieces of the Archaic Set from the Great Sky Island. You can also sell extra items if you're short on rupees.
Mub's shop also has Apples and Arrows on sale so buy some if you're running low on healing items or ammo.
List of All Armor and Locations
Try Obtaining the Champion's Leathers
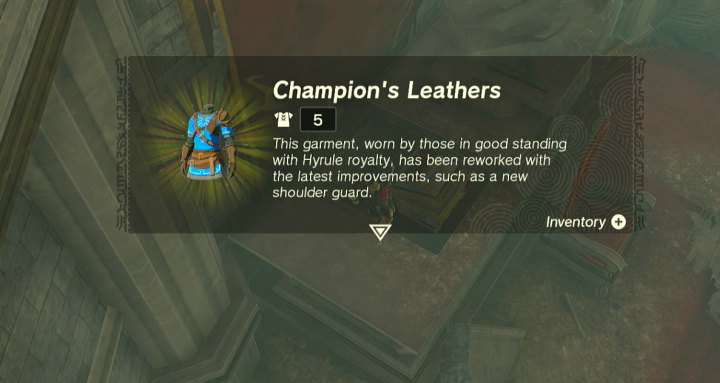
With the Lookout Landing Skyview Tower unlocked and the Paraglider available, you can now attempt to acquire Link's Champion's Leathers armor early. This can provide a major advantage as the Champion's Leathers are one of the best armor pieces in the game.
The Champion's Leathers are also based on the Champion's Tunic from Breath of the Wild, and matches the armor worn by link in the prologue sequence.
How to Get the Champion's Leathers: Location and Stats
Activate Skyview Towers to Expand the Map
Activating a Skyview Tower and performing a scan reveals the surrounding area and add its topography on your map, both for the Surface and Sky maps. This should help you spot points of interests and discover routes to your next destination.
You will also be launched high up in the air as part of the scanning process, where you can dive or glide straight to a nearby location that you want to check out!
Skyview Tower Map: Tower Order and Locations
| ◄ Previous Quest | Next Quest ▶ |
|---|---|
| Find Princess Zelda (Part 3) | Regional Phenomena |
Crisis at Hyrule Castle Part 2 Walkthrough
Quest Objectives
| Crisis at Hyrule Castle Part 2 Walkthrough Guide |
|---|
Follow Princess Zelda into the Castle
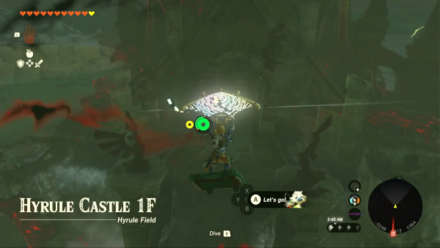
Go down to the base of Lookout Landing Skyview Tower and use the launch pad. Use this to glide towards the entrance of the castle. You will hear her once again upon landing on the platform.
Head to the Second Gatehouse

he objective marker will move to the Second Gatehouse, southeast of your location. Head there and survive the ambush against a Black Boss Bokoblin and two Black Bokoblins.
Travel to the North Side of Hyrule Castle B2
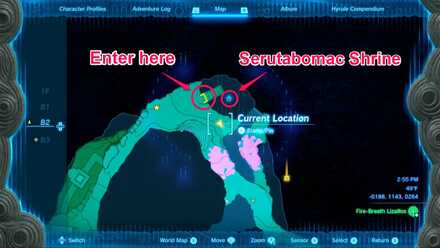
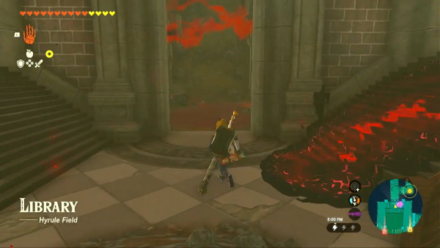
Travel to the north side of Hyrule Castle B2 and find the stairs beneath Serutabomac Shrine. This leads to the Library where you'll find Princess Zelda again.
You'll be up against a Black Hinox and three Chuchus, each with different elemental affinity.
Go Up the Stairs
Go up the stairs on the north end of the Library and follow the path to the right to find the princess again, who will spawn four Gibdos.
Head into Princess Zelda's Room
Princess Zelda can be found next inside her former room, located southwest of the castle. You can get here by passing through the Sanctum again (Hyrule Castle's central area).
Approach her and defeat the three Fire Lizalfos.
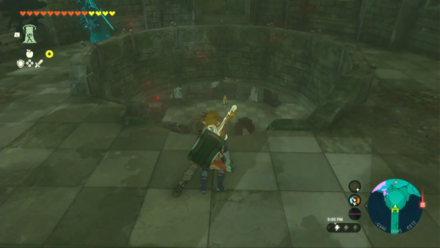
Continue Following Princess Zelda
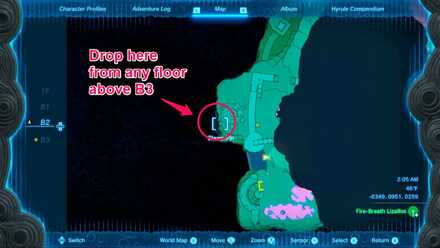
Check your map and you will find out that the princess has moved on the floor below. You'll need to get to a ledge on any of the floors above it and glide down. The entrance is easy to miss so always look on your minimap to check if you're already above it.
Two Ice Keese will appear in front of you and a Silver Moblin behind. Quickly take out the Keeses with a one-handed weapon before dealing with the Silver Moblin.
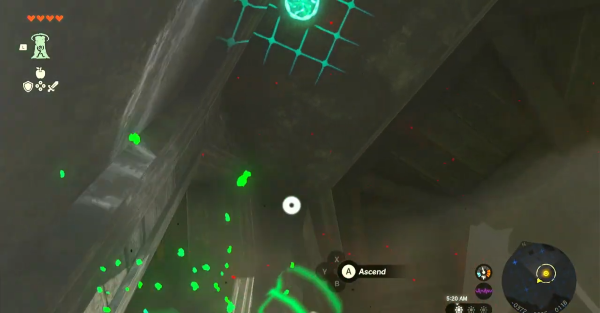
Use Ascend
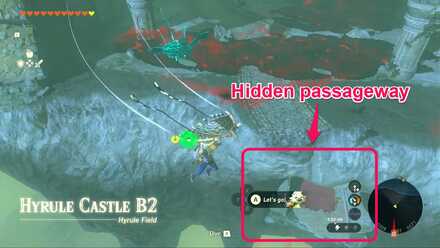
Use Ascend to get out of the room and head to the southern cliff, above where the marker is. Glide down to the hidden passageway and approach Zelda on the hallway.
Defeat the four Shock Likes to proceed.
Head into the Sanctum
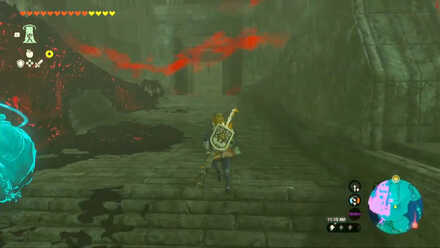
You will hear the princess' voice again, saying she's waiting for you. Based on your most recent encounters with her, this sounds like some major trouble, honestly, so best be prepared before you continue.
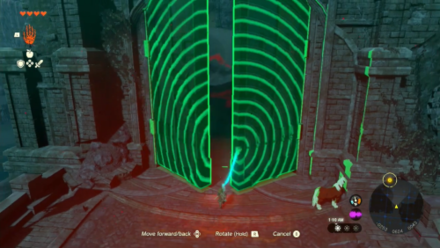
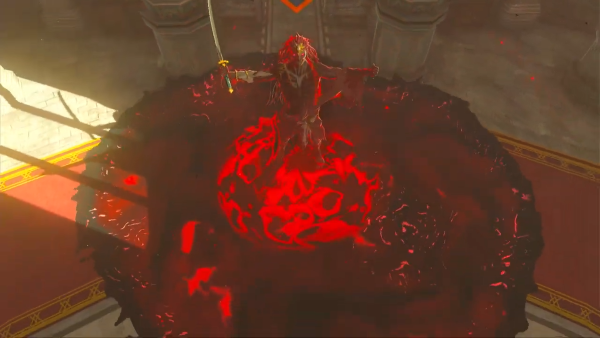
Ascend back to Hyrule Castle 1F and enter the Sanctum for a cutscene... and a boss fight.
Defeat Phantom Ganon

You'll actually face ten phantoms here—five on the first half, another five on the second—and you have to defeat all of them to deplete the big health bar at the top of your screen.
How to Beat Phantom Ganon Boss
Return to Purah
After the fight, grab the Heart Container and return to Lookout Landing. Talk to Purah at her usual spot to discuss your next game plan.
The fifth sage, huh? Before we find them, though, let's take a detour to a quest we skipped earlier when it's still difficult to go around the map.
| ◄ Previous Quest | Next Quest ▶ |
|---|---|
| Regional Phenomena (Part 2) | The Dragon's Tears |
How to Beat Phantom Ganon
Focus on One and Execute Perfect Dodges

Since this is a five on five battle (assuming that you have all four avatars active), you should focus on one phantom first and let your avatars distract the others. Instead of blindly swinging your weapon, get defensive and wait for it to attack before executing a perfect dodge followed by a Flurry Rush.
Try not to go aggressive too much and focus on timing your dodges, especially since another phantom can randomly charge at you and attack. Each phantom should go down in one or two flurry rushes.
Use Yunobo's Avatar at the Phantom Spreading Sludge
At the start of the second phase, the middle phantom will slowly spread gloom on the floor. Interrupt it using Yunobo's ability before it immobilizes your other avatars and cover the entire floor.
If ever it does, just keep attacking the other phantoms and prepare to heal afterwards. They will retreat to the center and switch weapons after dealing enough damage.
Stock Up on Bomb Flowers
You'll also be going up against Phantom Ganon's clones in a relatively small area, so using bows infused with Bomb Flowers is an effective way to deal with them as the explosions can deal splash damage to the other phantoms.
To add to this, the explosions will also interrupt Phantom Ganon when it is immobilizing the avatars.
You can maximize its AoE damage and effect even further by equipping a bow that fires off multiple arrows at once such as the Duplex Bow and Mighty Lynel Bow.
How to Beat Phantom Ganon Boss
The Legend of Zelda: Tears of the Kingdom Related Guides

List of All Walkthroughs
| All Quest Types | ||
|---|---|---|
 Main Quests Main Quests |
 Side Quests Side Quests |
 Side Adventures Side Adventures |
List of All Main Quests
| Recommended Main Quest Order | |
|---|---|
| 0 | Prologue |
| 1 | Find Princess Zelda |
| 2 | The Closed Door |
| 3 | Find Princess Zelda (Part 2) |
| 4 | To the Kingdom of Hyrule |
| 5 | Find Princess Zelda (Part 3) |
| 6 | Crisis at Hyrule Castle |
| 7 | Regional Phenomena |
| 8 | Camera Work in the Depths |
| 9 | Impa and the Geoglyphs |
| 10 | Tulin of Rito Village |
| 11 | A Mystery in the Depths |
| 12 | Riju of Gerudo Town |
| 13 | Yunobo of Goron City |
| 14 | The Sludge-Covered Statue |
| 15 | Sidon of the Zora |
| 16 | The Broken Slate |
| 17 | Clues to the Sky |
| 18 | Sidon of the Zora (Part 2) |
| 19 | Restoring the Zora Armor |
| 20 | Sidon of the Zora (Part 3) |
| 21 | Regional Phenomena (Part 2) |
| 22 | Crisis at Hyrule Castle (Part 2) |
| 23 | The Dragon's Tears |
| 24 | Find the Fifth Sage |
| 25 | Secret of the Ring Ruins |
| 26 | Guidance from Ages Past |
| 27 | Trail of the Master Sword |
| 28 | Recovering the Hero's Sword |
| 29 | Find the Fifth Sage (Part 2) |
| 30 | Destroy Ganondorf |
Comment
Author

The Legend of Zelda: Tears of the Kingdom Walkthrough & Guides Wiki
Crisis at Hyrule Castle Walkthrough
Rankings
- We could not find the message board you were looking for.
Gaming News
![Neverness to Everness (NTE) Review [Beta Co-Ex Test] | Rolling the Dice on Something Special](https://img.game8.co/4414628/dd3192c8f1f074ea788451a11eb862a7.jpeg/show)


Popular Games

Genshin Impact Walkthrough & Guides Wiki
Honkai: Star Rail Walkthrough & Guides Wiki
Arknights: Endfield Walkthrough & Guides Wiki
Umamusume: Pretty Derby Walkthrough & Guides Wiki
Wuthering Waves Walkthrough & Guides Wiki
Pokemon TCG Pocket (PTCGP) Strategies & Guides Wiki
Abyss Walkthrough & Guides Wiki
Zenless Zone Zero Walkthrough & Guides Wiki
Digimon Story: Time Stranger Walkthrough & Guides Wiki
Clair Obscur: Expedition 33 Walkthrough & Guides Wiki


Recommended Games
Fire Emblem Heroes (FEH) Walkthrough & Guides Wiki
Pokemon Brilliant Diamond and Shining Pearl (BDSP) Walkthrough & Guides Wiki
Diablo 4: Vessel of Hatred Walkthrough & Guides Wiki
Super Smash Bros. Ultimate Walkthrough & Guides Wiki
Yu-Gi-Oh! Master Duel Walkthrough & Guides Wiki
Elden Ring Shadow of the Erdtree Walkthrough & Guides Wiki
Monster Hunter World Walkthrough & Guides Wiki
The Legend of Zelda: Tears of the Kingdom Walkthrough & Guides Wiki
Persona 3 Reload Walkthrough & Guides Wiki
Cyberpunk 2077: Ultimate Edition Walkthrough & Guides Wiki


All rights reserved
© Nintendo. The Legend of Zelda and Nintendo Switch are trademarks of Nintendo.
The copyrights of videos of games used in our content and other intellectual property rights belong to the provider of the game.
The contents we provide on this site were created personally by members of the Game8 editorial department.
We refuse the right to reuse or repost content taken without our permission such as data or images to other sites.