Serutabomac Shrine Puzzle Solution
▲ Get Pristine Weapons from the depths!
△ All 1000 Koroks | All 4 Great Fairies
▲ 81 Addison Signs | 147 Caves | 58 Wells
△ Tips: Farm Rupees | Starting Armor
▲ Best Weapons | Best Armor | Best Food

Serutabomac Shrine (The Way Up) in The Legend of Zelda: Tears of the Kingdom (TotK) can be found within Hyrule Caste in the Hyrule Field Region. Read on to learn its location, puzzle solution, as well as all treasure chest locations in Serutabomac Shrine.
List of Contents
Serutabomac Shrine Location
Within Hyrule Castle B1
Serutabomac Shrine can be found within the Hyrule Castle at the Hyrule Field Region in the Surface. The exact coordinates of the Serutabomac Shrine is at -0178, 1169, 0280.
You may need to equip the Depths Set or prepare dishes that restore gloom-afflicted hearts, given that Hyrule Castle is stricken with Gloom.
Travel to Lookout Landing Skyview Tower, and launch yourself from there to glide north towards Hyrule Castle.
Can Be a Warp Point to Reach the Hylian Shield Nearby
Once you have activated the shrine, you can go back and use it as a starting point to reach the Hylian Shield early at the Hyrule Docks.
How to Get the Hylian Shield Early
Puzzle Shrine
This is a Puzzle type Shrine, so you need to solve the puzzle to reach the end and get a Light of Blessing.
Try to look around the area to find a way to move forward, and remember to use Link's Ultrahand, Ascend, or Recall abilities!
All Abilities and How to Unlock
Serutabomac Shrine Puzzle Solution
- Place the Slab on the Two Poles on the Wall
- Use Ascend to Reach the Top
- Attach the Two Slabs and Place It on the Pole
- Use Ascend to Reach the Top
- Place the Square Slab on the Spikes
- Use Recall on the Slab to Reach the Higher Platform
- Open the Hidden Treasure Chest
- Attach the Three Slabs to Create a Platform to Use Ascend With
- Examine the Shrine
Serutabomac Shrine Video Guide
1. Place the Slab on the Two Poles on the Wall
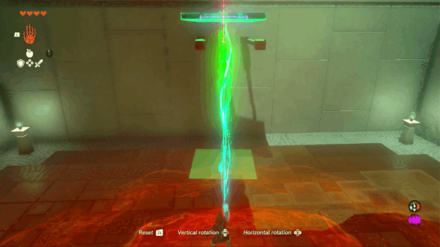
Use Ultrahand to move the slab and place it on the two poles on the wall.
2. Use Ascend to Reach the Top
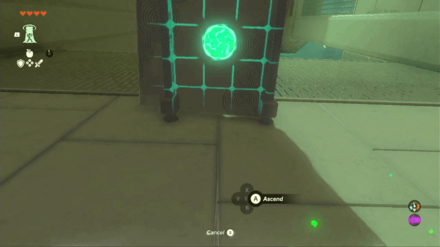
After placing the slab, use Ascend to reach the top of it and proceed to the next area.
3. Attach the Two Slabs and Place It on the Pole
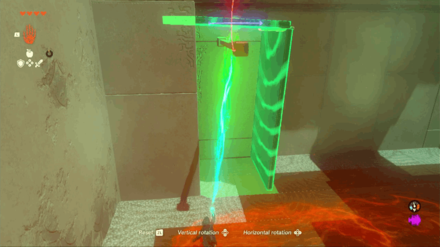
Attach the two slabs to form an L-shaped block and rotate it. Place the shorter end on the pole to use it as a platform that you can Ascend through to the top.
4. Use Ascend to Reach the Top

After placing the combined slab, use Ascend to reach the top of it and proceed to the next area.
5. Place the Square Slab on the Spikes
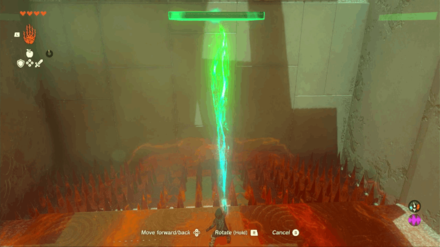
Use Ultrahand to lift the slab high up and drop it down towards the spikes. Doing this lets you use Recall to rewind that action to create a vertical moving platform.
6. Use Recall on the Slab to Reach the Higher Platform
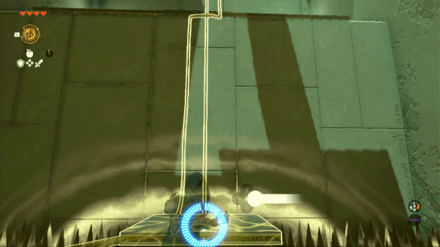
Jump on the square slab and use Recall on it. Wait for the platform to ascend in order for you to reach the higher platform.
7. Open the Hidden Treasure Chest
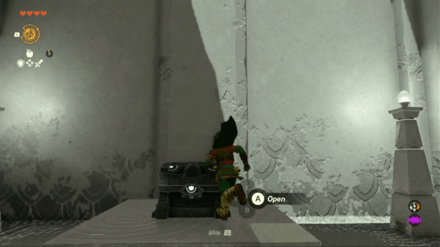
Head up the elevated platform and open the treasure chest to obtain a Magic Rod.
8. Attach the Three Slabs to Create a Platform to Use Ascend With
The final puzzle contains three slabs that you can use to attach together to create a platform. Place the combined slabs in such a way that you can use Ascend and reach the higher platform.
9. Examine the Shrine

Examine the shrine to obtain one Light of Blessing.
Serutabomac Shrine Rewards and Chest Locations
Magic Rod
| Chest Location | Chest Contents |
|---|---|
 |
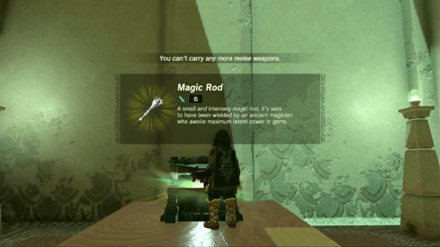 |
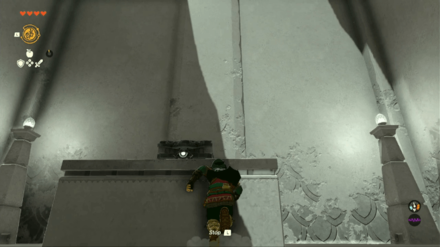
You can find a treasure chest with a Magic Rod in the small area with spikes. Use Ultrahand and Recall on the square slab to create a vertical moving platform to reach the higher area.
The Legend of Zelda: Tears of the Kingdom Related Guides

Shrines Lists
| Shrines Lists | |
|---|---|
| All Shrines | All Shrine Quests |
All Great Sky Island Shrines
| Great Sky Island Shrines | ||
|---|---|---|
| Ukouh Shrine | In-isa Shrine | Gutanbac Shrine |
| Nachoyah Shrine | - | - |
All Hyrule Field Shrines
All Tabantha Shrines
| Tabantha Shrines | ||
|---|---|---|
| Oromuwak Shrine | Gatakis Shrine | Nouda Shrine |
| Wao-os Shrine | Iun-orok Shrine | Turakawak Shrine |
| Gasas Shrine | Mayausiy Shrine | Ikatak Shrine |
| Ga-ahisas Shrine | Ganos Shrine | Taunhiy Shrine |
All Hebra Shrines
All Great Hyrule Forest Shrines
| Great Hyrule Forest Shrines | ||
|---|---|---|
| Sakunbomar Shrine | Pupunke Shrine | Ninjis Shrine |
| Musanokir Shrine | Kikakin Shrine | Kiuyoyou Shrine |
| Ekochiu Shrine | Mayam Shrine | Simosiwak Shrine |
All Akkala Shrines
All Eldin Shrines
All Lanayru Shrines
All Necluda Shrines
All Faron Shrines
| Faron Shrines | ||
|---|---|---|
| Jiukoum Shrine | Ishokin Shrine | Utsushok Shrine |
| Joku-u Shrine | Joku-usin Shrine | - |
All Gerudo Shrines
Comment
Author
The Legend of Zelda: Tears of the Kingdom Walkthrough & Guides Wiki
Serutabomac Shrine Puzzle Solution
Rankings
- We could not find the message board you were looking for.
Gaming News
Popular Games

Genshin Impact Walkthrough & Guides Wiki

Honkai: Star Rail Walkthrough & Guides Wiki

Umamusume: Pretty Derby Walkthrough & Guides Wiki

Pokemon Pokopia Walkthrough & Guides Wiki

Resident Evil Requiem (RE9) Walkthrough & Guides Wiki

Monster Hunter Wilds Walkthrough & Guides Wiki

Wuthering Waves Walkthrough & Guides Wiki

Arknights: Endfield Walkthrough & Guides Wiki

Pokemon FireRed and LeafGreen (FRLG) Walkthrough & Guides Wiki

Pokemon TCG Pocket (PTCGP) Strategies & Guides Wiki
Recommended Games

Diablo 4: Vessel of Hatred Walkthrough & Guides Wiki

Cyberpunk 2077: Ultimate Edition Walkthrough & Guides Wiki

Fire Emblem Heroes (FEH) Walkthrough & Guides Wiki

Yu-Gi-Oh! Master Duel Walkthrough & Guides Wiki

Super Smash Bros. Ultimate Walkthrough & Guides Wiki

Pokemon Brilliant Diamond and Shining Pearl (BDSP) Walkthrough & Guides Wiki

Elden Ring Shadow of the Erdtree Walkthrough & Guides Wiki

Monster Hunter World Walkthrough & Guides Wiki

The Legend of Zelda: Tears of the Kingdom Walkthrough & Guides Wiki

Persona 3 Reload Walkthrough & Guides Wiki
All rights reserved
© Nintendo. The Legend of Zelda and Nintendo Switch are trademarks of Nintendo.
The copyrights of videos of games used in our content and other intellectual property rights belong to the provider of the game.
The contents we provide on this site were created personally by members of the Game8 editorial department.
We refuse the right to reuse or repost content taken without our permission such as data or images to other sites.


![Monster Hunter Stories 3 Review [First Impressions] | Simply Rejuvenating](https://img.game8.co/4438641/2a31b7702bd70e78ec8efd24661dacda.jpeg/thumb)


