Yansamin Shrine Location and Walkthrough
▲ Get Pristine Weapons from the depths!
△ All 1000 Koroks | All 4 Great Fairies
▲ 81 Addison Signs | 147 Caves | 58 Wells
△ Tips: Farm Rupees | Starting Armor
▲ Best Weapons | Best Armor | Best Food
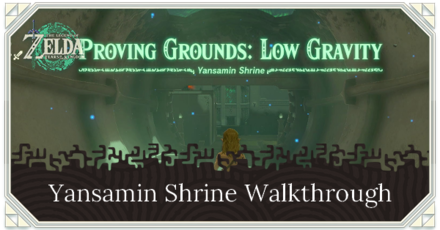
Yansamin Shrine (Proving Grounds: Low Gravity) in The Legend of Zelda: Tears of the Kingdom (TotK) can be found on Zonaite Forge Island in the East Necluda Sky Region. Read on to learn how to reach it, its location, puzzle solution, as well as all treasure chest locations in Yansamin Shrine.
Yansamin Shrine Location
Zonaite Forge Island, East Necluda Sky Region
Yansamin Shrine can be found on Zonaite Forge Island in the East Necluda Sky region. The exact coordinates of the shrine is at 2353, -1783, 1475.
Note that in order to reach this shrine, you will need the Zora Armor to traverse the waterfall! Without it, you will consume quite a few resources which isn't worth the cost.
Travel to Rabella Wetlands Skyview Tower, and launch yourself from there to glide north towards the Peak of Awakening.
Proving Grounds
This is a Proving Grounds Shrine where your combat skills and resourcefulness will be tested.
Use the weapons and items inside the Shrine to defeat enemies and clear the area!
How to Reach Yansamin Shrine
- Head to the Peak of Awakening
- Use Recall on Island Pieces
- Glide to the Waterfall
- Add Rockets to the Platform
- Activate the Rockets
- Glide to the Next Island
- Activate the Draft
- Ride the Winds
- Avoid the Lasers
Video Walkthrough
1. Head to the Peak of Awakening
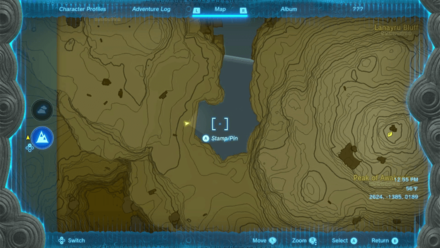
To access the Shrine, you'll need to swim up a waterfall located west of the Peak of Awakening.
2. Use Recall on Island Pieces
At the peak, look for any large island pieces that fall from the sky. Use Recall to have it rise back up in the air.
3. Glide to the Waterfall
You won't make it all the way up, but just high enough to glide to the waterfall! Touch the waterfall and the Zora Armor should help you swim up automatically!
4. Add Rockets to the Platform
[:movie:3723467:{mode:autoplay
There will be a construct and platform on the end of the island. Once the construct is defeated, or knocked off the platform you can use Ultrahand to attach the rockets!
5. Activate the Rockets
Swipe at the Rockets to raise the platform. It'll be a quick ride so get ready to hop off!
6. Glide to the Next Island
At the peak, jump off and glide to the next island!
7. Activate the Draft
Examine the device to activate the drafts that will help you go up the island.
8. Ride the Winds
There are a number of drafts leading upwards. Ride each till you find a platform with a hole in the center.
9. Avoid the Lasers
The hole in the center leads to the Shrine, but is littered with lasers. You'll need to dive in and dodge them all to get there! On the plus side, if you take any damage, you can heal in the pool at the bottom!
Yansamin Shrine Puzzle Solution
- Grab Your Weapons
- Take on the First Construct
- Fuse the Rocket
- Fly Up with the Rocket
- Defeat the Construct
- Go to the Next Construct
- Disarm the Construct
- Isolate Fights
- Defeat All 3 Constructs
- Fuse the Beam Emitter
- Jump Down and Take Down Construct
- Open the Chest
- Examine the Shrine
1. Grab Your Weapons
Since this is a Proving Grounds, you cannot bring any of your equipment with you. Grab what's provided from the rack to your left!
2. Take on the First Construct
To the left is a lone construct. Use the Long Stick to keep your distance and defeat it quickly. Take their items and weapons.
3. Fuse the Rocket
With your shield, fuse the rocket! You can optionally do it on both shields, but we recommend always keeping one free.
4. Fly Up with the Rocket
Use the shield to fly up! You'll want to head to the highest platform with the lone construct.
5. Defeat the Construct
This one is an archer, so overwhelm it by keeping close and attacking quickly.
6. Go to the Next Construct
The next one is also a lone construct on a lower platform. This one can pack a punch though, so be ready to defend against it.
7. Disarm the Construct
Your best bet against this construct is to strike fast and knock the sword from its hand. This allows you to defeat it much quicker!
8. Isolate Fights
The next platform involves 3 Constructs. You'll need to make the most of your shield here to isolate fights while taking them down one by one.
9. Defeat All 3 Constructs
Isolating your fights should mean you can take the 3 down in quick succession. Just be sure you don't accidentally detonate any bombs around you.
Optional: Fuse a Bomb with your Shield
Use Fuse to attach a bomb to your shield as a precaution. This is optional though, and we wouldn't recommend it if you only have one shield left.
10. Fuse the Beam Emitter
Use Fuse on your shield and the Beam Emitter. You can attack the constructs here from a distance, taking them out easily!
11. Jump Down and Take Down Construct
The last construct really packs a punch if you let it fuse its weapon. So you'll want to take it by surprise by jumping down and using your best weapons! Defeating this final one will clear the Proving Ground!
12. Open the Chest
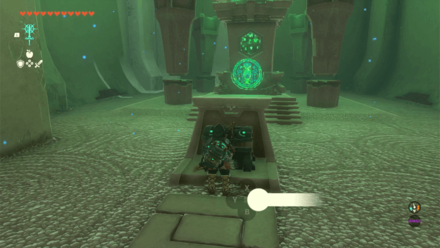
Past the doors is a chest that contains a Large Zonaite inside!
13. Examine the Shrine
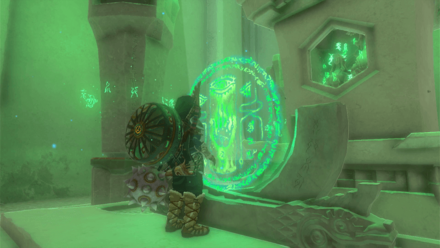
Examine the shrine to receive your reward!
Yansamin Shrine Rewards and Chest Locations
Large Zonaite
| Chest Location | Chest Contents |
|---|---|
 |
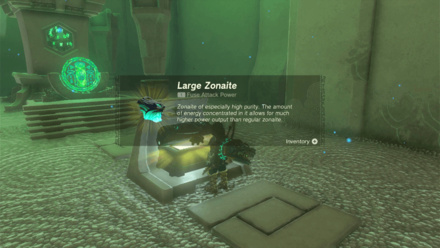 |
Defeat all the constructs in the shrine to unlock the door. Beyond the door is a chest containing a Large Zonaite inside!
The Legend of Zelda: Tears of the Kingdom Related Guides

Shrines Lists
| Shrines Lists | |
|---|---|
| All Shrines | All Shrine Quests |
All Great Sky Island Shrines
| Great Sky Island Shrines | ||
|---|---|---|
| Ukouh Shrine | In-isa Shrine | Gutanbac Shrine |
| Nachoyah Shrine | - | - |
All Hyrule Field Shrines
All Tabantha Shrines
| Tabantha Shrines | ||
|---|---|---|
| Oromuwak Shrine | Gatakis Shrine | Nouda Shrine |
| Wao-os Shrine | Iun-orok Shrine | Turakawak Shrine |
| Gasas Shrine | Mayausiy Shrine | Ikatak Shrine |
| Ga-ahisas Shrine | Ganos Shrine | Taunhiy Shrine |
All Hebra Shrines
All Great Hyrule Forest Shrines
| Great Hyrule Forest Shrines | ||
|---|---|---|
| Sakunbomar Shrine | Pupunke Shrine | Ninjis Shrine |
| Musanokir Shrine | Kikakin Shrine | Kiuyoyou Shrine |
| Ekochiu Shrine | Mayam Shrine | Simosiwak Shrine |
All Akkala Shrines
All Eldin Shrines
All Lanayru Shrines
All Necluda Shrines
All Faron Shrines
| Faron Shrines | ||
|---|---|---|
| Jiukoum Shrine | Ishokin Shrine | Utsushok Shrine |
| Joku-u Shrine | Joku-usin Shrine | - |
All Gerudo Shrines
Comment
Author
The Legend of Zelda: Tears of the Kingdom Walkthrough & Guides Wiki
Yansamin Shrine Location and Walkthrough
improvement survey
03/2026
improving Game8's site?

Your answers will help us to improve our website.
Note: Please be sure not to enter any kind of personal information into your response.

We hope you continue to make use of Game8.
Rankings
- We could not find the message board you were looking for.
Gaming News
Popular Games

Genshin Impact Walkthrough & Guides Wiki

Honkai: Star Rail Walkthrough & Guides Wiki

Umamusume: Pretty Derby Walkthrough & Guides Wiki

Pokemon Pokopia Walkthrough & Guides Wiki

Resident Evil Requiem (RE9) Walkthrough & Guides Wiki

Monster Hunter Wilds Walkthrough & Guides Wiki

Wuthering Waves Walkthrough & Guides Wiki

Arknights: Endfield Walkthrough & Guides Wiki

Pokemon FireRed and LeafGreen (FRLG) Walkthrough & Guides Wiki

Pokemon TCG Pocket (PTCGP) Strategies & Guides Wiki
Recommended Games

Diablo 4: Vessel of Hatred Walkthrough & Guides Wiki

Cyberpunk 2077: Ultimate Edition Walkthrough & Guides Wiki

Fire Emblem Heroes (FEH) Walkthrough & Guides Wiki

Yu-Gi-Oh! Master Duel Walkthrough & Guides Wiki

Super Smash Bros. Ultimate Walkthrough & Guides Wiki

Pokemon Brilliant Diamond and Shining Pearl (BDSP) Walkthrough & Guides Wiki

Elden Ring Shadow of the Erdtree Walkthrough & Guides Wiki

Monster Hunter World Walkthrough & Guides Wiki

The Legend of Zelda: Tears of the Kingdom Walkthrough & Guides Wiki

Persona 3 Reload Walkthrough & Guides Wiki
All rights reserved
© Nintendo. The Legend of Zelda and Nintendo Switch are trademarks of Nintendo.
The copyrights of videos of games used in our content and other intellectual property rights belong to the provider of the game.
The contents we provide on this site were created personally by members of the Game8 editorial department.
We refuse the right to reuse or repost content taken without our permission such as data or images to other sites.


![Monster Hunter Stories 3 Review [First Impressions] | Simply Rejuvenating](https://img.game8.co/4438641/2a31b7702bd70e78ec8efd24661dacda.jpeg/thumb)


