This survey will take about 1 minute.
Your answers will help us to improve our website.
Zelda: Tears of the Kingdom (TotK)
Yunobo of Goron City Walkthrough
▲ Get Pristine Weapons from the depths!
△ All 1000 Koroks | All 4 Great Fairies
▲ 81 Addison Signs | 147 Caves | 58 Wells
△ Tips: Farm Rupees | Starting Armor
▲ Best Weapons | Best Armor | Best Food
Yunobo of Goron City is a Main Quest in The Legend of Zelda: Tears of the Kingdom (TotK) that starts in Goron City. Read on for a detailed walkthrough of Yunobo of Goron City, its location and rewards, as well as other tips and strategies on how to complete this Main Quest!
| ◄ Previous Quest | Next Quest ▶ |
|---|---|
| Riju of Gerudo Town | The Sludge-Covered Statue |
List of Contents
How to Unlock Yunobo of Goron City
Approach Bludo in Goron City
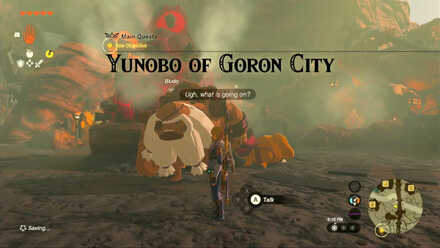
After unlocking Regional Phenomena, head northeast to Goron City in the Eldin region. Find and approach Bludo, who is scolding another Goron lying on the ground, to start the Yunobo of Goron City Main Quest.
Eldin Canyon - Goron City
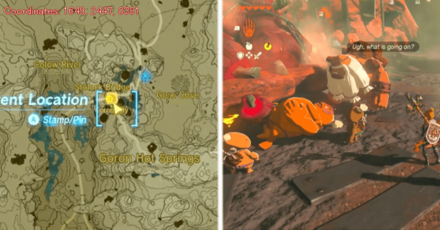
The exact coordinates for this quest on the map are 1649, 2447, 0381.
Rewards
| Rewards |
|---|
| ・Vow of Yunobo, Sage of Fire |
Yunobo of Goron City Walkthrough Guide
| Yunobo of Goron City Walkthrough Guide |
|---|
Make Your Way to YunoboCo Storage

Follow the path out of Goron City to YunoboCo HQ, located directly north. Once there, talk to Slergo and Offrak at the entrance of the storage area and offer your assistance so they can let you pass through.
However, you will need a fire-resistant armor first before you can go down or you're toast.
From the storage entrance, head west to the HQ and purchase the Flamebreaker Armor for 700 Rupees.
Defeat Yunobo
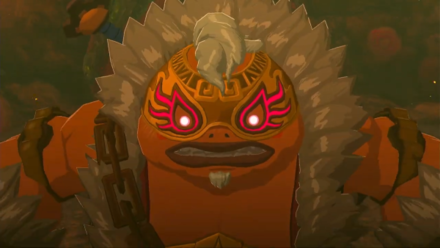
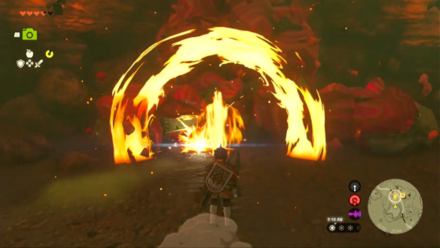
Put on the Flamebreaker Armor and head down the storage area to find Yunobo and... Zelda?!
Well, whatever Zelda whispered to him, he's certainly filled with unreasonable rage now. Switch to your battle stance and defeat Yunobo.
Yunobo is immune to all types of damage unless he's stunned. Save your weapons' durability and just dodge his attacks you get the perfect opportunity to strike.
Move Sideways to Avoid His Roll Attack
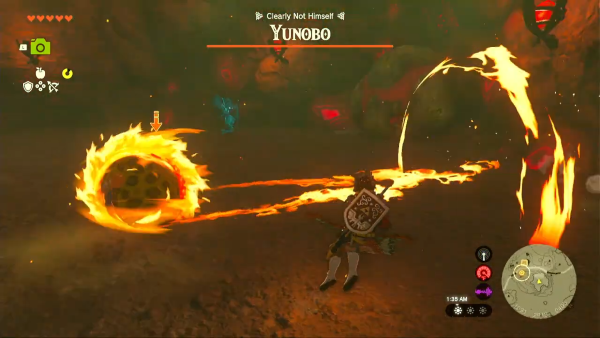
Yunobo attacks by curling up and rolling straight at you with extreme velocity. There are no visual or audio cues for when to dodge sideways—he'll just suddenly rush straight until he hits something—so keep your distance while moving sideways or jump to the side if needed.
Attack Him Once Stunned

After crashing into the walls a few times, Yunobo will be stunned and finally be vulnerable. While in this state, attack him with any weapon to cut his health by a third and slowly break the mask controlling him.
Yunobo will also shorten the wind up time of his attacks each time he gets damaged, down to around 2 seconds per roll, so be careful.
Successfully stun and attack him thrice to win the fight and get Yunobo back to his normal self.
Destroy the Marbled Rocks
Now you get to control Yunobo (sort of). Walk up to Yunobo, press the A button, then point him at the red rocks blocking the tunnel. Press the A button again to have Yunobo unleash his charge attack at the red rocks, clearing the path.
Climb to the Top of Death Mountain
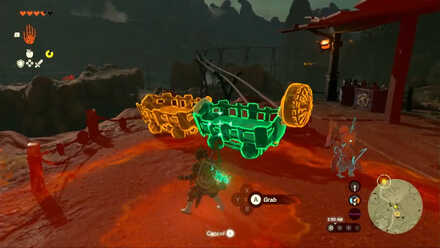
Walk east past the HQ to find carts and a fan. Attach the fan to one of the carts and use it to cross to the other side through the rail.
Change Tracks
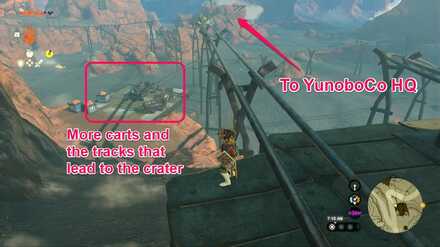
Hop off once you're at the end and turn right down the slope where you'll find more carts.
Create another moving cart using the fan and one of the carts below, then ride it all the way to the end. This should take you close to the crater.
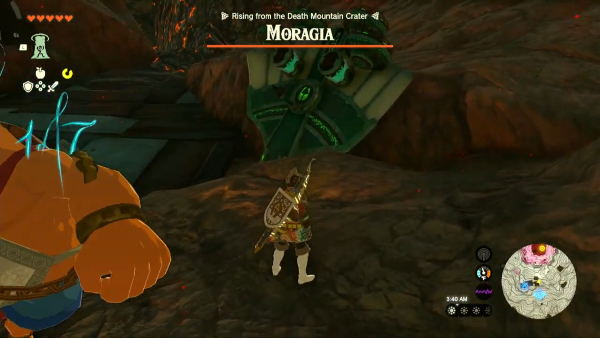
Defeat Moragia
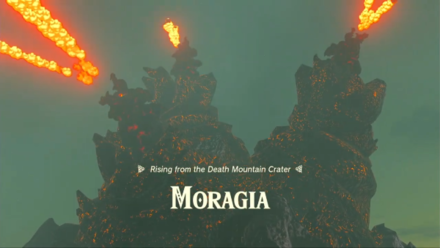
Follow Yunobo up the stairs for a cutscene, which will be followed by a boss fight against Moragia.
Use the Nearby Makeshift Plane to Fly Around
Right after the battle starts, grab the neatly built makeshift plane to your right with Ultrahand and place it on the platform. Hop on and grab the control stick to get the plane flying. Don't worry, Yunobo will also hop on and be ready to get lobbed at Moragia.
While in flight, avoid the stream of volcanic rocks that each head will spew by steering the stick to the right direction.
Destroy the Three Heads by Launching Yunobo
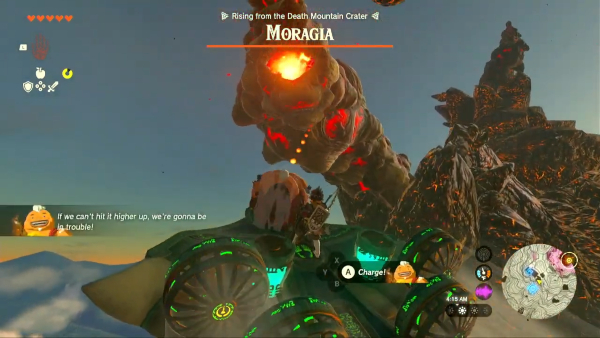
This gigantic boss looks terrifying but is actually a total pushover. Get close to each head so you can easily adjust Yunobo's trajectory then use his charge attack.
Each head only takes a single hit to destroy so this should be a piece of rock cake as long as you avoid the enemy projectiles.
Follow Yunobo into the Crater

Before you follow Yunobo down, make sure you have some Brightbloom Seeds with you as you're about to enter a part of the Depths.
Once everything's ready, dive down into the crater until you reach the lowest level of the Death Mountain Chasm. Watch out for the lava lake below!
Activate Mustis Lightroot

Follow the direction of the objective marker and activate Mustis Lightroot near it. Talk to Yunobo afterwards to progress the quest.
All 120 Lightroot Locations and Maps
Investigate Where the Voice Came From
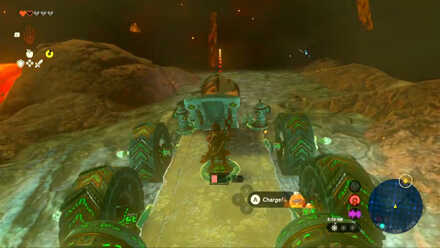
Head west and destroy the red rocks with Yunobo's charge attack to clear the way. Continue following the objective marker while fending off monsters and clearing red rocks along the way until you reach another mine cart tracks.
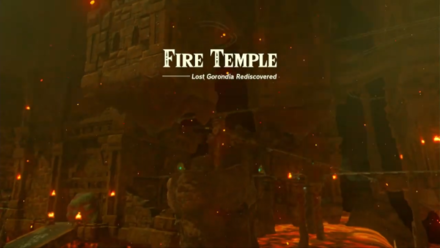
Reach the Fire Temple

Create a movable cart and ride it all the way to the end. Prepare to launch Yunobo at the enemies and red rocks that you'll run into.The tracks will bring you straight to the entrance of the next major dungeon.
Fire Temple Walkthrough and Puzzle Solutions
Clear the Fire Temple
Head inside the Fire Temple and defeat the Marbled Gohma to advance this quest.
Defeating the dungeon boss will reward you with the Vow of Yunobo, Sage of Fire. You will also return to Goron City with Yunobo afterwards, completing the main quest.
Finally, to the last temple! Fortunately, the Lanayru Great Spring region isn't that far from here.
How to Beat Marbled Gohma (Fire Temple Boss)
| ◄ Previous Quest | Next Quest ▶ |
|---|---|
| Riju of Gerudo Town | The Sludge-Covered Statue |
The Legend of Zelda: Tears of the Kingdom Related Guides
List of All Walkthroughs
| All Quest Types | ||
|---|---|---|
 Main Quests Main Quests |
 Side Quests Side Quests |
 Side Adventures Side Adventures |
List of All Main Quests
Author

The Legend of Zelda: Tears of the Kingdom Walkthrough & Guides Wiki
Yunobo of Goron City Walkthrough
Please participate in our site
improvement survey
03/2026
improvement survey
03/2026
Would you assist in
improving Game8's site?
improving Game8's site?

×
We are listening to our users' valuable opinions and discussing how to act on them.
The information collected through this survey will be used for the purpose of improving our services. In addition, the information will only be disclosed a part of a statistic in a format that will not allow identification of personal information.
Begin Survey
Not Now
×
Please rate each item regarding Game8.co's Advertisements.
Amount of Ads
Very Dissatisfied
Somewhat Dissatisfied
Fine
Somewhat Satisfied
Highly Satisfied
Placement of Ads
Timing of Ad Display
Ad Loading Speed
Safeness of Ads
Content of Ads
×
Please rate each item regarding Game8.co's Quality of Articles.
Amount of information
Very Dissatisfied
Somewhat Dissatisfied
Fine
Somewhat Satisfied
Highly Satisfied
Frequency of updates
Speed of new information
Accuracy of articles
Understandibility of articles
Readability of sentences
×
Please rate each item regarding Game8.co's Usability of the Site.
Ease of finding information
Very Dissatisfied
Somewhat Dissatisfied
Fine
Somewhat Satisfied
Highly Satisfied
Loading Speed
Use of Color
Font Size
Visibility of Images
Easy to Understand Layout
×
Please rate each item regarding Game8.co's Message Boards, Comments.
Ease of Writing
Very Dissatisfied
Somewhat Dissatisfied
Fine
Somewhat Satisfied
Highly Satisfied
Readability
Ease in Finding Information
Comment Quality
Comment Quantity
Admin Response
×
Please rate each item regarding Game8.co's Site's new design.
Please rate our site's new design
Very Dissatisfied
Somewhat Dissatisfied
Fine
Somewhat Satisfied
Highly Satisfied
Do you think that the website's design change makes the site easier to use?
Has the new design made it easier for you to find information on the site?
Has the new design improved the overall visual appeal of the site?
How would you rate your overall satisfaction with the new design of the site?
×
How likely are you to recommend Game8 to someone you know?
Very Unlikely
0
1
2
3
4
5
6
7
8
9
10
Very Likely
If you have other opinions regarding potential improvement to the website, please share them with us. We would appreciate your honest opinion.
Note: This is a free response section, so you can proceed without entering anything.
Note: Please be sure not to enter any kind of personal information into your response.
Note: Please be sure not to enter any kind of personal information into your response.
×
Thank You
×
Thank you for participating in our survey! Your answers will help us to improve the quality of our website and services.
We hope you continue to make use of Game8.
We hope you continue to make use of Game8.
Close
Rankings
- We could not find the message board you were looking for.
Gaming News


Popular Games

Genshin Impact Walkthrough & Guides Wiki
Honkai: Star Rail Walkthrough & Guides Wiki
Umamusume: Pretty Derby Walkthrough & Guides Wiki
Pokemon Pokopia Walkthrough & Guides Wiki
Resident Evil Requiem (RE9) Walkthrough & Guides Wiki
Monster Hunter Wilds Walkthrough & Guides Wiki
Wuthering Waves Walkthrough & Guides Wiki
Arknights: Endfield Walkthrough & Guides Wiki
Pokemon FireRed and LeafGreen (FRLG) Walkthrough & Guides Wiki
Pokemon TCG Pocket (PTCGP) Strategies & Guides Wiki


Recommended Games
Diablo 4: Vessel of Hatred Walkthrough & Guides Wiki
Fire Emblem Heroes (FEH) Walkthrough & Guides Wiki
Yu-Gi-Oh! Master Duel Walkthrough & Guides Wiki
Super Smash Bros. Ultimate Walkthrough & Guides Wiki
Pokemon Brilliant Diamond and Shining Pearl (BDSP) Walkthrough & Guides Wiki
Elden Ring Shadow of the Erdtree Walkthrough & Guides Wiki
Monster Hunter World Walkthrough & Guides Wiki
The Legend of Zelda: Tears of the Kingdom Walkthrough & Guides Wiki
Persona 3 Reload Walkthrough & Guides Wiki
Cyberpunk 2077: Ultimate Edition Walkthrough & Guides Wiki


All rights reserved
© Nintendo. The Legend of Zelda and Nintendo Switch are trademarks of Nintendo.
The copyrights of videos of games used in our content and other intellectual property rights belong to the provider of the game.
The contents we provide on this site were created personally by members of the Game8 editorial department.
We refuse the right to reuse or repost content taken without our permission such as data or images to other sites.
how did you not get attacked by the doom stuff there? i cant get past the candles at the start