This survey will take about 1 minute.
Your answers will help us to improve our website.
Zelda: Tears of the Kingdom (TotK)
Gerudo Desert Region Map: Korok Seed Locations, Shrines, and Quests
▲ Get Pristine Weapons from the depths!
△ All 1000 Koroks | All 4 Great Fairies
▲ 81 Addison Signs | 147 Caves | 58 Wells
△ Tips: Farm Rupees | Starting Armor
▲ Best Weapons | Best Armor | Best Food
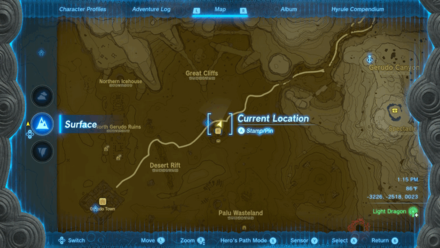
Gerudo Desert is a region found in the Surface of Hyrule in The Legend of Zelda: Tears of the Kingdom (TotK). Read on to see the full Gerudo Desert region map, as well as locations for Korok Seeds, Shrines, Quests, and other points of interest found within the Gerudo Desert!
List of Contents
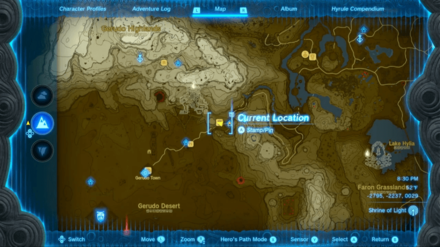
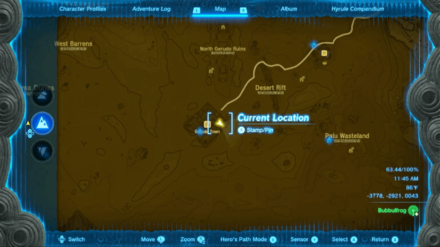
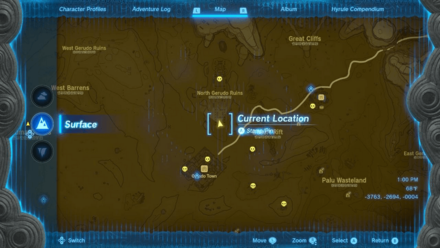
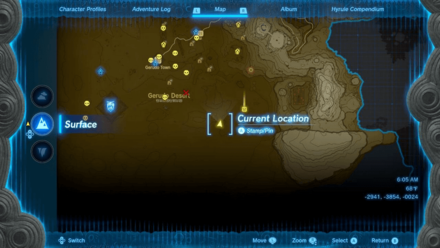
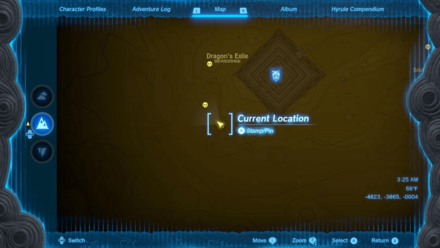
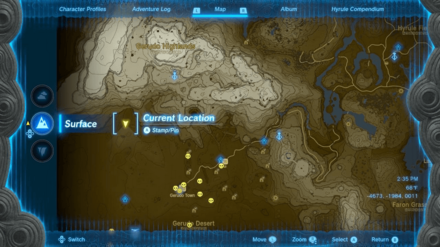
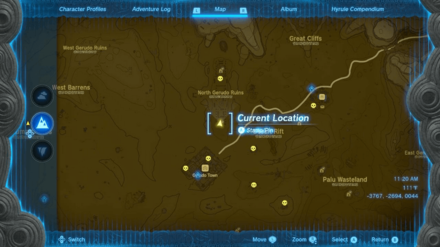
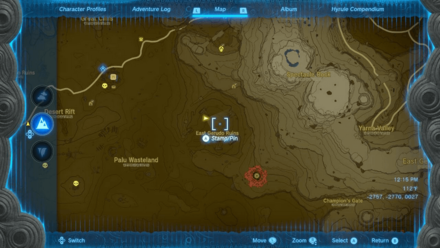
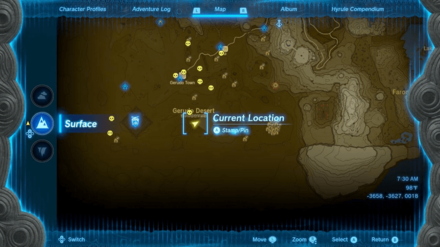
Gerudo Desert Region Map
Gerudo Desert Full Map
 Enlarge EnlargeView Full Image |
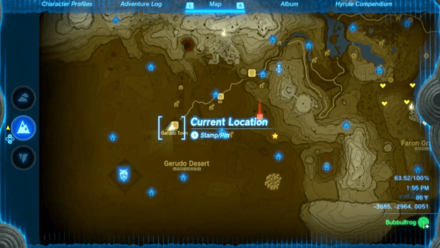
Gerudo Desert Shrine Locations
Shrine Map Locations and Coordinates
| Location | Coordinates |
|---|---|
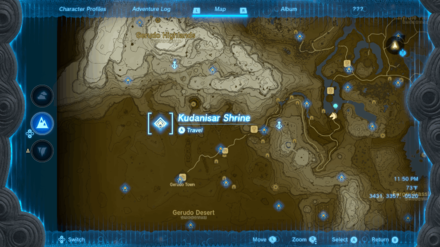 Enlarge EnlargeKudanisar Shrine (Bridging the Sands) |
-4168, -2140, 0050 |
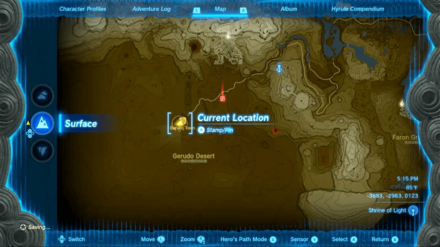
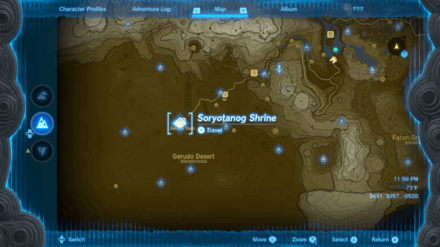 Enlarge EnlargeSoryotanog Shrine (Buried Light) |
-3883, -2963, 0123 |
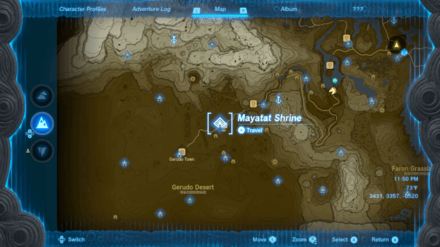 Enlarge EnlargeMayatat Shrine (A Sliding Device) |
-3290, -2512, 0024 |
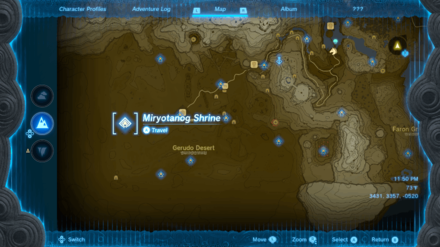 Enlarge EnlargeMiryotanog Shrine (Proving Grounds: Lure) |
Video Guide -4679, -3087, 0054 |
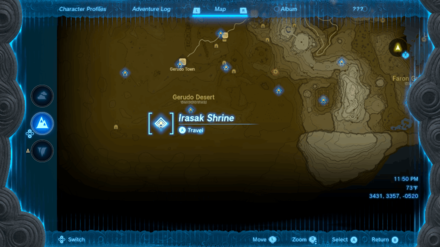 Enlarge EnlargeIrasak Shrine (Rauru's Blessing) |
-4159, -3824, 0028 |
 Enlarge EnlargeKarahatag Shrine (Drifting Flame) |
-3726, -3625, 0043 |
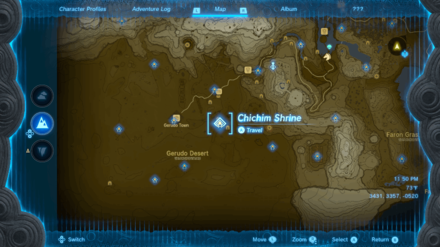 Enlarge EnlargeChichim Shrine (Rauru's Blessing) |
-3211, -3007, -0049 |
 Enlarge EnlargeSiwakama Shrine (Moving the Spheres) |
-2445, -3345, 0041 |
Gerudo Desert Temple Map Location
Lightning Temple Location and Coordinates
| Location | Coordinates |
|---|---|
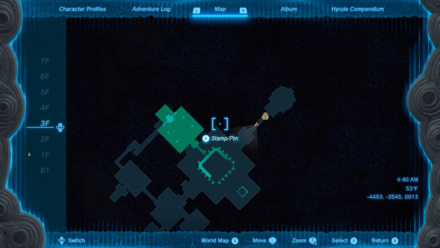
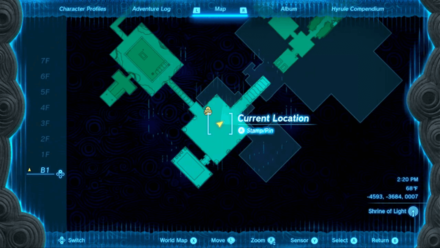
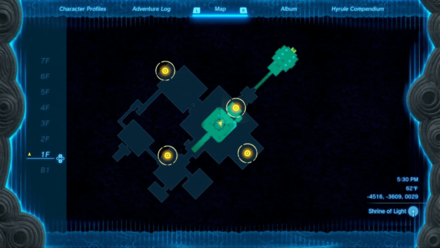 Enlarge EnlargeLightning Temple 1F |
-4516, -3609, 0029 |
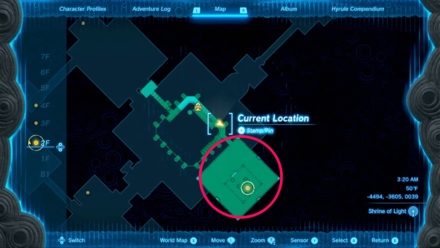
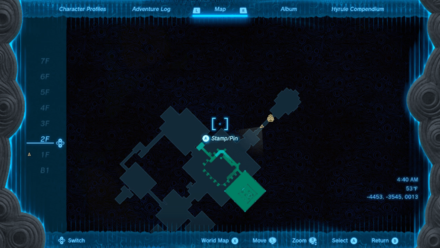 Enlarge EnlargeLightning Temple 2F |
-4493, -3615, 0039 |
 Enlarge EnlargeLightning Temple 3F |
- |
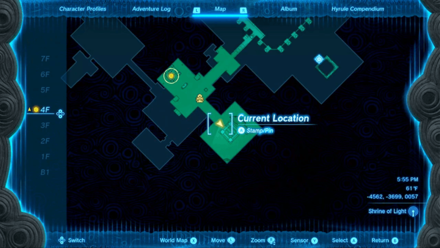
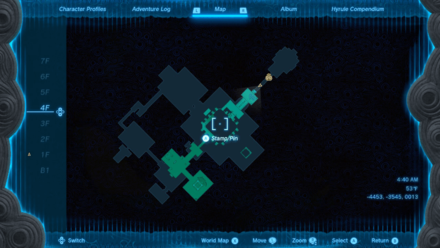 Enlarge EnlargeLightning Temple 4F |
-4541, -3607, 0063 |
 Enlarge EnlargeLightning Temple 5F |
- |
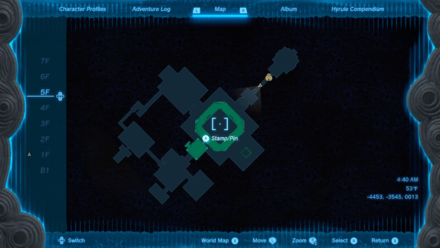
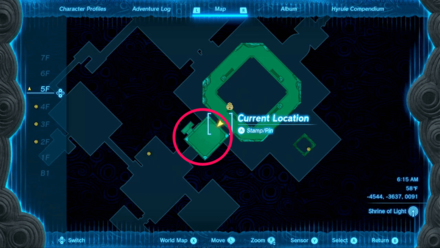
 Enlarge EnlargeLightning Temple 6F |
-4497, -3631, 0111 |
 Enlarge EnlargeLightning Temple 7F |
- |
 Enlarge EnlargeLightning Temple B1 |
- |
|
Enlarge Room of Ascension |
-4528, -3621, 0027 |
|
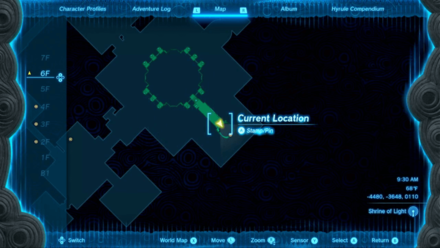
Room of Glorious Light |
-4526, -3608, 0127 |
 Enlarge EnlargeRoom of Hopeful Light |
-4608, -3677, 0007 |
 Enlarge EnlargeRoom of Light and Flame |
-4483, -3625, 0039 |
 Enlarge EnlargeRoom of Light and Shade |
-4563, -3692, 0057 |
 Enlarge EnlargeRoom of Natural Light |
-4548, -3645, 0087 |
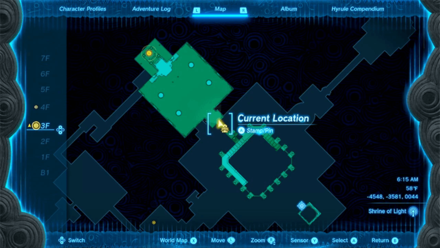 Enlarge EnlargeRoom of Offered Light |
-4548, -3581, 0044 |
Gerudo Desert Korok Seed Locations
Korok Seed Locations and Coordinates
| Overworld | Location Details |
|---|---|
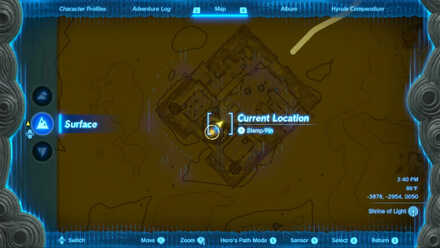
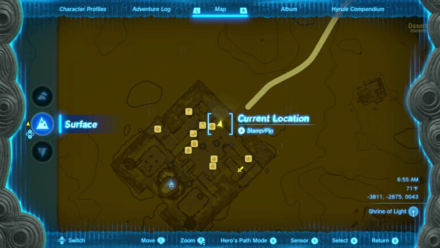
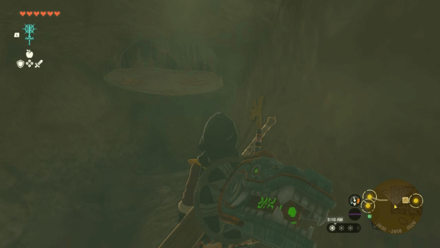 Enlarge EnlargeKorok Seed |
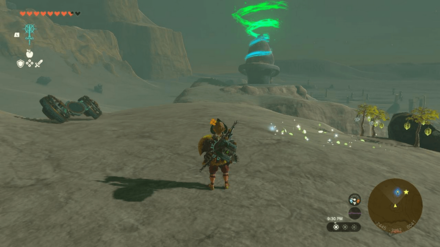
Start Coordinates -3830, -2858, 0026 Locate the tree stump at the end of the water under the town and Ascend to get the Korok Seed. |
 Enlarge EnlargeKorok Seed |
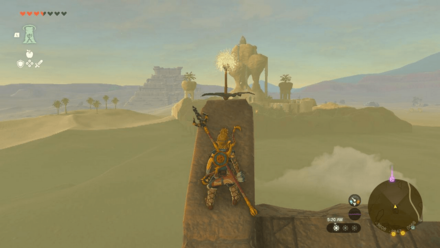
Start Coordinates -3266, -2609, 0120 Climb to the very top of the tower and interact with the sparkling leaves to reveal the Korok. |
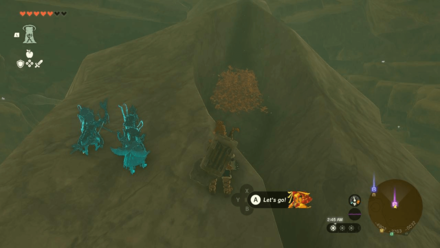
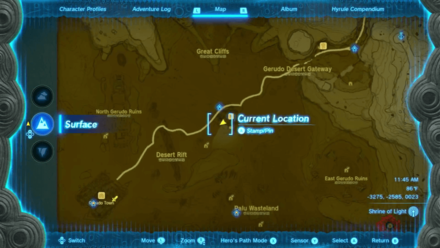
 Enlarge EnlargeKorok Seed x2 |
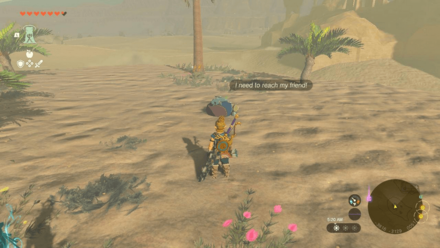
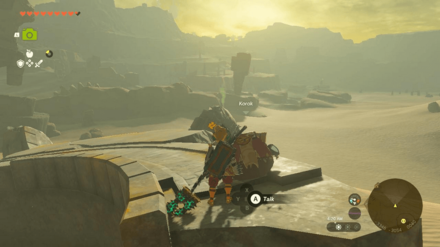
Start Coordinates -4609, 3199, 0037 End Coordinates -4872, -3565, 0039 Reunite the Korok with his friend across the desert to the south. |
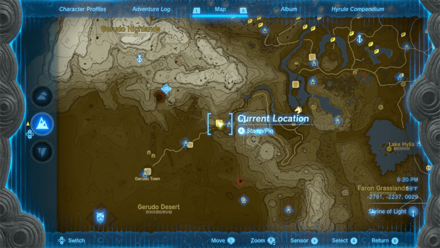
 Enlarge EnlargeKorok Seed |
Start Coordinates -3593, -3001, 0033 End Coordinates -3589, -3030, 0053 Follow the yellow flowers around the stone structure until you reach the white flower. |
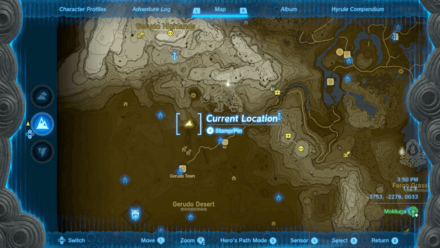
 Enlarge EnlargeKorok Seed |
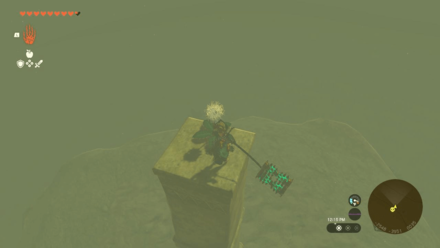
Start Coordinates -3745, -2443, 0043 Ascend through the tree stump to get the Korok Seed. |
 Enlarge EnlargeKorok Seed |
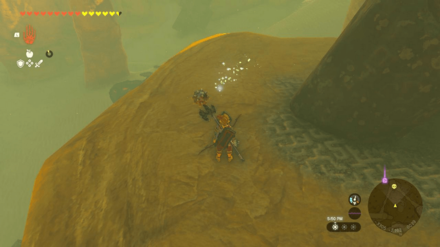
Start Coordinates -3608, -2842, 0068 Hit the dandelion and interact with it before it lands on the ground. |
 Enlarge EnlargeKorok Seed x2 |
Start Coordinates -3816, -3129, 0051 End Coordinates -3740, -3474, 0016 Reunite the Korok with his friend across the desert to the south. |
 Enlarge EnlargeKorok Seed |
Start Coordinates -3420, -3118, 0084 End Coordinates -3431, -3125, 0069 Step on the tree stump and jump down towards the target. |
 Enlarge EnlargeKorok Seed |
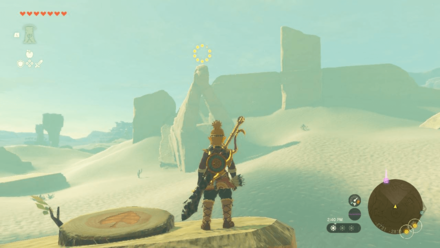
Start Coordinates -2731, -2818, 0035 End Coordinates -2823, -2833, 0062 Step on the tree stump and race towards the ring before time runs out. |
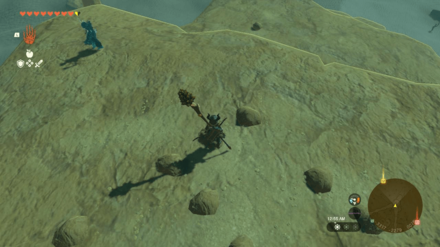
 Enlarge EnlargeKorok Seed |
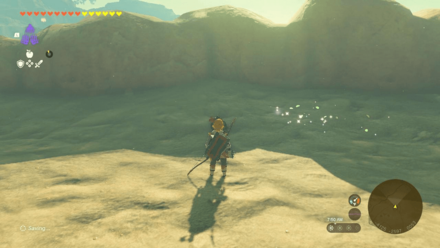
Start Coordinates -4902, -3763, -0032 On the fossil skull, burn the pile of leaves, then pick up the rock to reveal the Korok. This fossil is located underground in a cave. |
 Enlarge EnlargeKorok Seed |
Start Coordinates -3859, -3020, 0085 End Coordinates -3938, -2935, 0086 Step on the tree stump on the southern tower and race towards the ring at the western tower before time runs out. |
 Enlarge EnlargeKorok Seed |
Start Coordinates -3854, 2862, 0060 Examine the sparkling leaves at the top of the bottle sign on top of The Noble Canteen. |
 Enlarge EnlargeKorok Seed |
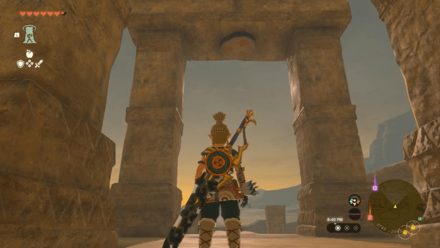
Start Coordinates -3317, -2279, 0075 Pick up the rock at the ledge below with Ultrahand and place it in the gap of the rock circle. |
 Enlarge EnlargeKorok Seed |
Start Coordinates -4442, -2267, 0080 End Coordinates -4426, -2262, 0064 Jump from pillar to pillar to follow the yellow flowers until you reach the white flower. |
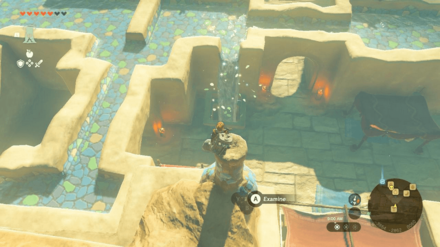
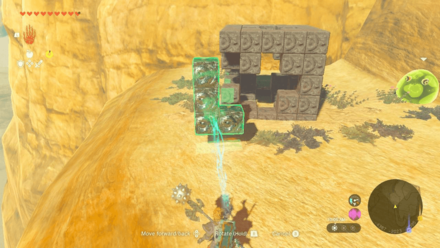 Enlarge EnlargeKorok Seed |
Start Coordinates -4387, -2023, 0095 Place the missing piece in the second layer such that there is a cross shape in every side of the box. |
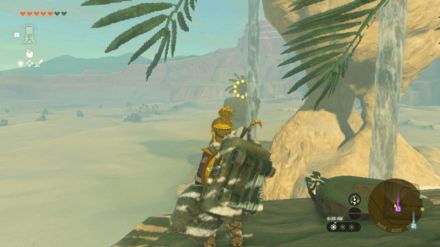
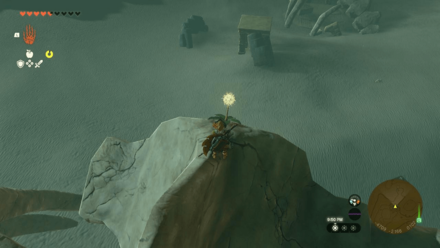 Enlarge EnlargeKorok Seed |
Start Coordinates -4709, -2166, 0102 Get to the top of the skeleton, hit the dandelion, then catch it before it hits the ground. |
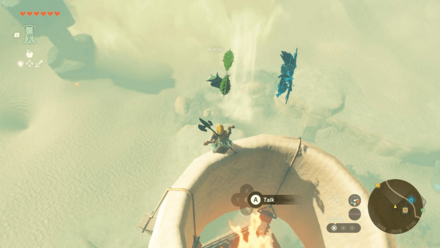
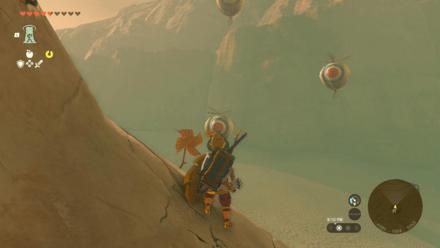 Enlarge EnlargeKorok Seed |
Start Coordinates -4689, -1964, 0059 Stand by the pinwheel on top of the skeleton and shoot the three floating balloons nearby. |
 Enlarge EnlargeKorok Seed |
Start Coordinates -4125, -2597, 0053 Chase the moving sparkles circling inside the rock circle and interact with it to reveal the Korok. |
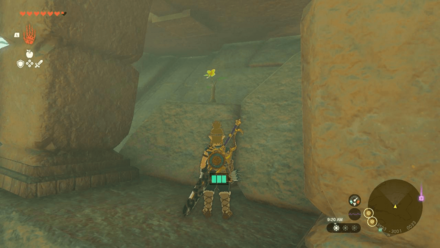
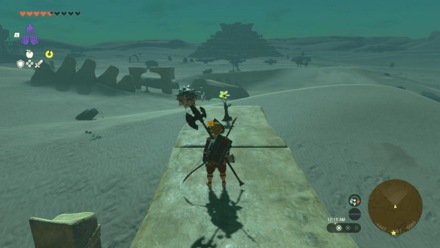
 Enlarge EnlargeKorok Seed |
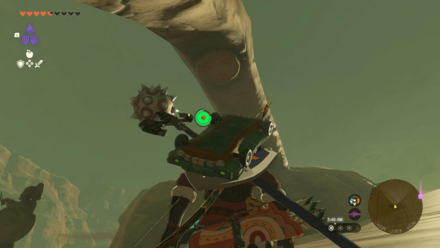
Start Coordinates -4584, -2351, 0040 Locate the Korok sign under the giant bone and use Ascend to pass through it. |
 Enlarge EnlargeKorok Seed |
Start Coordinates -4483, -2134, 0068 End Coordinates -4442, -2115, 0047 Jump from the initial platform located by the wooden structure and glide towards the target platform. |
 Enlarge EnlargeKorok Seed |
Start Coordinates -2935, -2215, 0209 Follow the yellow disappearing flowers until you reach the white flower. |
 Enlarge EnlargeKorok Seed |
Start Coordinates -3305, -2162, 0039 Chase the moving sparkles circling the rock and interact with it to reveal the Korok. |
 Enlarge EnlargeKorok Seed |
Start Coordinates -3748, -2288, 0077 Pick up the rock located on the roof of the Northern Icehouse. |
 Enlarge EnlargeKorok Seed x2 |
Start Coordinates -2984, -2322, 0025 End Coordinates -3317, -2459, 0029 Reunite the Korok at the Sand-Seal Rental Shop with its friend near Mayatat Shrine. |
 Enlarge EnlargeKorok Seed x2 |
Start Coordinates -3346, -3054, 0040 End Coordinates -3078, -3047, 0014 Reunite the Korok on the buried stone structure with its friend near the quicksand to the east. |
 Enlarge EnlargeKorok Seed x2 |
Start Coordinates -2492, -3346, 0026 End Coordinates -2546, -3929, 0014 Reunite the Korok near Siwakama Shrine with its friend across the quicksand pits to the south. |
 Enlarge EnlargeKorok Seed |
Start Coordinates -2548, -3951, 0035 Get to the top of the pillar, hit the dandelion, then catch it before it hits the ground. |
 Enlarge EnlargeKorok Seed |
Start Coordinates -2445, -3262, 0041 Chase the moving sparkles circling the area and interact with it to reveal the Korok. |
 Enlarge EnlargeKorok Seed |
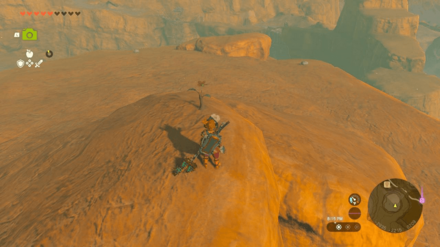
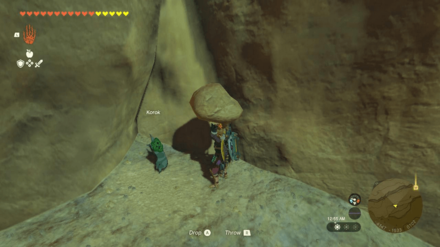
Start Coordinates -4147, -1933, 0102 Pick up the rock on top of the hanging boulder. |
 Enlarge EnlargeKorok Seed |
Start Coordinates -4358, -1854, 0073 Shoot the acorn hanging under the rock formation to reveal the Korok. |
 Enlarge EnlargeKorok Seed x2 |
Start Coordinates -4137, -2260, 0045 End Coordinates -4321, -1858, 0066 Reunite the Korok near Siwakama Shrine with its friend across the quicksand pits to the south. |
Korok Seed Map: All Korok Seed Locations
Gerudo Desert Quests
Main Quests
| Quest | Coordinates |
|---|---|
 Enlarge EnlargeRiju of Gerudo Town |
-3889, -2969, 0043 |
Side Quests
| Quest | Coordinates |
|---|---|
 Enlarge EnlargeThe Heroines' Secret |
-3884, -2970, 0033 |
 Enlarge EnlargePiaffe, Packed Away |
-2802, -2226, 0029 |
 Enlarge EnlargeThe Missing Owner |
-3871, -2960, 0033 |
 Enlarge EnlargePride of the Gerudo |
-3827, -2885, 0043 |
 Enlarge EnlargeThe Mysterious Eighth |
-3828, -2971, 0029 |
 Enlarge EnlargeDalia's Game |
-3814, -2874, 0043 |
 Enlarge EnlargeLost in the Dunes |
-3273, -2581, 0023 |
 Enlarge EnlargeA Picture for the Closed Stable |
-2812, -2219, 0029 |
 Enlarge EnlargeThe Iceless Icehouse |
-3754, -2276, 0033 |
 Enlarge EnlargeDecorate with Passion |
-3226, -2518, 0023 |
 Enlarge EnlargeTo the Ruins |
-3778, -2921, 0043 |
 Enlarge EnlargeTreasure of the Gerudo Desert |
-3885, -2964, 0051 |
Side Adventures
| Quest | Coordinates |
|---|---|
 Enlarge EnlargeThe Yiga Clan Exam |
-2426, -1823, 0147 |
Gerudo Desert Settlements
All Towns and Settlement Locations
| Overworld Location | Coordinates |
|---|---|
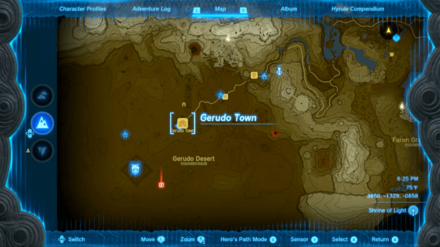
 Enlarge EnlargeGerudo Town |
-3786, -2864, 0043 |
 Enlarge EnlargeGerudo Shelter |
-3870, -2960, 0033 |
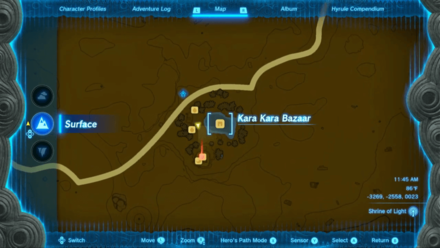 Enlarge EnlargeKara Kara Bazaar |
-3269, -2558, 0023 |
Gerudo Desert Hudson Signs
Addison Sign Locations
| Location | Solution |
|---|---|
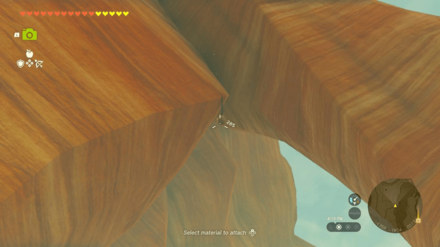
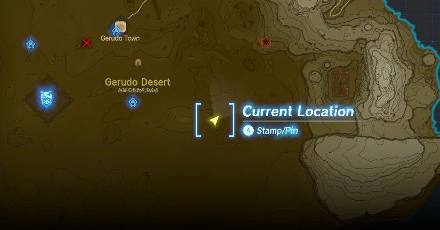
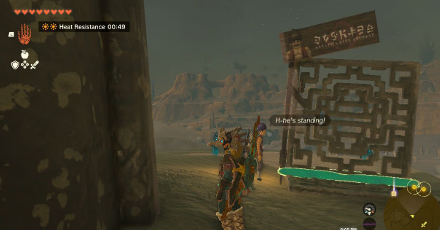
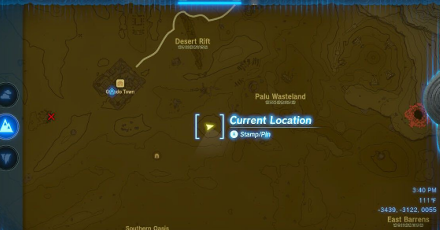 Enlarge Enlarge |
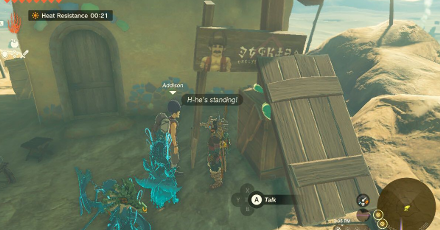 Enlarge Enlarge |
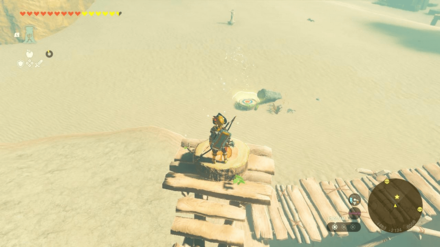
| Coordinates: -3439, -3122, 0055 Solution: Slide in a wooden leg and build a base for the sign. |
|
 Enlarge Enlarge |
 Enlarge Enlarge |
| Coordinates: -2964, -3793, 0030 Solution: Slot in the metal flooring vertically onto the middle of the sign and stick the other metal floor as its base. |
|
All Hudson Sign Locations: How to Help Addison's Signs Stand
Gerudo Desert Points of Interest
Cave Locations and Coordinates
| Overworld Location | Coordinates |
|---|---|
 Enlarge EnlargeValley of Silent Statues |
-3874, -2903, 0013 |
 Enlarge EnlargeOasis Source |
-3235, -2625, 0005 |
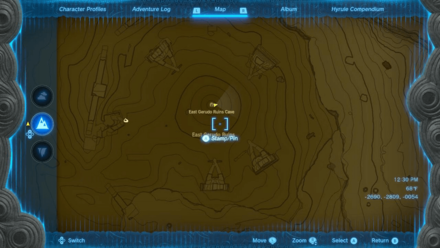 Enlarge EnlargeEast Gerudo Ruins Cave |
-2691, -2809, -0054 |
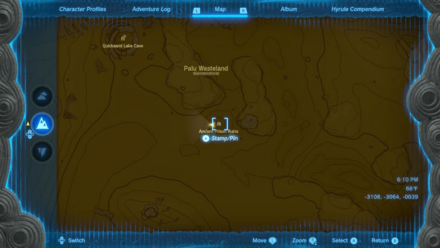
 Enlarge EnlargeQuicksand Lake Cave |
-3245, -2934, -0049 |
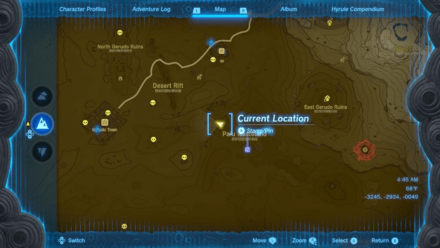
 Enlarge EnlargeCentral Gerudo Cave |
-3678, -3263, -0011 |
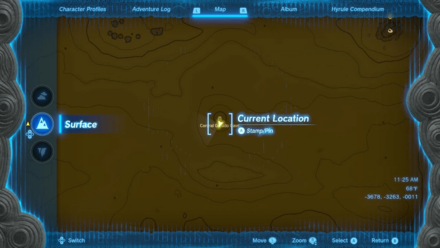
 Enlarge EnlargeAncient Prison Ruins |
-3107, -3064, -0039 |
 Enlarge EnlargeGerudo Sanctuary |
-3762, -2694, -0004 |
 Enlarge EnlargeSouth Gerudo Cave |
-2941, -3854, -0024 |
 Enlarge EnlargeAncient Altar Ruins |
-2583, -3642, -0040 |
 Enlarge EnlargeGerudo Great Skeleton |
-4819, -3868, -0001 |
 Enlarge EnlargeWest Gerudo Underground Ruins |
-4672, -1984, 0012 |
Well Locations and Coordinates
| Overworld Location | Coordinates |
|---|---|
 Enlarge EnlargeKara Kara Bazaar Well |
-3235, -2602, 0023 |
Notable Map Locations
| Overworld Location | Coordinates |
|---|---|
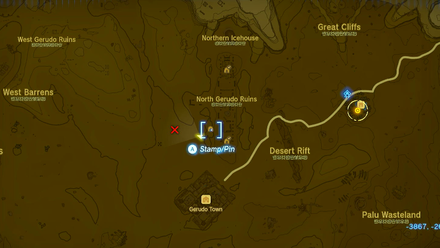
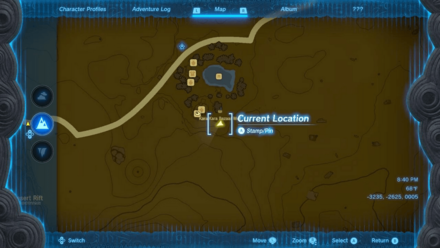
 Enlarge EnlargeNorth Gerudo Ruins |
-3784, -2639, 0032 |
 Enlarge EnlargeEast Gerudo Ruins |
2795, -2755, 0037 |
 Enlarge EnlargeSouthern Oasis Training Area |
-3658, -3625, 0018 |
The Legend of Zelda: Tears of the Kingdom Related Guides

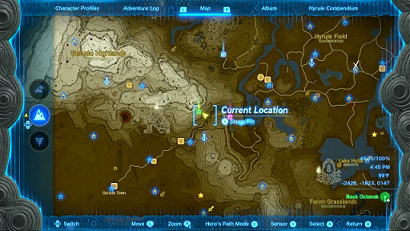
Interactive Map of Hyrule:
All Locations and Map Icons
All Area Maps and Locations
| Hyrule Map Locations | |||||
|---|---|---|---|---|---|
Other Maps
List of Surface Regions
Comment
Author

The Legend of Zelda: Tears of the Kingdom Walkthrough & Guides Wiki
Gerudo Desert Region Map: Korok Seed Locations, Shrines, and Quests
Please participate in our site
improvement survey
03/2026
improvement survey
03/2026
Would you assist in
improving Game8's site?
improving Game8's site?

×
We are listening to our users' valuable opinions and discussing how to act on them.
The information collected through this survey will be used for the purpose of improving our services. In addition, the information will only be disclosed a part of a statistic in a format that will not allow identification of personal information.
Begin Survey
Not Now
×
Please rate each item regarding Game8.co's Advertisements.
Amount of Ads
Very Dissatisfied
Somewhat Dissatisfied
Fine
Somewhat Satisfied
Highly Satisfied
Placement of Ads
Timing of Ad Display
Ad Loading Speed
Safeness of Ads
Content of Ads
×
Please rate each item regarding Game8.co's Quality of Articles.
Amount of information
Very Dissatisfied
Somewhat Dissatisfied
Fine
Somewhat Satisfied
Highly Satisfied
Frequency of updates
Speed of new information
Accuracy of articles
Understandibility of articles
Readability of sentences
×
Please rate each item regarding Game8.co's Usability of the Site.
Ease of finding information
Very Dissatisfied
Somewhat Dissatisfied
Fine
Somewhat Satisfied
Highly Satisfied
Loading Speed
Use of Color
Font Size
Visibility of Images
Easy to Understand Layout
×
Please rate each item regarding Game8.co's Message Boards, Comments.
Ease of Writing
Very Dissatisfied
Somewhat Dissatisfied
Fine
Somewhat Satisfied
Highly Satisfied
Readability
Ease in Finding Information
Comment Quality
Comment Quantity
Admin Response
×
Please rate each item regarding Game8.co's Site's new design.
Please rate our site's new design
Very Dissatisfied
Somewhat Dissatisfied
Fine
Somewhat Satisfied
Highly Satisfied
Do you think that the website's design change makes the site easier to use?
Has the new design made it easier for you to find information on the site?
Has the new design improved the overall visual appeal of the site?
How would you rate your overall satisfaction with the new design of the site?
×
How likely are you to recommend Game8 to someone you know?
Very Unlikely
0
1
2
3
4
5
6
7
8
9
10
Very Likely
If you have other opinions regarding potential improvement to the website, please share them with us. We would appreciate your honest opinion.
Note: This is a free response section, so you can proceed without entering anything.
Note: Please be sure not to enter any kind of personal information into your response.
Note: Please be sure not to enter any kind of personal information into your response.
×
Thank You
×
Thank you for participating in our survey! Your answers will help us to improve the quality of our website and services.
We hope you continue to make use of Game8.
We hope you continue to make use of Game8.
Close
Rankings
- We could not find the message board you were looking for.
Gaming News


![Everwind Review [Early Access] | The Shaky First Step to A Very Long Journey](https://img.game8.co/4440226/ab079b1153298a042633dd1ef51e878e.png/thumb)

![Monster Hunter Stories 3 Review [First Impressions] | Simply Rejuvenating](https://img.game8.co/4438641/2a31b7702bd70e78ec8efd24661dacda.jpeg/thumb)
Popular Games

Genshin Impact Walkthrough & Guides Wiki
Honkai: Star Rail Walkthrough & Guides Wiki
Umamusume: Pretty Derby Walkthrough & Guides Wiki
Pokemon Pokopia Walkthrough & Guides Wiki
Resident Evil Requiem (RE9) Walkthrough & Guides Wiki
Monster Hunter Wilds Walkthrough & Guides Wiki
Wuthering Waves Walkthrough & Guides Wiki
Arknights: Endfield Walkthrough & Guides Wiki
Pokemon FireRed and LeafGreen (FRLG) Walkthrough & Guides Wiki
Pokemon TCG Pocket (PTCGP) Strategies & Guides Wiki


Recommended Games
Diablo 4: Vessel of Hatred Walkthrough & Guides Wiki
Fire Emblem Heroes (FEH) Walkthrough & Guides Wiki
Yu-Gi-Oh! Master Duel Walkthrough & Guides Wiki
Super Smash Bros. Ultimate Walkthrough & Guides Wiki
Pokemon Brilliant Diamond and Shining Pearl (BDSP) Walkthrough & Guides Wiki
Elden Ring Shadow of the Erdtree Walkthrough & Guides Wiki
Monster Hunter World Walkthrough & Guides Wiki
The Legend of Zelda: Tears of the Kingdom Walkthrough & Guides Wiki
Persona 3 Reload Walkthrough & Guides Wiki
Cyberpunk 2077: Ultimate Edition Walkthrough & Guides Wiki


All rights reserved
© Nintendo. The Legend of Zelda and Nintendo Switch are trademarks of Nintendo.
The copyrights of videos of games used in our content and other intellectual property rights belong to the provider of the game.
The contents we provide on this site were created personally by members of the Game8 editorial department.
We refuse the right to reuse or repost content taken without our permission such as data or images to other sites.