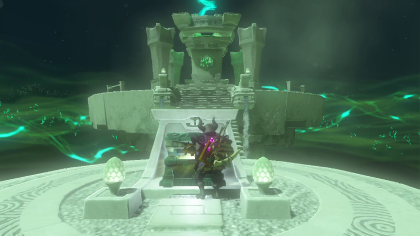
Jochisiu Shrine Quest Location and Walkthrough
▲ Get Pristine Weapons from the depths!
△ All 1000 Koroks | All 4 Great Fairies
▲ 81 Addison Signs | 147 Caves | 58 Wells
△ Tips: Farm Rupees | Starting Armor
▲ Best Weapons | Best Armor | Best Food

Jochisiu Shrine (Rauru's Blessing) in The Legend of Zelda: Tears of the Kingdom (TotK) can be unlocked by completing Keys Born of Water Shrine Quest in the West Necluda Region. Read on to learn how to unlock Jochisiu Shrine, its location, puzzle solution, as well as all treasure chest locations in Jochisiu Shrine!
List of Contents
Jochisiu Shrine Location
Squabble River, West Necluda
Jochisiu Shrine can be found south of Squabble River in the West Necluda Region.
The exact coordinates of the Jochisiu Shrine is at 0931, -1902, 0030.
You will need to complete the Keys Born of Water Shrine Quest in order to unlock the Jochisiu Shrine.
Travel to Popla Foothills Skyview Tower, and launch yourself from there to glide northeast towards the Jochisiu Shrine.
Rauru's Blessing
This is a Rauru's Blessing Shrine with a treasure chest inside as well as a Light of Blessing at the altar.
Keys Born of Water Shrine Quest Walkthrough
- Light Up a Bonfire
- Make Ice Panels
- Place Ice Panels Inside Stone Compartments
- Melt the Ice Panels
- Proceed to the Shrine
Video Guide
1. Light Up a Bonfire
There are remnants of a bonfire near the vicinity.
Light it up by throwing a Fire Fruit or a Red Chuchu Jelly on it. You can also attach the fruit to an arrow and shoot it with your bow.
2. Make Ice Panels
Head to the river and throw White Chuchu Jelly at the water to form ice panels.
You can also fuse these ice panels to make an ice-based weapon. Swinging an ice-based weapon on water will create more ice panels. This is a good way to make more of these in case you run out of White Chuchu Jellies to throw.
3. Place Ice Panels Inside Stone Compartments
You will need to insert the ice panels inside the three stone compartments near the vicinity. The ice panels will function as keys during this point.
Grab the ice panels using Ultrahand, and rotate its position so that it would fit in the recesses of the stones.
4. Melt the Ice Panels
The three stone compartments will vary in size.
You will need to use the bonfire and melt the ice panels depending on how large each ice panel is required to fit a particular stone recess.
5. Proceed to the Shrine
After inserting all ice panels inside the three stone compartments, a green crystal will materialize from the platform above you and transform into a shrine entrance.
Use Ascend, and activate the shrine entrance to begin the Jochisiu Shrine.
Jochisiu Shrine Walkthrough
1. Collect Your Reward Straight Ahead
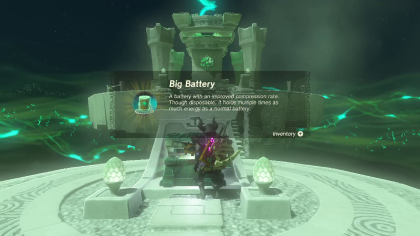
Proceed towards the area, and claim the Big Battery inside the chest straight ahead.
2. Proceed to the Altar
After collecting your reward, continue to the altar and complete the Jochisiu Shrine.
Jochisiu Shrine Rewards and Chest Locations
Big Battery
| Chest Location | Chest Contents |
|---|---|
 |
 |
Proceed towards the area to open the chest, and claim the Big Battery inside.
The Legend of Zelda: Tears of the Kingdom Related Guides

Shrines Lists
| Shrines Lists | |
|---|---|
| All Shrines | All Shrine Quests |
All Great Sky Island Shrines
| Great Sky Island Shrines | ||
|---|---|---|
| Ukouh Shrine | In-isa Shrine | Gutanbac Shrine |
| Nachoyah Shrine | - | - |
All Hyrule Field Shrines
All Tabantha Shrines
| Tabantha Shrines | ||
|---|---|---|
| Oromuwak Shrine | Gatakis Shrine | Nouda Shrine |
| Wao-os Shrine | Iun-orok Shrine | Turakawak Shrine |
| Gasas Shrine | Mayausiy Shrine | Ikatak Shrine |
| Ga-ahisas Shrine | Ganos Shrine | Taunhiy Shrine |
All Hebra Shrines
All Great Hyrule Forest Shrines
| Great Hyrule Forest Shrines | ||
|---|---|---|
| Sakunbomar Shrine | Pupunke Shrine | Ninjis Shrine |
| Musanokir Shrine | Kikakin Shrine | Kiuyoyou Shrine |
| Ekochiu Shrine | Mayam Shrine | Simosiwak Shrine |
All Akkala Shrines
All Eldin Shrines
All Lanayru Shrines
All Necluda Shrines
All Faron Shrines
| Faron Shrines | ||
|---|---|---|
| Jiukoum Shrine | Ishokin Shrine | Utsushok Shrine |
| Joku-u Shrine | Joku-usin Shrine | - |
All Gerudo Shrines
Comment
Author
The Legend of Zelda: Tears of the Kingdom Walkthrough & Guides Wiki
Jochisiu Shrine Quest Location and Walkthrough
improvement survey
03/2026
improving Game8's site?

Your answers will help us to improve our website.
Note: Please be sure not to enter any kind of personal information into your response.

We hope you continue to make use of Game8.
Rankings
- We could not find the message board you were looking for.
Gaming News
Popular Games

Genshin Impact Walkthrough & Guides Wiki

Honkai: Star Rail Walkthrough & Guides Wiki

Umamusume: Pretty Derby Walkthrough & Guides Wiki

Pokemon Pokopia Walkthrough & Guides Wiki

Resident Evil Requiem (RE9) Walkthrough & Guides Wiki

Monster Hunter Wilds Walkthrough & Guides Wiki

Wuthering Waves Walkthrough & Guides Wiki

Arknights: Endfield Walkthrough & Guides Wiki

Pokemon FireRed and LeafGreen (FRLG) Walkthrough & Guides Wiki

Pokemon TCG Pocket (PTCGP) Strategies & Guides Wiki
Recommended Games

Diablo 4: Vessel of Hatred Walkthrough & Guides Wiki

Cyberpunk 2077: Ultimate Edition Walkthrough & Guides Wiki

Fire Emblem Heroes (FEH) Walkthrough & Guides Wiki

Yu-Gi-Oh! Master Duel Walkthrough & Guides Wiki

Super Smash Bros. Ultimate Walkthrough & Guides Wiki

Pokemon Brilliant Diamond and Shining Pearl (BDSP) Walkthrough & Guides Wiki

Elden Ring Shadow of the Erdtree Walkthrough & Guides Wiki

Monster Hunter World Walkthrough & Guides Wiki

The Legend of Zelda: Tears of the Kingdom Walkthrough & Guides Wiki

Persona 3 Reload Walkthrough & Guides Wiki
All rights reserved
© Nintendo. The Legend of Zelda and Nintendo Switch are trademarks of Nintendo.
The copyrights of videos of games used in our content and other intellectual property rights belong to the provider of the game.
The contents we provide on this site were created personally by members of the Game8 editorial department.
We refuse the right to reuse or repost content taken without our permission such as data or images to other sites.


![Monster Hunter Stories 3 Review [First Impressions] | Simply Rejuvenating](https://img.game8.co/4438641/2a31b7702bd70e78ec8efd24661dacda.jpeg/thumb)


