Musanokir Shrine Location and Walkthrough
▲ Get Pristine Weapons from the depths!
△ All 1000 Koroks | All 4 Great Fairies
▲ 81 Addison Signs | 147 Caves | 58 Wells
△ Tips: Farm Rupees | Starting Armor
▲ Best Weapons | Best Armor | Best Food

Musanokir Shrine (Swing to Hit) in The Legend of Zelda: Tears of the Kingdom (TotK) can be found at the Korok Forest in the Great Hyrule Forest Region. Read on to learn how to reach it, its location, puzzle solution, as well as all treasure chest locations in Musanokir Shrine.
Musanokir Shrine Location
Korok Forest, Great Hyrule Forest
Musanokir Shrine can be found within Korok Forest in the Great Hyrule Forest Region. The exact coordinates of the Musanokir Shrine is at 0408, 2133, 0144.
You will need to Ascend the Rikonasum Lightroot located at the Great Hyrule Forest Depths.
You can reach the Great Hyrule Forest Depths by traveling to the Eldin Canyon Skyview Tower and launching yourself from there to glide towards the Minshi Woods Chasm.
Great Hyrule Forest Region Map
Puzzle Shrine
This is a Puzzle type Shrine, so you need to solve the puzzle to reach the end and get a Light of Blessing.
Try to look around the area to find a way to move forward, and remember to use Link's Ultrahand, Ascend, or Recall abilities!
All Abilities and How to Unlock
How to Reach Musanokir Shrine
- Fast Travel to Ekochiu Shrine
- Reach Korok Grove at the Depths
- Activate Korok Grove Lightroots
- Ascend to Korok Forest
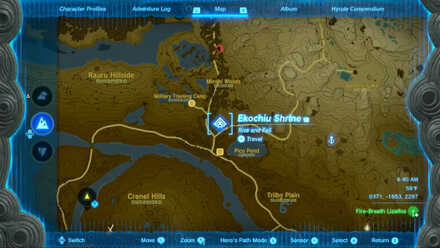
1. Fast Travel to Ekochiu Shrine

Minshi Woods Chasm, the initial gateway to Korok Forest, is located southeast of the Great Hyrule Forest.
You can fast travel to Ekochiu Shrine if it's activated and head north until you find the gloom-covered entrance. This Shrine is found west of the Eldin Canyon Skyview Tower.
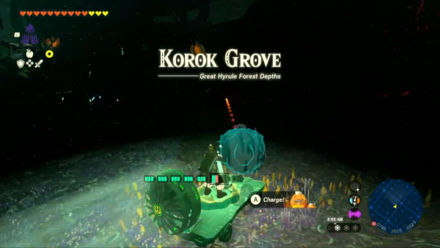
2. Reach Korok Grove at the Depths

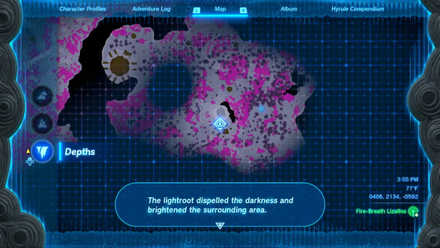
Upon entering the chasm and reaching the Depths, glide south and activate the Uihcoke Lightroot to add the surrounding area's topography to your map.
Now, head northwest from your starting position (chasm entrance) until you reach the Korok Grove.
The grove is right below the Great Hyrule Forest, so you can open your map and switch between the Surface and Depths layers to check where you currently are underground.
3. Activate Korok Grove Lightroots

You will eventually run into Eknupup Lightroot, which you can activate to gain more visibility. If you turn to the southwest direction, you'll spot another lightroot not too far from your current position. Head there and activate Rikonasum Lightroot.
4. Ascend to Korok Forest

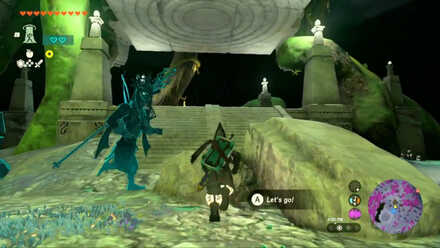
Walk up the stairs to the south and Ascend through the ceiling to reach Musanokir Shrine and Korok Forest.
Musanokir Shrine Puzzle Solution
- Raise the Bridge
- Attach the Cube
- Swing the Cube
- Climb on the Platform
- Create a Battering Ram
- Attach the Cube
- Swing the Cube
- Examine the Shrine
Video Guide
1. Raise the Bridge
Once you've entered the shrine, you'll notice a gap you'll need to get across. Using Ultrahand, grab the ball on the chain to raise the platform, and attach it to the box on the other side of the gap.
2. Attach the Cube
Take the same cube and detach it from the chain. To the right of the chamber is another chain by a target. Attach the cube to this chain.
3. Swing the Cube
With the cube attached to the chain, use Ultrahand to pull the cube back and swing it towards the target. This will open the door to the next chamber.
4. Climb on the Platform
Using Ultrahand, lift the cube from your side to the platform before bringing it back. Use Recall and hop on the cube to use it as a stepping stone to grab the chest and snag a Large Zonai Charge!
5. Create a Battering Ram
Take the log and raise it up to the box on the rail. Place it on the front so that it acts as a battering ram of sorts.
6. Attach the Cube
If the cube falls, it will respawn so just grab it and attach it with Ultrahand to the chain beneath your battering ram!
7. Swing the Cube
Raise the Cube up high and let the momentum pull the box along the rail! This will allow your log to hit the target and open the door!
8. Examine the Shrine

In the last room, approach the shrine and examine it to receive a Light of Blessing!
Musanokir Shrine Rewards and Chest Locations
Large Zonai Charge
| Chest Location | Chest Contents |
|---|---|
 |
 |
You'll need to use Ultrahand to move the cube towards the platform and back. With Recall, hop on the cube and move it towards the platform to use it as a stepping stone to grab the chest and snag a Large Zonai Charge!
The Legend of Zelda: Tears of the Kingdom Related Guides

Shrines Lists
| Shrines Lists | |
|---|---|
| All Shrines | All Shrine Quests |
All Great Sky Island Shrines
| Great Sky Island Shrines | ||
|---|---|---|
| Ukouh Shrine | In-isa Shrine | Gutanbac Shrine |
| Nachoyah Shrine | - | - |
All Hyrule Field Shrines
All Tabantha Shrines
| Tabantha Shrines | ||
|---|---|---|
| Oromuwak Shrine | Gatakis Shrine | Nouda Shrine |
| Wao-os Shrine | Iun-orok Shrine | Turakawak Shrine |
| Gasas Shrine | Mayausiy Shrine | Ikatak Shrine |
| Ga-ahisas Shrine | Ganos Shrine | Taunhiy Shrine |
All Hebra Shrines
All Great Hyrule Forest Shrines
| Great Hyrule Forest Shrines | ||
|---|---|---|
| Sakunbomar Shrine | Pupunke Shrine | Ninjis Shrine |
| Musanokir Shrine | Kikakin Shrine | Kiuyoyou Shrine |
| Ekochiu Shrine | Mayam Shrine | Simosiwak Shrine |
All Akkala Shrines
All Eldin Shrines
All Lanayru Shrines
All Necluda Shrines
All Faron Shrines
| Faron Shrines | ||
|---|---|---|
| Jiukoum Shrine | Ishokin Shrine | Utsushok Shrine |
| Joku-u Shrine | Joku-usin Shrine | - |
All Gerudo Shrines
Comment
Author
The Legend of Zelda: Tears of the Kingdom Walkthrough & Guides Wiki
Musanokir Shrine Location and Walkthrough
Rankings
- We could not find the message board you were looking for.
Gaming News
Popular Games

Genshin Impact Walkthrough & Guides Wiki

Honkai: Star Rail Walkthrough & Guides Wiki

Umamusume: Pretty Derby Walkthrough & Guides Wiki

Pokemon Pokopia Walkthrough & Guides Wiki

Resident Evil Requiem (RE9) Walkthrough & Guides Wiki

Monster Hunter Wilds Walkthrough & Guides Wiki

Wuthering Waves Walkthrough & Guides Wiki

Arknights: Endfield Walkthrough & Guides Wiki

Pokemon FireRed and LeafGreen (FRLG) Walkthrough & Guides Wiki

Pokemon TCG Pocket (PTCGP) Strategies & Guides Wiki
Recommended Games

Diablo 4: Vessel of Hatred Walkthrough & Guides Wiki

Cyberpunk 2077: Ultimate Edition Walkthrough & Guides Wiki

Fire Emblem Heroes (FEH) Walkthrough & Guides Wiki

Yu-Gi-Oh! Master Duel Walkthrough & Guides Wiki

Super Smash Bros. Ultimate Walkthrough & Guides Wiki

Pokemon Brilliant Diamond and Shining Pearl (BDSP) Walkthrough & Guides Wiki

Elden Ring Shadow of the Erdtree Walkthrough & Guides Wiki

Monster Hunter World Walkthrough & Guides Wiki

The Legend of Zelda: Tears of the Kingdom Walkthrough & Guides Wiki

Persona 3 Reload Walkthrough & Guides Wiki
All rights reserved
© Nintendo. The Legend of Zelda and Nintendo Switch are trademarks of Nintendo.
The copyrights of videos of games used in our content and other intellectual property rights belong to the provider of the game.
The contents we provide on this site were created personally by members of the Game8 editorial department.
We refuse the right to reuse or repost content taken without our permission such as data or images to other sites.


![Monster Hunter Stories 3 Review [First Impressions] | Simply Rejuvenating](https://img.game8.co/4438641/2a31b7702bd70e78ec8efd24661dacda.jpeg/thumb)


