Iun-orok Shrine Location and Walkthrough
▲ Get Pristine Weapons from the depths!
△ All 1000 Koroks | All 4 Great Fairies
▲ 81 Addison Signs | 147 Caves | 58 Wells
△ Tips: Farm Rupees | Starting Armor
▲ Best Weapons | Best Armor | Best Food

Iun-orok Shrine (The Right Roll) in The Legend of Zelda: Tears of the Kingdom (TotK) can be found inside Tanagar Canyon West Cave in the Tabantha Frontier Region. Read on to learn how to reach it, its location, puzzle solution, as well as all treasure chest locations in Iun-orok Shrine.
Iun-orok Shrine Location
Tanagar Canyon West Cave, Tabantha Frontie
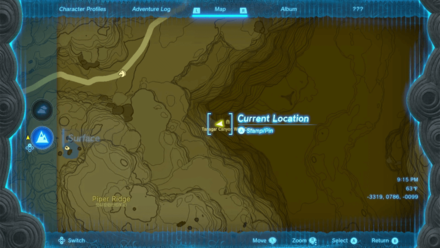
Iun-orok Shrine can be found inside Tanagar Canyon West Cave in the Tabantha Frontier Region.
The exact coordinates of the Iun-orok Shrine is at -3538, 0850, -0133. For the Tanagar Canyon West Cave, the exact coordinates of its location is at -3320, 0786, -0099.
Travel to Rospro Pass Skyview Tower, and launch yourself from there to glide south towards the Tanagar Canyon West Cave.
Puzzle Shrine
This is a Puzzle type Shrine, so you need to solve the puzzle to reach the end and get a Light of Blessing.
Try to look around the area to find a way to move forward, and remember to use Link's Ultrahand, Ascend, or Recall abilities!
All Abilities and How to Unlock
How to Reach Iun-orok Shrine
- Locate the Cave Entrance
- Glide Down into the Cavern
- Break the Rock Wall
- Take the Path to the Right
- Run Past the Ice Like
- Deal with the Shock Like
- Break the Wall
- Approach the Shrine
1. Locate the Cave Entrance

In order to find Iun-orok Shrine, you'll need to first find the cave entrance to Tanagar Canyon West Cave. It's just east of Piper Ridge and can be accessed by gliding down into the canyon!
2. Glide Down into the Cavern
Go into the cave and glide down into the cavern. You will find a few enemies in here, but they are easily dispatched.
3. Break the Rock Wall
Once you've taken care of enemies here, you'll find a breakable rock wall. Break through the wall until you create a path to the other side. This is the first of many so be sure to have enough weapons to push forward.
4. Take the Path to the Right
Once you've broken through, you should notice an Ice Like on the left and a path to the right. Take the path to the right.
5. Run Past the Ice Like
At the end of this path, you will find another Ice Like guarding a breakable rock wall. Stun the Ice Like or defeat it and break the wall to continue on. Just note that it will be facing the opposite way when stunned so it may be difficult to kite the ice blasts.
6. Deal with the Shock Like
Follow the path forward until you reach the Shock Like. You can choose to dodge the Shock Like or you can beat it! Regardless you'll need to go towards the brown breakable wall.
7. Break the Wall
Break the wall to progress further into the cavern. Be sure you have enough to break through all the rock!
8. Approach the Shrine
Once you've broken through the wall, simply enter the chamber to get to the shrine!
Iun-orok Shrine Puzzle Solution
- Roll the Ball
- Connect the Balls
- Roll the Two Balls
- Connect All 3 Balls
- Lean the Balls Against the Pillar
- Open the Chest
- Hit the Target
- Examine the Shrine
Video Guide
1. Roll the Ball
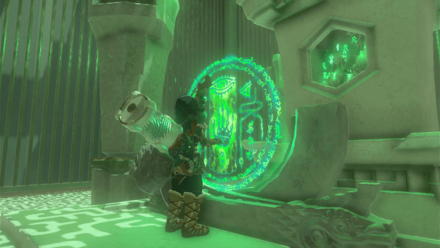
In the first chamber is a ball and a target on a slope. Use Ultrahand to grab and roll the ball down the slope and hit the target. This will open up the next section.
2. Connect the Balls
In the second chamber, you'll notice that the slope makes it almost impossible to roll just one ball down! So you'll need to attach the two together with Ultrahand.
3. Roll the Two Balls
With the two balls connected, place them at the center of the ramp, keeping them balanced on each side so that they don't lean too far and let them roll down! Once it hits the target, it should open up the next area.
4. Connect All 3 Balls
In the third chamber are 3 balls of different sizes. Attach them together in from largest to smallest!
5. Lean the Balls Against the Pillar
With all three balls attached, bring it over to the pillar with the chest. Lean the set of balls against the pillar to create a path up to the chest! Be sure to keep the smallest one at the base so you can hop on properly.
6. Open the Chest

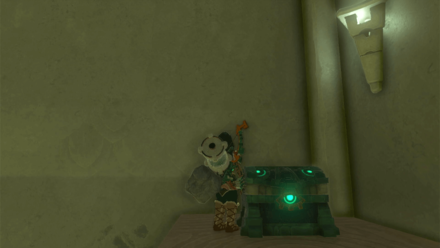
Open the chest at the top to snag 10 arrows!
7. Hit the Target
Grab the 3 balls and instead of sending them down the ramp, carry it and drag it just above the target, making sure it's touching the wall. If done right, it will tap the top of the target and open the final chamber.
8. Examine the Shrine

Examine the Shrine to receive your reward.
Iun-orok Shrine Rewards and Chest Locations
10 Arrows
| Chest Location | Chest Contents |
|---|---|
 |
 |
Connect the 3 balls to create a ladder up to the pillar. Be sure the smallest ball is at the bottom so that you can jump up properly. Once up, open the chest to reveal 10 Arrows.
The Legend of Zelda: Tears of the Kingdom Related Guides

Shrines Lists
| Shrines Lists | |
|---|---|
| All Shrines | All Shrine Quests |
All Great Sky Island Shrines
| Great Sky Island Shrines | ||
|---|---|---|
| Ukouh Shrine | In-isa Shrine | Gutanbac Shrine |
| Nachoyah Shrine | - | - |
All Hyrule Field Shrines
All Tabantha Shrines
| Tabantha Shrines | ||
|---|---|---|
| Oromuwak Shrine | Gatakis Shrine | Nouda Shrine |
| Wao-os Shrine | Iun-orok Shrine | Turakawak Shrine |
| Gasas Shrine | Mayausiy Shrine | Ikatak Shrine |
| Ga-ahisas Shrine | Ganos Shrine | Taunhiy Shrine |
All Hebra Shrines
All Great Hyrule Forest Shrines
| Great Hyrule Forest Shrines | ||
|---|---|---|
| Sakunbomar Shrine | Pupunke Shrine | Ninjis Shrine |
| Musanokir Shrine | Kikakin Shrine | Kiuyoyou Shrine |
| Ekochiu Shrine | Mayam Shrine | Simosiwak Shrine |
All Akkala Shrines
All Eldin Shrines
All Lanayru Shrines
All Necluda Shrines
All Faron Shrines
| Faron Shrines | ||
|---|---|---|
| Jiukoum Shrine | Ishokin Shrine | Utsushok Shrine |
| Joku-u Shrine | Joku-usin Shrine | - |
All Gerudo Shrines
Comment
Author
The Legend of Zelda: Tears of the Kingdom Walkthrough & Guides Wiki
Iun-orok Shrine Location and Walkthrough
improvement survey
03/2026
improving Game8's site?

Your answers will help us to improve our website.
Note: Please be sure not to enter any kind of personal information into your response.

We hope you continue to make use of Game8.
Rankings
- We could not find the message board you were looking for.
Gaming News
Popular Games

Genshin Impact Walkthrough & Guides Wiki

Honkai: Star Rail Walkthrough & Guides Wiki

Umamusume: Pretty Derby Walkthrough & Guides Wiki

Pokemon Pokopia Walkthrough & Guides Wiki

Resident Evil Requiem (RE9) Walkthrough & Guides Wiki

Monster Hunter Wilds Walkthrough & Guides Wiki

Wuthering Waves Walkthrough & Guides Wiki

Arknights: Endfield Walkthrough & Guides Wiki

Pokemon FireRed and LeafGreen (FRLG) Walkthrough & Guides Wiki

Pokemon TCG Pocket (PTCGP) Strategies & Guides Wiki
Recommended Games

Diablo 4: Vessel of Hatred Walkthrough & Guides Wiki

Cyberpunk 2077: Ultimate Edition Walkthrough & Guides Wiki

Fire Emblem Heroes (FEH) Walkthrough & Guides Wiki

Yu-Gi-Oh! Master Duel Walkthrough & Guides Wiki

Super Smash Bros. Ultimate Walkthrough & Guides Wiki

Pokemon Brilliant Diamond and Shining Pearl (BDSP) Walkthrough & Guides Wiki

Elden Ring Shadow of the Erdtree Walkthrough & Guides Wiki

Monster Hunter World Walkthrough & Guides Wiki

The Legend of Zelda: Tears of the Kingdom Walkthrough & Guides Wiki

Persona 3 Reload Walkthrough & Guides Wiki
All rights reserved
© Nintendo. The Legend of Zelda and Nintendo Switch are trademarks of Nintendo.
The copyrights of videos of games used in our content and other intellectual property rights belong to the provider of the game.
The contents we provide on this site were created personally by members of the Game8 editorial department.
We refuse the right to reuse or repost content taken without our permission such as data or images to other sites.


![Monster Hunter Stories 3 Review [First Impressions] | Simply Rejuvenating](https://img.game8.co/4438641/2a31b7702bd70e78ec8efd24661dacda.jpeg/thumb)


